Getting Started
Checklist
To get started, perform these steps in order:
- Make sure you have Visual Studio Code installed.
We highly recommend using Visual Studio Code for writing MIDI Remote API Scripts. We provide a JSDoc based auto-completion setup. You will not have to look up types and methods in a separate documentation. Visual Studio Code will help you write scripts intuitively.
Make sure the folder containing the Visual Studio Code executable is in your
PATHenvironment variable.Make sure you have a current Cubase / Nuendo version installed.
Start Cubase / Nuendo.
Create a project with audio and/or instrument tracks.
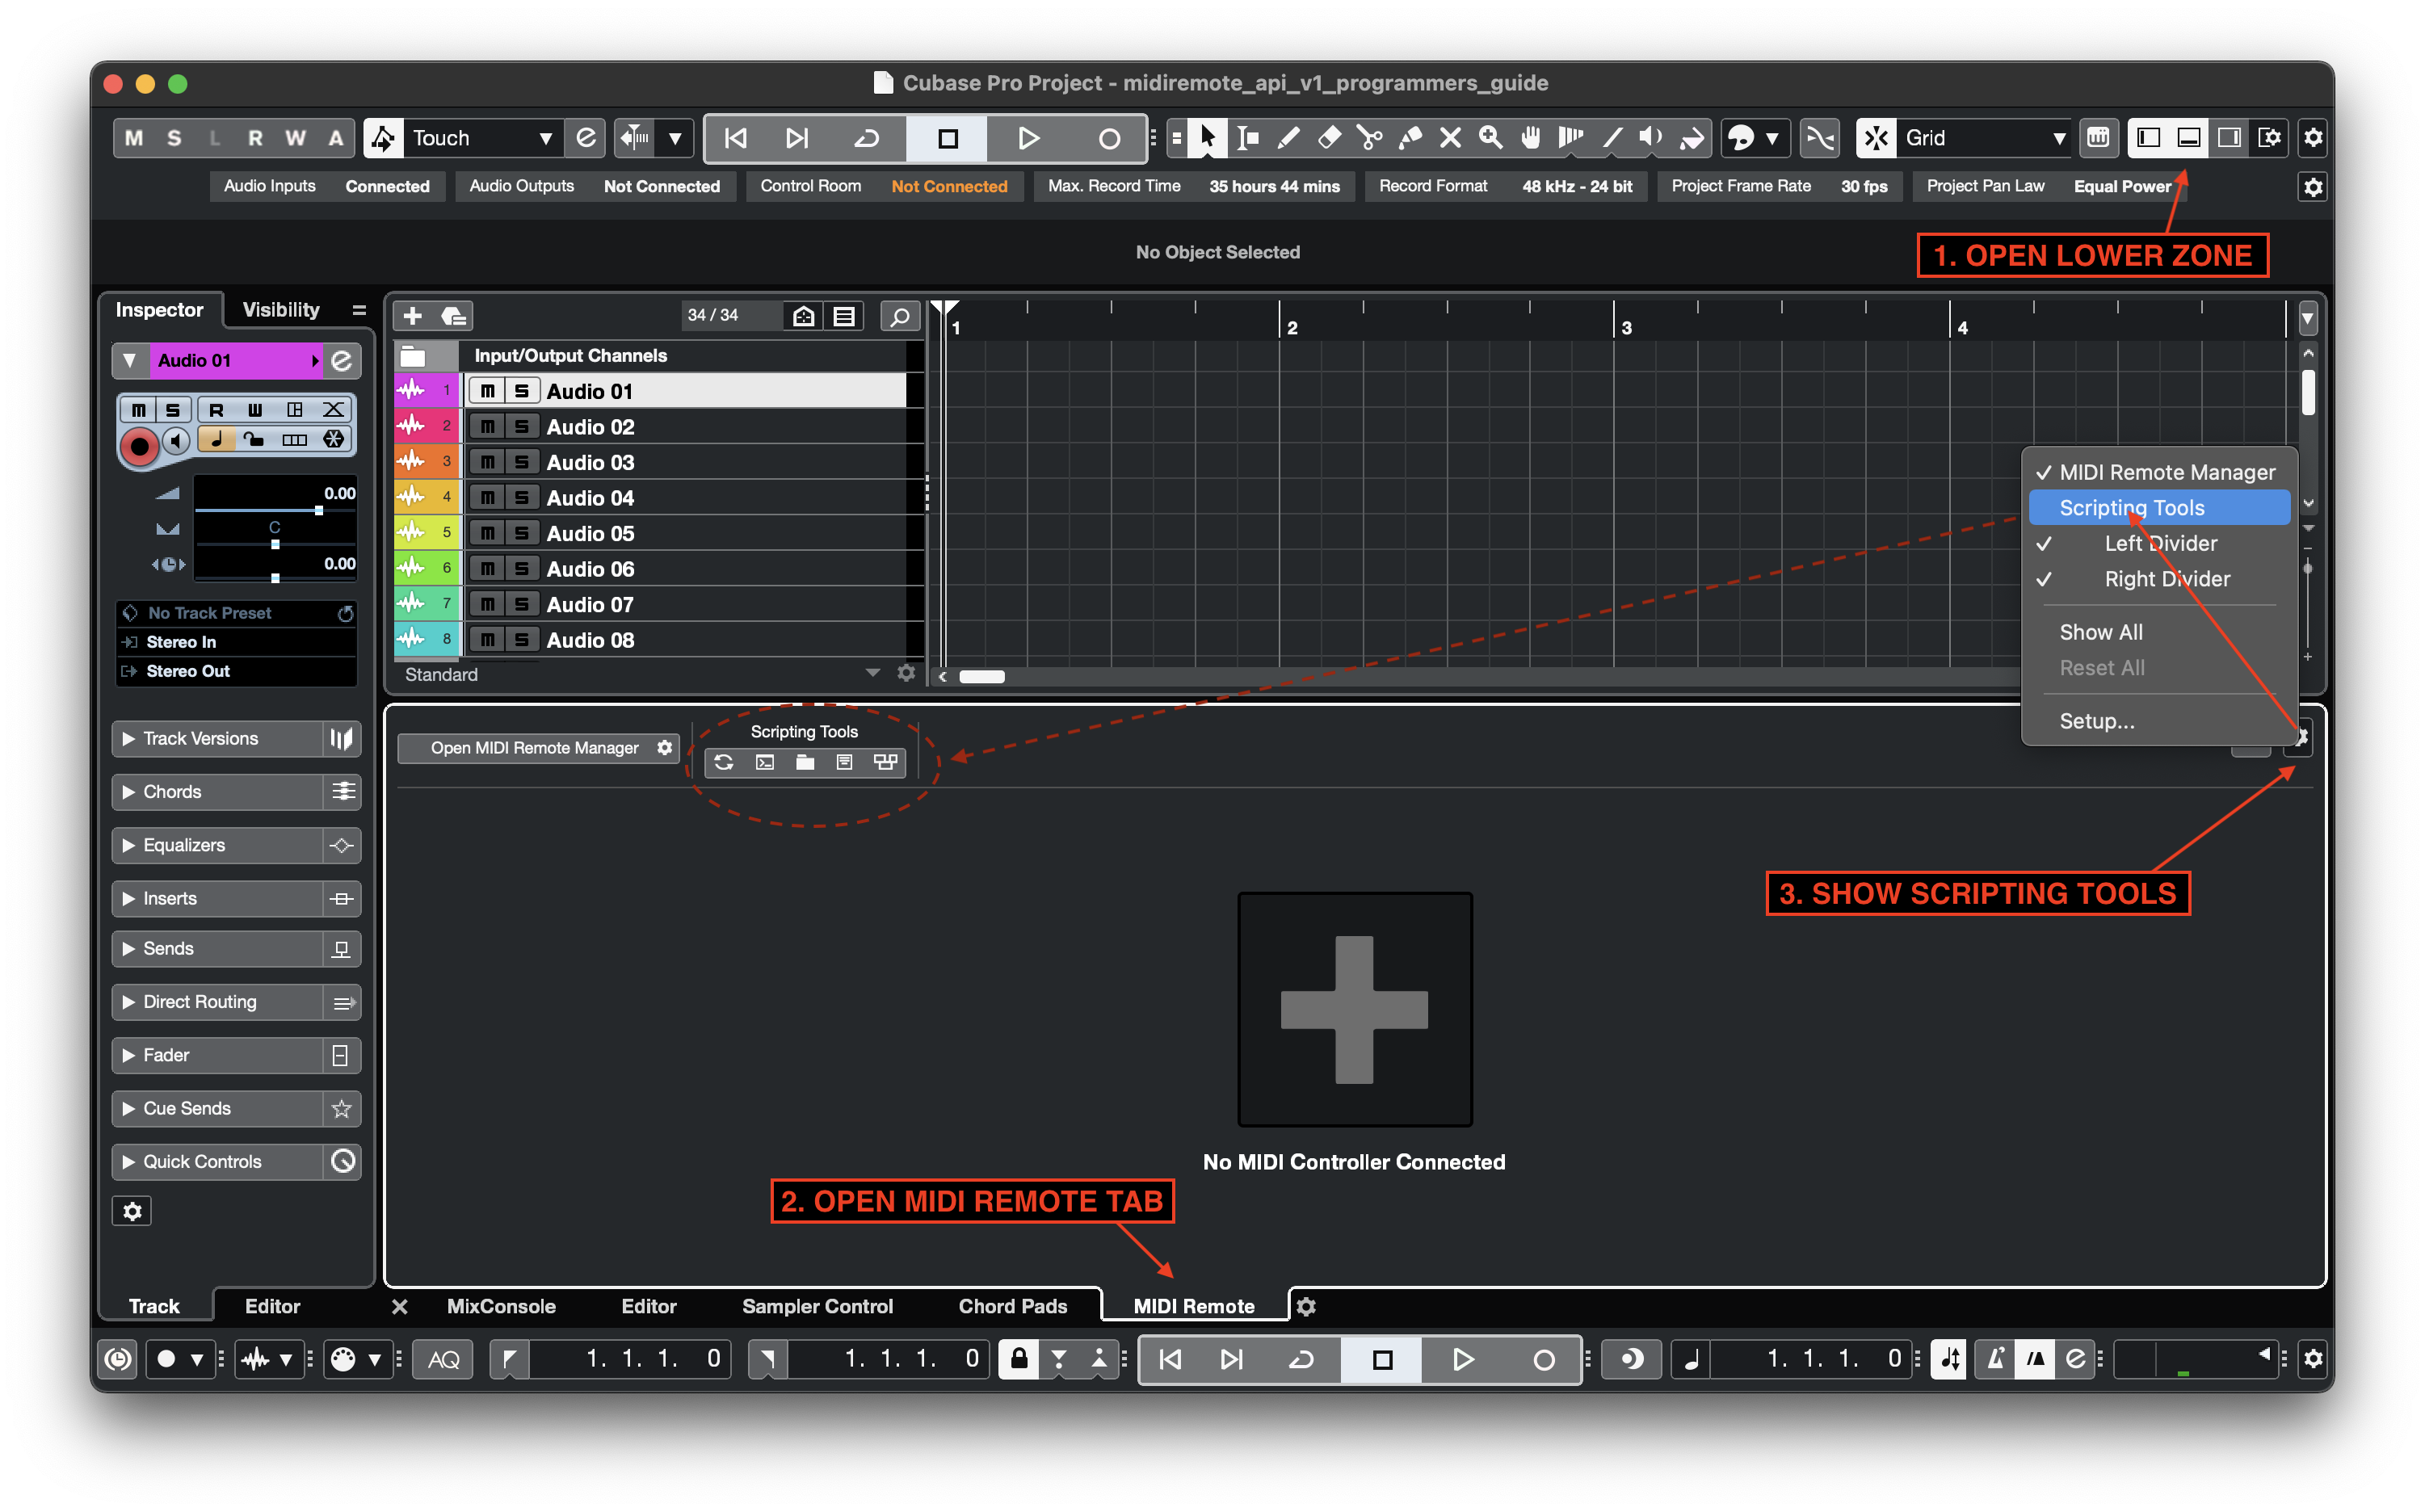
Open the Remote tab in the lower zone.
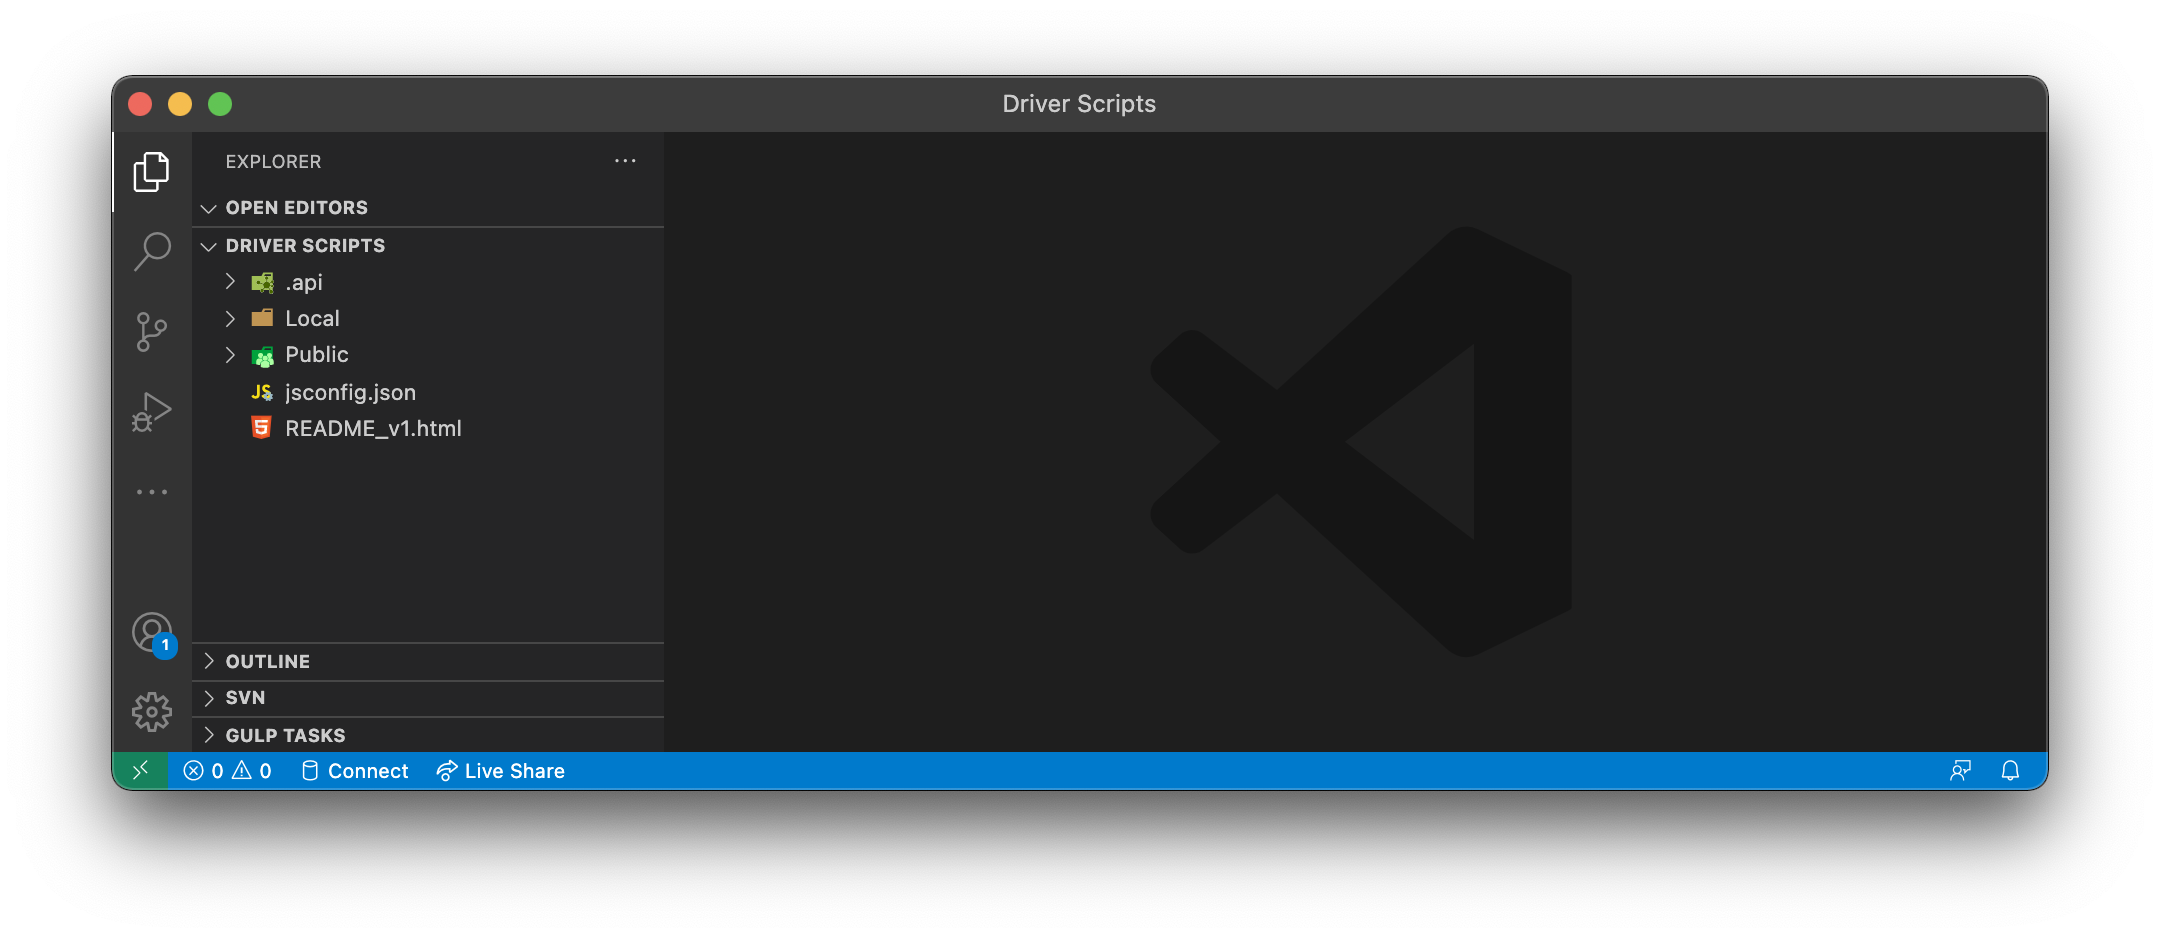
- Open the MIDI Remote Driver Scripts folder for your host application.
If this folder does not exist yet, launch Cubase/Nuendo once and open the MIDI Remote panel. The host will create the default folder structure.
- Windows
- macOS
C:\Users\<Username>\Documents\Steinberg\<Cubase or Nuendo>\MIDI Remote\Driver Scripts
/Users/<Username>/Documents/Steinberg/<Cubase or Nuendo>/MIDI Remote/Driver Scripts
Open a console (
Windows:cmdorPowerShell,macOS:Terminal) and change to the MIDI Remote Driver Scripts folder.Open Visual Studio Code from the command line like this:
code .
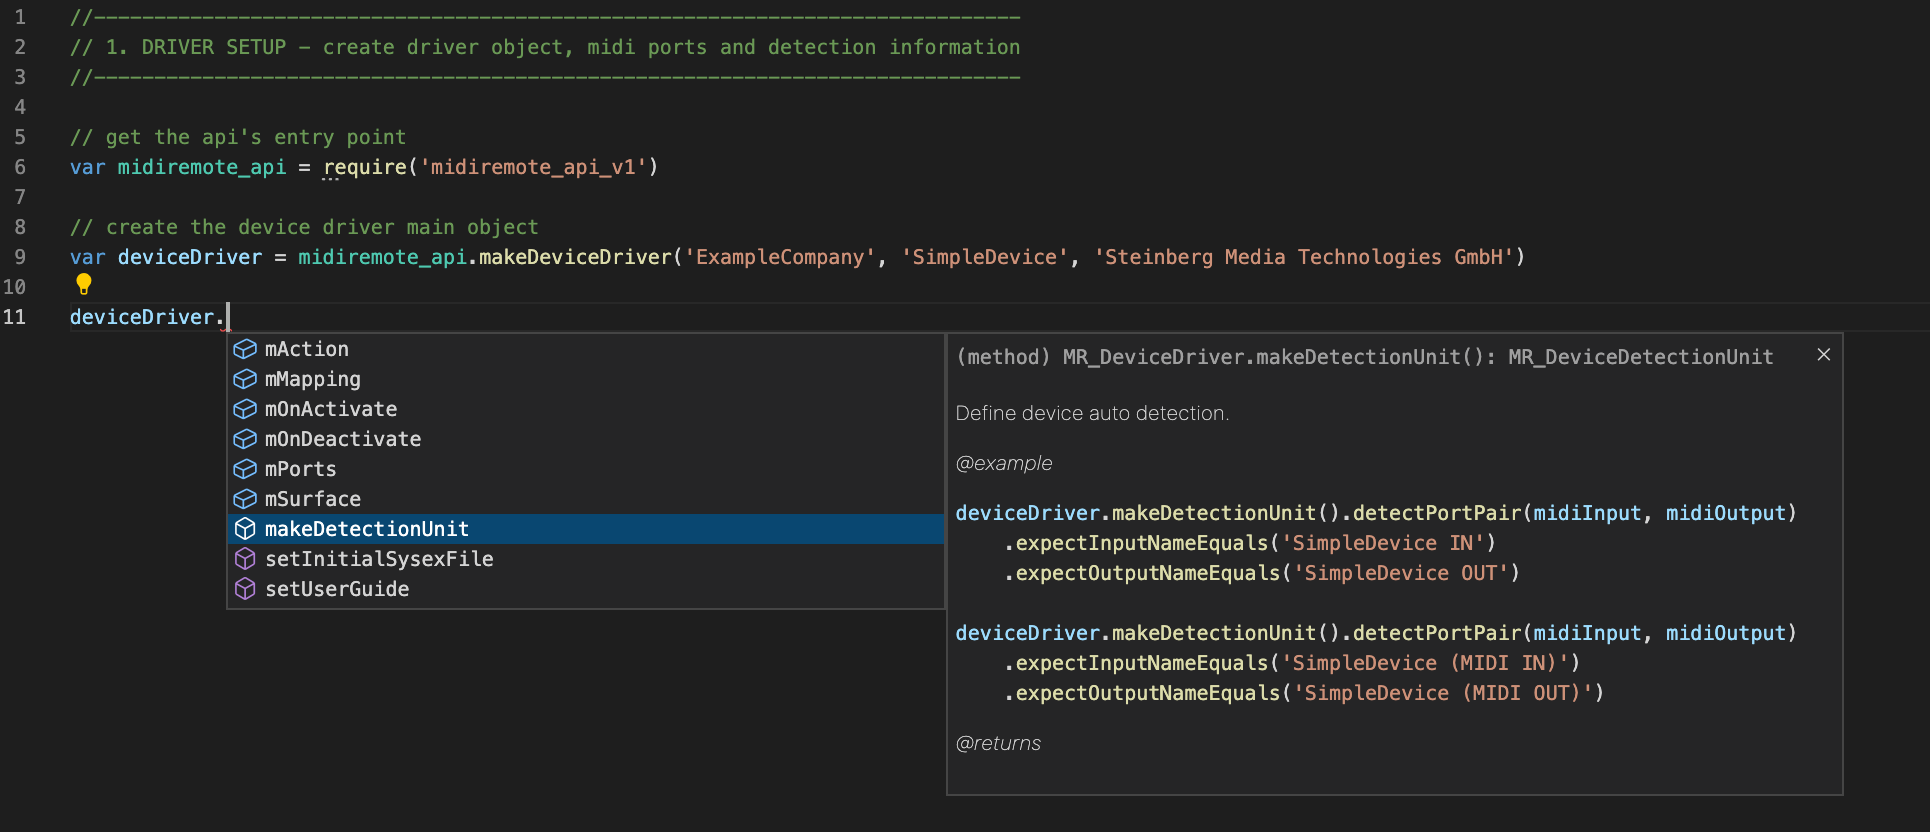
- Create a script file.
The MIDI Remote API script file follows this structure:
<Driver Scripts Folder>/Local/<vendor>/<device>/<vendor>_<device>.js
Example:
<Driver Scripts Folder>/Local/Nektar/Impact_LX49Plus/Nektar_Impact_LX49Plus.js
Connect your MIDI hardware controller.
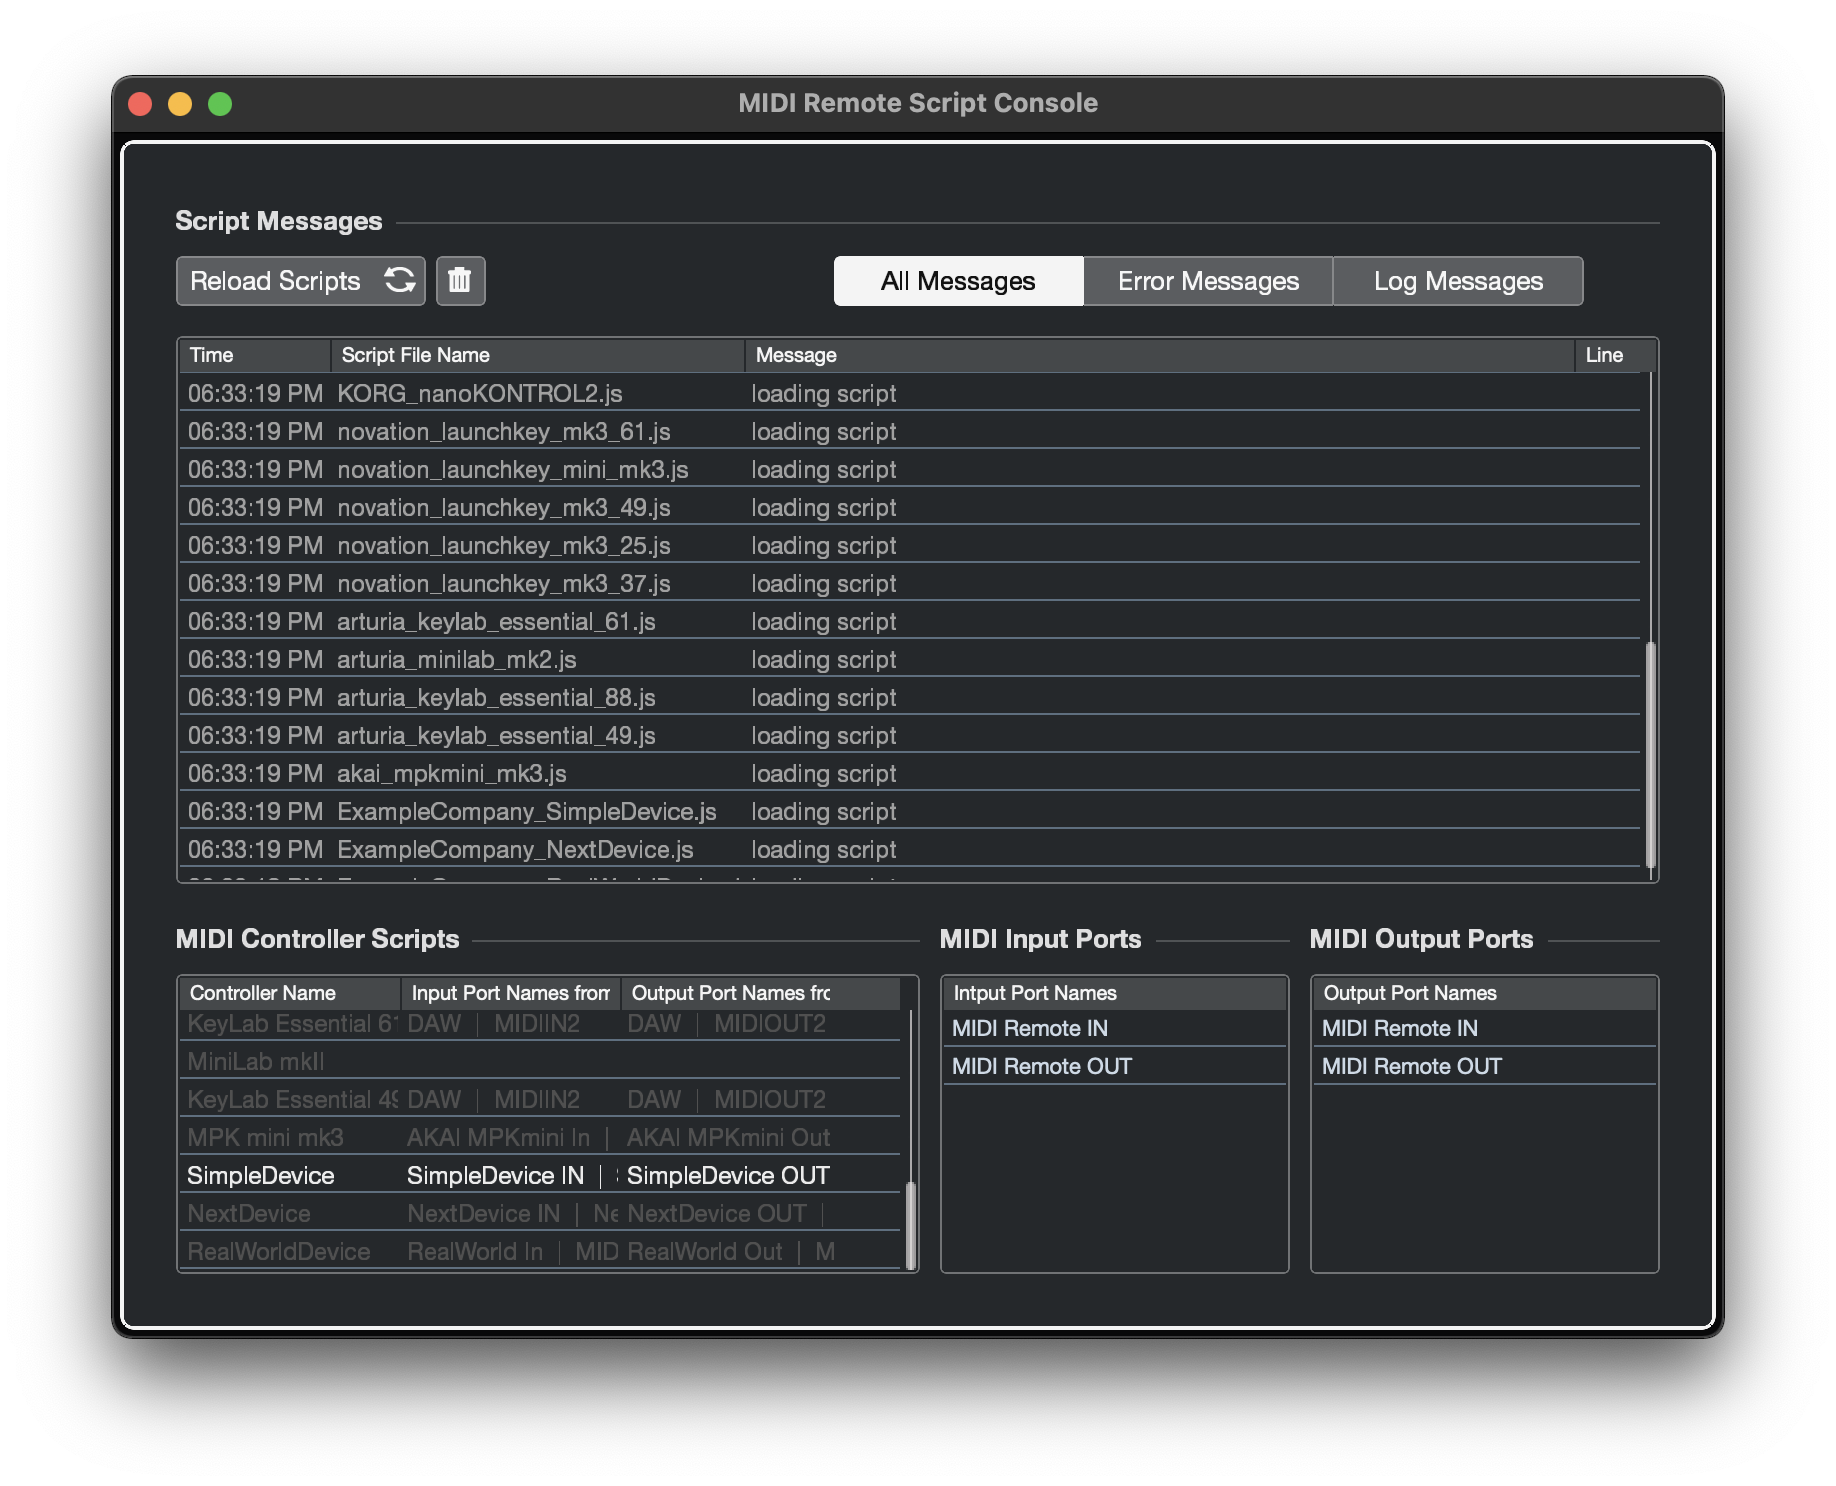
Open the Script Console.
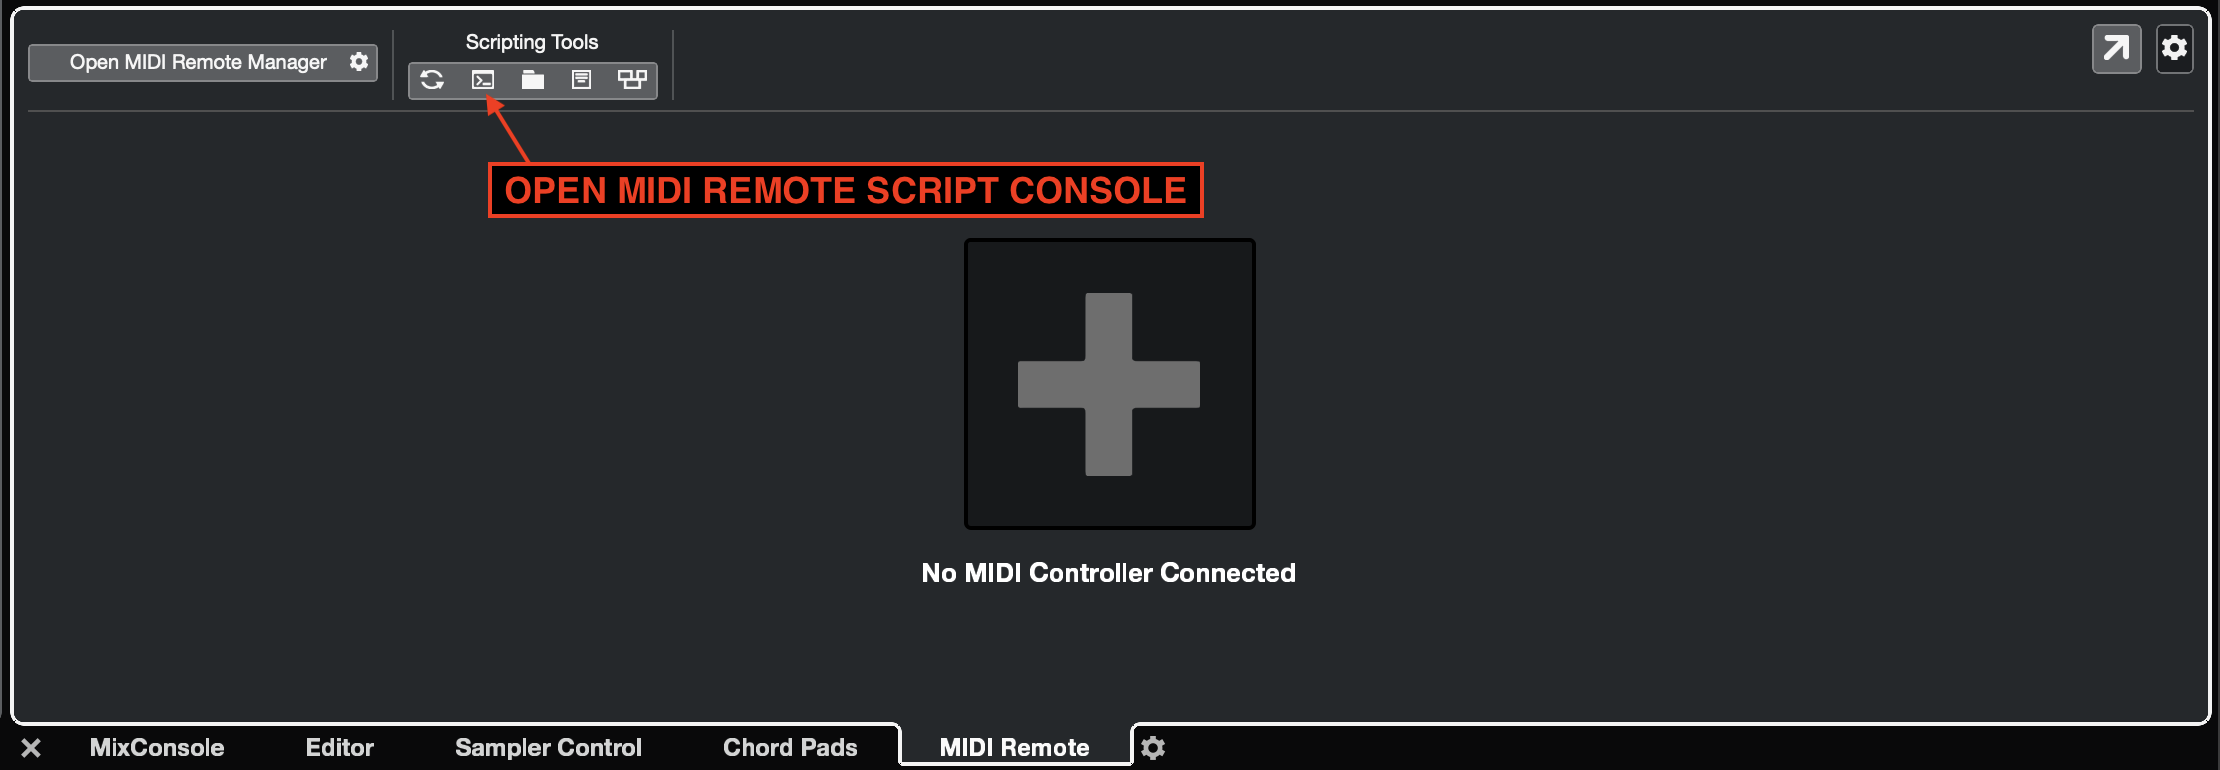
The Script Console appears like this:
After modifying a script file, press the 'Reload Scripts' button for the changes to apply.