Table of Contents
Introduction
VSTGUI 4.1 includes a new VST3 inline UI editor which makes UI design easier than before.
It automatically supports the following VST3 features:
- IParameterFinder (find parameter under mouse)
- IContextMenu (show host context menu on right click for an automatable parameter) [VST3.5 SDK required]
- Note
- You need at least VST SDK 3.1, any earlier version will not work.
- The new editor is compatible to the old one included in VSTGUI 4.0
Preparation
Before using the inline UI editor, you must make sure that you use the Steinberg::Vst::EditController class as a base of your own edit controller and that you have used the Steinberg::Vst::Parameter class or any subclass of it for your parameters.
Otherwise the inline UI editor won't work properly.
Next you have to add two files to your project:
- vstgui/vstgui_uidescription.cpp
- vstgui/plugin-bindings/vst3editor.cpp
After that you have to alter your project settings to add a preprocessor definition to your debug build:
- VSTGUI_LIVE_EDITING=1
As last step you have to modify your edit controller class to overwrite the createView() method:
And make sure to include the vst3editor.h header.
Now you can build your plug-in and start your preferred VST3 host to start designing your user interface.
If you now open your plug-in editor you will see a blank editor. To enter the UI editor you have to make a right click on it and choose "Open UIDescription Editor".
- Note
- Your VST3 host should support live plug-in resizing for optimal experience. As of this writing, not all VST3 hosts support this feature.
Parameter Binding
If you've used the Parameter class provided by the VST3 SDK, you will get automatic parameter bindings between the controls of your editor and the parameters in your VST Edit Controller.
The only thing you need to do is to declare the ids of the parameters as tags in the Tags editor (or use the 'Sync Parameter Tags' command in the Edit Menu of the Toolbar) and set the tags of your controls to these ids. After you've done this your VST Edit Controller will receive the beginEdit(..)/performEdit(..)/endEdit(..) calls when the user changes the controls and if the host automates the parameter the control will also reflect these changes.
As an addition you can modify your VST Edit Controller to return specific parameter objects in the getParameterObject(int32 paramID) method for UI only needs, which are not parameters of your VST audio processor. This way you can store view settings like the tab which is open when the user closes the editor so that you can restore it when the user opens the editor again. You can look at the sources of the included 'uidescription test' project how this works.
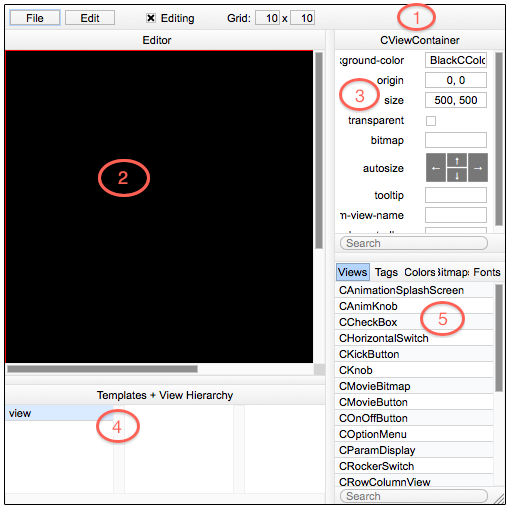
The Editor
The Editor has mainly five sections:
-
Toolbar
-
Template Editor
-
View Attribute Editor
-
Template Selector + View Hierarchy Browser
-
View Palette + Global UI Properties Editor
All actions you do here are undoable.
Toolbar
The toolbar currently contains the two menus "File" and "Edit", the editing checkbox and the grid settings.
TODO: describe menu items
The File Menu contains:
- Save
- Save as...
- Close Editor
The Edit Menu contains:
- Undo
- Redo
- Cut
- Copy
- Paste
- Delete
- Size To Fit
- Unembed Views
- Embed Into
- Transform View Type
- Add New Template
- Delete Template
- Duplicate Template
- Template Settings...
- Focus Settings...
- Sync Parameter Tags
Template Editor
TODO
View Attribute Editor
The View Attribute Editor shows the attributes of the selected views. If multiple views are selected it only shows those attributes which applies to all selected views. On the left side are the names of the attributes and on the right side their values. The values are editable.
You can enter a search term in the search field so that only those attributes are shown which matches the search string.
Template Selector + View Hierarchy Browser
The most left list shows all the templates. You can rename a template with a double click on it.
If a template is selected, it is shown in the Template Editor and all sub views are listed in the next list. You can select these sub views and if the selected sub view is a container view, its subviews are listed in the next list, etc.
You can alter the selection of the Template Editor via double click.
You can move the selected view up and down in the hierarchy order via Command-Up and Command-Down.
View Palette + Global UI Properties Editor
This section contains five subsections :
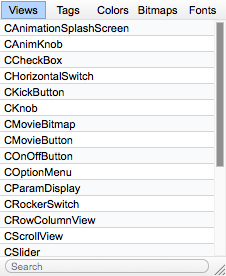
Views
This section shows all views which are registered with UIDescription. You can register your own views, see IViewCreator.
To insert a view, select it and drag it into the template editor. While dragging the view over the template editor, the container view will be highlighted which will be the parent of the view if you drop it there.
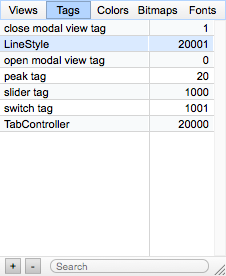
Tags
Here you define Tags for your controls. The left column describes the name of the Tag and the right column is the numerical value of the tag as used in VSTGUI::CControl.
With the + button you add a new tag and with the - button you remove the selected tag.
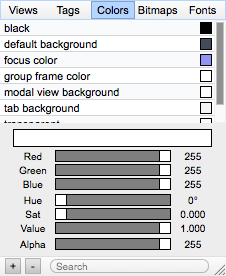
Colors
TODO: New Screenshot
Here you define custom colors.
With the + button you add a new color and with the - button you remove the selected color.
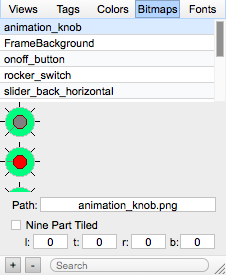
Bitmaps
TODO: New Screenshot
Here you define your bitmaps.
The path is the path to the bitmap.
- On Mac OS X this is the filename of the bitmap inside the Resources directory of the plug-in bundle.
- On Windows this is the resource name as described in the .rc file of your plug-in.
The Nine Part Tiled checkbox indicates if this is a VSTGUI::CNinePartTiledBitmap. And the l/t/r/b values describes its offsets.
With the + button you add a new bitmap and with the - button you remove the selected bitmap.
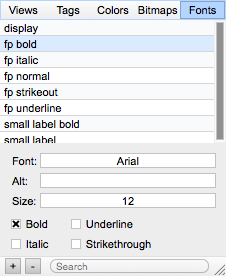
Fonts
Here you describe your custom fonts.
- The font menu let you choose a font family installed on your system.
- The alt control let you insert alternative font families if the main font is not available. You can insert more than one by using a comma as separator.
With the + button you add a new font and with the - button you remove the selected font.
Creating Custom Views
If you need to create custom views, you can implement the VSTGUI::VST3EditorDelegate interface in your edit controller class. The createCustomView method will be called if you set the 'custom-view-name' attribute in one of the views.
Another way to use your own views is to register them at runtime with the UIViewFactory. This method requires more work but has the advantage that the view will be listed like the built-in views and changing attributes work on the fly. See IViewCreator.
Sub-Controllers
Sub-Controllers are useful if you need finer control of your views. You can define sub-controllers for views with the 'sub-controller' attribute. Sub-Controllers will be created via the VSTGUI::VST3EditorDelegate interface. The Sub-Controller object is now owned by the view and will be destroyed when the view is destroyed.
TODO: describe nested subcontrollers
The VSTGUI::DelegationController is a helper class if you don't want to control every aspect of the views by forwarding every call to its parent controller. You only overwrite the methods you need in your inherited class.
If you want to be notified about value changes for controls in your sub-controller but don't want to loose the Parameter Binding you can add your sub-controller as dependent of the control:
Templates
Templates are root views where you can group controls in logical entities. You can embed templates into other templates.
Some views like the VSTGUI::UIViewSwitchContainer shows different templates depending on a control value.