HALion Developer Resource
Please choose from the below to learn how to get started and find short examples and detailed information on the selected topic.


HALion Script
Getting Started
This section provides general information about HALion Script and the Lua scripting language. Links for learning more about Lua can be found in What is HALion Script?.
Diving Deeper
This section provides information about the inner workings of HALion and its implementation of the Lua scripting language. How to protect your work is described in Protecting Layers and Managing Script Modules.
HALion Script Reference
The classes and functions of the HALion Script language are described in the Class Reference and on the Reference pages. Many of the descriptions provide small code examples. For more details, see Exploring the Code Examples.
/ HALion Developer Resource / HALion Script /
Getting Started
This section provides general information about HALion Script and the Lua scripting language.
/ HALion Developer Resource / HALion Script / Getting Started /
What is HALion Script?
On this page:
HALion Script allows you to customize and expand the features of HALion to a great extent. It is a domain-specific programming language based on the Lua scripting language. It comes with many functions tailored to HALion, while maintaining the general programmability of Lua. HALion Script allows you to manipulate musical events, access and modify parameters of HALion, control the behavior of macro pages, and much more. All of this can enhance your instrument creation greatly.
Fields of application:
- Arpeggiation and sequencing
- Chord generation and recognition
- Microtonal music and alternative scales
- Algorithmic composition
- Advanced, interactive playback for creating more realistic performances
- Custom-built workflows for macro pages
- Automization of repeating tasks while building large-scale libraries
Lua Resources
Lua is a very common scripting language, used in many professional fields, such as game development or image processing, for example. To find out more about Lua, please visit lua.org. For learning Lua, we recommend the official book Programming in Lua and Lua's Reference Manual.
Lua Release
HALion Script uses Lua 5.2.3 with the following standard libraries:
- basic library
- package library
- string manipulation
- table manipulation
- mathematical functions
- bitwise operations
- input and output facilities
- operating system facilities
- debug facilities
❕ The standard library coroutine is not supported. Furthermore, the functions
io.popen,io.tmpfile,os.execute,os.exit,os.getenv,os.setlocaleandos.tmpnameare not supported.
The classes and functions of the HALion Script language are described in the Class Reference and on the Reference pages. Many of the descriptions provide small code examples. For more details, see Exploring the Code Examples.
/ HALion Developer Resource / HALion Script / Getting Started /
Exploring the Code Examples
On this page:
Many of the classes and functions that are are described in the Class Reference and on the Reference pages provide working code examples. The code examples use syntax highlighting. Comments are displayed in green, functions in magenta and values in blue, for example. See Lua Syntax Highlighting for more details.
Example
-- "Hello world!" Lua script

print("Hello world!")
The easiest way to explore the code examples is to copy the code to the clipboard and to paste it to the internal script editor of the Lua Script MIDI module. Please read on for information on how to do this.
Program for Code Examples
If not stated otherwise, the following simple program will be sufficient for exploring the code examples in HALion.
- Download the program Explore Code Examples.vstpreset
- Drag the program to the Slot Rack.
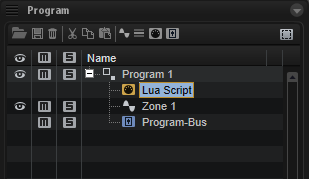
To create the program manually, proceed as follows:
- Select an empty program in the Program Table.
- In the Program Tree, click Create New MIDI Module
 and select Lua Script.
 - In the Program Tree, click Create New Zone
 and select Synth Zone.
 - Load the program to the Slot Rack.
This is how your program should look like in the Program Tree.
Loading the Code Examples
The program described above should be loaded in the Slot Rack.
- Open a page with a code example, for example, onNote.
- Double-click the code example to select all lines and press Ctrl/Cmd-C to copy the code to the clipboard.
- Go to HALion and select Lua Script in the Program Tree.
- Open the section for the Lua Script MIDI module, either in the Sound editor or in the MIDI Modules editor.
- Click Edit Script to open the internal Script Editor.
- Click the Script Editor window to bring it to focus and press Ctrl/Cmd-V to paste the code from the clipboard.
- Click OK to activate the script.
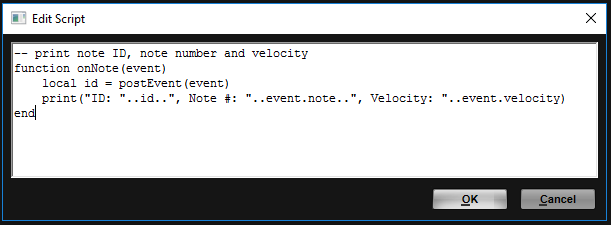
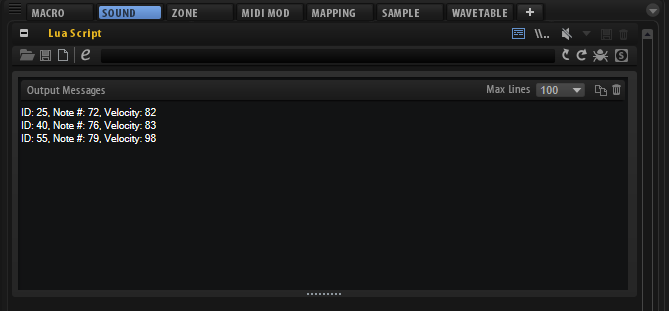
Depending on the code example, you usually have to play a note or send a MIDI controller to get a sound or output message from the script. Typically, the description of the feature and the comments in the code will give you enough hints on what to do. In the example above, onNote prints the note ID, the MIDI note number and the MIDI velocity each time you play a note.
/ HALion Developer Resource / HALion Script / Getting Started /
Lua Syntax Highlighting
The following pseudo code examplifies the Lua syntax highlighting used throughout this documentation.
--single line comment

--[[
    block comment
--]]

--keywords
and       break     do        else      elseif    end
false     for       function  goto      if        in
local     nil       not       or        repeat    return
then      true      until     while

--strings
a = 'alo\n123"'
a = "alo\n123\""
a = '\97lo\10\04923"'
a = [[alo
123"]]
a = [==[
alo
123"]==]

--numbers
3     3.0     3.1416     314.16e-2     0.31416E1
0xff  0x0.1E  0xA23p-4   0X1.921FB54442D18P+1

--functions
print(a)
print("Hello")
print(123)

for k,v in ipairs(t)
    print(v)
end
Keywords, strings and numbers extracted from Lua's Reference Manual, Chapter 3 - The Language.
/ HALion Developer Resource / HALion Script /
Diving Deeper
This section provides information about the inner workings of HALion and its implementation of the Lua scripting language. How to protect your work is described in Protecting Layers and Managing Script Modules.
- Working with Objects
- Working with UI Scripts
- Threads in HALion
- Script Initialization
- Creating Parameters
- Working with Parameters
- Using Slot Local Variables
- Protecting Layers
- Managing Script Modules
- Using External Files
- Debugging with LDT
/ HALion Developer Resource / HALion Script / Diving Deeper /
Working with Objects
On this page:
In the HALion Script language, elements that make up the program, MIDI and note expression events, the definitions of parameters, etc., are all represented by objects. HALion Script provides dedicated functions for modifying these objects. To understand the principles of writing scripts that operate on objects, some terminology from object-oriented programming will be helpful.
Objects and Classes
Object-oriented programming (OOP) is a style of programming based on the concept of objects. In OOP objects are organized in classes. A class provides data fields and methods for an object. The data fields describe what the object is and the methods describe what it can do. A concrete occurance of an object is called an instance. The elements in the Program Tree are instances of different types of objects, for example, Bus objects, Layer objects, Zone objects, etc. MIDI and note expression events are represented by Event objects and each parameter has a ParameterDefinition object.
Class Reference
The classes/objects of the HALion Script language are structured in the following class hierarchy.
HALion Script Class Hierarchy
Classes deeper down inherit the data fields and methods of classes higher up in the class hierarchy. For example, the classes Bus, Instance, Layer, Effect, and so on, inherit all data fields and methods of the Element class. Subclasses add functionality to their parent class by providing more data fields and methods.
Addressing Objects
The Lua Script MIDI module itself can be addressed with this. Further objects can be addressed with this.parent, this.program or with the respective 'get' and 'find' functions.
| Syntax | Object | Class |
|---|---|---|
| this | Returns the object of the script module itself. | MidiModule |
| this.parent | Returns the object of the parent element, which can be a Layer or the Program. | Layer or Program |
| this.program | Returns the object of the Program. | Program |
After addressing an object, you can read its fields through dot-notation. In the following example, the name and the type of different objects are printed with .name and .type.
Example 1
-- Print the name and type of different objects.

print(this.name, this.type)
print(this.parent.name, this.parent.type)
print(this.program.name, this.program.type)
print(this.program:getChild().name, this.program:getChild().type)
Calling Methods
To operate on an element in the Program Tree, you must first address its object and then call the desired method. The basic syntax is as follows:
object:method()
Example 2
-- Get the object of the first Zone after the script module.

zone = this.parent:getZone()

-- setName operates on the Zone object.

zone:setName("MyZone")
Using type() on Objects
For the HALion Script language the type() function of Lua has been extended to return the type of an object.
Example 3
-- Print the name of all zones in the program.

elements = this.program:findChildren(true)

for i, element in ipairs(elements) do
    if type(element) == "Zone" then
        print(element.name)
    end
end
/ HALion Developer Resource / HALion Script / Diving Deeper /
Working with UI Scripts
On this page:
Related pages:
HALion offers two types of scripts:
| Type | Fields of Application |
|---|---|
| MIDI module scripts | Process MIDI events, set parameters, etc. |
| UI scripts | Switching logic for pages and disable views, translation of parameter values to display strings, etc. |
UI scripts have the following restrictions:
- UI scripts are only executed when the UI is open. If the UI is closed, the UI script is not executed anymore.
- The parameters defined in a UI script cannot be automated.
❕ MIDI module scripts do not have these restrictions. Therefore, be sure to check if UI scripts are required for a specific task, and if not, use MIDI module scripts instead.
Executing UI Scripts
You can execute UI scripts for the macro page and even for each template. The Script section can be found in the Properties section in the lower left of the Macro Page Designer. Just as with the Lua Script MIDI Module, you can write your scripts with the internal editor or an external editor. See steinberg.help / MIDI Modules Reference / Lua Script for more details.
- In the GUI Tree of the Macro Page Designer, select the element that has the macro page attached. Alternatively, select a control element, then go to the Show Templates tab and click Edit Element.
- In the Properties section in the lower left of the Macro Page Designer, go to the Script section.
- Click Edit Script to open the internal Script Editor, then enter your script and press OK. Alternatively, click Load Script and select a script file from disk.
Show/Hide Output Messages
The Output Messages section for the UI scripts is hidden by default.
- In the toolbar of the Macro Page Designer, click Show/Hide Script Output Messages
 to show or hide the Output Messages below the Resource / Library Browser.
The Output Messages section displays the messages of all UI scripts. The UI script the message belongs to is indicated by a prefix.
Addressing the Elements of the Program
A UI script cannot address the elements of a program directly. To address a program and its elements from the UI script, you must use getElement.
Example
-- Must be executed as UI script!
-- Print the name and type of the element that has the macro page attached.

element = getElement()
print(element.name, element.type)

-- Print the name and type of the parent element.

if element.parent then
    print(element.parent.name, element.parent.type)
end
/ HALion Developer Resource / HALion Script / Diving Deeper /
Threads in HALion
On this page:
HALion provides two threads:
- Parameter changes and the storage of them are handled by the Controller thread.
- MIDI event processing and sound reproduction happen in the Processor thread.
You can think of these threads as two sections of code that are exectued in concurrency by HALion. Basically, the two threads are needed to separate longer-lasting function calls from timing-critical function calls. The functions that are called in the Controller thread are executed only as fast as required, while the functions that are called in the Processor thread are executed within an ASIO block.
The information whether a function can be called in the Controller thread, the Processor thread, or in both threads, can be found on the Reference pages below the description of each function.
It looks like this:
Available in: Controller, Processor.
Script Error - Wrong Thread
If you call a function in the wrong thread, the script module will output an error message.
Example 1
--[[
  Example for a script error when calling a function in the wrong thread.
  The onNote callback runs in the Processor thread. openURL runs in the Controller thread.
  Therefore, openURL cannot be called in onNote. The script produces a script error when playing a note.
--]]

function onNote(event)
  openURL("http://www.steinberg.net/en/home.html")
end
The output message for the script error of the above example looks like this:

If this ever happens to you, please review your code and try to place the function call elsewhere in your script. Alternatively, you could use runAsync.
Using runAsync
By calling runAsync in the Processor thread you can invoke a function that is executed in the Controller thread. The execution of runAsync takes at least one audio block, or longer, depending on the function that was called. Please note that when using runAsync, the callback that called runAsync is put on hold until the function has completed.
Example 2
-- Using runAsync to call openURL within onNote.

function onNote(event)
  runAsync(function() openURL("http://www.steinberg.net/en/home.html") end)
end
Using runSync
By calling runSync in the Controller thread, you can invoke a function that is executed in the Processor thread. For example, by calling runSync in a parameter change callback, you can invoke an event function like playNote, releaseVoice, controlChange, etc. The callback that called runSync is not stopped and continues its execution. The specified function will be exectued in the next audio block.
-- Fade all voices, triggered by a script parameter.

defineSlotLocal("noteIDs")
noteIDs = {}

function onNote(event)
  local id = postEvent(event)
  table.insert(noteIDs, id)
end

function syncFadeAllVoices()
  for i, id in ipairs(noteIDs) do
      fade(id, nil, 0, 1000, true)
  end
  noteIDs = {}
end

function fadeAllVoices()
  if fadeVoices then
    runSync(syncFadeAllVoices, 1)
  end
end

defineParameter("fadeVoices", "Fade All Voices", false, fadeAllVoices)
/ HALion Developer Resource / HALion Script / Diving Deeper /
Script Initialization
When a program with a script is loaded into the Slot Rack, the global statements, all parameters and the onLoad, onLoadIntoSlot and onInit callbacks must be initialized. The order is as follows:
| # | Initialization of | Description | Thread |
|---|---|---|---|
| 1. | Global statements | Global statements are any expressions outside a function call. | Controller |
| 2. | Parameters | All parameters of the program, including the parameters that you defined in the script. | Controller |
| 3. | onLoad | This callback function is called when the script module is loaded as part of a preset or project. | Controller |
| 4. | onLoadIntoSlot | This callback function is called when the program is loaded into the Slot Rack. | Controller |
| 5. | onInit | This is the first callback function that is called when the processor thread is initialized. | Processor |
For more details about threads, see Threads in HALion.
Example
-- Script for testing the initialization when loading a program into the Slot Rack.

function onInit()
  print("onInit")  -- This is printed last, after onLoadIntoSlot.
end

function onLoadIntoSlot()
  print("onLoadIntoSlot")  -- This is printed after onLoad.
end

function onLoad()
  print("onLoad")  -- This is printed after the global statement.
end

print("Global statement") -- This is printed first.
/ HALion Developer Resource / HALion Script / Diving Deeper /
Creating Parameters
On this page:
- Defining Parameters
- Parameters vs. Global Variables
- Parameter Characteristics
- Parameter Change Callback
- Change Callback with Anonymous Function
- Defining Parameters by Named Arguments
- Additional Named Arguments
You need parameters to connect the script module with controls on the macro page and to save the script module's state with the program. Before you can connect your script module with controls on a macro page, you must specify the parameters that you want to use in your script by calling the function defineParameter for each of them. Once a parameter is defined, it is shown in the Parameter List. From this list, you can then connect it with a control on the macro page. When you save the program, the parameters that you defined for the script module are saved with it.
The function defineParameter also creates a global variable that represents the value of the parameter in the script. You can use this global variable like any other variable in the script (see Parameter vs. Global Variables for details).
Defining Parameters
defineParameter(name)
You define a parameter by calling the function defineParameter with at least its name as the first argument. This name serves as name for the parameter in the Parameter List and as name for the global variable that represents the parameter in the script. The additional arguments of defineParameter are optional and can be used to change the characteristics of the parameter (see Parameter Characteristics for details). If no further arguments are defined, the parameter will be a floating point value in the range from 0 to 100.
Parameters vs. Global Variables
The function defineParameter creates a global variable that represents the value of the parameter in the script. It should be noted that:
- The rules for the naming and scope of global variables also apply for parameters.
- You can change the value of a parameter by assigning a new value to the corresponding global variable.
- The parameters that you defined for your script module are saved with the program, as opposed to global variables, which are not saved automatically.
The following example shows that parameters can be used just like global variables. After the parameter Scale has been defined, it is used to replace the note-on velocity. The value of Scale is changed by assigning the value of the last incoming MIDI controller to it.
Example 1
-- Change the parameter Scale through a MIDI controller and use its value to replace the note-on velocity.

-- Initialize variables.

min = 0
max = 100
maxVel = 127
defVel = 100
default = defVel / maxVel * max
maxCC = 127

-- Define Scale using the previous variables.

defineParameter("Scale", nil, default, min, max)

-- Use the value of Scale to replace the note-on velocity.

function onNote(event)
    event.velocity = maxVel * Scale / max
    postEvent(event)
end

-- Change the value of Scale through the last incoming MIDI controller.

function onController(event)
    Scale = event.value / maxCC * max
end
Parameter Characteristics
How a parameter behaves depends on its characteristics. You determine the characteristics of a parameter with the arguments of defineParameter. To create a parameter with specific characteristics, the arguments must be set in the order in which they are shown in the following syntax examples.
Numeric
defineParameter(name, longName, default, min, max, increment, changeCallback)
Creates a numeric parameter. The default argument defines the value that the parameter will default to. The min and max arguments define the value range of the parameter. The increment argument defines the step size in which the parameter value can be adjusted. The arguments default, min, max and increment can be any integer or floating point value. How many digits are shown after the decimal point for a value string of a parameter is determined by the value of the increment argument. For example:
| Value | Description |
|---|---|
increment = 1 | The parameter will be an integer value and its value string will display no digits after the decimal point. |
increment = 0.001 | The parameter will be a floating point value and its value string will display three digits after the decimal point. |
increment = 0 | The parameter will be a floating point value and its value string will display two digits after the decimal point. |
The automatic formatting of a value can be overridden with the format argument. See Additional Named Arguments for more details.
Indexed String Array
defineParameter(name, longName, default, strings, changeCallback)
Creates a parameter with integer indices that have a text representation given by the string values of an array. The default argument defines the index value that the parameter will default to. The strings argument must be an array with string values starting with index 0 or 1.
Boolean
defineParameter(name, longName, bool, changeCallback)
Creates a boolean parameter. The bool argument also defines the default value of the parameter.
String
defineParameter(name, longName, string, changeCallback)
Creates a parameter with a string value. You can change the string by assigning a new string value to the parameter.
Table
defineParameter(name, longName, table, changeCallback)
Creates a parameter with a table as value. The name argument of the parameter also defines the name of the table. You can access the values of the table using the regular methods, e.g., dot notation.
By Parameter Definition
defineParameter(name, longName, parameterDefinition, changeCallback)
Creates a parameter with the behavior of the specified ParameterDefinition. You can use this to clone the behavior of existing parameters.
By Named Arguments
defineParameter { name = "p", longName = "param", default = 0, min = 0, max = 100, increment = 0.01, onChanged = callback, type = "float", format = "%.2f", readOnly = false, writeAlways = false, automatable = true, persistent = true }
Creates a parameter by named arguments. The only argument to the function is a table with the key/value pairs that define the parameter. The additional keys type, format, readOnly, writeAlways, automatable, processorCallback and persistent give you control over more advanced features. They can only be set with named arguments. See Defining Parameters by Named Arguments for more details.
Example 2
-- Showcase different parameters.

-- Initialize variables.

maxVelocity = 127

-- Change callback of the parameter "Label".

function nameChanged()
    print("name changed to", Label) --Print the value of the parameter.
end

-- Initialize parameters.

defineParameter("Scale", nil, 100)                                          -- Parameter with default 100 and range 0 to 100.
defineParameter("Offset", nil, 0, -100, 100, 1)                             -- Bipolar parameter with integer steps.
defineParameter("Pan", nil, 0, -100, 100, 0.1)                              -- Bipolar parameter with 0.1 steps.
defineParameter("Mode", nil, 1, { "Off", "Normal", "Hyper" })               -- Indexed string array.
defineParameter("Enable", "Enable Filter", true)                            -- Switch with long name.
defineParameter("Label", nil, "untitled", nameChanged)                      -- String parameter.
defineParameter("Intervals", nil, { 0, 4, 7 })                              -- Table parameter.
defineParameter("Volume", nil, this.parent:getParameterDefinition("Level")) -- Parameter with the same behavior as the "Level" parameter of the parent layer.

-- Use the parameters Scale and Intervals to play a chord with fixed velocity.

function onNote(event)
    fixedVelocity = maxVelocity * Scale / 100
    local id1 = playNote(event.note + Intervals[1], fixedVelocity)
    local id2 = playNote(event.note + Intervals[2], fixedVelocity)
    local id3 = playNote(event.note + Intervals[3], fixedVelocity)
end
Parameter Change Callback
The change callback is only called if the value of the parameter was changed on the user interface, e.g., by adjusting the corresponding control on the macro page, or by calling setParameter. It is not called if the value was changed by assigning a value from inside the script. The following example revisits Example 1 to demonstrate this:
Example 3
-- Change the parameter Scale through MIDI controller and use its value to replace the note-on velocity.
-- The current value of Scale is printed only if changed from UI, e.g., go to the Parameter List to adjust Scale

-- Initialize variables.

min = 0
max = 100
maxVel = 127
defVel = 100
default = defVel / maxVel * max
maxCC = 127

-- This callback function will only be called if you adjust Scale from the UI.

function valueChanged()
    print("Value of Scale changed to:", Scale)
end

-- Define Scale with the previous variables.

defineParameter("Scale", nil, default, min, max, valueChanged)

-- Use the value of Scale to replace the note-on velocity.

function onNote(event)
    event.velocity = maxVel * Scale / max
    postEvent(event)
end

-- Change the value of Scale through the last incoming MIDI controller.

function onController(event)
    -- Assigning a value to Scale will not call the callback function.
    Scale = event.value / maxCC * max
end
Change Callback with Anonymous Function
In Example 2, the function nameChanged is declared before the associate parameter is defined. This is necessary for defineParameter in order to detect that the argument nameChanged is a function. If you want to declare the callback function after defining the corresponding parameter, you must call the callback function within an anonymous function. As the name suggests, an anonymous function is a function without a name.
Example 4
-- Define a string parameter.

defineParameter("Name", nil, "untitled", function() nameChanged() end)

-- If nameChanged is called inside an anonymous function, it can be declared after defineParameter.

function nameChanged()
    print("name changed to", Name) -- Print the value of the parameter.
end
Defining Parameters by Named Arguments
When calling defineParameter with several arguments, the arguments are matched by their position and the associated values are passed on to the function. For this reason, the arguments of defineParameter must match the exact order and position when calling the function. Alternatively, you can set the arguments with the keys and values of a table. This method of passing arguments and values to a function is called named arguments.
Named arguments have the advantage that they can be set in any order and that optional or additional arguments can be left out without destroying the predefined order and position of the arguments of that function. The following example shows the parameters from Example 2 created with named arguments.
Example 5
-- Different parameters created with named arguments.

-- Change callback of the parameter "Label".

function nameChanged()
    print("name changed to", Label) --Print the value of the parameter.
end

-- Parameter with default 100 and range 0 to 100.

defineParameter{
    name = "Scale",
    default = 100
}

-- Bipolar parameter with integer steps.

defineParameter{
    name = "Offset",
    default = 0,
    min = -100,
    max = 100,
    increment = 1,
}

-- Bipolar parameter with 0.1 steps.

defineParameter{
    name = "Pan",
    default = 0,
    min = -100,
    max = 100,
    increment = 0.1,
}

-- Indexed string array.

defineParameter{
    name = "Mode",
    default = 1,
    strings = { "Off", "Normal", "Hyper" },
}

-- Switch with long name.

defineParameter{
    name = "Enable",
    longName = "Enable Filter",
    default = true,
}

-- String parameter.

defineParameter{
    name = "Label",
    default = "untitled",
    onChanged = nameChanged,
}

-- Table parameter.

defineParameter{
    name = "Intervals",
    default = { 0, 4, 7 },
}
❕ Creating a parameter by ParameterDefinition is not supported when using named arguments.
Additional Named Arguments
(Since HALion 6.1)
If you create a parameter by named arguments, you get access to these additional arguments:
| Argument | Description | Value Type |
|---|---|---|
| type | The value type of the parameter (integer, float, boolean, string, variant, or envelope). The type must match the default and increment arguments. | string, optional |
| format | Formats the value string of a float value using the provided arguments. Only the format specifiers for float values are supported, i.e., e, E, f, g, or G. Other format specifiers are not supported. This overrides any automatic formatting from the increment argument. | string, optional |
| readOnly | Setting this to true will prevent the parameter from being changed from outside the script. The argument defaults to false if no value is set. | bool, optional |
| writeAlways | A parameter does not call its change callback if its value is set without being changed. Set this to true if you want to make sure that the change callback of the parameter is called. The argument defaults to false if not set. | bool, optional |
| automatable | Set this to false if you do not want the parameter to be automated. The argument defaults to true if not set. | bool, optional |
| processorCallback | If this is set to true, the parameter change callback will be executed in the processor context with high accuracy. This is required for automated script parameters to update correctly when using Render in Place or Export Audio, for example. If no processor exists, the callback is still run in the controller context. (Since HALion 6.4.20) | bool, optional |
| persistent | The parameter will not be restored from the VST preset if this is set to false. The argument defaults to true if not set. | bool, optional |
The arguments readOnly, writeAlways and automatable are usepful if you have a parameter that is used only for indication, but not for entering values.
Example 6
-- The following parameter is read only, not automatable and not persistent.

defineParameter {
    name = "deltaTime",
    longName = "Delta Time",
    default = 0,
    min = 0,
    max = 2^31,
    type = "float",
    format = "%.3f ms",
    readOnly = true,
    automatable = false,
    persistent = false,
}

-- Measure the time between subsequent notes.

function onNote(event)
    postEvent(event)
    t2 = getTime()
    if t1 then
        deltaTime = t2 - t1
    end
    t1 = t2
end

-- The following parameter change callback is executed in the processor context with high accuracy.

function onP1changed()
   this.parent:setParameterNormalized("Level", P1 / 100)
end

defineParameter{name = "P1", min=0, max=100, onChanged = onP1changed, processorCallback = true}
/ HALion Developer Resource / HALion Script / Diving Deeper /
Working with Parameters
On this page:
Properties of Parameters
Every parameter has a ParameterDefinition object that describes the properties of a parameter. For example, you can retrieve the minimum, maximum, or default value of a parameter by reading the corresponding fields of the ParameterDefinition object (see getParameterDefinition for details). The fields of the ParameterDefinition object can only be read and not be modified.
The actual value of a parameter is not part of the ParameterDefinition object. It can be modified using the functions getParameter and setParameter or getParameterNormalized and setParameterNormalized.
Addressing Parameters
Functions like getParameter, setParameter or getParameterDefinition address the desired parameter by its name or ID.
Addressing Parameters by Name
Please do not mix up the parameter's label on the UI with its name in the engine. Sometimes, the label and the name of a parameter are the same, but most of the time they are different.
❕ Throughout this documentation "name of parameter..." refers to its name in the engine and not its label on the UI.
The name of a parameter can be found in HALion's Parameter List. The Parameter List gives you a detailed overview of the parameters of the currently selected element in the Program Tree. The following screenshot shows parts of the parameters of a zone.
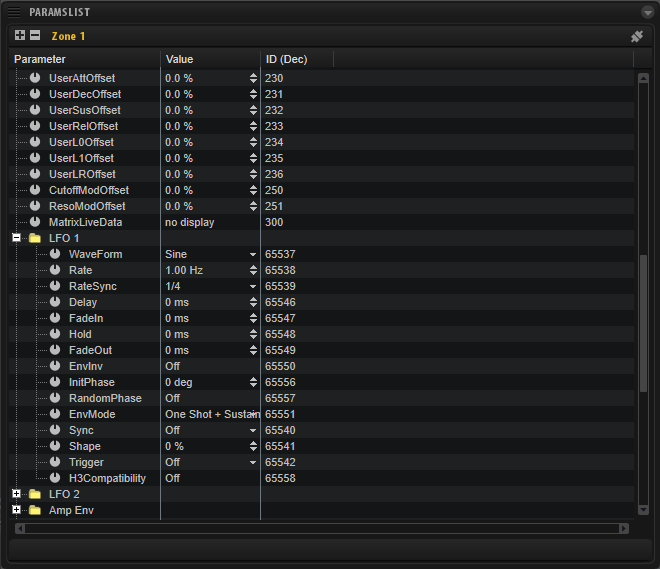
The Parameter column lists the names of the parameters. Parameters that belong together can be grouped into functional sections, represented by the folders in the Parameter column.
- Parameters that do not belong to a section can be addressed directly. In the screenshot above, "UserAttOffset" addresses the attack offset of the user envelope in the zone, for example.
- Parameters that belong to a section need the name of the section as prefix, for example, the shape parameter of LFO 1 in the zone has the name "LFO 1.Shape".
Example 1
function onLoadIntoSlot()
  local zones = this.program:findZones(true)
  if zones[1] then
    print("LFO 1.Shape: "..tostring(zones[1]:hasParameter("LFO 1.Shape")))
    print("lfo 1.shape: "..tostring(zones[1]:hasParameter("lfo 1.shape")))
  end
end
❕ Addressing a parameter by its name is case sensitive.
Addressing Parameters by ID
The ID of a parameter can also be found in the Parameter List. By default, the Parameter List does not show the ID.
- To add the ID column to the Parameter List, right-click a column header and select ID (Dec).
The ID of "LFO 1.Shape" is 65542, for example.
Example 2
local lfo1ShapeID = 65542
function onLoadIntoSlot()
  local zones = this.program:findZones(true)
  if zones[1] then
    print("LFO 1.Shape: "..tostring(zones[1]:hasParameter(lfo1ShapeID)))
  end
end
Addressing parameters by name needs more computing time and might be a disadvantage for timing critical scripts. To optimize your script, you can read the ID of a parameter with getParameterDefinition during the initialization of the script and use this instead.
Example 3
-- Read the ID of the parent layer's level parameter.

local paramID = this.parent:getParameterDefinition("Level").id

-- Print the value of the parent layer's level parameter with each note-on.

function onNote(event)
    postEvent(event)
    print("Level = "..this.parent:getParameter(paramID))
end
Using setParameter
The functions setParameter and setParameterNormalized address parameters also by name or ID.
Example 4
-- Set the value of the Level parameter of the parent layer.

function onLoadIntoSlot()
    this.parent:setParameter("Level", 0) -- set via name
    this.parent:setParameter(38, 0) -- set via ID
end
/ HALion Developer Resource / HALion Script / Diving Deeper /
Using Slot Local Variables
If a program is loaded in several slots, the state of its parameters (e.g., level, cutoff, resonance, etc.) is synchronized across these slots. The same is true for the state of global variables in a Lua script. If a global variable is changed in one slot, its state will change in every other slot where the program is loaded.
However, the engine's playback state of the program is handled independently for each slot. This is necessary because each slot can receive different MIDI events. If some functions in your script depend on global variables that store the state of MIDI events, the automatic synchronization of global variables is usually a hindrance, because the global variables will be overwritten by the slot that received the latest MIDI events. To attain global variables that operate independently per slot, use slot local variables by calling defineSlotLocal.
Declaring Slot Local Variables
You declare slot local variables by calling defineSlotLocal with the name of the corresponding global variable as argument. You can call defineSlotLocal before or after the initialization of the variable, but it is common practice to call the function in advance.
Example
The following example plays a classic up arpeggio. The variables for the arpeggio (noteBuffer, arpRunning and arpeggioNotes) need to be declared as slot local variables, otherwise, the script will not work as expected if the program is loaded into more than one slot.
To explore the script:
- Download SlotLocalVariables.vstpreset.
- Load the program twice into the Slot Rack and send different chords to the slots.
- Comment out the declaration of the slot local variables and send different chords to the slots again.
If slot local variables are declared, both slots play separate arpeggios. If slot local variables are not declared, only one slot will play an arpeggio with a mix of the chords that you are sending to the slots.
--[[
    Simple arpeggiator playing 1/16 notes with fixed velocity.
    The global variables noteBuffer, arpRunning and arpeggioNotes use defineSlotLocal.
--]]

-- Global statements.

-- Declare slot local variables.

defineSlotLocal("noteBuffer")
defineSlotLocal("arpRunning")
defineSlotLocal("arpeggioNotes")

-- Initialize variables.
-- Set note length to 1/16, i.e., one beat divided by four.

noteLength = 0.25

-- Set a fixed velocity of 100.

fixedVelocity = 100

-- Buffer for held notes.

noteBuffer = {}

-- Playback state of the arpeggiator.

arpRunning = false

-- Transfer the held notes into an array and sort its values.

function sortNotes()
    arpeggioNotes = {}
    for note in pairs(noteBuffer) do
        arpeggioNotes[#arpeggioNotes+1] = note
    end
    table.sort(arpeggioNotes)
end

-- Play up arpeggio.

function playArpeggioUp()
    arpRunning = true
    -- Start playback with index 1.
    local i = 1
    -- Playback for as long as there are arpeggio notes.
    while arpeggioNotes[i] do
        local id = playNote(arpeggioNotes[i], fixedVelocity, 0)
        wait(getBeatDuration() * noteLength * 0.5)
        -- Release the current voice after half the note length.
        releaseVoice(id)
        wait(getBeatDuration() * noteLength * 0.5)
        -- Increase index by 1 to play the next note.
        i = i + 1
        -- Reset playback to index 1, if index out of range.
        if not arpeggioNotes[i] then
            i = 1
        end
    end
    arpRunning = false
end

function onNote(event)
    -- Write notes to the buffer.
    noteBuffer[event.note] = event.velocity
    sortNotes()
    -- Start the arpeggio only if it is not running.
    if arpRunning == false then
        playArpeggioUp()
    end
end

function onRelease(event)
    -- Remove notes from the buffer.
    noteBuffer[event.note] = nil
    sortNotes()
end
/ HALion Developer Resource / HALion Script / Diving Deeper /
Protecting Layers
On this page:
Related pages:
You might want to avoid that users make edits to critical parts of the program. Moreover, how you built a program for your instrument might be a considerable part of your intellectual property. To safeguard the program and your work, you can protect the layers to which the users should not have access.
Using Layer Protection
Protecting layers is a two-step process:
- First, you define the layers you want to protect by setting the Layer Protection in the Program Tree. This has the advantage that you can decide at an early stage which layers you want to be protected. You can continue your work as usual and you still can add or remove the protection as needed. The permanent activation of the layer protection happens later.
- Before you release the instrument to the public, you export the program and apply the protection by using Export Program as VST3 Preset... with the Protect option activated. All layers for which the layer protection is set will be permanently protected in the exported program.
❕ Applying the layer protection permanently by exporting a protected VST 3 preset cannot be undone. For this reason, you should always keep a backup of the unprotected program.
Setting the Layer Protection
- In the Program Tree, right-click the column header and select Layer Protection. The column for setting the layer protection is added to the Program Tree. An open lock icon is displayed next to each layer, indicating that the layers are not protected yet.
- Click the lock icon for the layer that you want to protect. A dialog opens where you can enter the password for the layer protection.
- Enter a password in the text field. You must enter a password each time you protect a layer. You are free to use the same or different passwords for each of the layers.
- Click OK to engage the layer protection.
The Layer Protection is engaged if a closed lock icon is displayed next to the layer. If a child layer is protected through a parent layer, its lock will turn light gray to indicate this. To disengage the Layer Protection, click the closed lock icon of a layer, so that an open lock icon is shown. This also resets the password of the layer. To apply the Layer Protection permanently, you must build a library or export a protected version of the program or layer.
Applying the Layer Protection Automatically
The Library Creator protects layers with activated protection automatically when building a VST Sound. This only affects the presets that go into the VST Sound container – not your source presets on disk. Using the Library Creator is the preferred way to protect layers permanently for release.
- Set the Layer Protection as described above.
- In the Library Creator, add the respective presets to your library.
- Build the library and mount it.
- Go to the MediaBay and load a preset from the library.
Notice how the protected layers cannot be accessed in the Program Tree any longer.
Applying the Layer Protection Manually
❕ Applying the layer protection cannot be undone. Please keep a backup of the unprotected program if you need to edit the layers at a later stage.
- Right-click in the Program Tree and go to the Import/Export submenu.
- Select Export Program as VST3 Preset...
- Activate the Protect option.
- Choose a location and file name.
- Click Save to export the program and apply the layer protection permanently.
When you load the exported program, the protected layers cannot be accessed in the Program Tree any longer.
Accessing Protected Layers from a Script
By default, protected layers cannot be accessed by scripts. The parameters of a protected layer and any elements inside of it are hidden for scripts. This avoids unauthorized parsing of the Program Tree to retrieve hidden information. A script can access protected layers only by calling the function addLayerPassword with the correct password for the corresponding layers.
Example
-- Access the protected layer(s) which have the password "abc123".

addLayerPassword("abc123")
❕ To hide the password in addLayerPassword, you must also protect the script module. See Managing Script Modules for details.
/ HALion Developer Resource / HALion Script / Diving Deeper /
Managing Script Modules
On this page:
Related pages:
You can add your script module to the MIDI module library by saving it as a MIDI module. Script modules that have been saved as MIDI modules behave like the factory MIDI modules and can be loaded with Create New MIDI Module.
Saving Modules
- In the Program Tree, right-click the script module that you want to save.
- On the MIDI Module Library submenu, select Save Module...
- In the file dialog, enter a name for the module and click Save.
Deleting Modules
- Right-click in the Program Tree.
- On the MIDI Module Library submenu, select Delete Module...
- Select the module that you want to delete and click Yes to confirm.
Protecting Modules
If you want to prevent others from viewing or changing the sources of your script module, you can protect the module with the Protect Module command.
Protecting a script module has the following effects:
- The source files for the script module cannot be edited anymore. This includes the script itself and any sources for the MacroPage of the module.
- The sections for source files and output messages will be hidden in the editor and cannot be accessed anymore.
Using Protect Module
- In the Program Tree, right-click the script module that you want to protect.
- On the MIDI Module Library submenu, select Protect Module. At this point, you can still revert the protection with the undo command of the history.
- To protect the script module permanently, open the MIDI Module Library submenu and select Save Module... The next time you load the module, it will be protected. Alternatively, you can save the program together with the module.
❕ The protection of permanently protected modules cannot be undone. Make sure that you have an unprotected backup of the script module and its sources if you need to edit them at a later stage.
/ HALion Developer Resource / HALion Script / Diving Deeper /
Using External Files
(Since HALion 7.0)
The functions of the i/o and os libraries of Lua allow you to manipulate external files. External files are files that are managed by the operating system. For example, while developing large scale sample instruments, it can be helpful to read or write files with comma separated values (.csv). To protect private data, the location for reading and writing files is limited to the folders ./Documents/Steinberg and ./Documents/tmp of the user. In addition, you can read files from the VST sound that contains the executed script. Lua's i/o functions allow you to manipulate files. The functions os.remove and os.rename from the os library allow you to delete or rename files. See Input and Output Facilities and Operating System Facilities for a description of the respective functions.
❕ The functions
io.popen,io.tmpfile,os.execute,os.exit,os.getenv,os.setlocaleandos.tmpnameare not supported.
Retrieving the File Path of ./Documents/Steinberg
You can use the function getUserSubPresetPath to retreive the file path of ./Documents/Steinberg on your system.
Example
-- Retrieve ./Documents/Steinberg/ and try to open a file.

fileLocation = getUserSubPresetPath()
posStart, posEnd = string.find(getUserSubPresetPath(), "Steinberg/")
fileLocation = string.sub(fileLocation, 1, posEnd)

io.input(fileLocation.."some.txt")
/ HALion Developer Resource / HALion Script / Diving Deeper /
Debugging with LDT
On this page:
- Installing LDT
- Setting Up a Debug Session
- Starting a Debug Session
- Stopping a Debug Session
- Using the LDT Debugger
External links:
HALion uses Lua Development Tools (LDT) by Eclipse Foundation as the front end for debugging. LDT is an open source software for Windows and Mac OSX that provides you with an integrated development environment (IDE) for Lua with tools like code assistance, debugging, syntax coloring, code formatting, and many more. LDT allows you to debug scripts that run in HALion. After configuring Attach Debug in LDT, you can connect a Lua Script module for debugging its script. In LDT, you can monitor the script step by step, inspect variables and evaluate expressions. This way, you can identify and remove errors from your script more easily.
More information about LDT and support from the Eclipse community can be found here:
Installing LDT
LDT can be downloaded from here:
- After downloading the package for your system, unpack the files into a folder of your choice.
❕ In addition, the Java SE 8 JRE (Windows) or the Java SE 8 JDK (Mac OSX) must be installed.
Windows
The Java SE 8 JRE can be downloaded from here:
https://www.oracle.com/technetwork/java/javase/downloads/jre8-downloads-2133155.html
Mac OSX
The Java SE 8 JDK can be downloaded from here:
https://www.oracle.com/technetwork/java/javase/downloads/jdk8-downloads-2133151.html
❕ Mac OSX might tell you that you need to install the legacy Java SE 6 runtime. Please ignore the message and install the Java SE 8 JDK instead.
Setting Up a Debug Session
Before starting a debug session, some preparations are required. In the following, you will be guided through all the necessary steps.
Starting LDT
Windows
- Double-click LuaDevelopmentTools.exe.
Mac OSX
- Double-click the Eclipse application.
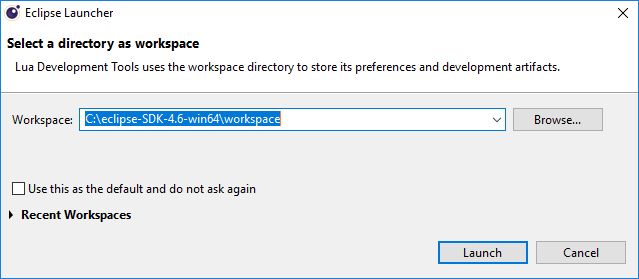
Selecting a Workspace
Upon start of LDT, the Eclipse Launcher will ask you to select a directory as workspace.
- Choose a location for Workspace and click Launch.
Creating a Project
-
Open File > New > Project, select Lua Project and click Next >.
-
Enter a Project name.
-
Select Create project at existing location (from existing source) and set Directory to the location of your scripts.
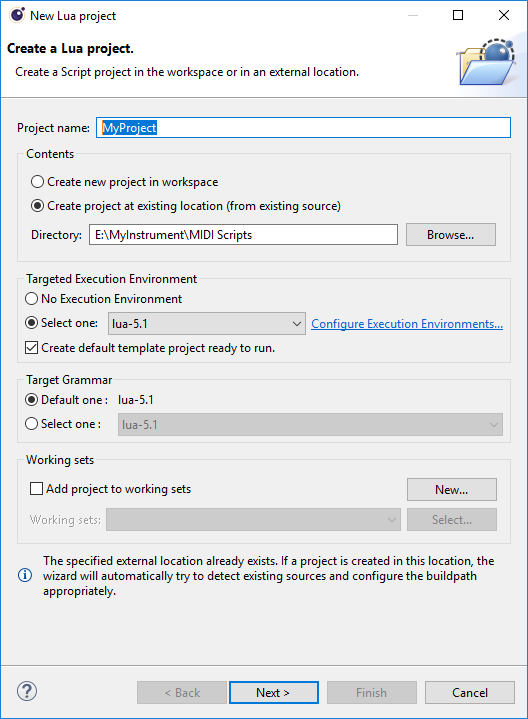
-
Click Next >. The contents of the specified directory will be scanned. You can ignore the warning that says, "Your project has no source folder defined."
-
Click Finish.
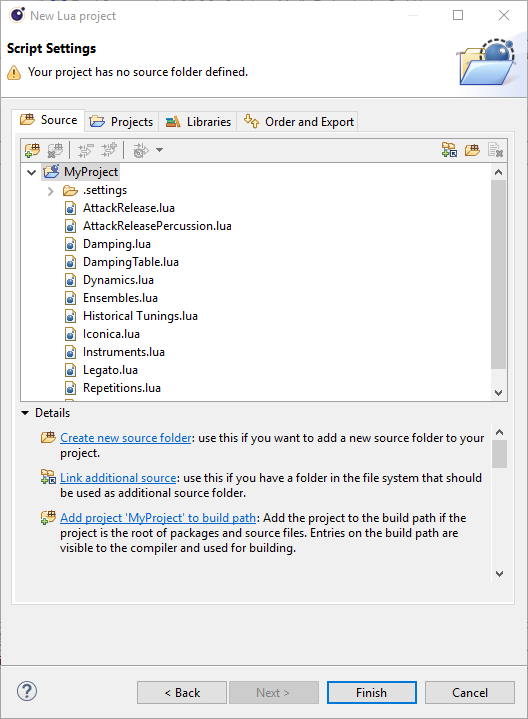
The Lua scripts that have been found will appear in the Script Explorer of LDT. You can load them via double-click.
Configuring Attach Debug
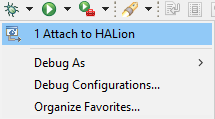
In order for incoming debug sessions to be accepted, you must create a Lua Attach to Application launch configuration.
- Open Run > Debug Configurations...
- Select Lua Attach to Application and click the New button to create a configuration of this type.
- Enter a name and click Apply.
- Click Close, since we do not want to debug at the moment.
Changing the Debug Port on Mac
On Mac, you must change the debug server port before you can start a debug session.
- Open Lua Development Tools Product > Preferences... and go in Dynamic Languages > Debug.
- Change Port to "Custom" and enter the value "10001".
- Click Apply and Close.
❕ Do not change the debug server port on Windows.
Starting a Debug Session
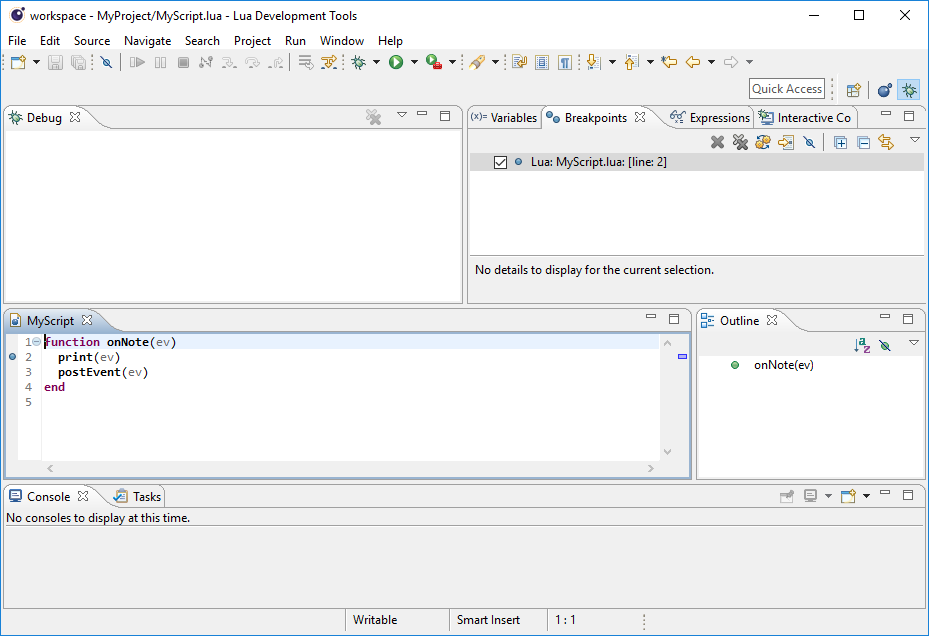
Please load the following code example for your first debug session.
Loading the Code Example
Create a new Lua file in LDT.
- In File > New > Other..., select Lua File and click Next >.
- Enter a file name and click Finish.
❕ New Lua files will be saved to the directory that you specified for the Lua project.
- Copy the following code example to the editor area of LDT.
Example
function onNote(ev)
  print(ev)
  postEvent(ev)
end
- Click
 to save the script file in LDT.
Now it is time to start HALion and to load the script.
- Open HALion, create a program with a synth zone and a Lua Script module.
- Load the script file from the location where you saved it.

❕ The script running in the Lua Script module of HALion must be loaded from the same location where LDT saved it. This ensures that the script in LDT and HALion are physically the same file. Otherwise, the debugger cannot establish a connection between LDT (debugger server) and the Lua Script module (debugger client).
Opening the Debug Perspective
Most of the debug functionality can be found in the Debug perspective of LDT.
- Click
 in the top right corner of the editor area.
 - Alternatively, in Window > Perspective > Open Perspective > Other..., select Debug and click Open.
Breakpoints can be set by double-clicking the margin.
- Double-click the margin in line two, for example.
Connecting the Lua Script module with LDT
The following steps will establish a connection between LDT (debugger server) and the Lua Script module (debugger client).
- Open HALion, go to the Lua Script module and click the Connect to Debugger
 button. This defines the Lua Script module as debugger client. The Connect to Debugger button turns blue
  to indicate that it waits for the debugger server.
 - Open LDT and go to Run > Debug Configurations. In Lua Attach to Application, select the configuarion you have previously created.
- Click Debug to start the debugger server.
The Connect to Debugger button in HALion turns green  if debugger server and client are connected.
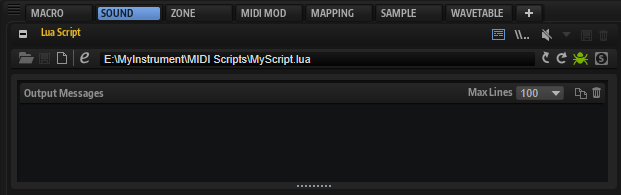
As a basic test, try the following steps with the code example from above and a breakpoint in line two:
-
Play a MIDI note. LDT will break into the onNote function.
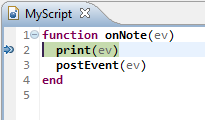
-
Click Resume
 or press (F8) to continue the script. HALion prints the event and outputs the note.
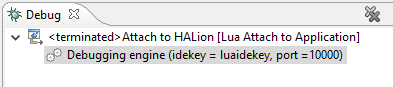
Stopping a Debug Session
To stop the debug session:
- Open the Lua Script module in HALion and click the Connect to Debugger button.
The Connect to Debugger button turns gray and the Debug area in LDT says the Lua Attach to Application session has <terminated>.
Using the LDT Debugger
From now on, the debug session can be started from the Debug menu  on the LDT toolbar.
Tips for using the LDT debugger can be found here:
Updates
This page lists the modified and added pages for each version.
On this page:
- HALion 7.1.0
- HALion 7.0.0
- HALion 6.4.20
- HALion 6.4.10
- HALion 6.4.0
- HALion 6.3.0
- HALion 6.2.20
- HALion 6.1.0
HALion 7.1.0
Added Pages
HALion 7.0.0
Added Pages
- cancelDecompose
- decompose
- Decompose Output Modes
- getDecomposeOutputPath
- getDecomposeProgress
- getDecomposeSettings
- getUserSubPresetPath
- onData
- onRetrigger
- savePreset
- setZoneFMXAlgo
- startWriteOutputToFile
- stopWriteOutputToFile
- Using External Files
Modified Pages
- Event
- Event Types
- getNoteDuration
- getUserPresetPath
- isKeyDown
- isOctaveKeyDown
- Modulation Destination Types
- Modulation Source Types
- onNote
- onRelease
- onUnhandledEvent
- playNote
- postEvent
- Protecting Layers
HALion 6.4.20
Modified Pages
HALion 6.4.10
Added Pages
HALion 6.4.0
Added Pages
- Bus Constructor
- Bypass Masks
- Effect Constructor
- getOnsets
- Layer Constructor
- MidiModule Constructor
- Program Constructor
- Zone Constructor
Modified Pages
HALion 6.3.0
Added Pages
Modified Pages
HALion 6.2.20
Added Pages
HALion 6.1.0
Added Pages
Modified Pages
Functions by Subject
Here you can browse the functions of the HALion Script language by their subject.
On this page:
- Audio File Functions
- Automation Functions
- Bus Functions
- Context Functions
- Conversion Functions
- Element Functions
- Event Callback
- Event Functions
- Instance Functions
- Layer Functions
- MIDI File Functions
- Modulation Matrix Functions
- ParameterDefinition Functions
- QC Functions
- Slot Functions
- Timing Functions
- UI Script Functions
- Undo Functions
- Voice Functions
- Zone Functions
Audio File Functions
analyzePitch, AudioFile.open, cancelDecompose, cancelPitchAnalysis, decompose, getDecomposeProgress, getOnsets, getPeak, getPitch, getPitchAnalysisProgress,
Automation Functions
assignAutomation, forgetAutomation, getAutomationIndex,
Bus Functions
appendEffect, findEffects, getEffect, getOutputBus, insertEffect, removeEffect, setOutputBus,
Context Functions
getAllocatedMemory, getBarDuration, getBeatDuration, getBeatTime, getBeatTimeInBar, getCC, getContext, getDecomposeOutputPath, getDecomposeSettings, getFreeVoices, getHostName, getHostVersion, getMsTime, getNoteDuration, getNoteExpression, getProcessedSamples, getProductName, getProductVersion, getSamplingRate, getScriptVersion, getSlotIndex, getTempo, getTime, getTimeSignature, getUsedMemory, getUsedVoices, getUsedVoicesOfSlot, getUserPresetPath, getUserSubPresetPath, getVoices, isKeyDown, isNoteHeld, isOctaveKeyDown, isPlaying,
Conversion Functions
beat2ms, ms2beat, ms2samples, samples2ms,
Element Functions
findChildren, getChild, getParameter, getParameterDefinition, getParameterNormalized, hasParameter, removeFromParent, setName, setParameter, setParameterNormalized,
Event Callback
onAfterTouch, onController, onData, onIdle, onInit, onLoad, onLoadIntoSlot, onLoadSubPreset, onNote, onNoteExpression, onPitchBend, onRelease, onRemoveFromSlot, onRetrigger, onSave, onSaveSubPreset, onTriggerPad, onUnhandledEvent,
Event Functions
afterTouch, controlChange, pitchBend, playNote, playTriggerPad, postEvent, releaseVoice, setBypassNoteOff,
Instance Functions
findBusses, findEffects, findSlots, getBus, getProgram, getSlot, setProgram,
Layer Functions
addQCAssignment, appendBus, appendLayer, appendLayerAsync, appendMidiModule, appendZone, findBusses, findEffects, findLayers, findMidiModules, findZones, getBus, getLayer, getMidiModule, getNumQCAssignments, getQCAssignmentBypass, getQCAssignmentCurve, getQCAssignmentMax, getQCAssignmentMin, getQCAssignmentMode, getQCAssignmentParamId, getQCAssignmentScope, getZone, insertBus, insertLayer, insertLayerAsync, insertMidiModule, insertZone, removeBus, removeLayer, removeMidiModule, removeQCAssignment, removeZone, setQCAssignmentBypass, setQCAssignmentCurve, setQCAssignmentMax, setQCAssignmentMin, setQCAssignmentMode, setQCAssignmentParamId, setQCAssignmentScope,
MIDI File Functions
insertEvent, readMidiFile, sortEvents, writeMidiFile,
Modulation Matrix Functions
getSource1, getSource2, setSource1, setSource2,
ParameterDefinition Functions
QC Functions
addQCAssignment, getNumQCAssignments, getQCAssignmentBypass, getQCAssignmentCurve, getQCAssignmentMax, getQCAssignmentMin, getQCAssignmentMode, getQCAssignmentParamId, getQCAssignmentScope, removeQCAssignment, setQCAssignmentBypass, setQCAssignmentCurve, setQCAssignmentMax, setQCAssignmentMin, setQCAssignmentMode, setQCAssignmentParamId, setQCAssignmentScope,
Slot Functions
findBusses, findEffects, getBus,
Timing Functions
runAsync, runSync, spawn, wait, waitBeat, waitForRelease,
UI Script Functions
Undo Functions
endUndoBlock, getUndoContext, startUndoBlock,
Voice Functions
changeNoteExpression, changePan, changeTune, changeVolume, changeVolumedB, fade,
Zone Functions
getModulationMatrixRow, getOutputBus, setOutputBus,
/ HALion Developer Resource / HALion Script /
Class Reference
Class Hierarchy
/ HALion Developer Resource / HALion Script / Class Reference /
Audio File
The AudioFile class describes the properties of audio files.
On this page:
AudioFile Class, analyzePitch, cancelDecompose, cancelPitchAnalysis, decompose, getDecomposeProgress, getOnsets, getPeak, getPitch, getPitchAnalysisProgress
Classes
AudioFile Class
Description
The AudioFile.open function creates an AudioFile object of the specified audio file. The AudioFile object can be used to retrieve information from the audio file, for example, the sample rate, bit depth, length in samples, etc. The AudioFile object has the following fields.
❕ All fields of the AudioFile object are read-only.
Available in: Controller, Processor.
Fields
| Field | Description | Value Type |
|---|---|---|
| .valid | Indicates if the file is a supported audio file and whether it could be opened or not. | boolean |
| .fileName | The file name that was used for opening the audio file. | string |
| .rate | The sample rate of the audio file. Returns nil if the audio file could not be opened or is invalid. | number |
| .bits | The bit depth of the audio file. Returns nil if the audio file could not be opened or is invalid. | number |
| .channels | The number of channels of the audio file. Returns nil if the audio file could not be opened or is invalid. | number |
| .length | The number of samples in the audio file. Returns nil if the audio file could not be opened or is invalid. | number |
| .rootKey | The root key stored in the sampler chunk of the audio file. Returns nil if the audio file does not contain an appropriate sampler chunk or could not be opened or is invalid. | number |
| .keyLow | The lowest key of the key range stored in the sampler chunk of the audio file. Returns nil if the audio file does not contain an appropriate sampler chunk or could not be opened or is invalid. | number |
| .keyHigh | The highest key of the key range stored in the sampler chunk of the audio file. Returns nil if the audio file does not contain an appropriate sampler chunk or could not be opened or is invalid. | number |
| .velLow | The lowest velocity of the velocity range stored in the sampler chunk of the audio file. Returns nil if the audio file does not contain an appropriate sampler chunk or could not be opened or is invalid. | number |
| .velHigh | The highest velocity of the velocity range stored in the sampler chunk of the audio file. Returns nil if the audio file does not contain an appropriate sampler chunk or could not be opened or is invalid. | number |
| .detune | The tune offset in cents stored in the sampler chunk of the audio file. Returns nil if the audio file does not contain an appropriate sampler chunk or could not be opened or is invalid. | number |
| .level | The level offset in dB stored in the sampler chunk of the audio file. Returns nil if the audio file does not contain an appropriate sampler chunk or could not be opened or is invalid. | number |
| .tempo | The tempo in bpm stored in a data chunk of the audio file. Returns nil if the audio file does not contain an appropriate data chunk or could not be opened or is invalid. | number |
| .beats | The number of beats stored in a data chunk of the audio file. Returns nil if the audio file does not contain an appropriate data chunk or could not be opened or is invalid. | number |
| .signature | A pair of values for the numerator and denominator of the signature stored in a data chunk of the audio file. The values are nil if the audio file does not contain an appropriate data chunk or could not be opened or is invalid. | number, number |
| .sampleStart | The position of the sample start in samples stored in a data chunk of the audio file. Returns nil if the audio file does not contain an appropriate data chunk or could not be opened or is invalid. | number |
| .sampleEnd | The position of the sample end in samples stored in a data chunk of the audio file. Returns nil if the audio file does not contain an appropriate data chunk or could not be opened or is invalid. | number |
| .loops | The loop start and end positions in samples stored in a data chunk of the audio file. The returned table is an array that contains tables with the fields loopStart and loopEnd for each loop. Returns nil if the audio file does not contain an appropriate data chunk or could not be opened or is invalid. | table |
Example
-- Open an audio file from HALion Sonic 1.0.

fname = "vstsound://502B301A6C914CEDA5C7500DC890C4DC/.Samples/g:/projects/yamahacontentserver/download/release/smtg/winds/Samples/DP060_FluteC3.wav"
af = AudioFile.open(fname)
loops = af.loops

-- Print information from the audio file.

if af.valid then
  print(fname, "opened.")
  print("Sample Rate: ", af.rate)
  print("Bit Depth: ", af.bits)
  print("Channels: ", af.channels)
  print("Sample Length: ", af.length)
  if loops then
    print("Loop Start: ", loops[1].loopStart)
    print("Loop End: ", loops[1].loopEnd)
  end
else
  print(fname, "does not exist.")
end
Methods
analyzePitch
analyzePitch(callback, channel)
(Since HALion 6.3)
Description
Function to analyze the pitch of an audio file. You specify the audio file with the AudioFile object that is returned by the AudioFile.open function. The arguments callback and channel are optional. If called without a callback function, analyzePitch will be executed in the same thread. If called with a callback function as argument, analyzePitch will be executed in a separate, parallel thread. You can specify the channel to be analyzed with the channel argument. Without the channel argument, multiple channels of an audio file will be summed before the pitch is analyzed. The callback function is called with the AudioFile object as the first and the channel as the second argument after the pitch has been analyzed. The results of analyzePitch are cashed for as long as the corresponding AudioFile object exists. The function itself does not return any pitch information. You must use getPitch to obtain the analyzed pitch.
Available in: Controller.
Arguments
| Argument | Description | Value Type |
|---|---|---|
| callback | Callback function that is called with the AudioFile object as argument after the pitch has been analyzed. | function, optional |
| channel | Use this to specify the channel of the audio file to be analyzed. Leave this empty or set this to 0 for summing all audio channels before they are analyzed. | number, optional |
Example
channelNames = { [0] = "All", "Left", "Right" }

defineParameter( "Channel", nil, 0, channelNames)
defineParameter( "Start", nil, false, function() if Start then onStart() end end)
defineParameter( "Cancel", nil, false)

-- Requires the Skylab content.
path = "vstsound://724ACB205EFF46F885735D1B216C37AD/.AppData/Steinberg/Skylab/Sub Presets/Layer Presets/Ambient Pads/Ambient Pad 01.vstpreset"
layer = loadPreset(path)

function onPitchAnalysisFinished(audioFile, channelNum)
    print("Progress: 100%")
    print(channelNames[channelNum].." channel(s) of "..audioFile.fileName.." analyzed.")
end

function onStart()
    zones = layer:findZones(true)
    for i, zone in ipairs(zones) do
        local samplePath = zone:getParameter("SampleOsc.Filename")
        print("File: "..samplePath)
        local afile = AudioFile.open(samplePath)
        afile:analyzePitch(onPitchAnalysisFinished, Channel)
        while afile:getPitchAnalysisProgress(Channel) < 1 do
            if Cancel then
                afile:cancelPitchAnalysis(Channel)
                break
            end
            local progressPercent = 100 * afile:getPitchAnalysisProgress(Channel)
            print(string.format("Progress: %2d%%", progressPercent))
            wait(2000)
        end
        if Cancel then
            Cancel = false
            print("Canceled!")
            break
        end
        local pitch = afile:getPitch(0, -1, Channel)
        print("Analyzed Pitch: "..pitch)
    end
    print("Done!")
    Start = false
end
cancelDecompose
cancelDecompose()
(Since HALion 7.0)
Description
Function to cancel the decompose function for an audio file. You specify the audio file with the AudioFile object that is returned by the AudioFile.open function. To cancel the decompose of a specific audio file, the AudioFile object of the cancelDecompose function must match the AudioFile object of the corresponding decompose function.
Available in: Controller.
Example
outputModes = { "Tonal", "Noise", "All", "Mix", }

defineParameter { name = "Decompose", default = false, onChanged = function() if Decompose then onDecompose() end end }
defineParameter { name = "Cancel", default = false}
defineParameter { name = "Sensitivity", default = -24, min = -96, max = 0, increment = 0.1 }
defineParameter { name = "Cutoff", default = 20000, min = 20, max = 20000, increment = 1 }
defineParameter { name = "Duration", default = 80, min = 0, max = 100, increment = 0.1 }
defineParameter { name = "TonalLevel", default = 0, min = -96, max = 12, increment = 0.1 }
defineParameter { name = "NoiseLevel", default = 0, min = -96, max = 12, increment = 0.1 }
defineParameter { name = "Start", default = 0, min = 0, max = 1000, increment = 1 }
defineParameter { name = "Length", default = 0, min = 0, max = 1000, increment = 1 }
defineParameter { name = "OutputMode", default = DecomposeOutputMode.all, strings = outputModes }
defineParameter { name = "OutputPath", default = "" }
defineParameter { name = "Subfolder", default = "" }

function onDecomposeFinished(audioFile, file1, file2)
    print("Progress: 100%")
    print(audioFile.fileName, audioFile.length)
    if file1 then
        local afile1 = AudioFile.open(file1)
        print(afile1.fileName, afile1.length)
    end
    if file2 then
        local afile2 = AudioFile.open(file2)
        print(afile2.fileName, afile2.length)
    end
end

function onDecompose()
    zones = this.parent:findZones(true)
    for i, zone in ipairs(zones) do
        local samplePath = zone:getParameter("SampleOsc.Filename")
        local afile = AudioFile.open(samplePath)
        local startSamples = Start * afile.rate/1000
        local lengthSamples = Length * afile.rate/1000
        if not Subfolder == "" then
            if OutputPath == "" then
                OutputPath = getDecomposeOutputPath(samplePath)..Subfolder
            else
                OutputPath = OutputPath..Subfolder
            end
        end
        print("Decompose: "..samplePath)
        afile:decompose{
            callback = onDecomposeFinished,
            start = startSamples,
            length = lengthSamples,
            sensitivity = Sensitivity,
            cutoff = Cutoff,
            duration = Duration,
            tonalLevel = TonalLevel,
            noiseLevel = NoiseLevel,
            outputMode = OutputMode,
            outputPath = OutputPath,
        }
        while afile:getDecomposeProgress() < 1 do
            if Cancel then
                afile:cancelDecompose()
                break
            end
            local progress, errorMessage = afile:getDecomposeProgress()
            if errorMessage then
                print(errorMessage)
                break
            end
            local progressPercent = 100 * progress
            print(string.format("Progress: %2d%%", progressPercent))
            wait(2000)
        end
        if Cancel then
            Cancel = false
            print("Decompose Canceled!")
            break
        end
    end
    print("Decompose finished.")
    Decompose = false
end
cancelPitchAnalysis
cancelPitchAnalysis(channel)
(Since HALion 6.3)
Description
Function to cancel a pitch analysis you started with analyzePitch. You specify the audio file with the AudioFile object that is returned by the AudioFile.open function. The channel argument specifies the channel of the audio file. The AudioFile object and the channel argument must match the call to analyzePitch.
Available in: Controller.
Arguments
| Argument | Description | Value Type |
|---|---|---|
| channel | Use this to specify the channel of the audio file that is being analyzed. | number, optional |
Example
channelNames = { [0] = "All", "Left", "Right" }

defineParameter( "Channel", nil, 0, channelNames)
defineParameter( "Start", nil, false, function() if Start then onStart() end end)
defineParameter( "Cancel", nil, false)

-- Requires the Skylab content.
path = "vstsound://724ACB205EFF46F885735D1B216C37AD/.AppData/Steinberg/Skylab/Sub Presets/Layer Presets/Ambient Pads/Ambient Pad 01.vstpreset"
layer = loadPreset(path)

function onPitchAnalysisFinished(audioFile, channelNum)
    print("Progress: 100%")
    print(channelNames[channelNum].." channel(s) of "..audioFile.fileName.." analyzed.")
end

function onStart()
    zones = layer:findZones(true)
    for i, zone in ipairs(zones) do
        local samplePath = zone:getParameter("SampleOsc.Filename")
        print("File: "..samplePath)
        local afile = AudioFile.open(samplePath)
        afile:analyzePitch(onPitchAnalysisFinished, Channel)
        while afile:getPitchAnalysisProgress(Channel) < 1 do
            if Cancel then
                afile:cancelPitchAnalysis(Channel)
                break
            end
            local progressPercent = 100 * afile:getPitchAnalysisProgress(Channel)
            print(string.format("Progress: %2d%%", progressPercent))
            wait(2000)
        end
        if Cancel then
            Cancel = false
            print("Canceled!")
            break
        end
        local pitch = afile:getPitch(0, -1, Channel)
        print("Analyzed Pitch: "..pitch)
    end
    print("Done!")
    Start = false
end
decompose
decompose{arguments}
(Since HALion 7.0)
Description
Function to decompose an audio file into its tonal and noise components. You specify the audio file with the AudioFile object that is returned by the AudioFile.open function. The decompose function can be configured with named arguments. The named arguments are optional and if called without, decompose will be executed with its default settings.
Available in: Controller.
Arguments
| Argument | Description | Value Type |
|---|---|---|
| callback | This callback function is called with the AudioFile object and the file path of the ouput sample(s) as arguments after the original sample has been decomposed. If called without a callback function, decompose will be executed in the same thread. If called with a callback function as argument, decompose will be executed in a separate, parallel thread. | function, optional |
| start | The start position in samples. The created samples are trimmed to this position. The default is 0 samples. | number, optional |
| length | The duration in samples. Set this to less than or equal to 0 to use all samples from the specified start to the end of the sample. By default, everything from start to the end of the sample is decomposed. The created samples are trimmed to this length. | number, optional |
| sensitivity | Determines the minimum level difference that is needed to distinguish the tonal from the noise signals. The sensitivity is specified in dB and the value range is from -96 to 0 dB. The default is -24 dB. | number, optional |
| cutoff | Sets the frequency limit below which the algorithm detects tonal signals. Any signals above the cutoff frequency are classified as noise, regardless of the sensitivity and duration arguments. The cutoff is specified in Hz and the value range is from 20 to 20000 Hz. The default is 20000 Hz. | number, optional |
| duration | Allows you to specify the minimum length for a tonal signal in milliseconds. Signals that are shorter than the specified duration are classified as noise, longer signals are classified as tonal. The value range is fom 0 to 100 ms. The default is 80 ms. | number, optional |
| tonalLevel | Specifies the level of the tonal component in dB. The value range is from -96 to +12 dB. The default is 0 dB. | number, optional |
| noiseLevel | Specifies the level of the noise component in dB. The value range is from -96 to +12 dB. The default is 0 dB. | number, optional |
| outputMode | Defines if only one of the components, both components, or a mix of them is created. See Decompose Output Modes for details. | number, optional |
| outputPath | Specifies the path for the decomposed audio files. If the string is empty, invalid, or nil, the file paths of the decompose settings of the plug-in will be used. The default is nil. | string, optional |
❕ Samples that were loaded from a VST Sound container can only be decomposed if the
ouputPathargument is set to a valid file location. You can use getDecomposeOutputPath to obtain the file location from the decompose settings of the plug-in.
Example
outputModes = { "Tonal", "Noise", "All", "Mix", }

defineParameter { name = "Decompose", default = false, onChanged = function() if Decompose then onDecompose() end end }
defineParameter { name = "Cancel", default = false}
defineParameter { name = "Sensitivity", default = -24, min = -96, max = 0, increment = 0.1 }
defineParameter { name = "Cutoff", default = 20000, min = 20, max = 20000, increment = 1 }
defineParameter { name = "Duration", default = 80, min = 0, max = 100, increment = 0.1 }
defineParameter { name = "TonalLevel", default = 0, min = -96, max = 12, increment = 0.1 }
defineParameter { name = "NoiseLevel", default = 0, min = -96, max = 12, increment = 0.1 }
defineParameter { name = "Start", default = 0, min = 0, max = 1000, increment = 1 }
defineParameter { name = "Length", default = 0, min = 0, max = 1000, increment = 1 }
defineParameter { name = "OutputMode", default = DecomposeOutputMode.all, strings = outputModes }
defineParameter { name = "OutputPath", default = "" }
defineParameter { name = "Subfolder", default = "" }

function onDecomposeFinished(audioFile, file1, file2)
    print("Progress: 100%")
    print(audioFile.fileName, audioFile.length)
    if file1 then
        local afile1 = AudioFile.open(file1)
        print(afile1.fileName, afile1.length)
    end
    if file2 then
        local afile2 = AudioFile.open(file2)
        print(afile2.fileName, afile2.length)
    end
end

function onDecompose()
    zones = this.parent:findZones(true)
    for i, zone in ipairs(zones) do
        local samplePath = zone:getParameter("SampleOsc.Filename")
        local afile = AudioFile.open(samplePath)
        local startSamples = Start * afile.rate/1000
        local lengthSamples = Length * afile.rate/1000
        if not Subfolder == "" then
            if OutputPath == "" then
                OutputPath = getDecomposeOutputPath(samplePath)..Subfolder
            else
                OutputPath = OutputPath..Subfolder
            end
        end
        print("Decompose: "..samplePath)
        afile:decompose{
            callback = onDecomposeFinished,
            start = startSamples,
            length = lengthSamples,
            sensitivity = Sensitivity,
            cutoff = Cutoff,
            duration = Duration,
            tonalLevel = TonalLevel,
            noiseLevel = NoiseLevel,
            outputMode = OutputMode,
            outputPath = OutputPath,
        }
        while afile:getDecomposeProgress() < 1 do
            if Cancel then
                afile:cancelDecompose()
                break
            end
            local progress, errorMessage = afile:getDecomposeProgress()
            if errorMessage then
                print(errorMessage)
                break
            end
            local progressPercent = 100 * progress
            print(string.format("Progress: %2d%%", progressPercent))
            wait(2000)
        end
        if Cancel then
            Cancel = false
            print("Decompose Canceled!")
            break
        end
    end
    print("Decompose finished.")
    Decompose = false
end
getDecomposeProgress
getDecomposeProgress()
(Since HALion 7.0)
Description
Function to monitor the progress of the decompose function for an audio file. You specify the audio file with the AudioFile object that is returned by the AudioFile.open function. To get the progress of a specific audio file that is being decomposed, the AudioFile object of the getDecomposeProgress function must match the AudioFile object of the corresponding decompose function. The function returns two values: the progress as a value between 0 and 1 and an error message if the decompose did not succeed.
Available in: Controller.
Return Values
Returns the progress as a float value between 0 and 1, and an error message if the decompose did not succeed. The error message returns nil if the decompose was successful.
Example
outputModes = { "Tonal", "Noise", "All", "Mix", }

defineParameter { name = "Decompose", default = false, onChanged = function() if Decompose then onDecompose() end end }
defineParameter { name = "Cancel", default = false}
defineParameter { name = "Sensitivity", default = -24, min = -96, max = 0, increment = 0.1 }
defineParameter { name = "Cutoff", default = 20000, min = 20, max = 20000, increment = 1 }
defineParameter { name = "Duration", default = 80, min = 0, max = 100, increment = 0.1 }
defineParameter { name = "TonalLevel", default = 0, min = -96, max = 12, increment = 0.1 }
defineParameter { name = "NoiseLevel", default = 0, min = -96, max = 12, increment = 0.1 }
defineParameter { name = "Start", default = 0, min = 0, max = 1000, increment = 1 }
defineParameter { name = "Length", default = 0, min = 0, max = 1000, increment = 1 }
defineParameter { name = "OutputMode", default = DecomposeOutputMode.all, strings = outputModes }
defineParameter { name = "OutputPath", default = "" }
defineParameter { name = "Subfolder", default = "" }

function onDecomposeFinished(audioFile, file1, file2)
    print("Progress: 100%")
    print(audioFile.fileName, audioFile.length)
    if file1 then
        local afile1 = AudioFile.open(file1)
        print(afile1.fileName, afile1.length)
    end
    if file2 then
        local afile2 = AudioFile.open(file2)
        print(afile2.fileName, afile2.length)
    end
end

function onDecompose()
    zones = this.parent:findZones(true)
    for i, zone in ipairs(zones) do
        local samplePath = zone:getParameter("SampleOsc.Filename")
        local afile = AudioFile.open(samplePath)
        local startSamples = Start * afile.rate/1000
        local lengthSamples = Length * afile.rate/1000
        if not Subfolder == "" then
            if OutputPath == "" then
                OutputPath = getDecomposeOutputPath(samplePath)..Subfolder
            else
                OutputPath = OutputPath..Subfolder
            end
        end
        print("Decompose: "..samplePath)
        afile:decompose{
            callback = onDecomposeFinished,
            start = startSamples,
            length = lengthSamples,
            sensitivity = Sensitivity,
            cutoff = Cutoff,
            duration = Duration,
            tonalLevel = TonalLevel,
            noiseLevel = NoiseLevel,
            outputMode = OutputMode,
            outputPath = OutputPath,
        }
        while afile:getDecomposeProgress() < 1 do
            if Cancel then
                afile:cancelDecompose()
                break
            end
            local progress, errorMessage = afile:getDecomposeProgress()
            if errorMessage then
                print(errorMessage)
                break
            end
            local progressPercent = 100 * progress
            print(string.format("Progress: %2d%%", progressPercent))
            wait(2000)
        end
        if Cancel then
            Cancel = false
            print("Decompose Canceled!")
            break
        end
    end
    print("Decompose finished.")
    Decompose = false
end
getOnsets
getOnsets(start, length, peakThreshold, sensThreshold, minLength)
(Since HALion 6.4.0)
Description
Function to analyze the onsets in an audio file. You specify the audio file with the AudioFile object that is returned by the AudioFile.open function. The onset analysis is performed on the sum of all channels in the audio file. The arguments start and length define the time range in the audio file to be analyzed. The peakThreshold and sensThreshold arguments determine the minimum level and the weight of an onset, the minLength argument determines the minimum duration between consecutive onsets.
Available in: Controller.
Arguments
| Argument | Description | Value Type |
|---|---|---|
| start | The start position in samples. | number |
| length | The duration in samples. Set this to equal to or less than 0 to use all samples from the specified start to the end of the sample. | number |
| peakThreshold | The minimum level in decibels. Onsets with a lower level are skipped. The value range is from -96 to 0. | number |
| sensThreshold | The minimum weight in percent. Onsets with a lower weight are skipped. The value range is from 0 to 100. | number |
| minLength | The minimum duration between consecutive onsets in milliseconds. The value range is from 0 to 10000. | number |
Return Values
Returns an array with the positions of the detected onsets.
Example
fname = "vstsound://271CB2CFA75E4295B1C273FA651FE11D/.Samples/g:/projects/yamahacontentserver/Download/Release/ycj/ME_Waveform/Loop145/samples/Loop145_072(2).wav"

af = AudioFile.open(fname)

onsets = af:getOnsets(0, -1, -24, 0, 10)

for i, pos in ipairs(onsets) do
   print(i.." ".."Onset: "..pos)
end
getPeak
getPeak(start, length, rms)
Description
Function to analyze the levels in an audio file. You specify the audio file with the AudioFile object that is returned by the AudioFile.open function. The arguments start and length define the range in the audio file to be analyzed. The rms argument determines whether the peak level or the RMS level of the specified range is returned.
Available in: Controller.
Arguments
| Argument | Description | Value Type |
|---|---|---|
| start | The start position in samples. | number |
| length | The duration in samples. Set this to equal to or less than 0 to use all samples from the specified start to the end of the file. | number |
| rms | If this is set to 0, the peak level of the specified range will be returned. If this is set to a value above 0, the RMS level over the specified range will be calculated. | number |
Return Values
Returns the level of the specifed range as a linear value. The example shows how to convert the value from linear to dB.
Example
function lin2db(lin)
  return 20 * math.log(lin) / math.log(10)
end

fname = "vstsound://F29C895D6D8E4D6C9BCBBA5198412192/.samples/Ambient Pad 01/Ambient Pad 01 - C3.tg3c"
af = AudioFile.open(fname)

-- Analyze the peak level in the first 1000 samples.

attpeak = af:getPeak(0, 1000, 0)

-- Analyze the RMS level in the range from 1000 samples till the end of the file.

susrms = af:getPeak(1000, -1, 1)
print("Attack Peak:", attpeak, "(", lin2db(attpeak), "dB )")
print("Sustain RMS:", susrms, "(", lin2db(susrms), "dB )")
getPitch
getPitch(start, length, channel)
(Since HALion 6.3)
Description
Function to obtain the pitch of an audio file that has been analyzed with analyzePitch. The audio file you want to obtain the pitch from is specified with the AudioFile object that is returned by the AudioFile.open function. The arguments start and length define the range in the audio file that is used for obtaining the pitch. The channel argument specifies the channel of the audio file that was analyzed. The AudioFile object and the channel argument must match the call to analyzePitch. The function returns two values: The pitch as MIDI note number with decimals for cents and a boolean for voiced/unvoiced detection. If length is greater than 20 ms, the average of the pitches in the specified range is returned. If the audio file has not been analyzed in advance, getPitch returns nil.
Available in: Controller.
Arguments
| Argument | Description | Value Type |
|---|---|---|
| start | The start position in samples. | number |
| length | The duration in samples. Set this to less than or equal to 0 to use all samples from the specified start to the end of the file. | number |
| channel | Use this to specify the audio channel that was analyzed. | number, optional |
Return Values
Returns two values:
- A float value representing the pitch as MIDI note number with decimals for cents,
- a boolean for voiced/unvoiced detection. The return value
truemeans that a pitch was detected in the specified range.
If length is greater than 20 ms, the average of the pitches in the specified range is returned. If the audio file has not been analyzed in advance, getPitch returns nil.
Example
channelNames = { [0] = "All", "Left", "Right" }

defineParameter( "Channel", nil, 0, channelNames)
defineParameter( "Start", nil, false, function() if Start then onStart() end end)
defineParameter( "Cancel", nil, false)

-- Requires the Skylab content.
path = "vstsound://724ACB205EFF46F885735D1B216C37AD/.AppData/Steinberg/Skylab/Sub Presets/Layer Presets/Ambient Pads/Ambient Pad 01.vstpreset"
layer = loadPreset(path)

function onPitchAnalysisFinished(audioFile, channelNum)
    print("Progress: 100%")
    print(channelNames[channelNum].." channel(s) of "..audioFile.fileName.." analyzed.")
end

function onStart()
    zones = layer:findZones(true)
    for i, zone in ipairs(zones) do
        local samplePath = zone:getParameter("SampleOsc.Filename")
        print("File: "..samplePath)
        local afile = AudioFile.open(samplePath)
        afile:analyzePitch(onPitchAnalysisFinished, Channel)
        while afile:getPitchAnalysisProgress(Channel) < 1 do
            if Cancel then
                afile:cancelPitchAnalysis(Channel)
                break
            end
            local progressPercent = 100 * afile:getPitchAnalysisProgress(Channel)
            print(string.format("Progress: %2d%%", progressPercent))
            wait(2000)
        end
        if Cancel then
            Cancel = false
            print("Canceled!")
            break
        end
        local pitch = afile:getPitch(0, -1, Channel)
        print("Analyzed Pitch: "..pitch)
    end
    print("Done!")
    Start = false
end
getPitchAnalysisProgress
getPitchAnalysisProgress(channel)
(Since HALion 6.3)
Description
Function to monitor the progress of analyzePitch. You specify the audio file with the AudioFile object that is returned by the AudioFile.open function. The channel argument specifies the channel of the audio file. The AudioFile object and the channel argument must match the call to analyzePitch. The function returns the progress as a float value between 0 and 1.
Available in: Controller.
Arguments
| Argument | Description | Value Type |
|---|---|---|
| channel | Use this to specify the channel of the audio file that is being analyzed. | number, optional |
Return Values
Returns the progress as a float value between 0 and 1.
Example
channelNames = { [0] = "All", "Left", "Right" }

defineParameter( "Channel", nil, 0, channelNames)
defineParameter( "Start", nil, false, function() if Start then onStart() end end)
defineParameter( "Cancel", nil, false)

-- Requires the Skylab content.
path = "vstsound://724ACB205EFF46F885735D1B216C37AD/.AppData/Steinberg/Skylab/Sub Presets/Layer Presets/Ambient Pads/Ambient Pad 01.vstpreset"
layer = loadPreset(path)

function onPitchAnalysisFinished(audioFile, channelNum)
    print("Progress: 100%")
    print(channelNames[channelNum].." channel(s) of "..audioFile.fileName.." analyzed.")
end

function onStart()
    zones = layer:findZones(true)
    for i, zone in ipairs(zones) do
        local samplePath = zone:getParameter("SampleOsc.Filename")
        print("File: "..samplePath)
        local afile = AudioFile.open(samplePath)
        afile:analyzePitch(onPitchAnalysisFinished, Channel)
        while afile:getPitchAnalysisProgress(Channel) < 1 do
            if Cancel then
                afile:cancelPitchAnalysis(Channel)
                break
            end
            local progressPercent = 100 * afile:getPitchAnalysisProgress(Channel)
            print(string.format("Progress: %2d%%", progressPercent))
            wait(2000)
        end
        if Cancel then
            Cancel = false
            print("Canceled!")
            break
        end
        local pitch = afile:getPitch(0, -1, Channel)
        print("Analyzed Pitch: "..pitch)
    end
    print("Done!")
    Start = false
end
/ HALion Developer Resource / HALion Script / Class Reference /
Element
The Element class is the base class for the classes Bus, Instance, Layer, Effect, MidiModule, ModulationMatrixRow, Slot and Zone.
On this page:
Element Class, findChildren, getChild, getParameter, getParameterDefinition, getParameterNormalized, hasParameter, removeFromParent, setName, setParameter, setParameterNormalized
Classes
Element Class
The different types of elements are Instance, Slot, Program, Layer, Zone, ModulationMatrixRow, MidiModule, Bus and Effect. The properties of an Element object are described by the following fields.
Available in: Controller, Processor.
Fields
| Field | Description | Value Type |
|---|---|---|
| .name | Returns the name of the element. | string |
| .id | Returns the unique ID of the element. | string |
| .type | Returns the type of the element. | string |
| .parameterDefinitions | Returns an array with all ParameterDefinition objects of the element. | table |
| .parent | Returns the parent element in the Program Tree. This evaluates to nil if the element is the program. | Element or nil |
| .program | Returns the program element in the Program Tree. | Program |
| .level | Returns the level in the Program Tree hierarchy. The program equals level 1. Each sublayer adds +1 to the level. | number |
Example
-- Print information about the script module.

print(this.name)
print(this.id)
print(this.type)
print(this.name)
print(this.numParams)
print(this.parent.name)
print(this.program.name)
print(this.level)

-- Print the names of all parameters of the parent element.

defs = this.parent.parameterDefinitions

for i, def in ipairs(defs) do
    print(def.name)
end
Methods
findChildren
findChildren(recursive, nameOrFilterFunction)
Description
Function to find children in the specified Element object. For example, this.parent specifies the parent layer of the script module as the Element object to be searched in. If recursive is set to true, subelements will also be searched. The function returns an array with the Element objects of the found children. Particular children can be searched by name or via a filter function. If searching by name, findChildren accepts only the Element objects that match the specified name. The filter function uses the Element object of each child as argument. Only those Element objects that return true for the search criteria defined in the filter function will be accepted by findChildren. Without a name or filter function, the Element objects of all children in the searched Element object will be returned.
Available in: Controller, Processor.
Arguments
| Argument | Description | Value Type |
|---|---|---|
| recursive | If this is set to false, only the specified Element object will be searched. If this is set to true, subelements will also be searched. The default is false. | boolean |
| nameOrFilterFunction | The name of the children searched for or a filter function. Only the Element objects that match the name or return true for the search criteria of the filter function will be accepted. Set this to nil to deactivate any name filter or search criteria. | string or function, optional |
Return Values
Returns an array with the Element objects of the found children. Returns an empty table if no children are found.
Example
-- Find the MIDI module with the name "Lua Script" and print its type.

scriptModules = this.parent:findChildren(false, "Lua Script")

if scriptModules[1] then
    print(scriptModules[1].type)
end

-- Find all children and print their names.
children = this.program:findChildren(true)

if children[1] then
    for i, child in ipairs(children) do
        print(child.name)
    end
else
    print("Could not find any children!")
end
getChild
getChild(nameOrPosition)
Description
Function to retrieve the Element object of a child in the specified Element object. For example, this.parent specifies the parent layer of the script module as the Element object to be searched in. This function does not search in subelements. A particular child can be searched by name or position. The position is the number indexing the children in the specified Element object. If several children share the same name, only the first match will be returned. If no argument is set, the function returns the first child it finds.
Available in: Controller, Processor.
Arguments
| Argument | Description | Value Type |
|---|---|---|
| nameOrPosition | The name or position of the child. Set this to nil to deactivate the search filter. | string or number, optional |
Return Values
Returns the Element object of the found child. Returns nil if no child is found.
Example
-- Locate the first child in the program and print its name.

child = this.program:getChild()

if child then
    print(child.name)
else
    print("Could not find a child!")
end
getParameter
getParameter(nameOrID)
Description
Function to read the current value of a parameter. The parameter can be determined by name or ID.
Available in: Controller, Processor.
Arguments
| Argument | Description | Value Type |
|---|---|---|
| nameOrID | The name or ID of the parameter. | string or number |
Return Values
Returns the current value of the parameter or nil if the parameter doesn't exist.
Example
-- Print the value of the parent layer's level parameter.

function onLoadIntoSlot()
    print("Level = "..this.parent:getParameter("Level")) -- via name
    print("Level = "..this.parent:getParameter(38))      -- via ID
end
getParameterDefinition
getParameterDefinition(nameOrID)
Description
Function to retrieve the ParameterDefinition object for a parameter. The parameter can be determined by name or ID. The ParameterDefinition object describes the properties of a parameter.
Available in: Controller, Processor.
Arguments
| Argument | Description | Value Type |
|---|---|---|
| nameOrID | The name or ID of the parameter. | string or number |
Return Values
Returns the ParameterDefinition object for the specified parameter.
Example
-- Print the parameter definition with corresponding
-- data type of the parent layer's level parameter.

function onLoadIntoSlot()

    local def = this.parent:getParameterDefinition("Level")

    print("Name = "..def.name..", "..type(def.name))
    print("ID = "..def.id..", "..type(def.id))
    print("Type = "..def.type..", "..type(def.type))
    print("Default = "..def.default..", "..type(def.default))
    print("Read Only = "..tostring(def.readOnly)..", "..type(def.readOnly))
    print("Min = "..def.min..", "..type(def.min))
    print("Max = "..def.max..", "..type(def.max))
    print("Unit = "..def.unit..", "..type(def.unit).."\n")

end
getParameterNormalized
getParameterNormalized(nameOrID)
Description
Function to read the current value of a parameter in the normalized range from 0 to 1.0. The parameter can be determined by name or ID.
Available in: Controller, Processor.
Arguments
| Argument | Description | Value Type |
|---|---|---|
| nameOrID | The name or ID of the parameter. | string or number |
Return Values
Returns the current value of the parameter in the normalized range from 0 to 1.0 or nil if the parameter doesn't exist. If the parameter is not numeric, the function returns the same as getParameter
Example
-- Print the normalized value of the parent layer's level parameter.

function onLoadIntoSlot()
    print("Level = "..this.parent:getParameterNormalized("Level")) -- via name
    print("Level = "..this.parent:getParameterNormalized(38))      -- via ID
end
hasParameter
hasParameter(nameOrID)
Description
Function to check if a parameter exists. The parameter can be determined by name or ID.
Available in: Controller, Processor.
Arguments
| Argument | Description | Value Type |
|---|---|---|
| nameOrID | The name or ID of the parameter. | string or number |
Return Values
Returns true if the parameter exists or false if not.
Example
-- Check if the elements in the Program Tree have filter cutoff.

function onLoadIntoSlot()
    childs = this.program:findChildren(true)
    for i, child in ipairs(childs) do
        if child:hasParameter("Filter.Cutoff") then
            print(child.name.." has filter cutoff.")
        else
            print(child.name.." has no filter cutoff.")
        end
    end
end
removeFromParent
removeFromParent()
Description
Function to remove an element in the Program Tree from the parent element. The function can remove elements of the type Layer, Zone, MidiModule, Bus and Effect. It can even remove the script module that calls the function.
Available in: Controller.
Example
-- Remove the second child element.

childs = this.program:findChildren(true)
if childs[2] then
    childs[2]:removeFromParent()
end

-- Remove the program bus.

bus = this.program:getBus("Program-Bus")
if bus then
    bus:removeFromParent()
end
setName
setName(name)
Description
Function to change the name of an element in the Program Tree.
Available in: Controller.
Arguments
| Argument | Description | Value Type |
|---|---|---|
| name | The new name for the element. | string |
Example
-- Print current name of the script module.

print(this.name)

-- Set the name of the script module to "My Element".

this:setName("My Element")

-- Print the new name of the script module.

print(this.name)
setParameter
setParameter(nameOrID, value, undo)
Description
Function to set the value of a parameter. The parameter can be determined by name or ID. The function will have no effect if the parameter does not exist.
Available in: Controller, Processor.
Arguments
| Argument | Description | Value Type |
|---|---|---|
| nameOrID | The name or ID of the parameter. | string or number |
| value | The value that you want to set. | The new value must match the data type of the parameter. |
| undo | Determines if the parameter change will be part of the undo. This argument is only evaluated in the controller context. A parameter change in the processor context never has undo. If setParameter is called in the controller context it will be part of the undo, unless you set this argument to false. For example, you should set this to false if the call to setParameter is made within a parameter callback that is already part of the undo, and if the order of execution of these parameter changes is important. | boolean, optional |
Example
-- Set the value of the Level parameter of the parent layer.

function onLoadIntoSlot()
    this.parent:setParameter("Level", 0) -- Set via name.
    this.parent:setParameter(38, 0)      -- Set via ID.
end
setParameterNormalized
setParameterNormalized(nameOrID, value, undo)
Description
Function to set the value of a parameter in the normalized range from 0 to 1.0. The parameter can be determined by name or ID. This function has no effect if the parameter does not exist or if the value is of the type string.
Available in: Controller, Processor.
Arguments
| Argument | Description | Value Type |
|---|---|---|
| nameOrID | The name or ID of the parameter. | string or number |
| value | The value you want to set in the normalized range from 0 to 1.0. | number |
| undo | Determines if the parameter change will be part of the undo. This argument is only evaluated in the controller context. A parameter change in the processor context never has undo. If setParameter is called in the controller context it will be part of the undo, unless you set this argument to false. For example, you should set this to false if the call to setParameter is made within a parameter callback that is already part of the undo, and if the order of execution of these parameter changes is important. | boolean, optional |
Example
-- Set the normalized value of the parent layer's level parameter.

function onLoadIntoSlot()
    this.parent:setParameterNormalized("Level", 0.5) -- Set via name.
    this.parent:setParameterNormalized(38, 0.5)      -- Set via ID.
end
/ HALion Developer Resource / HALion Script / Class Reference / Element /
Bus
The Bus class inherits all properties and methods of the Element class.
On this page:
Bus Class, Bus Constructor, findEffects, getEffect, insertEffect, appendEffect, removeEffect, getOutputBus, setOutpuBus
List of inherited members:
Element
Element Class, findChildren, getChild, getParameter, getParameterDefinition, getParameterNormalized, hasParameter, removeFromParent, setName, setParameter, setParameterNormalized
Classes
Bus Class
Description
The Element object of a bus can be obtained with findBusses or getBus. It has the following fields.
Available in: Controller, Processor.
Fields
| Field | Description | Value Type |
|---|---|---|
| .isAuxBus | Returns true if this is an aux bus and false if it is not. | boolean |
| .auxNumber | The number of the corresponding aux bus. | number |
| .numChannels | The number of output channels of the bus. | number |
| .active | Returns true if the bus is active and false if it is not active. | boolean |
| .bypassMask | Determines if a bus follows the global inserts and Aux bypass buttons. See Bypass Masks for details. | number |
Example
-- Print the names of the active output busses of the plug-in.

busses = this.program.instance:findBusses()

for i, bus in ipairs(busses) do
    if bus.active then
        print(bus.name)
    end
end
Constructors
Bus Constructor
Bus()
(Since HALion 6.4.0)
Description
Constructor to create a new Bus object.
Available in: Controller.
Return Values
Returns a new Bus object.
Example
-- The following function creates different types of objects in the Program Tree.
-- The objects in the Program Tree do not have a name. You will see only their icons.

function createProgram()
  local inst = this.program.instance
  local prg = Program()
  local bus = Bus()
  prg:appendBus(bus)
  inst:setProgram(prg, 1)
  local layer = Layer()
  prg:appendLayer(layer)
  layer:appendZone(Zone())
  local mm = MidiModule('MIDI Player')
  layer:appendMidiModule(mm)
  local fx = Effect('Distortion')
  bus:appendEffect(fx)
end

createProgram()
Methods
findEffects
findEffects(recursive, nameOrFilterFunction)
Description
Function to find effects in the specified Element object. For example, this.parent specifies the parent of the script module as the Element object to be searched in. To specifiy a bus to be searched in, use getBus or findBusses. If recursive is set to true, subelements will also be searched. The function returns an array with the Effect objects of the found effects. Particular effects can be searched by name or via a filter function. If searching by name, findEffects accepts only the Effect objects that match the specified name. The filter function uses the Effect object of each effect as argument. Only those Effect objects that return true for the search criteria defined in the filter function will be accepted by findEffects. Without a name or filter function, the Effect objects of all effects in the searched Element objects will be returned.
Available in: Controller, Processor.
Arguments
| Argument | Description | Value Type |
|---|---|---|
| recursive | If this is set to false, only the specified Element object will be searched. If this is set to true, subelements will also be searched. The default is false. | boolean |
| nameOrFilterFunction | The name of the effects searched for or a filter function. Only the Effect objects that match the name or return true for the search criteria of the filter function will be accepted. Set this to nil to deactivate any name filter or search criteria. | string or function, optional |
Return Values
Returns an array with the Effect objects of the found effects. Returns an empty table if no effects are found.
Example
-- Find all effects and print their names.
effects = this.program:findEffects(true)

if effects[1] then
    for i, effect in ipairs(effects) do
        print(effect.name)
    end
else
    print("Could not find any effects!")
end
getEffect
getEffect(nameOrPosition)
Description
Function to retrieve the Effect object of an effect from the specified bus. You can use getBus or findBusses to specify the bus. A particular effect can be searched by name or position. The position is the number indexing the effects in the specified bus. If several effects share the same name, only the first match will be returned. If no argument is set, the function returns the first effect that it finds.
Available in: Controller, Processor.
Arguments
| Argument | Description | Value Type |
|---|---|---|
| nameOrPosition | The name or position of the effect. Set this to nil to deactivate the search filter. | string or number, optional |
Return Values
Returns the Effect object of the found effect. Returns nil if no bus is found.
Example
-- Locate the first bus in the program.

bus = this.program:getBus()

if bus then
    -- Locate the first effect of the bus and print its name.
    effect = bus:getEffect()
    if effect then
        print(effect.name)
    else
        print("Could not find an effect!")
    end
else
    print("Could not find a bus!")
end
insertEffect
insertEffect(effect, position)
Description
Function to insert an effect at a specific position in a destination bus. The effect to be inserted is determined by its Effect object. You can use getEffect or findEffects to determine the effect. The destination bus is determined by its Bus object. You can use getBus or findBusses to determine the destination bus. The position is the number indexing the effects in the destination bus. The new effect will be inserted before the specified position. To add the effect at the end, use appendEffect instead.
❕ An Element object can only have one parent. It cannot be child of multiple parents. Therefore, an Element object that you retrieved from the running plug-in instance must be removed before it can be inserted again. The Element objects that you retrieve through loadPreset or loadPresetAsync can be inserted freely, because these functions create a copy of the Element objects when reading them.
Available in: Controller.
Arguments
| Argument | Description | Value Type |
|---|---|---|
| effect | The element object of the effect that you want to insert. | Effect |
| position | The position where the effect is inserted. | number |
Example
To explore the following script:
- Download Program.vstpreset.
- Drag the preset on the MediaBay to import it to the user folder for VST presets.
- Create an empty program and add a script module.
- Paste the script into the text editor of the script module and execute the script.
-- Insert an effect from Program.vstpreset into the current program.

-- Get the file path for user VST presets.
path = getUserPresetPath()

-- Load the VST preset.
loadedProgram = loadPreset(path.."/Program/Program.vstpreset")

-- Get the first effect from the loaded program.
effect = loadedProgram:getBus():getEffect()

-- Get the first bus of this program.
bus = this.program:getBus()

-- Insert the effect.
if (effect and bus) then
   bus:insertEffect(effect, 1)
end
appendEffect
appendEffect(effect)
Description
Function to add an effect to the specified destination bus. The destination bus is determined by its Bus object. You can use getBus or findBusses to determine the destination bus. The effect to be added is determined by its Effect object. You can use getEffect or findEffects to determine the effect. The new effect will be added behind the existing effects. To insert an effect at a specific position in the bus, use insertEffect instead.
❕ An Element object can only have one parent. It cannot be child of multiple parents. Therefore, an Element object that you retrieved from the running plug-in instance must be removed before it can be inserted again. The Element objects that you retrieve through loadPreset or loadPresetAsync can be inserted freely, because these functions create a copy of the Element objects when reading them.
Available in: Controller.
Arguments
| Argument | Description | Value Type |
|---|---|---|
| effect | The Effect object of the insert effect that you want to append. | Effect |
Example
To explore the following script:
- Download Program.vstpreset.
- Drag the preset on the MediaBay to import it to the user folder for VST presets.
- Create an empty program and add a script module.
- Paste the script into the text editor of the script module and execute the script.
-- Insert an effect from Program.vstpreset into the current program.

-- Get the file path for user VST presets.
path = getUserPresetPath()

-- Load the VST preset.
loadedProgram = loadPreset(path.."/Program/Program.vstpreset")

-- Get the first effect from the loaded program.
effect = loadedProgram:getBus():getEffect()

-- Get the first bus of this program.
bus = this.program:getBus()

-- Append the effect.
if (insert and bus) then
    bus:appendEffect(effect)
end
removeEffect
removeEffect(effectOrPosition)
Description
Function to remove an effect from a bus. You can use getBus or findBusses to define the bus that contains the effect. The effect to be removed is determined by its Effect object or its position. You can use getEffect or findEffects to determine the Effect object. The position is the number indexing the effects in the bus.
Available in: Controller.
Arguments
| Argument | Description | Value Type |
|---|---|---|
| insertOrPosition | The Effect object or the position of the effect to be removed. | Effect or number |
Example
-- Remove all effects from the program.

busses = this.program:findBusses(true)

for i, bus in ipairs(busses) do
    effects = bus:findEffects(true)
    for j, effect in ipairs(effects) do
        bus:removeEffect(effect)
    end
end
getOutputBus
getOutputBus()
Description
Function to retrieve the currently assigned output bus of a zone or bus.
Available in: Controller, Processor.
Return Values
Returns the Bus object of the currently assigned output bus or nil if the default routing is used.
Example
-- Raise an error if no output bus is assigned.

zone = this.parent:getZone()

assert(zone:getOutputBus(), "No output bus assigned. The default routing is used!")
setOutputBus
setOutputBus(bus)
Description
Function to assign the output of a zone or bus to the specified output bus. The sending zone or bus is determined by its Element object. The receiving output bus is specified by its Bus object. Setting the output bus to nil enables the default signal routing for the zone or bus.
❕ Output busses that are higher up in the hierarchy of the Program Tree can be assigned freely. If the sending bus and the receiving output bus have the same parent layer, the output bus must come later in the signal flow.
Available in: Controller.
Arguments
| Argument | Description | Value Type |
|---|---|---|
| bus | The Bus object of the bus that you want to assign, or nil. | Bus or nil |
Example
-- Assign the output of the zone to the Master output bus of the plug-in.

zone = this.parent:getZone()
masterbus = this.program.instance:getBus(1)

zone:setOutputBus(masterbus)

print("Output of "..zone.name.." is assigned to "..masterbus.name..".")
/ HALion Developer Resource / HALion Script / Class Reference / Element /
Effect
The Effect class inherits all properties and methods of the Element class.
On this page:
Effect Class, Effect Constructor
List of inherited members:
Element
Element Class, findChildren, getChild, getParameter, getParameterDefinition, getParameterNormalized, hasParameter, removeFromParent, setName, setParameter, setParameterNormalized
Classes
Effect Class
Description
The Element object of an effect can be obtained with findEffects or getEffect. It has the following fields.
Available in: Controller, Processor.
Fields
| Field | Description | Value Type |
|---|---|---|
| .moduleType | Returns the effect type. | string |
| .bypassMask | Determines if an effect follows the global inserts and Aux bypass buttons. See Bypass Masks for details. | number |
Example
effects = this.program:findEffects(true)

for i , effect in ipairs(effects) do
    print(effect.moduleType)
end
Constructors
Effect Constructor
Effect(type)
(Since HALion 6.4.0)
Description
Constructor to create a new Effect object of the specified type.
Available in: Controller.
Arguments
| Argument | Description | Value Type |
|---|---|---|
| type | The type of effect. | string |
Return Values
Returns a new Effect object of the specified type.
Example
-- The following function creates different types of objects in the Program Tree.
-- The objects in the Program Tree do not have a name. You will see only their icons.

function createProgram()
  local inst = this.program.instance
  local prg = Program()
  local bus = Bus()
  prg:appendBus(bus)
  inst:setProgram(prg, 1)
  local layer = Layer()
  prg:appendLayer(layer)
  layer:appendZone(Zone())
  local mm = MidiModule('MIDI Player')
  layer:appendMidiModule(mm)
  local fx = Effect('Distortion')
  bus:appendEffect(fx)
end

createProgram()
/ HALion Developer Resource / HALion Script / Class Reference / Element /
Instance
The Instance class inherits all properties and methods of the Element class.
On this page:
findBusses, findEffects, findSlots, getBus, getSlot, getProgram, setProgram
List of inherited members:
Element
Element Class, findChildren, getChild, getParameter, getParameterDefinition, getParameterNormalized, hasParameter, removeFromParent, setName, setParameter, setParameterNormalized
Methods
findBusses
findBusses(recursive, nameOrFilterFunction)
Description
Function to find busses in the specified Element object. For example, this.parent specifies the parent of the script module as the Element object to be searched in. If recursive is set to true, subelements will also be searched. The function returns an array with the Bus objects of the found busses. Particular busses can be searched by name or via a filter function. If searching by name, findBusses accepts only the Bus objects that match the specified name. The filter function uses the Bus object of each bus as argument. Only those Bus objects that return true for the search criteria defined in the filter function will be accepted by findBusses. Without a name or filter function, the Bus objects of all busses in the searched Element obects will be returned.
Available in: Controller, Processor.
Arguments
| Argument | Description | Value Type |
|---|---|---|
| recursive | If this is set to false, only the specified Element object will be searched. If this is set to true, subelements will also be searched. The default is false. | boolean |
| nameOrFilterFunction | The name of the busses searched for or a filter function. Only the Bus objects that match the name or return true for the search criteria of the filter function will be accepted. Set this to nil to deactivate any name filter or search criteria. | string or function, optional |
Return Values
Returns an array with the Bus objects of the found busses. Returns an empty table if no busses are found.
Example
-- Find all busses and print their names.
busses = this.program:findBusses(true)

if busses[1] then
    for i, bus in ipairs(busses) do
        print(bus.name)
    end
else
    print("Could not find any busses!")
end
findEffects
findEffects(recursive, nameOrFilterFunction)
Description
Function to find effects in the specified Element object. For example, this.parent specifies the parent of the script module as the Element object to be searched in. To specifiy a bus to be searched in, use getBus or findBusses. If recursive is set to true, subelements will also be searched. The function returns an array with the Effect objects of the found effects. Particular effects can be searched by name or via a filter function. If searching by name, findEffects accepts only the Effect objects that match the specified name. The filter function uses the Effect object of each effect as argument. Only those Effect objects that return true for the search criteria defined in the filter function will be accepted by findEffects. Without a name or filter function, the Effect objects of all effects in the searched Element objects will be returned.
Available in: Controller, Processor.
Arguments
| Argument | Description | Value Type |
|---|---|---|
| recursive | If this is set to false, only the specified Element object will be searched. If this is set to true, subelements will also be searched. The default is false. | boolean |
| nameOrFilterFunction | The name of the effects searched for or a filter function. Only the Effect objects that match the name or return true for the search criteria of the filter function will be accepted. Set this to nil to deactivate any name filter or search criteria. | string or function, optional |
Return Values
Returns an array with the Effect objects of the found effects. Returns an empty table if no effects are found.
Example
-- Find all effects and print their names.
effects = this.program:findEffects(true)

if effects[1] then
    for i, effect in ipairs(effects) do
        print(effect.name)
    end
else
    print("Could not find any effects!")
end
findSlots
findSlots(nameOrFilterFunction)
Description
Function to find the slots of the plug-in instance. Before calling this function you must access the Instance object with this.program.instance. The function returns an array with the Slot objects of the found slots. Particular slots can be searched by name or via a filter function. If searching by name, findSlots accepts only the Slot objects that match the specified name. The filter function uses the Slot object of each slot as argument. Only those Slot objects that return true for the search criteria defined in the filter function will be accepted by findSlots. Without a name or filter function, the Slot objects of all slots in the instance will be returned.
Available in: Controller, Processor.
Arguments
| Argument | Description | Value Type |
|---|---|---|
| nameOrFilterFunction | The name of the slots searched for or a filter function. Only the Slot objects that match the name or return true for the search criteria of the filter function will be accepted. Set this to nil to deactivate any name filter or search criteria. | string or function, optional |
Return Values
Returns an array with the Slot objects of the found slots. Returns an empty table if no slots are found.
Example
-- Print the names of all slots.

slots = this.program.instance:findSlots()

for i, slot in ipairs(slots) do
        print(slot.name)
end
getBus
getBus(nameOrPosition)
Description
Function to retrieve the Bus object of a bus in the specified Element object. For example, this.parent specifies the parent of the script module as the Element object to be searched in. This function does not search in subelements. A particular bus can be searched by name or position. The position is the number indexing the busses in the specified Element object. If several busses share the same name, only the first match will be returned. If no argument is set, the function returns the first bus it finds.
Available in: Controller, Processor.
Arguments
| Argument | Description | Value Type |
|---|---|---|
| nameOrPosition | The name or position of the bus. Set this to nil to deactivate the search filter. | string or number, optional |
Return Values
Returns the Bus object of the found bus. Returns nil if no bus is found.
Example
-- Locate the first bus in the program and print its name.

bus = this.program:getBus()

if bus then
    print(bus.name)
else
    print("Could not find a bus!")
end
getSlot
getSlot(nameOrIndex)
Description
Function to retrieve the Slot object of a slot of the plug-in instance. Before calling this function you must access the Instance object with this.program.instance. A particular slot can be searched by name or index. The index equals the slot numbering in the Slot Rack. If no argument is set, the function returns the first slot it finds.
Available in: Controller, Processor.
Arguments
| Argument | Description | Value Type |
|---|---|---|
| nameOrIndex | The name or index of the slot. Set this to nil to deactivate the search filter. | string or number, optional |
Return Values
Returns the Slot object of the found slot. Returns nil if no slot is found.
Example
-- Print the name of slot index 3.

slot = this.program.instance:getSlot(3)

print(slot.name)
getProgram
getProgram(index)
Description
Function to retrieve the Program object of a program in the Program Table of the plug-in instance. Before calling this function you must access the Instance object with this.program.instance. The index corresponds to the number of the slot in the Program Table where the program is set. The function returns the Program object of the program with the specified index.
Available in: Controller.
Arguments
| Argument | Description | Value Type |
|---|---|---|
| index | The index of the slot in the Program Table where the program is set. | number |
Return Values
Returns the Program object of the program with the specified index.
Example
-- Print the name of the program in the third slot of the Program Table.

program = this.program.instance:getProgram(3)
print(program.name)
setProgram
setProgram(programOrNil, index)
Description
Function to set a program in the specified slot of the Program Table or the Slot Rack of the plug-in instance. Before calling this function, you must access the Instance object with this.program.instance. The program is determined by its Program object. To specify the slot in the Program Table, you must use the index argument. To specify the slot in the Slot Rack, you must use a Slot object, for example, via getSlot. The program can be removed from the Slot Rack by using nil as argument.
❕ An Element object can only have one parent. It cannot be child of multiple parents. Therefore, each program can exist only once in the Program Table. Furthermore, an Element object that you retrieved from the running plug-in instance cannot be added twice to the Program Table. It must be removed before it can be added again. The Element objects that you retrieve through loadPreset or loadPresetAsync can be added freely to the Program Table, because these functions create a copy of the Element objects when reading them.
Available in: Controller.
Arguments
| Argument | Description | Value Type |
|---|---|---|
| programOrNil | The Program object of the program. Programs can be removed from the Slot Rack by using nil. | Program or nil |
| index | The index of the slot in the Program Table where you want to set the program. | number, optional |
Example
To explore the following script:
- Download Program.vstpreset.
- Drag the preset on the MediaBay to import it to the user folder for VST presets.
- Create an empty program and add a script module.
- Paste the script into the text editor of the script module and execute the script.
-- Set Program.vstpreset in slot 3 of the Program Table and slot 1 of the Slot Rack.

-- Get the file path for user VST presets.
path = getUserPresetPath()

-- Load the VST preset.
loadedProgram = loadPreset(path.."/Program/Program.vstpreset")

-- Set loadedProgram in slot 3 of the Program Table.
this.program.instance:setProgram(loadedProgram, 3)

-- Set program in slot 1 of the Slot Rack.
program = this.program.instance:getProgram(3)
this.program.instance:getSlot(1):setProgram(program)

-- Clear slot 2 of the Slot Rack.
this.program.instance:getSlot(2):setProgram(nil)
/ HALion Developer Resource / HALion Script / Class Reference / Element /
Layer
The Layer class inherits all properties and methods of the Element class.
On this page:
appendBus, appendLayer, appendLayerAsync, appendMidiModule, appendZone, findBusses, findEffects, findLayers, findMidiModules, findZones, getBus, getLayer, getMidiModule, getZone, insertBus, insertLayer, insertLayerAsync, insertMidiModule, insertZone, removeBus, removeLayer, removeMidiModule, removeZone, addQCAssignment, removeQCAssignment, getNumQCAssignments, getQCAssignmentParamId, getQCAssignmentScope, getQCAssignmentMin, getQCAssignmentMax, getQCAssignmentCurve, getQCAssignmentMode, getQCAssignmentBypass, setQCAssignmentParamId, setQCAssignmentScope, setQCAssignmentMin, setQCAssignmentMax, setQCAssignmentCurve, setQCAssignmentMode, setQCAssignmentBypass
List of inherited members:
Element
Element Class, findChildren, getChild, getParameter, getParameterDefinition, getParameterNormalized, hasParameter, removeFromParent, setName, setParameter, setParameterNormalized
Constructors
Layer Constructor
Layer()
(Since HALion 6.4.0)
Description
Constructor to create a new Layer object.
Available in: Controller.
Return Values
Returns a new Layer object.
Example
-- The following function creates different types of objects in the Program Tree.
-- The objects in the Program Tree do not have a name. You will see only their icons.

function createProgram()
  local inst = this.program.instance
  local prg = Program()
  local bus = Bus()
  prg:appendBus(bus)
  inst:setProgram(prg, 1)
  local layer = Layer()
  prg:appendLayer(layer)
  layer:appendZone(Zone())
  local mm = MidiModule('MIDI Player')
  layer:appendMidiModule(mm)
  local fx = Effect('Distortion')
  bus:appendEffect(fx)
end

createProgram()
Methods
appendBus
appendBus(bus)
Description
Function to add a bus in the specified destination layer. The destination layer is determined by its Layer object. For example, this.parent specifies the parent layer of the script module as destination layer. The bus to be added is determined by its Bus object. You can use getBus or findBusses to determine the bus. The new bus will be added behind the existing busses. To insert a bus at a specific position in the destination layer, use insertBus instead.
❕ An Element object can only have one parent. It cannot be child of multiple parents. Therefore, an Element object that you retrieved from the running plug-in instance must be removed before it can be inserted again. The Element objects that you retrieve through loadPreset or loadPresetAsync can be inserted freely, because these functions create a copy of the Element objects when reading them.
Available in: Controller.
Arguments
Example
To explore the following script:
- Download Program.vstpreset.
- Drag the preset on the MediaBay to import it to the user folder for VST presets.
- Create an empty program and add a script module.
- Paste the script into the text editor of the script module and execute the script.
-- Append the bus from Program.vstpreset into the current program.

-- Get the file path for user VST presets.
path = getUserPresetPath()

-- Load the VST preset.
loadedProgram = loadPreset(path.."/Program/Program.vstpreset")

-- Get the first bus from the loaded program.
bus = loadedProgram:getBus()

-- Append the bus.
if bus then
    this.program:appendBus(bus)
end
appendLayer
appendLayer(layer)
Description
Function to add a layer in the specified destination layer. The layer to be added and the destination layer are both determined by their Layer objects. You can use getLayer or findLayers to determine the layer to be added. For example, this.parent defines the parent layer of the script module as destination layer. The new layer will be added behind the existing layers. To insert a layer at a specific position in the destination layer, use insertLayer or insertLayerAsync instead.
❕ An Element object can only have one parent. It cannot be child of multiple parents. Therefore, an Element object that you retrieved from the running plug-in instance must be removed before it can be inserted again. The Element objects that you retrieve through loadPreset or loadPresetAsync can be inserted freely, because these functions create a copy of the Element objects when reading them.
Available in: Controller.
Arguments
| Argument | Description | Value Type |
|---|---|---|
| layer | The Layer object of the layer that you want to append. | Layer |
Example
To explore the following script:
- Download Program.vstpreset.
- Drag the preset on the MediaBay to import it to the user folder for VST presets.
- Create an empty program and add a script module.
- Paste the script into the text editor of the script module and execute the script.
-- Append the layer from Program.vstpreset into the current program.

-- Get the file path for user VST presets.
path = getUserPresetPath()

-- Load the VST preset.
loadedProgram = loadPreset(path.."/Program/Program.vstpreset")

-- Get the first layer from the loaded program.
layer = loadedProgram:getLayer ()

-- Append the layer.
if layer then
    this.program:appendLayer(layer)
end
appendLayerAsync
appendLayerAsync(layer, callback)
Description
Function to add a layer in the specified destination layer using a separate, parallel thread. Appending a layer in a separate thread can be necessary if the layer is too big to be added in a short time. The layer to be inserted and the destination layer are both determined by their Layer objects. You can use getLayer or findLayers to determine the layer to be inserted. For example, this.parent determines the parent layer of the script module as destination layer. The new layer will be added behind the existing layers. To insert a layer at a specific position in the destination layer, use insertLayer or insertLayerAsync instead. The function returns a LoadProgress object that can be used to monitor the load progress. After the layer is added, the callback function is called. The callback function gets the LoadProgress object as default argument.
❕ An Element object can only have one parent. It cannot be child of multiple parents. Therefore, an Element object that you retrieved from the running plug-in instance must be removed before it can be inserted again. The Element objects that you retrieve through loadPreset or loadPresetAsync can be inserted freely, because these functions create a copy of the Element objects when reading them.
Available in: Controller.
Arguments
| Argument | Description | Value Type |
|---|---|---|
| layer | The Layer object of the layer that you want to append. | Layer |
| callback | Callback function that is called when the layer is added. The callback function gets the LoadProgress object as argument. | function, optional |
Return Values
Returns a LoadProgress object.
Example
-- Start with an empty program, remove any existing layers.

layers = this.parent:findLayers()

if layers then
   for i, layer in ipairs(layers) do
       this.parent:removeLayer(layer)
   end
end

-- Table with layer presets from Skylab.
layerPresets = {
   { name = "Ambient Pad 01", path = "vstsound://724ACB205EFF46F885735D1B216C37AD/.AppData/Steinberg/Skylab/Sub Presets/Layer Presets/Ambient Pads/Ambient Pad 01.vstpreset" },
   { name = "Ambient Pad 02", path = "vstsound://724ACB205EFF46F885735D1B216C37AD/.AppData/Steinberg/Skylab/Sub Presets/Layer Presets/Ambient Pads/Ambient Pad 02.vstpreset" },
   { name = "Ambient Pad 03", path = "vstsound://724ACB205EFF46F885735D1B216C37AD/.AppData/Steinberg/Skylab/Sub Presets/Layer Presets/Ambient Pads/Ambient Pad 03.vstpreset" },
   { name = "Ambient Pad 04", path = "vstsound://724ACB205EFF46F885735D1B216C37AD/.AppData/Steinberg/Skylab/Sub Presets/Layer Presets/Ambient Pads/Ambient Pad 04.vstpreset" },
}
-- Create a table with the preset names.
function getPresetNames()
   presetNames = {}
   for i, preset in ipairs(layerPresets) do
       presetNames[i] = preset.name
   end
end

getPresetNames()

-- Remove the old layer after the new one was added.
function removeOldLayer(progressInfo)
   local newPreset = progressInfo.root
   if oldPreset then
       this.parent:removeLayer(oldPreset)
       print(oldPreset.name.." removed.")
   end
   oldPreset = newPreset
end

-- Append the preset in a separate thread.
function appendNewLayer(progressInfo)
   if progressInfo.root then
       this.parent:appendLayerAsync(progressInfo.root, removeOldLayer)
       print("Appending "..progressInfo.root.name.."...")
   end
end

-- Load the preset in a separate thread.
function onSelectPresetChanged()
   progress = 0
   progressInf = loadPresetAsync(layerPresets[SelectPreset].path, appendNewLayer)
   print("Loading "..layerPresets[SelectPreset].name.."...")
end

-- Define a parameter for selecting the preset to be loaded.
defineParameter("SelectPreset", "Select Preset", 1, presetNames, onSelectPresetChanged)

-- Monitor the load progress with onIdle.
progress = 1
function onIdle()
   if progress < 1 then
       progress = progressInf.progress
       print("Progress: "..(progressInf.progress * 100).."%")
   end
end
appendMidiModule
appendMidiModule(module)
Description
Function to add a MIDI module in the specified destination layer. The destination layer is determined by its Layer object. For example, this.parent specifies the parent layer of the script module as destination layer. The MIDI module to be added is determined by its MidiModule object. You can use getMidiModule or findMidiModules to determine the desired MIDI module. The new MIDI module will be added behind the existing MIDI modules. To insert a MIDI module at a specific position in the destination layer, use insertMidiModule instead.
❕ An Element object can only have one parent. It cannot be child of multiple parents. Therefore, an Element object that you retrieved from the running plug-in instance must be removed before it can be inserted again. The Element objects that you retrieve through loadPreset or loadPresetAsync can be inserted freely, because these functions create a copy of the Element objects when reading them.
Available in: Controller.
Arguments
| Argument | Description | Value Type |
|---|---|---|
| module | The MidiModule object of the MIDI module that you want to append. | MidiModule |
Example
To explore the following script:
- Download Program.vstpreset.
- Drag the preset on the MediaBay to import it to the user folder for VST presets.
- Create an empty program and add a script module.
- Paste the script into the text editor of the script module and execute the script.
-- Append a MIDI module from Program.vstpreset into the current program.

-- Get the file path for user VST presets.
path = getUserPresetPath()

-- Load the VST preset.
loadedProgram = loadPreset(path.."/Program/Program.vstpreset")

-- Get the first MIDI module from the loaded program.
module = loadedProgram:getMidiModule()

-- Append the MIDI module.
if module then
    this.program:appendMidiModule(module)
end
appendZone
appendZone(zone)
Description
Function to add a zone in the specified destination layer. The destination layer is determined by its Layer object. For example, this.parent specifies the parent layer of the script module as destination layer. The zone to be added is determined by its Zone object. You can use getZone or findZones to determine the zone. The new zone will be added behind the existing zones. To insert a zone at a specific position in the destination layer, use insertZone instead.
❕ An Element object can only have one parent. It cannot be child of multiple parents. Therefore, an Element object that you retrieved from the running plug-in instance must be removed before it can be inserted again. The Element objects that you retrieve through loadPreset or loadPresetAsync can be inserted freely, because these functions create a copy of the Element objects when reading them.
Available in: Controller, Processor.
Arguments
Example
To explore the following script:
- Download Program.vstpreset.
- Drag the preset on the MediaBay to import it to the user folder for VST presets.
- Create an empty program and add a script module.
- Paste the script into the text editor of the script module and execute the script.
-- Append a zone from Program.vstpreset into the current program.

-- Get the file path for user VST presets.
path = getUserPresetPath()

-- Load the VST preset.
loadedProgram = loadPreset(path.."/Program/Program.vstpreset")

-- Get the first zone from the loaded program.
zone = loadedProgram:getZone()

-- Append the zone.
if zone then
    this.program:appendZone(zone)
end
findBusses
findBusses(recursive, nameOrFilterFunction)
Description
Function to find busses in the specified Element object. For example, this.parent specifies the parent of the script module as the Element object to be searched in. If recursive is set to true, subelements will also be searched. The function returns an array with the Bus objects of the found busses. Particular busses can be searched by name or via a filter function. If searching by name, findBusses accepts only the Bus objects that match the specified name. The filter function uses the Bus object of each bus as argument. Only those Bus objects that return true for the search criteria defined in the filter function will be accepted by findBusses. Without a name or filter function, the Bus objects of all busses in the searched Element obects will be returned.
Available in: Controller, Processor.
Arguments
| Argument | Description | Value Type |
|---|---|---|
| recursive | If this is set to false, only the specified Element object will be searched. If this is set to true, subelements will also be searched. The default is false. | boolean |
| nameOrFilterFunction | The name of the busses searched for or a filter function. Only the Bus objects that match the name or return true for the search criteria of the filter function will be accepted. Set this to nil to deactivate any name filter or search criteria. | string or function, optional |
Return Values
Returns an array with the Bus objects of the found busses. Returns an empty table if no busses are found.
Example
-- Find all busses and print their names.
busses = this.program:findBusses(true)

if busses[1] then
    for i, bus in ipairs(busses) do
        print(bus.name)
    end
else
    print("Could not find any busses!")
end
findEffects
findEffects(recursive, nameOrFilterFunction)
Description
Function to find effects in the specified Element object. For example, this.parent specifies the parent of the script module as the Element object to be searched in. To specifiy a bus to be searched in, use getBus or findBusses. If recursive is set to true, subelements will also be searched. The function returns an array with the Effect objects of the found effects. Particular effects can be searched by name or via a filter function. If searching by name, findEffects accepts only the Effect objects that match the specified name. The filter function uses the Effect object of each effect as argument. Only those Effect objects that return true for the search criteria defined in the filter function will be accepted by findEffects. Without a name or filter function, the Effect objects of all effects in the searched Element objects will be returned.
Available in: Controller, Processor.
Arguments
| Argument | Description | Value Type |
|---|---|---|
| recursive | If this is set to false, only the specified Element object will be searched. If this is set to true, subelements will also be searched. The default is false. | boolean |
| nameOrFilterFunction | The name of the effects searched for or a filter function. Only the Effect objects that match the name or return true for the search criteria of the filter function will be accepted. Set this to nil to deactivate any name filter or search criteria. | string or function, optional |
Return Values
Returns an array with the Effect objects of the found effects. Returns an empty table if no effects are found.
Example
-- Find all effects and print their names.
effects = this.program:findEffects(true)

if effects[1] then
    for i, effect in ipairs(effects) do
        print(effect.name)
    end
else
    print("Could not find any effects!")
end
findLayers
findLayers(recursive, nameOrFilterFunction)
Description
Function to find layers in the specified layer. For example, this.parent specifies the parent layer of the script module as the layer to be searched in. If recursive is set to true, sublayers will also be searched. The function returns an array with the Layer objects of the found layers. Particular layers can be searched by name or via a filter function. If searching by name, findLayers accepts only the Layer objects that match the specified name. The filter function uses the Layer object of each layer as argument. Only those Layer objects that return true for the search criteria defined in the filter function will be accepted by findLayers. Without a name or filter function, the Layer objects of all layers in the searched layers will be returned.
Available in: Controller, Processor.
Arguments
| Argument | Description | Value Type |
|---|---|---|
| recursive | If this is set to false, only the current layer will be searched. If this is set to true, sublayers will also be searched. The default is false. | boolean |
| nameOrFilterFunction | The name of the layers searched for or a filter function. Only the Layer objects that match the name or return true for the search criteria of the filter function will be accepted. Set this to nil to deactivate any name filter or search criteria. | string or function, optional |
Return Values
Returns an array with the Layer objects of the found layers. Returns an empty table if no layers are found.
Example
-- Find all layers and print their names.

layers = this.program:findLayers(true)

if layers[1] then
    for i, layer in ipairs(layers) do
        print(layer.name)
    end
else
    print("Could not find any layers!")
end
findMidiModules
findMidiModules(recursive, nameOrFilterFunction)
Description
Function to find MIDI modules in the specified layer. For example, this.parent specifies the parent layer of the script module as the layer to be searched in. If recursive is set to true, sublayers will also be searched. The function returns an array with the MidiModule objects of the found MIDI modules. Particular MIDI modules can be searched by name or via a filter function. If searching by name, findMidiModules accepts only the MidiModule objects that match the specified name. The filter function uses the MidiModule object of each MIDI module as argument. Only those MidiModule objects that return true for the search criteria defined in the filter function will be accepted by findMidiModules. Without a name or filter function, the MidiModule objects of all MIDI modules in the searched layers will be returned.
Available in: Controller, Processor.
Arguments
| Argument | Description | Value Type |
|---|---|---|
| recursive | If this is set to false, only the current layer will be searched. If this is set to true, sublayers will also be searched. The default is false. | boolean |
| nameOrFilterFunction | The name of the MIDI modules searched for or a filter function. Only the MidiModule objects that match the name or return true for the search criteria of the filter function will be accepted. Set this to nil to deactivate any name filter or search criteria. | string or function, optional |
Return Values
Returns an array with the MidiModule objects of the found MIDI modules. Returns an empty table if no MIDI modules are found.
Example
-- Find all MIDI modules and print their names.

modules = this.program:findMidiModules(true)

if modules[1] then
    for i, module in ipairs(modules) do
        print(module.name)
    end
else
    print("Could not find any MIDI modules!")
end
findZones
findZones(recursive, nameOrFilterFunction)
Description
Function to find zones in the specified layer. For example, this.parent defines the parent layer of the script module as the layer to be searched in. If recursive is set to true, sublayers will also be searched. The function returns an array with the Zone objects of the found zones. Particular zones can be searched by name or via a filter function. If searching by name, findZones accepts only the Zone objects that match the specified name. The filter function uses the Zone object of each zone as argument. Only those Zone objects that return true for the search criteria defined in the filter function will be accepted by findZones. Without a name or filter function, the Zone objects of all zones in the searched layers will be returned.
Available in: Controller, Processor.
Arguments
| Argument | Description | Value Type |
|---|---|---|
| recursive | If this is set to false, only the current layer will be searched. If this is set to true, sublayers will also be searched. The default is false. | boolean |
| nameOrFilterFunction | The name of the zones searched for or a filter function. Only the Zone objects that match the name or return true for the search criteria of the filter function will be accepted. Set this to nil to deactivate any name filter or search criteria. | string or function, optional |
Return Values
Returns an array with the Zone objects of the found zones. Returns an empty table if no zones are found.
Example
-- Find all zones and print their names.

zones = this.program:findZones(true)

if zones[1] then
    for i, zone in ipairs(zones) do
        print(zone.name)
    end
else
    print("Could not find any zones!")
end
getBus
getBus(nameOrPosition)
Description
Function to retrieve the Bus object of a bus in the specified Element object. For example, this.parent specifies the parent of the script module as the Element object to be searched in. This function does not search in subelements. A particular bus can be searched by name or position. The position is the number indexing the busses in the specified Element object. If several busses share the same name, only the first match will be returned. If no argument is set, the function returns the first bus it finds.
Available in: Controller, Processor.
Arguments
| Argument | Description | Value Type |
|---|---|---|
| nameOrPosition | The name or position of the bus. Set this to nil to deactivate the search filter. | string or number, optional |
Return Values
Returns the Bus object of the found bus. Returns nil if no bus is found.
Example
-- Locate the first bus in the program and print its name.

bus = this.program:getBus()

if bus then
    print(bus.name)
else
    print("Could not find a bus!")
end
getLayer
getLayer(nameOrPosition)
Description
Function to retrieve the Layer object of a layer in the specified layer. For example, this.parent specifies the parent layer of the script module as the layer to be searched in. The function does not search in sublayers. A particular layer can be searched by name or position. The position is the number indexing the layers in the specified layer. If several layers share the same name, only the first match will be returned. If no argument is set, the function returns the first layer it finds.
Available in: Controller, Processor.
Arguments
| Argument | Description | Value Type |
|---|---|---|
| nameOrPosition | The name or position of the layer. Set this to nil to deactivate the search filter. | string or number, optional |
Return Values
Returns the Layer object of the found layer. Returns nil if no layer is found.
Example
-- Locate the first layer in the program and print its name.

layer = this.program:getLayer()

if layer then
    print(layer.name)
else
    print("Could not find a layer!")
end
getMidiModule
getMidiModule(nameOrPosition)
Description
Function to retrieve the MidiModule object of a MIDI module in the specified layer. For example, this.parent defines the parent layer of the script module as the layer to be searched in. This function does not search in sublayers. A particular MIDI module can be searched by name or position. The position is the number indexing the MIDI modules in the specified layer. If several MIDI modules share the same name, only the first match will be returned. If no argument is set, the function returns the first MIDI module it finds.
Available in: Controller, Processor.
Arguments
| Argument | Description | Value Type |
|---|---|---|
| nameOrPosition | The name or position of the MIDI module. Set this to nil to deactivate the search filter. | string or number, optional |
Return Values
Returns the MidiModule object of the found MIDI module. Returns nil if no MIDI module is found.
Example
-- Locate the first MIDI module in the program and print its name.

module = this.program:getMidiModule()

if module then
    print(module.name)
else
    print("Could not find a MIDI module!")
end
getZone
getZone(nameOrPosition)
Description
Function to retrieve the Zone object of a zone in the specified layer. For example, this.parent defines the parent layer of the script module as the layer to be searched in. This function does not search in sublayers. A particular zone can be searched by name or position. The position is the number indexing the zones in the specified layer. If several zones share the same name, only the first match will be returned. If no argument is set, the function returns the first zone it finds.
Available in: Controller, Processor.
Arguments
| Argument | Description | Value Type |
|---|---|---|
| nameOrPosition | The name or position of the zone. Set this to nil to deactivate the search filter. | string or number, optional |
Return Values
Returns the Zone object of the found zone. Returns nil if no zone is found.
Example
-- Get the first zone in the program and print its name.

zone = this.program:getZone()

if zone then
    print(zone.name)
else
    print("Could not find a zone!")
end
insertBus
insertBus(bus, position)
Description
Function to insert a bus at the specified position in the destination layer. The bus to be inserted is determined by its Bus object. You can use getBus or findBusses to determine the bus. The destination layer is determined by its Layer object. For example, this.parent sets the parent layer of the script module as destination layer. The position is the number indexing the existing busses in the destination layer. The new bus will be inserted before the specified position. To add the bus at the end, use appendBus instead.
❕ An Element object can only have one parent. It cannot be child of multiple parents. Therefore, an Element object that you retrieved from the running plug-in instance must be removed before it can be inserted again. The Element objects that you retrieve through loadPreset or loadPresetAsync can be inserted freely, because these functions create a copy of the Element objects when reading them.
Available in: Controller.
Arguments
| Argument | Description | Value Type |
|---|---|---|
| bus | The Bus object of the bus that you want to insert. | Bus |
| position | The position where the bus is inserted. | number |
Example
To explore the following script:
- Download Program.vstpreset.
- Drag the preset on the MediaBay to import it to the user folder for VST presets.
- Create an empty program and add a script module.
- Paste the script into the text editor of the script module and execute the script.
-- Insert the bus from Program.vstpreset into the current program.

-- Get the file path for user VST presets.
path = getUserPresetPath()

-- Load the VST preset.
loadedProgram = loadPreset(path.."/Program/Program.vstpreset")

-- Get the first bus from the loaded program.
bus = loadedProgram:getBus()

-- Insert the bus.
if bus then
    this.program:insertBus(bus, 1)
end
insertLayer
insertLayer(layer, position)
Description
Function to insert a layer at a specific position in a destination layer. The layer to be inserted and the destination layer are both determined by their Layer objects. You can use getLayer or findLayers to determine the layer to be inserted. For example, this.parent determines the parent layer of the script module as destination layer. The position is the number indexing the existing layers in the destination layer. The new layer will be inserted before the specified position. To add the layer at the end, use appendLayer or appendLayerAsync instead.
❕ An Element object can only have one parent. It cannot be child of multiple parents. Therefore, an Element object that you retrieved from the running plug-in instance must be removed before it can be inserted again. The Element objects that you retrieve through loadPreset or loadPresetAsync can be inserted freely, because these functions create a copy of the Element objects when reading them.
Available in: Controller.
Arguments
| Argument | Description | Value Type |
|---|---|---|
| layer | The Layer object of the layer that you want to insert. | Layer |
| position | The position where the layer is to be inserted. | number |
Example
To explore the following script:
- Download Program.vstpreset.
- Drag the preset on the MediaBay to import it to the user folder for VST presets.
- Create an empty program and add a script module.
- Paste the script into the text editor of the script module and execute the script.
-- Insert a layer from Program.vstpreset into the current program.

-- Get the file path for user VST presets.
path = getUserPresetPath()

-- Load the VST preset.
loadedProgram = loadPreset(path.."/Program/Program.vstpreset")

-- Get the first layer from the loaded program.
layer = loadedProgram:getLayer ()

-- Insert the layer.
if layer then
    this.program:insertLayer(layer, 1)
end
insertLayerAsync
insertLayerAsync(layer, position, callback)
Description
Function to insert a layer at a specified position in a destination layer using a separate, parallel thread. Inserting a layer in a separate thread can be necessary if the layer is too big to be inserted in a short time. The layer to be inserted and the destination layer are both determined by their Layer objects. You can use getLayer or findLayers to determine the layer to be inserted. For example, this.parent determines the parent layer of the script module as destination layer. The position is the number indexing the existing layers in the destination layer. The new layer will be inserted before the specified position. To add the layer at the end, use appendLayer or appendLayerAsync instead. The function returns a LoadProgress object that can be used to monitor the load progress. After the layer is inserted, the callback function is called. The callback function gets the LoadProgress object as default argument.
❕ An Element object can only have one parent. It cannot be child of multiple parents. Therefore, an Element object that you retrieved from the running plug-in instance must be removed before it can be inserted again. The Element objects that you retrieve through loadPreset or loadPresetAsync can be inserted freely, because these functions create a copy of the Element objects when reading them.
Available in: Controller.
Arguments
| Argument | Description | Value Type |
|---|---|---|
| layer | The Layer object of the layer that you want to insert. | Layer |
| position | The position where the layer is to be inserted. | number |
| callback | Callback function that is called when the layer is inserted. The callback function gets the LoadProgress object as argument. | function, optional |
Return Values
Returns a LoadProgress object.
Example
-- Start with an empty program, remove all existing layers.
layers = this.parent:findLayers()

if layers then
  for i, layer in ipairs(layers) do
      this.parent:removeLayer(layer)
  end
end

-- Table with layer presets from Skylab.
layerPresets = {
  { name = "Ambient Pad 01", path = "vstsound://EB86867EFF8E44FEA8FE366F676E25BE/.AppData/Steinberg/Skylab/Sub Presets/Layer Presets/Ambient Pads/Ambient Pad 01.vstpreset" },
  { name = "Ambient Pad 02", path = "vstsound://EB86867EFF8E44FEA8FE366F676E25BE/.AppData/Steinberg/Skylab/Sub Presets/Layer Presets/Ambient Pads/Ambient Pad 02.vstpreset" },
  { name = "Ambient Pad 03", path = "vstsound://EB86867EFF8E44FEA8FE366F676E25BE/.AppData/Steinberg/Skylab/Sub Presets/Layer Presets/Ambient Pads/Ambient Pad 03.vstpreset" },
  { name = "Ambient Pad 04", path = "vstsound://EB86867EFF8E44FEA8FE366F676E25BE/.AppData/Steinberg/Skylab/Sub Presets/Layer Presets/Ambient Pads/Ambient Pad 04.vstpreset" },
}

-- Create a table with the preset names.
function getPresetNames()
  presetNames = {}
  for i, preset in ipairs(layerPresets) do
    presetNames[i] = preset.name
  end
end

getPresetNames()

-- Remove the old layer after the new one was added.
function removeOldLayer(progressInfo)
  local newPreset = progressInfo.root
  if oldPreset then
    this.parent:removeLayer(oldPreset)
    print(oldPreset.name.." removed.")
  end
  oldPreset = newPreset
end

-- Insert the preset in a separate thread.
function insertNewLayer(progressInfo)
  if progressInfo.root then
    this.parent:insertLayerAsync(progressInfo.root, 1, removeOldLayer)
    print("Inserting "..progressInfo.root.name.."...")
  end
end

-- Load the preset in a separate thread.
function onSelectPresetChanged(layerPreset)
  loadPresetAsync(layerPreset.path, insertNewLayer)
  print("Loading "..layerPreset.name.."...")
end

-- Define a parameter for selecting the preset to be loaded.
defineParameter("SelectPreset",  "Select Preset",  1, presetNames, function() onSelectPresetChanged(layerPresets[SelectPreset]) end)
insertMidiModule
insertMidiModule(module, position)
Description
Function to insert a MIDI module at the specified position in the determined destination layer. The MIDI module to be inserted is determined by its MidiModule object. You can use getMidiModule or findMidiModules to determine the desired MIDI module. The destination layer is determined by its Layer object. For example, this.parent determines the parent layer of the script module as destination layer. The position is the number indexing the existing MIDI modules in the destination layer. The new MIDI module will be inserted before the specified position. To add the MIDI module at the end, use appendMidiModule instead.
❕ An Element object can only have one parent. It cannot be child of multiple parents. Therefore, an Element object that you retrieved from the running plug-in instance must be removed before it can be inserted again. The Element objects that you retrieve through loadPreset or loadPresetAsync can be inserted freely, because these functions create a copy of the Element objects when reading them.
Available in: Controller.
Arguments
| Argument | Description | Value Type |
|---|---|---|
| module | The MidiModule object of the MIDI module that you want to insert. | MidiModule |
| position | The position where the MIDI module is inserted. | number |
Example
To explore the following script:
- Download Program.vstpreset.
- Drag the preset on the MediaBay to import it to the user folder for VST presets.
- Create an empty program and add a script module.
- Paste the script into the text editor of the script module and execute the script.
-- Insert a MIDI module from Program.vstpreset into the current program.

-- Get the file path for user VST presets.
path = getUserPresetPath()

-- Load the VST preset.
loadedProgram = loadPreset(path.."/Program/Program.vstpreset")

-- Get the first MIDI module from the loaded program.
module = loadedProgram:getMidiModule()

-- Insert the MIDI module.
if module then
    this.program:insertMidiModule(module, 1)
end
insertZone
insertZone(zone, position)
Description
Function to insert a zone at the specified position in the determined layer. The zone to be inserted is determined by its Zone object. You can use getZone or findZones to determine the desired zone. The destination layer is determined by its Layer object. For example, this.parent determines the parent layer of the script module as destination layer. The position is the number indexing the existing zones in the destination layer. The new zone will be inserted before the specified position. To add the zone at the end, use appendZone instead.
❕ An Element object can only have one parent. It cannot be child of multiple parents. Therefore, an Element object that you retrieved from the running plug-in instance must be removed before it can be inserted again. The Element objects that you retrieve through loadPreset or loadPresetAsync can be inserted freely, because these functions create a copy of the Element objects when reading them.
Available in: Controller.
Arguments
| Argument | Description | Value Type |
|---|---|---|
| zone | The Zone object of the zone that you want to insert. | Zone |
| position | The position where the zone is inserted. | number |
Example
To explore the following script:
- Download Program.vstpreset.
- Drag the preset on the MediaBay to import it to the user folder for VST presets.
- Create an empty program and add a script module.
- Paste the script into the text editor of the script module and execute the script.
-- Insert a zone from Program.vstpreset into the current program.

-- Get the file path for user VST presets.
path = getUserPresetPath()

-- Load the VST preset.
loadedProgram = loadPreset(path.."/Program/Program.vstpreset")

-- Get the first zone from the loaded program.
zone = loadedProgram:getZone()

-- Insert the zone.
if zone then
    this.program:insertZone(zone, 1)
end
removeBus
removeBus(busOrPosition)
Description
Function to remove a bus from the specified layer. For example, this.parent specifies the parent layer of the script module as the layer that contains the bus. The bus to be removed is determined by its Bus object or its position. You can use getBus or findBusses to determine the Bus object. The position is the number that indexes the busses in the specified layer.
Available in: Controller.
Arguments
| Argument | Description | Value Type |
|---|---|---|
| busOrPosition | The Bus object or the position of the bus to be removed. | Bus or number |
Example
-- Remove all busses from the program.

busses = this.program:findBusses(true)

for i, bus in ipairs(busses) do
    this.parent:removeBus(bus)
end
removeLayer
removeLayer(layerOrPosition)
Description
Function to remove a layer from the specified layer. For example, this.parent specifies the parent layer of the script module as the layer that contains the layer to be removed. The layer is determined by its Layer object or its position. You can use getLayer or findLayers to determine the Layer object. The position is the number indexing the layers within the specified layer.
Available in: Controller.
Arguments
| Argument | Description | Value Type |
|---|---|---|
| layerOrPosition | The Layer object or the position of the layer to be removed. | Layer or number |
Example
-- Remove all layers from the program.

layers = this.program:findLayers(true)

for i, layer in ipairs(layers) do
    layer.parent:removeLayer(layer)
end
removeMidiModule
removeMidiModule(moduleOrPosition)
Description
Function to remove a MIDI module from the specified layer. For example, this.parent specifies the parent layer of the script module as the layer that contains the MIDI module. The MIDI module to be removed is determined by its MidiModule object or its position. You can use getMidiModule or findMidiModules to determine the MidiModule object. The position is the number that indexes the MIDI modules in the specified layer.
Available in: Controller.
Arguments
| Argument | Description | Value Type |
|---|---|---|
| moduleOrPosition | The MidiModule object or the position of the MIDI module to be removed. | MidiModule or number |
Example
-- Remove all MIDI modules from the program except the script module.

modules = this.program:findMidiModules(true)

for i, module in ipairs(modules) do
    if module ~= this then -- Exclude script module.
        module.parent:removeMidiModule(module)
    end
end
removeZone
removeZone(zoneOrPosition)
Description
Function to remove a zone from the specified layer. For example, this.parent specifies the parent layer of the script module as the layer that contains the zone. The zone to be removed is determined by its Zone object or its position. You can use getZone or findZones to determine the Zone object. The position is the number that indexes the zones in the specified layer.
Available in: Controller.
Arguments
| Argument | Description | Value Type |
|---|---|---|
| zoneOrPosition | The Zone object or position of the zone to be removed. | Zone or number |
Example
-- Remove all zones from the program.

zones = this.program:findZones(true)

for i, zone in ipairs(zones) do
    zone.parent:removeZone(zone)
end
addQCAssignment
addQCAssignment(qc, element, nameOrID, scope)
Description
Function to add a quick control assignment to the specified layer and quick control. For example, this.parent defines the parent layer of the script module as the layer that contains the quick control that you want to edit. The quick control assignment will be added to the quick control with the index stated by the qc argument. The arguments element and nameOrID specify the parameter to be connected. The scope determines the part of the program that will be affected by the quick control assignment. You specify the scope by setting the scope argument to the Element object that corresponds to the desired part of the program.
❕ The index of the quick controls starts counting from 1. QC 1 to QC 8 have index 1 to 8. Sphere H, Sphere V and Mod Wheel have index 9, 10 and 11.
Available in: Controller.
Arguments
| Argument | Description | Value Type |
|---|---|---|
| qc | The index of the quick control to which the assignment will be added. | number |
| element | The Element object of the parameter to be connected. | Element |
| nameOrID | The name or ID of the parameter. | string or number |
| scope | The Element object that will be affected by the quick control assignment. | Element |
Example
-- Assign the octave parameter of the zone to the
-- first quick control of the script module's parent layer.

layer = this.parent
zones = layer:findZones(true)

layer:addQCAssignment(1, zones[1], "Pitch.Octave", layer)
removeQCAssignment
removeQCAssignment(qc, assignment)
Description
Function to remove a quick control assignment from the specified layer and quick control. For example, this.parent defines the parent layer of the script module as the layer that contains the quick control. The qc argument is the index of the quick control with the assignment to be removed. The assignment argument is the index of the quick control assignment to be removed. The indices of the quick controls and the assignments both start counting from 1.
Available in: Controller.
Arguments
| Argument | Description | Value Type |
|---|---|---|
| qc | The index of the quick control with the assignment to be removed. | number |
| assignment | The index of the quick control assignment to be removed. | number |
Example
-- Remove all quick control assignments from the specified layer and qc.

function clearQC(layer, qc)
    local assignments = layer:getNumQCAssignments(qc)
    if assignments > 0 then
        for i = assignments, 1, -1 do
            layer:removeQCAssignment(qc, i)
        end
        print(assignments.." assignments have been removed from '"..layer.name.."', QC "..qc..".")
    else
        print("No assignments found on '"..layer.name.."', QC "..qc..".")
    end
end

clearQC(this.parent, 1)
getNumQCAssignments
getNumQCAssignments(qc)
Description
Function to retrieve the number of assignments of a quick control on the specified layer. For example, this.parent defines the parent layer of the script module as the layer with the desired quick control. The qc argument is the index of the quick control with the requested assignments.
Available in: Controller.
Arguments
| Argument | Description | Value Type |
|---|---|---|
| qc | The index of the quick control. | number |
Return Values
Returns the number of assignments of the specified layer and quick control.
Example
-- Print the number of assignments of the first quick control on the parent layer.

layer = this.parent
qc = 1

print("Number of assignments on '"..layer.name.."', QC "..qc..": "..layer:getNumQCAssignments(qc)..".")
getQCAssignmentParamId
getQCAssignmentParamId(qc, assignment)
Description
Function to retrieve the parameter ID of the parameter that is connected to the specified quick control assignment. The quick control assignment is determined by the Layer object, the index of the quick control and the index of the assignment itself. For example, this.parent defines the parent layer of the script module as the layer that contains the quick control. The qc argument is the index of the quick control and the assignment argument is the index of the assignment with the requested parameter. The indices of the quick controls and the assignments both start counting from 1.
Available in: Controller.
Arguments
| Argument | Description | Value Type |
|---|---|---|
| qc | The index of the quick control. | number |
| assignment | The index of the quick control assignment. | number |
Return Values
Returns the parameter ID of the parameter connected to the specified quick control assignment.
Example
-- Print the parameter ID of the parameter connected to the qc assignment.

layer = this.parent
qc = 1
assignment = 1

paramID = layer:getQCAssignmentParamId(qc, assignment)

print("Parameter ID of '"..layer.name.."', QC "..qc..", assignment "..assignment..": "..paramID..".")
getQCAssignmentScope
getQCAssignmentScope(qc, assignment)
Description
Function to retrieve the Element object that is set as scope for the specified quick control assignment. The quick control assignment is determined by the Layer object of the layer, the index of the quick control and the index of the assignment itself. For example, this.parent defines the parent layer of the script module as the layer that contains the quick control. The qc argument is the index of the quick control and the assignment argument is the index of the assignment with the requested scope. The indices of the quick controls and the assignments both start counting from 1.
Available in: Controller.
Arguments
| Argument | Description | Value Type |
|---|---|---|
| qc | The index of the quick control. | number |
| assignment | The index of the quick control assignment. | number |
Return Values
Returns the element object that is set as scope for the specified quick control assignment.
Example
-- Print the scope for the qc assignment.

layer = this.parent
qc = 1
assignment = 1

scope = layer:getQCAssignmentScope(qc, assignment).name -- use only the name of the returned element

print("Scope of '"..layer.name.."', QC "..qc..", assignment "..assignment..": "..scope..".")
getQCAssignmentMin
getQCAssignmentMin(qc, assignment)
Description
Function to retrieve the minimum value of the specified quick control assignment. The quick control assignment is determined by the Layer object, the index of the quick control and the index of the assignment itself. For example, this.parent defines the parent layer of the script module as the layer that contains the quick control. The qc argument is the index of the quick control and the assignment argument is the index of the assignment with the requested minimum value. The indices of the quick controls and the assignments both start counting from 1.
Available in: Controller.
Arguments
| Argument | Description | Value Type |
|---|---|---|
| qc | The index of the quick control. | number |
| assignment | The index of the quick control assignment. | number |
Return Values
Returns the minimum value of the specified quick control assignment.
❕ The value range is always 0 to 100 %, even if the mode of the quick control assignment is set to Relative or Switch Relative.
Example
-- Print the minimum value of the qc assignment as displayed in HALion.
layer = this.parent
qc = 1
assignment = 1

qcMode = layer:getQCAssignmentMode(qc, assignment)
qcMin = layer:getQCAssignmentMin(qc, assignment)

-- Convert to bipolar range if the qc is of the type relative or switch relative.
if (qcMode == QCAssignmentMode.relative or qcMode == QCAssignmentMode.switchRelative) then
    qcMin = qcMin * 2 - 100
end

print("Minimum value of '"..layer.name.."', QC "..qc..", assignment "..assignment..": "..qcMin..".")
getQCAssignmentMax
getQCAssignmentMax(qc, assignment)
Description
Function to retrieve the maximum value of the specified quick control assignment. The quick control assignment is determined by the Layer object, the index of the quick control and the index of the assignment itself. For example, this.parent defines the parent layer of the script module as the layer that contains the quick control. The qc argument is the index of the quick control and the assignment argument is the index of the assignment with the requested maximum value. The indices of the quick controls and the assignments both start counting from 1.
Available in: Controller.
Arguments
| Argument | Description | Value Type |
|---|---|---|
| qc | The index of the quick control. | number |
| assignment | The index of the quick control assignment. | number |
Return Values
Returns the maximum value of the specified quick control assignment.
❕ The value range is always 0 to 100 %, even if the mode of the quick control assignment is set to Relative or Switch Relative.
Example
-- Print the maximum value of the qc assignment as displayed in HALion.

layer = this.parent
qc = 1
assignment = 1

qcMode = layer:getQCAssignmentMode(qc, assignment)
qcMax = layer:getQCAssignmentMax(qc, assignment)

-- Convert to bipolar range if the qc is of the type relative or switch relative.

if (qcMode == QCAssignmentMode.relative or qcMode == QCAssignmentMode.switchRelative) then
    qcMax = qcMax * 2 - 100
end

print("Maximum value of '"..layer.name.."', QC "..qc..", assignment "..assignment..": "..qcMax..".")
getQCAssignmentCurve
getQCAssignmentCurve(qc, assignment)
Description
Function to retrieve the curve value of the specified quick control assignment. The quick control assignment is determined by the Layer object, the index of the quick control and the index of the assignment itself. For example, this.parent defines the parent layer of the script module as the layer that contains the quick control. The qc argument is the index of the quick control and the assignment argument is the index of the assignment with the requested curve value. The indices of the quick controls and the assignments both start counting from 1.
Available in: Controller.
Arguments
| Argument | Description | Value Type |
|---|---|---|
| qc | The index of the quick control. | number |
| assignment | The index of the quick control assignment. | number |
Return Values
Returns the curve value of the specified quick control assignment. The value range is -100% to +100%.
Example
-- Print the curve value of the qc assignment.

layer = this.parent
qc = 1
assignment = 1

qcCurve = layer:getQCAssignmentCurve(qc, assignment)

print("Curve value of '"..layer.name.."', QC "..qc..", assignment "..assignment..": "..qcCurve..".")
getQCAssignmentMode
getQCAssignmentMode(qc, assignment)
Description
Function to retrieve the mode that is set for the specified quick control assignment. The quick control assignment is determined by the Layer object, the index of the quick control and the index of the assignment itself. For example, this.parent defines the parent layer of the script module as the layer that contains the quick control. The qc argument is the index of the quick control and the assignment argument is the index of the assignment with the requested mode. The indices of the quick controls and the assignments both start counting from 1.
Available in: Controller, Processor.
Arguments
| Argument | Description | Value Type |
|---|---|---|
| qc | The index of the quick control. | number |
| assignment | The index of the quick control assignment. | number |
Return Values
Returns the mode that is set for the specified quick control assignment as a number. The mode can be determined via names or indices. See Quick Control Assignment Modes for details.
Example
-- Print the mode of the qc assignment.
layer = this.parent
qc = 1
assignment = 1

qcMode = layer:getQCAssignmentMode(qc, assignment)

if qcMode == QCAssignmentMode.absolute then
    qcModeName = "Absolute"
elseif qcMode == QCAssignmentMode.relative then
    qcModeName = "Relative"
elseif qcMode == QCAssignmentMode.switch then
    qcModeName = "Switch"
elseif qcMode == QCAssignmentMode.switchRelative then
    qcModeName = "Switch Relative"
end

print("Mode of '"..layer.name.."', QC "..qc..", assignment "..assignment..": "..qcModeName..".")
getQCAssignmentBypass
getQCAssignmentBypass(qc, assignment)
Description
Function to retrieve the bypass state of the specified quick control assignment. The quick control assignment is determined by the Layer object, the index of the quick control and the index of the assignment itself. For example, this.parent defines the parent layer of the script module as the layer that contains the quick control. The qc argument is the index of the quick control and the assignment argument is the index of the assignment with the requested bypass state. The indices of the quick controls and the assignments both start counting from 1.
Available in: Controller.
Arguments
| Argument | Description | Value Type |
|---|---|---|
| qc | The index of the quick control. | number |
| assignment | The index of the quick control assignment. | number |
Return Values
Returns the bypass state of the specified quick control assignment as boolean value.
Example
-- Print the bypass state of the qc assignment.

layer = this.parent
qc = 1
assignment = 1

qcBypass = layer:getQCAssignmentBypass(qc, assignment)

print("Bypass of '"..layer.name.."', QC "..qc..", assignment "..assignment..": "..tostring(qcBypass)..".")
setQCAssignmentParamId
setQCAssignmentParamId(qc, assignment, paramID)
Description
Function to set the parameter ID for connecting the corresponding parameter to the specified quick control assignment. The quick control assignment is determined by the Layer object, the index of the quick control and the index of the assignment itself. For example, this.parent defines the parent layer of the script module as the layer that contains the quick control. The qc argument is the index of the quick control and the assignment argument is the index of the assignment. The indices of the quick controls and the assignments both start counting from 1. The paramID argument selects the parameter to be connected with the quick control assignment.
Available in: Controller.
Arguments
| Argument | Description | Value Type |
|---|---|---|
| qc | The index of the quick control. | number |
| assignment | The index of the quick control assignment. | number |
| paramID | The ID of the parameter to be connected. | number |
Example
-- Connect the coarse parameter of the zone to the specified quick control assignment.

layer = this.parent
zones = layer:findZones(true)
zone = zones[1]
qc = 1
assignment = 1
coarseParamID = zone:getParameterDefinition("Pitch.Coarse").id

layer:setQCAssignmentParamId(qc, assignment, coarseParamID)
setQCAssignmentScope
setQCAssignmentScope(qc, assignment, scope)
Description
Function to set the scope for the specified quick control assignment. The quick control assignment is determined by the Layer object, the index of the quick control and the index of the assignment itself. For example, this.parent defines the parent layer of the script module as the layer that contains the quick control. The qc argument is the index of the quick control and the assignment argument is the index of the assignment. The indices of the quick controls and the assignments both start counting from 1. The scope is defined by the Element object that you assign to the scope argument.
Available in: Controller.
Arguments
| Argument | Description | Value Type |
|---|---|---|
| qc | The index of the quick control. | number |
| assignments | The index of the quick control assignment. | number |
| scope | The Element object to be used as scope. | Element |
Example
-- Set the scope to the first zone that was found.

layer = this.parent
zones = layer:findZones(true)
zone = zones[1]
qc = 1
assignment = 1

layer:setQCAssignmentScope(qc, assignment, zone)
setQCAssignmentMin
setQCAssignmentMin(qc, assignment, min)
Description
Function to set the minimum value of the specified quick control assignment. The quick control assignment is determined by the Layer object, the index of the quick control and the index of the assignment itself. For example, this.parent defines the parent layer of the script module as the layer that contains the quick control. The qc argument is the index of the quick control and the assignment argument is the index of the assignment. The indices of the quick controls and the assignments both start counting from 1. The min argument sets the minimum value of the quick control assignment.
Available in: Controller.
Arguments
| Argument | Description | Value Type |
|---|---|---|
| qc | The index of the quick control. | number |
| assignment | The index of the quick control assignment. | number |
| min | The minimum value to be set. | number |
❕ The value range is always 0 to 100 %, even if the mode of the quick control assignment is set to Relative or Switch Relative.
Example
-- Set the minimum value of the quick control assignment depending on the mode.

layer = this.parent
qc = 1
assignment = 1

qcMode = layer:getQCAssignmentMode(qc, assignment)

if (qcMode == QCAssignmentMode.relative or qcMode == QCAssignmentMode.switchRelative) then
    qcMin = 25
else
    qcMin = 0
end

layer:setQCAssignmentMin(qc, assignment, qcMin)
setQCAssignmentMax
setQCAssignmentMax(qc, assignment max)
Description
Function to set the maximum value of the specified quick control assignment. The quick control assignment is determined by the Layer object, the index of the quick control and the index of the assignment itself. For example, this.parent defines the parent layer of the script module as the layer that contains the quick control. The qc argument is the index of the quick control and the assignment argument is the index of the assignment. The indices of the quick controls and the assignments both start counting from 1. The max argument sets the maximum value of the quick control assignment.
Available in: Controller.
Arguments
| Argument | Description | Value Type |
|---|---|---|
| qc | The index of the quick control. | number |
| assignment | The index of the quick control assignment. | number |
| max | The maximum value to be set. | number |
❕ The value range is always 0 to 100 %, even if the mode of the quick control assignment is set to Relative or Switch Relative.
Example
-- Set the maximum value of the quick control assignment depending on the mode.

layer = this.parent
qc = 1
assignment = 1

qcMode = layer:getQCAssignmentMode(qc, assignment)

if (qcMode == QCAssignmentMode.relative or qcMode == QCAssignmentMode.switchRelative) then
    qcMax = 75
else
    qcMax = 100
end

layer:setQCAssignmentMax(qc, assignment, qcMax)
setQCAssignmentCurve
setQCAssignmentCurve(qc, assignment, curve)
Description
Function to set the curve value of the specified quick control assignment. The quick control assignment is determined by the Layer object, the index of the quick control and the index of the assignment itself. For example, this.parent defines the parent layer of the script module as the layer that contains the quick control. The qc argument is the index of the quick control and the assignment argument is the index of the assignment. The indices of the quick controls and the assignments both start counting from 1. The curve argument sets the curve value of the quick control assignment.
Available in: Controller.
Arguments
| Argument | Description | Value Type |
|---|---|---|
| qc | The index of the quick control. | number |
| asignment | The index of the quick control assignment. | number |
| curve | The curve value in the range -100 % to +100 %. | number |
Example
-- Set the curve of the quick control assignment to -100 %.

layer = this.parent
qc = 1
assignment = 1

layer:setQCAssignmentCurve(qc, assignment, -100)
setQCAssignmentMode
setQCAssignmentMode(qc, assignment, mode)
Description
Function to set the mode of the specified quick control assignment. The quick control assignment is determined by the Layer object, the index of the quick control and the index of the assignment itself. For example, this.parent defines the parent layer of the script module as the layer that contains the quick control. The qc argument is the index of the quick control and the assignment argument is the index of the assignment. The indices of the quick controls and the assignments both start counting from 1. The mode argument sets the mode of the quick control assignment.
Available in: Controller.
Arguments
| Argument | Description | Value Type |
|---|---|---|
| qc | The index of the quick control. | number |
| asignment | The index of the quick control assignment. | number |
| mode | The mode to be set. It can be determined via names or indices. See Quick Control Assignment Modes for details. | enum or number |
Example
-- Set the mode of the quick control assignment to absolute and adjust min and max to full range.

layer = this.parent
qc = 1
assignment = 1

layer:setQCAssignmentMode(qc, assignment, QCAssignmentMode.absolute)
layer:setQCAssignmentMin(qc, assignment, 0)
layer:setQCAssignmentMax(qc, assignment, 100)
setQCAssignmentBypass
setQCAssignmentBypass(qc, assignment, bypass)
Description
Function to set the bypass state of the specified quick control assignment. The quick control assignment is determined by the Layer object, the index of the quick control and the index of the assignment itself. For example, this.parent defines the parent layer of the script module as the layer that contains the quick control. The qc argument is the index of the quick control and the assignment argument is the index of the assignment. The indices of the quick controls and the assignments both start counting from 1. The bypass argument sets the bypass state of the quick control assignment.
Available in: Controller.
Arguments
| Argument | Description | Value Type |
|---|---|---|
| qc | The index of the quick control. | number |
| assignment | The index of the quick control assignment. | number |
| bypass | The bypass state to be set. | boolean |
Example
-- Bypass the specified quick control assignment.

layer = this.parent
qc = 1
assignment = 1

layer:setQCAssignmentBypass(qc, assignment, true)
/ HALion Developer Resource / HALion Script / Class Reference / Element / Layer /
Program
The Program class inherits all properties and methods of the Layer class.
On this page:
Program Class, Program Constructor
List of inherited members:
Layer
appendBus, appendLayer, appendLayerAsync, appendMidiModule, appendZone, findBusses, findEffects, findLayers, findMidiModules, findZones, getBus, getLayer, getMidiModule, getZone, insertBus, insertLayer, insertLayerAsync, insertMidiModule, insertZone, removeBus, removeLayer, removeMidiModule, removeZone, addQCAssignment, removeQCAssignment, getNumQCAssignments, getQCAssignmentParamId, getQCAssignmentScope, getQCAssignmentMin, getQCAssignmentMax, getQCAssignmentCurve, getQCAssignmentMode, getQCAssignmentBypass, setQCAssignmentParamId, setQCAssignmentScope, setQCAssignmentMin, setQCAssignmentMax, setQCAssignmentCurve, setQCAssignmentMode, setQCAssignmentBypass
Element
Element Class, findChildren, getChild, getParameter, getParameterDefinition, getParameterNormalized, hasParameter, removeFromParent, setName, setParameter, setParameterNormalized
Classes
Program Class
Description
The Element object of the program can be obtained with this.program. It has the following fields.
Available in: Controller, Processor.
Fields
| Field | Description | Value Type |
|---|---|---|
| .instance | The Element object of the plug-in instance. | Instance |
| .assignedSlots | An array with the Element objects of the slots to which this program is assigned. | table |
Example
-- Print the name of the plug-in instance.

print(this.program.instance.name)

-- Print the name of the first slot to which the program is assigned.

if this.program.assignedSlots[1] then
    print(this.program.assignedSlots[1].name)
end
Constructors
Program Constructor
Program()
(Since HALion 6.4.0)
Description
Constructor to create a new Program object.
Available in: Controller.
Return Values
Returns a new Program object.
Example
-- The following function creates different types of objects in the Program Tree.
-- The objects in the Program Tree do not have a name. You will see only their icons.

function createProgram()
  local inst = this.program.instance
  local prg = Program()
  local bus = Bus()
  prg:appendBus(bus)
  inst:setProgram(prg, 1)
  local layer = Layer()
  prg:appendLayer(layer)
  layer:appendZone(Zone())
  local mm = MidiModule('MIDI Player')
  layer:appendMidiModule(mm)
  local fx = Effect('Distortion')
  bus:appendEffect(fx)
end

createProgram()
/ HALion Developer Resource / HALion Script / Class Reference / Element /
MidiModule
The MidiModule class inherits all properties and methods of the Element class.
On this page:
MidiModule Class, MidiModule Constructor
List of inherited members:
Element
Element Class, findChildren, getChild, getParameter, getParameterDefinition, getParameterNormalized, hasParameter, removeFromParent, setName, setParameter, setParameterNormalized
Classes
MidiModule Class
Description
The Element object of a MIDI module can be obtained with findMidiModules or getMidiModule.
Available in: Controller, Processor.
Fields
| Field | Description | Value Type |
|---|---|---|
| .moduleType | Returns the MIDI module type. | string |
Example
print(this.moduleType)
Constructors
MidiModule Constructor
MidiModule(type)
(Since HALion 6.4.0)
Description
Constructor to create a new MidiModule object of the specified type.
Available in: Controller.
Arguments
| Argument | Description | Value Type |
|---|---|---|
| type | The type of MIDI module. | string |
Return Values
Returns a new MidiModule object of the specified type.
Example
-- The following function creates different types of objects in the Program Tree.
-- The objects in the Program Tree do not have a name. You will see only their icons.

function createProgram()
  local inst = this.program.instance
  local prg = Program()
  local bus = Bus()
  prg:appendBus(bus)
  inst:setProgram(prg, 1)
  local layer = Layer()
  prg:appendLayer(layer)
  layer:appendZone(Zone())
  local mm = MidiModule('MIDI Player')
  layer:appendMidiModule(mm)
  local fx = Effect('Distortion')
  bus:appendEffect(fx)
end

createProgram()
/ HALion Developer Resource / HALion Script / Class Reference / Element /
ModulationMatrixRow
The ModulationMatrixRow class inherits all properties and methods of the Element class.
On this page:
ModulationMatrixRow Class, getSource1, getSource2, setSource1,setSource2
List of inherited members:
Element
Element Class, findChildren, getChild, getParameter, getParameterDefinition, getParameterNormalized, hasParameter, removeFromParent, setName, setParameter, setParameterNormalized
Classes
ModulationMatrixRow Class
The Element object of the modulation matrix row can be obtained with getModulationMatrixRow. It has the following fields.
Available in: Controller, Processor.
Fields
| Field | Description | Value Type |
|---|---|---|
| .rowNumber | Returns the index of the modulation matrix row. | number |
| .zone | Returns the Zone object of the zone that the modulation matrix row belongs to. | Zone |
Example
-- Get the element object of the first zone in the program.

zone = this.program:findZones(true)[1]

-- Get the element object of the first modulation matrix row.

modRow = zone:getModulationMatrixRow(1)

-- Print the zone name and row number of the modulation matrix row.

print(modRow.zone.name)
print(modRow.rowNumber)
Methods
getSource1
getSource1()
Description
Function to retrieve the 1st modulation source of a row in the modulation matrix. The row is specified with the Zone object of the zone and the index of the modulation matrix row.
Available in: Processor.
Return Values
Returns up to three values, i.e., source, sourceInfo1 and sourceInfo2. The number of return values depends on the modulation source. See Modulation Source Types for details.
Example
-- Print modulation sources.

function printSource(source)
    if source.source == ModulationSource.midiControl then
        print("MIDI Ctrl, Controller Number: "..source.info1)
    elseif source.source == ModulationSource.quickControl then
        print("Quick Ctrl, Layer: "..source.info1.name..", QC Index: "..source.info2)
    elseif source.source == ModulationSource.modulationModule then
        print("MIDI Module,  Module: "..source.info1.name..", Output: "..source.info2)
    elseif source.source == ModulationSource.noteExpression then
        print("Note Expression, Custom NE: "..source.info1)
    elseif source.source == ModulationSource.sampleAndHold then
        print("Sample & Hold, Index: "..source.info1)
    else
        print("Standard Modulation, Index: "..source.source)
    end
end

-- Get the zone object of the first zone.

zone = this.program:findZones(true)[1]

-- Run through all 32 modulation rows of the zone and print source1 if assigned.

for i=1, 32 do
    local modRow = zone:getModulationMatrixRow(i)
    local source1 = {}
    source1.source, source1.info1, source1.info2 = modRow:getSource1()
    if source1.source ~= ModulationSource.unassigned then
        print("Modulation Row "..i..", Source 1:")
        printSource(source1)
    end
end
getSource2
getSource2()
Description
Function to retrieve the 2nd modulation source of a row in the modulation matrix. The row is specified with the Zone object of the zone and the index of the modulation matrix row.
Available in: Controller.
Return Values
Returns up to three values, i.e., source, sourceInfo1 and sourceInfo2. The number of return values depends on the modulation source. See Modulation Source Types for details.
❕ The 2nd modulation source has an additional sample & hold. See Modulation Source Types for details.
Example
-- Print modulation sources.

function printSource(source)
    if source.source == ModulationSource.midiControl then
        print("MIDI Ctrl, Controller Number: "..source.info1)
    elseif source.source == ModulationSource.quickControl then
        print("Quick Ctrl, Layer: "..source.info1.name..", QC Index: "..source.info2)
    elseif source.source == ModulationSource.modulationModule then
        print("MIDI Module,  Module: "..source.info1.name..", Output: "..source.info2)
    elseif source.source == ModulationSource.noteExpression then
        print("Note Expression, Custom NE: "..source.info1)
    elseif source.source == ModulationSource.sampleAndHold then
        print("Sample & Hold, Index: "..source.info1)
    else
        print("Standard Modulation, Index: "..source.source)
    end
end

-- Get the zone object of the first zone.

zone = this.program:findZones(true)[1]

-- Run through all 32 modulation rows of the zone and print source2 if assigned.
for i=1, 32 do
    local modRow = zone:getModulationMatrixRow(i)
    local source2 = {}
    source2.source, source2.info1, source2.info2 = modRow:getSource2()
    if source2.source ~= ModulationSource.unassigned then
        print("Modulation Row "..i..", Source 2:")
        printSource(source2)
    end
end
setSource1
setSource1(source, sourceInfo1, sourceInfo2)
Description
Function to set the 1st modulation source of a row in the modulation matrix. The row is specified with the Zone object of the zone and the index of the modulation matrix row.
Available in: Controller.
Arguments
| Argument | Description | Value Type |
|---|---|---|
| source | The modulation source. It can be determined via names or indices. See Modulation Source Types for details. Standard modulation sources like the LFOs or the envelopes can be set directly. Special modulation sources like MIDI controllers or MIDI modules can only be set by also specifiying sourceInfo1 and sourceInfo2. | enum or number |
| sourceInfo1 | Optional argument to specify the MIDI controller number or the MIDI module, for example. See example for details. | number or MidiModule, optional |
| sourceInfo2 | Optional argument to select the modulation output of a MIDI module, for example. See example for details. | number, optional |
Example
-- Define the modulation sources and infos in an array.

modSources = {
    { source = ModulationSource.lfo1, bipolar = 1 },
    { source = ModulationSource.midiControl, bipolar = 0, sourceInfo1 = 1 },
    { source = ModulationSource.quickControl, bipolar = 1, sourceInfo1 = this.program, sourceInfo2 = 1 },
    { source = ModulationSource.modulationModule, bipolar = 0, sourceInfo1 = this, sourceInfo2 = 1 },
    { source = ModulationSource.modulationModule, bipolar = 0, sourceInfo1 = this, sourceInfo2 = 2 },
    { source = ModulationSource.noteExpression, bipolar = 0, sourceInfo1 = 1 }
}

-- Define two modulation outputs for the script module.

defineModulation("50%", false)
defineModulation("100%", false)

-- Calculate the modulation outputs.

function calcModulation()
    return 0.5, 1
end

-- Get the element object of the first zone.

zone = this.program:findZones(true)[1]

-- Assign the modulation sources to source 1 in the modulation rows 1 to 6.

for i=1, #modSources do
    local modRow = zone:getModulationMatrixRow(i)
    modRow:setSource1(modSources[i].source, modSources[i].sourceInfo1, modSources[i].sourceInfo2)
    modRow:setParameter("Source1.Polarity", modSources[i].bipolar) -- Set the default polarity of the source.
end

-- Assign the sample & hold to source 2 in modulation row 1.

modRow = zone:getModulationMatrixRow(1)
modRow:setSource2(ModulationSource.sampleAndHold, 0)
setSource2
setSource2(source, sourceInfo1, sourceInfo2)
Description
Function to set the 2nd modulation source of a row in the modulation matrix. The row is specified with the Zone object of the zone and the index of the modulation matrix row.
Available in: Controller.
Arguments
| Argument | Description | Value Type |
|---|---|---|
| source | The modulation source. It can be determined via names or indices. See Modulation Source Types for details. Standard modulation sources like the LFOs or the envelopes can be set directly. Special modulation sources like MIDI controllers or MIDI modules can only be set by also specifiying sourceInfo1 and sourceInfo2. | enum or number |
| sourceInfo1 | Optional argument to specify the MIDI controller number or the MIDI module, for example. See example for details. | number or MidiModule, optional |
| sourceInfo2 | Optional argument to select the modulation output of a MIDI module, for example. See example for details. | number, optional |
Example
-- Define the modulation sources and infos in an array.

modSources = {
    { source = ModulationSource.lfo1, bipolar = 1 },
    { source = ModulationSource.midiControl, bipolar = 0, sourceInfo1 = 1 },
    { source = ModulationSource.quickControl, bipolar = 1, sourceInfo1 = this.program, sourceInfo2 = 1 },
    { source = ModulationSource.modulationModule, bipolar = 0, sourceInfo1 = this, sourceInfo2 = 1 },
    { source = ModulationSource.modulationModule, bipolar = 0, sourceInfo1 = this, sourceInfo2 = 2 },
    { source = ModulationSource.noteExpression, bipolar = 0, sourceInfo1 = 1 }
}

-- Define two modulation outputs for the script module.

defineModulation("50%", false)
defineModulation("100%", false)

-- Calculate the modulation outputs.

function calcModulation()
    return 0.5, 1
end

-- Get the element object of the first zone.

zone = this.program:findZones(true)[1]

-- Assign the modulation sources to source 1 in the modulation rows 1 to 6.

for i=1, #modSources do
    local modRow = zone:getModulationMatrixRow(i)
    modRow:setSource1(modSources[i].source, modSources[i].sourceInfo1, modSources[i].sourceInfo2)
    modRow:setParameter("Source1.Polarity", modSources[i].bipolar) -- Set the default polarity of the source.
end

-- Assign the sample & hold to source 2 in modulation row 1.

modRow = zone:getModulationMatrixRow(1)
modRow:setSource2(ModulationSource.sampleAndHold, 0)
/ HALion Developer Resource / HALion Script / Class Reference / Element /
Slot
The Slot class inherits all properties and methods of the Element class.
On this page:
findBusses, findEffects, getBus, setProgram
List of inherited members:
Element
Element Class, findChildren, getChild, getParameter, getParameterDefinition, getParameterNormalized, hasParameter, removeFromParent, setName, setParameter, setParameterNormalized
Methods
findBusses
findBusses(recursive, nameOrFilterFunction)
Description
Function to find busses in the specified Element object. For example, this.parent specifies the parent of the script module as the Element object to be searched in. If recursive is set to true, subelements will also be searched. The function returns an array with the Bus objects of the found busses. Particular busses can be searched by name or via a filter function. If searching by name, findBusses accepts only the Bus objects that match the specified name. The filter function uses the Bus object of each bus as argument. Only those Bus objects that return true for the search criteria defined in the filter function will be accepted by findBusses. Without a name or filter function, the Bus objects of all busses in the searched Element obects will be returned.
Available in: Controller, Processor.
Arguments
| Argument | Description | Value Type |
|---|---|---|
| recursive | If this is set to false, only the specified Element object will be searched. If this is set to true, subelements will also be searched. The default is false. | boolean |
| nameOrFilterFunction | The name of the busses searched for or a filter function. Only the Bus objects that match the name or return true for the search criteria of the filter function will be accepted. Set this to nil to deactivate any name filter or search criteria. | string or function, optional |
Return Values
Returns an array with the Bus objects of the found busses. Returns an empty table if no busses are found.
Example
-- Find all busses and print their names.
busses = this.program:findBusses(true)

if busses[1] then
    for i, bus in ipairs(busses) do
        print(bus.name)
    end
else
    print("Could not find any busses!")
end
findEffects
findEffects(recursive, nameOrFilterFunction)
Description
Function to find effects in the specified Element object. For example, this.parent specifies the parent of the script module as the Element object to be searched in. To specifiy a bus to be searched in, use getBus or findBusses. If recursive is set to true, subelements will also be searched. The function returns an array with the Effect objects of the found effects. Particular effects can be searched by name or via a filter function. If searching by name, findEffects accepts only the Effect objects that match the specified name. The filter function uses the Effect object of each effect as argument. Only those Effect objects that return true for the search criteria defined in the filter function will be accepted by findEffects. Without a name or filter function, the Effect objects of all effects in the searched Element objects will be returned.
Available in: Controller, Processor.
Arguments
| Argument | Description | Value Type |
|---|---|---|
| recursive | If this is set to false, only the specified Element object will be searched. If this is set to true, subelements will also be searched. The default is false. | boolean |
| nameOrFilterFunction | The name of the effects searched for or a filter function. Only the Effect objects that match the name or return true for the search criteria of the filter function will be accepted. Set this to nil to deactivate any name filter or search criteria. | string or function, optional |
Return Values
Returns an array with the Effect objects of the found effects. Returns an empty table if no effects are found.
Example
-- Find all effects and print their names.
effects = this.program:findEffects(true)

if effects[1] then
    for i, effect in ipairs(effects) do
        print(effect.name)
    end
else
    print("Could not find any effects!")
end
getBus
getBus(nameOrPosition)
Description
Function to retrieve the Bus object of a bus in the specified Element object. For example, this.parent specifies the parent of the script module as the Element object to be searched in. This function does not search in subelements. A particular bus can be searched by name or position. The position is the number indexing the busses in the specified Element object. If several busses share the same name, only the first match will be returned. If no argument is set, the function returns the first bus it finds.
Available in: Controller, Processor.
Arguments
| Argument | Description | Value Type |
|---|---|---|
| nameOrPosition | The name or position of the bus. Set this to nil to deactivate the search filter. | string or number, optional |
Return Values
Returns the Bus object of the found bus. Returns nil if no bus is found.
Example
-- Locate the first bus in the program and print its name.

bus = this.program:getBus()

if bus then
    print(bus.name)
else
    print("Could not find a bus!")
end
setProgram
setProgram(programOrNil, index)
Description
Function to set a program in the specified slot of the Program Table or the Slot Rack of the plug-in instance. Before calling this function, you must access the Instance object with this.program.instance. The program is determined by its Program object. To specify the slot in the Program Table, you must use the index argument. To specify the slot in the Slot Rack, you must use a Slot object, for example, via getSlot. The program can be removed from the Slot Rack by using nil as argument.
❕ An Element object can only have one parent. It cannot be child of multiple parents. Therefore, each program can exist only once in the Program Table. Furthermore, an Element object that you retrieved from the running plug-in instance cannot be added twice to the Program Table. It must be removed before it can be added again. The Element objects that you retrieve through loadPreset or loadPresetAsync can be added freely to the Program Table, because these functions create a copy of the Element objects when reading them.
Available in: Controller.
Arguments
| Argument | Description | Value Type |
|---|---|---|
| programOrNil | The Program object of the program. Programs can be removed from the Slot Rack by using nil. | Program or nil |
| index | The index of the slot in the Program Table where you want to set the program. | number, optional |
Example
To explore the following script:
- Download Program.vstpreset.
- Drag the preset on the MediaBay to import it to the user folder for VST presets.
- Create an empty program and add a script module.
- Paste the script into the text editor of the script module and execute the script.
-- Set Program.vstpreset in slot 3 of the Program Table and slot 1 of the Slot Rack.

-- Get the file path for user VST presets.
path = getUserPresetPath()

-- Load the VST preset.
loadedProgram = loadPreset(path.."/Program/Program.vstpreset")

-- Set loadedProgram in slot 3 of the Program Table.
this.program.instance:setProgram(loadedProgram, 3)

-- Set program in slot 1 of the Slot Rack.
program = this.program.instance:getProgram(3)
this.program.instance:getSlot(1):setProgram(program)

-- Clear slot 2 of the Slot Rack.
this.program.instance:getSlot(2):setProgram(nil)
/ HALion Developer Resource / HALion Script / Class Reference / Element /
Zone
The Zone class inherits all properties and methods of the Element class.
On this page:
Zone Class, Zone Constructor, getModulationMatrixRow, getOutputBus, setOutputBus
List of inherited members:
Element
Element Class, findChildren, getChild, getParameter, getParameterDefinition, getParameterNormalized, hasParameter, removeFromParent, setName, setParameter, setParameterNormalized
Classes
Zone Class
Description
The Element object of a zone can be obtained with findZones or getZone. It has the following fields.
Available in: Controller, Processor.
Fields
| Field | Description | Value Type |
|---|---|---|
| .keyLow | The lowest key of the zone. | number |
| .keyHigh | The highest key of the zone. | number |
| .velLow | The lowest velocity of the zone. | number |
| .velHigh | The highest velocity of the zone. | number |
Example
-- Print the key and velocity range of the first zone in the program.

zone = this.program:findZones(true)[1]

print(zone.keyLow)
print(zone.keyHigh)
print(zone.velLow)
print(zone.velHigh)
Constructors
Zone Constructor
Zone()
(Since HALion 6.4.0)
Description
Constructor to create a new Zone object.
Available in: Controller.
Return Values
Returns a new Zone object.
Example
-- The following function creates different types of objects in the Program Tree.
-- The objects in the Program Tree do not have a name. You will see only their icons.

function createProgram()
  local inst = this.program.instance
  local prg = Program()
  local bus = Bus()
  prg:appendBus(bus)
  inst:setProgram(prg, 1)
  local layer = Layer()
  prg:appendLayer(layer)
  layer:appendZone(Zone())
  local mm = MidiModule('MIDI Player')
  layer:appendMidiModule(mm)
  local fx = Effect('Distortion')
  bus:appendEffect(fx)
end

createProgram()
Methods
getModulationMatrixRow
getModulationMatrixRow(rowNumber)
Description
Function to obtain the ModulationMatrixRow object of the specified modulation matrix row. The modulation matrix row is determined by the Zone object of the zone and the index of the modulation matrix row.
Available in: Controller, Processor.
Arguments
| Argument | Description | Value Type |
|---|---|---|
| rowNumber | The index of the modulation matrix row in the range from 1 to 32. | number |
Return Values
The ModulationMatrixRow object of the specified modulation matrix row.
Example
-- Get the element object of the first zone in the program.

zone = this.program:findZones(true)[1]

-- Get the element object of the first modulation matrix row.

modRow = zone:getModulationMatrixRow(1)

-- Print the row number of the specified modulation matrix row.

print(modRow.rowNumber)
getOutputBus
getOutputBus()
Description
Function to retrieve the currently assigned output bus of a zone or bus.
Available in: Controller, Processor.
Return Values
Returns the Bus object of the currently assigned output bus or nil if the default routing is used.
Example
-- Raise an error if no output bus is assigned.

zone = this.parent:getZone()

assert(zone:getOutputBus(), "No output bus assigned. The default routing is used!")
setOutputBus
setOutputBus(bus)
Description
Function to assign the output of a zone or bus to the specified output bus. The sending zone or bus is determined by its Element object. The receiving output bus is specified by its Bus object. Setting the output bus to nil enables the default signal routing for the zone or bus.
❕ Output busses that are higher up in the hierarchy of the Program Tree can be assigned freely. If the sending bus and the receiving output bus have the same parent layer, the output bus must come later in the signal flow.
Available in: Controller.
Arguments
| Argument | Description | Value Type |
|---|---|---|
| bus | The Bus object of the bus that you want to assign, or nil. | Bus or nil |
Example
-- Assign the output of the zone to the Master output bus of the plug-in.

zone = this.parent:getZone()
masterbus = this.program.instance:getBus(1)

zone:setOutputBus(masterbus)

print("Output of "..zone.name.." is assigned to "..masterbus.name..".")
/ HALion Developer Resource / HALion Script / Class Reference /
Event
The Event class describes the properties of events.
On this page:
Event Class, Event Constructor
Classes
Event Class
Description
The state of an Event object is described by the following fields.
Available in: Processor.
Fields
| Field | Description | Value Type |
|---|---|---|
| .type | The type of event. See Event Types for details. | number |
| .id | The ID of the event. | number |
| .note | The note number in the range of 0 to 127. | number |
| .velocity | The note-on velocity in the range of 0 to 127. | number |
| .tuning | The tuning offset in semitones. | number |
| .controller | The controller number. See Controller Numbers for a description of the different controllers. | number |
| .value | The value of a controller, pitch bend, or note expression event. The value range depends on the event type. | number |
| .bend | The value of a pitch bend event in the range of -1.0 to 1.0. | number |
| .noteExpressionType | The type of note expression event. See Note Expression Types for details. | number |
| .data | An array with the bytes of a system exclusive message. For the interpretation of these values, please consult the documentation of the MIDI data format of the device sending the system exclusive message. (Since HALion 7.0) | table |
| .dataType | Currently, there is only one data type (0 = sysex). (Since HALion 7.0) | number |
| .ppqPosition | The position of the event in ppq relative to the project start. The host must be in playback, otherwise, this value will be 0.0. | number |
Fields per Event Type
Which of the fields are used depends on the Event Type.
| Field | noteOn | noteOff | controller | noteExpression | noteRetrigger | data |
|---|---|---|---|---|---|---|
| .type | ✅ | ✅ | ✅ | ✅ | ✅ | ✅ |
| .id | ✅ | ✅ | - | ✅ | ✅ | - |
| .note | ✅ | ✅ | - | - | ✅ | - |
| .velocity | ✅ | ✅ | - | - | ✅ | - |
| .tuning | ✅ | ✅ | - | - | ✅ | - |
| .controller | - | - | ✅ | - | - | - |
| .value | - | - | ✅ | ✅ | - | - |
| .bend | - | - | ✅ | - | - | - |
| .noteExpressionType | - | - | - | ✅ | - | - |
| .data | - | - | - | - | - | ✅ |
| .dataType | - | - | - | - | - | ✅ |
| .ppqPosition | ✅ | ✅ | ✅ | ✅ | ✅ | ✅ |
Example
-- Print the fields of an Event object.

function onNote(event)
    print(event)
    postEvent(event)
end

function onRelease(event)
    print(event)
    postEvent(event)
end

function onController(event)
    print(event)
    postEvent(event)
end

function onNoteExpression(event)
    print(event)
    -- postEvent(event), not needed for note expression.
end

function onRetrigger(event)
    print(event)
    postEvent(event)
end

function onData(event)
    print(event)
    postEvent(event)
end
Constructors
Event Constructor
Event(type)
Description
Constructor to create a new Event object of the specified type.
Available in: Processor.
Arguments
| Argument | Description | Value Type |
|---|---|---|
| type | The type of event. See Event Types for details. | enum or number |
Return Values
Returns a new Event object of the specified type.
❕ The fields of the Event object must be set after its creation.
Example
-- Create a new note-on event.

function onNote(event)
    local newEvent = Event(EventType.noteOn)
    newEvent.note = event.note + 12
    newEvent.velocity = event.velocity
    local id = postEvent(newEvent)
    waitForRelease()
    releaseVoice(id)
end
/ HALion Developer Resource / HALion Script / Class Reference /
LoadProgress
The properties of the LoadProgress class can be used to monitor the progress when loading elements of VST presets.
On this page:
Classes
LoadProgress Class
Description
The functions loadPresetAsync, appendLayerAsync and insertLayerAsync return a LoadProgress object. The properties of the LoadProgress object are described by the following fields.
Available in: Controller.
Fields
| Field | Description | Value Type |
|---|---|---|
| .progress | The load progress in the range from 0 to 1. | number |
| .root | The value of .root will be the Element object of the first element (root) of the loaded VST preset. Depending on whether you load a layer, program, or multi-program VST preset, this is either an Element object of the type Layer, Program,or Instance. | Layer, Program, or Instance |
| .cancel | Set this to true to cancel the loading of the preset. | boolean |
| .error | Message if an error occured. | string |
| .info | User definable field, for example, to manage several loading threads. | string or table |
Example
-- Start with an empty program, remove any existing layers.

layers = this.parent:findLayers()

if layers then
   for i, layer in ipairs(layers) do
       this.parent:removeLayer(layer)
   end
end

-- Table with layer presets from Skylab.
layerPresets = {
   { name = "Ambient Pad 01", path = "vstsound://724ACB205EFF46F885735D1B216C37AD/.AppData/Steinberg/Skylab/Sub Presets/Layer Presets/Ambient Pads/Ambient Pad 01.vstpreset" },
   { name = "Ambient Pad 02", path = "vstsound://724ACB205EFF46F885735D1B216C37AD/.AppData/Steinberg/Skylab/Sub Presets/Layer Presets/Ambient Pads/Ambient Pad 02.vstpreset" },
   { name = "Ambient Pad 03", path = "vstsound://724ACB205EFF46F885735D1B216C37AD/.AppData/Steinberg/Skylab/Sub Presets/Layer Presets/Ambient Pads/Ambient Pad 03.vstpreset" },
   { name = "Ambient Pad 04", path = "vstsound://724ACB205EFF46F885735D1B216C37AD/.AppData/Steinberg/Skylab/Sub Presets/Layer Presets/Ambient Pads/Ambient Pad 04.vstpreset" },
}
-- Create a table with the preset names.
function getPresetNames()
   presetNames = {}
   for i, preset in ipairs(layerPresets) do
       presetNames[i] = preset.name
   end
end

getPresetNames()

-- Remove the old layer after the new one was added.
function removeOldLayer(progressInfo)
   local newPreset = progressInfo.root
   if oldPreset then
       this.parent:removeLayer(oldPreset)
       print(oldPreset.name.." removed.")
   end
   oldPreset = newPreset
end

-- Append the preset in a separate thread.
function appendNewLayer(progressInfo)
   if progressInfo.root then
       this.parent:appendLayerAsync(progressInfo.root, removeOldLayer)
       print("Appending "..progressInfo.root.name.."...")
   end
end

-- Load the preset in a separate thread.
function onSelectPresetChanged()
   progress = 0
   progressInf = loadPresetAsync(layerPresets[SelectPreset].path, appendNewLayer)
   print("Loading "..layerPresets[SelectPreset].name.."...")
end

-- Define a parameter for selecting the preset to be loaded.
defineParameter("SelectPreset", "Select Preset", 1, presetNames, onSelectPresetChanged)

-- Monitor the load progress with onIdle.
progress = 1
function onIdle()
   if progress < 1 then
       progress = progressInf.progress
       print("Progress: "..(progressInf.progress * 100).."%")
   end
end
/ HALion Developer Resource / HALion Script / Class Reference /
ParameterDefinition
The ParameterDefinition class describes the properties of parameters.
On this page:
ParameterDefinition Class, getDisplayString
Classes
ParameterDefinition Class
Description
The ParameterDefinition object describes the properties of a parameter. It has the following fields.
Available in: Controller, Processor.
Fields
| Field | Description | Value Type |
|---|---|---|
| .name | Returns the name of the parameter. | string |
| .longName | Returns the long name of the parameter. | string |
| .id | Returns the ID of the parameter. | number |
| .type | Returns the data type of the parameter. | string |
| .default | Returns the default value of the parameter. | number |
| .min | Returns the minimum value of the parameter. | number |
| .max | Returns the maximum value of the parameter. | number |
| .readOnly | Returns true if the value of the parameter is read-only and false if it is not. | boolean |
| .writeAlways | Returns true if the value is always set and false if it is not. If this returns true, the parameter sends a changed message even if the actual value did not change when it was set. | boolean |
| .automatable | Returns true if the parameter can be automated and false if it cannot. | boolean |
| .persistent | Returns true if the parameter restores from the VST preset and false if it does not. | boolean |
| .unit | Returns the unit of the parameter value, for example, dB. | string |
-- Print the parameter definition with corresponding data type of the parent layer's level parameter.

function onLoadIntoSlot()

    local def = this.parent:getParameterDefinition("Level")

    print("Name = "..def.name..", "..type(def.name))
    print("Long Name = "..def.longName..", "..type(def.longName))
    print("ID = "..def.id..", "..type(def.id))
    print("Type = "..def.type..", "..type(def.type))
    print("Default = "..def.default..", "..type(def.default))
    print("Min = "..def.min..", "..type(def.min))
    print("Max = "..def.max..", "..type(def.max))
    print("Read Only = "..tostring(def.readOnly)..", "..type(def.readOnly))
    print("Write Always = "..tostring(def.writeAlways)..", "..type(def.writeAlways))
    print("Automatable = "..tostring(def.automatable)..", "..type(def.automatable))
    print("Persistent = "..tostring(def.persistent)..", "..type(def.persistent))
    print("Unit = "..def.unit..", "..type(def.unit).."\n")

end
Methods
getDisplayString
getDisplayString(value)
Description
The internal precision of parameter values is usually higher than the precision of the corresponding display string on the user interface. You can use this function to obtain the display string of the specified parameter and value. You specify the parameter with getParameterDefinition.
Available in: Controller, Processor.
Arguments
| Argument | Description | Value Type |
|---|---|---|
| value | The value for the display string. | number or string |
❕ The data type of the value for getDisplayString must match the data type of the corresponding parameter value.
Return Values
Returns the display string of the specified parameter and value.
Example
-- Get the display string of a value.

value = -2.471
print("value = "..value)
print("Display String = "..this.program:getParameterDefinition("Level"):getDisplayString(-2.471))
/ HALion Developer Resource, / HALion Script, /
Reference
The reference pages describe the functions and features of the HALion Script language.
A-E
addLayerPassword, addQCAssignment, afterTouch, AlternateData Table, analyzePitch, appendBus, appendEffect, appendLayer, appendLayerAsync, appendMidiModule, appendZone, assignAutomation, AudioFile.open, beat2ms, Bus Constructor, Bypass Masks, calcModulation, cancelDecompose, cancelPitchAnalysis, changeNoteExpression, changePan, changeTune, changeVolume, changeVolumedB, clone, controlChange, Controller Numbers, decompose Decompose Output Modes, defineModulation, defineParameter, defineSlotLocal, Effect Constructor, endUndoBlock, Event Constructor, Event Types,
F-J
fade, findBusses, findChildren, findEffects, findLayers, findMidiModules, findSlots, findZones, forgetAutomation, getAllocatedMemory, getAutomationIndex, getBarDuration, getBeatDuration, getBeatTime, getBeatTimeInBar, getBus, getCC, getChild, getContext, getDecomposeOutputPath, getDecomposeProgress, getDecomposeSettings, getDisplayString, getEffect, getElement, getFreeVoices, getHostName, getHostVersion, getKeyProperties, getKeySwitches, getLayer, getMidiModule, getModulationMatrixRow, getMsTime, getNoteDuration, getNoteExpression, getNoteExpressionProperties, getNumQCAssignments, getOnsets, getOutputBus, getParameter, getParameterDefinition, getParameterNormalized, getPeak, getPitch, getPitchAnalysisProgress, getProcessedSamples, getProductName, getProductVersion, getProgram, getQCAssignmentBypass, getQCAssignmentCurve, getQCAssignmentMax, getQCAssignmentMin, getQCAssignmentMode, getQCAssignmentParamId, getQCAssignmentScope, getSamplingRate, getScriptExecTimeOut, getScriptVersion, getSlot, getSlotIndex, getSource1, getSource2, getTempo, getTime, getTimeSignature, getUndoContext, getUsedMemory, getUsedVoices, getUsedVoicesOfSlot, getUserPresetPath, getUserSubPresetPath, getVoices, getZone, hasParameter, insertBus, insertEffect, insertEnvelopePoint, insertEvent, insertLayer, insertLayerAsync, insertMidiModule, insertZone, isKeyDown, isNoteHeld, isOctaveKeyDown, isPlaying,
K-O
Layer Constructor, loadPreset, loadPresetAsync, messageBox, MIDI File Format Types, MidiModule Constructor, MIDI Sequence Table, Modulation Destination Types, Modulation Source Types, ms2beat, ms2samples, Note Expression Types, onAfterTouch, onController, onData, onIdle, onInit, onLoad, onLoadIntoSlot, onLoadSubPreset, onNote, onNoteExpression, onPitchBend, onRelease, onRemoveFromSlot, onRetrigger, onSave, onSaveSubPreset, onTriggerPad, onUnhandledEvent, openURL,
P-T
pitchBend, playNote, playTriggerPad, postEvent, printRaw, Program Constructor, Quick Control Assignment Modes, readMidiFile, releaseVoice, removeBus, removeEffect, removeEnvelopePoint, removeFromParent, removeLayer, removeMidiModule, removeQCAssignment, removeZone, runAsync, runSync, samples2ms, savePreset, setBypassNoteOff, setName, setOutputBus, setParameter, setParameterNormalized, setProgram, setQCAssignmentBypass, setQCAssignmentCurve, setQCAssignmentMax, setQCAssignmentMin, setQCAssignmentMode, setQCAssignmentParamId, setQCAssignmentScope, setScriptExecTimeOut, setSource1, setSource2, setZoneFMXAlgo, sortEvents, spawn, startUndoBlock, startWriteOutputToFile, stopWriteOutputToFile,
U-Z
Undo Context Types, VoiceGroupsData Table, Voice Group Steal Modes, wait, waitBeat, waitForRelease, writeMidiFile, Zone Constructor,
/ HALion Developer Resource / HALion Script / Reference /
addLayerPassword
addLayerPassword(pwd)
Description
Function that gives access to protected layers. By default, protected layers cannot be accessed by scripts. The parameters of a protected layer and any elements inside of it are hidden for scripts. This prevents someone unauthorized from parsing the Program Tree to retrieve hidden information. By calling this function with the correct password, the calling script can access the corresponding protected layers again.
❕ To hide the password in addLayerPassword, you must also protect the script module. See Managing Script Modules for details.
Available in: Controller.
Arguments
| Argument | Description | Value Type |
|---|---|---|
| pwd | The password of the protected layer(s). | string |
Example
-- Access the protected layer(s) which have the password "abc123".

addLayerPassword("abc123")
See also: Protecting Layers
/ HALion Developer Resource / HALion Script / Reference /
addQCAssignment
Description
Function to add a quick control assignment to the specified layer and quick control. For example, this.parent defines the parent layer of the script module as the layer that contains the quick control that you want to edit. The quick control assignment will be added to the quick control with the index stated by the qc argument. The arguments element and nameOrID specify the parameter to be connected. The scope determines the part of the program that will be affected by the quick control assignment. You specify the scope by setting the scope argument to the Element object that corresponds to the desired part of the program.
❕ The index of the quick controls starts counting from 1. QC 1 to QC 8 have index 1 to 8. Sphere H, Sphere V and Mod Wheel have index 9, 10 and 11.
Available in: Controller.
Arguments
| Argument | Description | Value Type |
|---|---|---|
| qc | The index of the quick control to which the assignment will be added. | number |
| element | The Element object of the parameter to be connected. | Element |
| nameOrID | The name or ID of the parameter. | string or number |
| scope | The Element object that will be affected by the quick control assignment. | Element |
Example
-- Assign the octave parameter of the zone to the
-- first quick control of the script module's parent layer.

layer = this.parent
zones = layer:findZones(true)

layer:addQCAssignment(1, zones[1], "Pitch.Octave", layer)
See also: removeQCAssignment, getNumQCAssignments, getQCAssignmentParamId, getQCAssignmentScope, getQCAssignmentMin, getQCAssignmentMax, getQCAssignmentCurve, getQCAssignmentMode, getQCAssignmentBypass, setQCAssignmentParamId, setQCAssignmentScope, setQCAssignmentMin, setQCAssignmentMax, setQCAssignmentCurve, setQCAssignmentMode, setQCAssignmentBypass, Quick Control Assignment Modes
/ HALion Developer Resource / HALion Script / Reference /
afterTouch
afterTouch(value)
Description
Function to generate channel aftertouch events.
Available in: Processor.
Arguments
| Argument | Description | Value Type |
|---|---|---|
| value | The aftertouch value in the range of 0 to 127. | number |
Example
-- Invert aftertouch values.
function onAfterTouch(event)
    local invAT =  127 - event.value
    afterTouch(invAT)
    print("Inverse AT:", invAT)
end
See also: onAfterTouch, controlChange, pitchBend
/ HALion Developer Resource / HALion Script / Reference /
AlternateData Table
(Since HALion 6.4.10)
Description
The alternations in the Alternation List of the Layer Alternate MIDI module are managed via a predefined table: the AlternateData table. This table can be obtained by making a call to getParameter with "AlternateData" as parameter. The alternations are referenced by their index. Each alternation has the fields .keyswitch and .layer. You can change the values, but the structure of this table must remain unaltered. The values are set by making a call to setParameter. See the example below for more details.
Available in: Controller.
Fields
| Field | Description | Value Type |
|---|---|---|
| .keyswitch | Key switches allow you to switch to a particular layer. You set the key switch with the corresponding MIDI note number . Set this to -1 to deactivate the keyswitch. | number |
| .layer | The layer for the alternation is defined by the corresponding Layer object. | Layer |
Example
-- Add a Layer Alternate MIDI module.
this.parent:appendMidiModule(MidiModule("Layer Alternate"))
layerAlternate = this.parent:getMidiModule("")
layerAlternate:setName("Layer Alternate")
altdata = layerAlternate:getParameter("AlternateData")
-- Create three layers with a synth zone and add them to the alternation list.
for i = 1, 3 do
    this.parent:appendLayer(Layer())
    local alternateLayer = this.parent:getLayer(i)
    alternateLayer:setName("Alt "..i)
    alternateLayer:appendZone(Zone())
    local zone = alternateLayer:getZone()
    zone:setName("Zone "..i)
    altdata[#altdata+1] = { keyswitch = -1, layer = alternateLayer }
end
layerAlternate:setParameter("AlternateData", altdata)
/ HALion Developer Resource / HALion Script / Reference /
analyzePitch
analyzePitch(callback, channel)
(Since HALion 6.3)
Description
Function to analyze the pitch of an audio file. You specify the audio file with the AudioFile object that is returned by the AudioFile.open function. The arguments callback and channel are optional. If called without a callback function, analyzePitch will be executed in the same thread. If called with a callback function as argument, analyzePitch will be executed in a separate, parallel thread. You can specify the channel to be analyzed with the channel argument. Without the channel argument, multiple channels of an audio file will be summed before the pitch is analyzed. The callback function is called with the AudioFile object as the first and the channel as the second argument after the pitch has been analyzed. The results of analyzePitch are cashed for as long as the corresponding AudioFile object exists. The function itself does not return any pitch information. You must use getPitch to obtain the analyzed pitch.
Available in: Controller.
Arguments
| Argument | Description | Value Type |
|---|---|---|
| callback | Callback function that is called with the AudioFile object as argument after the pitch has been analyzed. | function, optional |
| channel | Use this to specify the channel of the audio file to be analyzed. Leave this empty or set this to 0 for summing all audio channels before they are analyzed. | number, optional |
Example
channelNames = { [0] = "All", "Left", "Right" }

defineParameter( "Channel", nil, 0, channelNames)
defineParameter( "Start", nil, false, function() if Start then onStart() end end)
defineParameter( "Cancel", nil, false)

-- Requires the Skylab content.
path = "vstsound://724ACB205EFF46F885735D1B216C37AD/.AppData/Steinberg/Skylab/Sub Presets/Layer Presets/Ambient Pads/Ambient Pad 01.vstpreset"
layer = loadPreset(path)

function onPitchAnalysisFinished(audioFile, channelNum)
    print("Progress: 100%")
    print(channelNames[channelNum].." channel(s) of "..audioFile.fileName.." analyzed.")
end

function onStart()
    zones = layer:findZones(true)
    for i, zone in ipairs(zones) do
        local samplePath = zone:getParameter("SampleOsc.Filename")
        print("File: "..samplePath)
        local afile = AudioFile.open(samplePath)
        afile:analyzePitch(onPitchAnalysisFinished, Channel)
        while afile:getPitchAnalysisProgress(Channel) < 1 do
            if Cancel then
                afile:cancelPitchAnalysis(Channel)
                break
            end
            local progressPercent = 100 * afile:getPitchAnalysisProgress(Channel)
            print(string.format("Progress: %2d%%", progressPercent))
            wait(2000)
        end
        if Cancel then
            Cancel = false
            print("Canceled!")
            break
        end
        local pitch = afile:getPitch(0, -1, Channel)
        print("Analyzed Pitch: "..pitch)
    end
    print("Done!")
    Start = false
end
See also: getPitch, getPitchAnalysisProgress, cancelPitchAnalysis
/ HALion Developer Resource / HALion Script / Reference /
appendBus
appendBus(bus)
Description
Function to add a bus in the specified destination layer. The destination layer is determined by its Layer object. For example, this.parent specifies the parent layer of the script module as destination layer. The bus to be added is determined by its Bus object. You can use getBus or findBusses to determine the bus. The new bus will be added behind the existing busses. To insert a bus at a specific position in the destination layer, use insertBus instead.
❕ An Element object can only have one parent. It cannot be child of multiple parents. Therefore, an Element object that you retrieved from the running plug-in instance must be removed before it can be inserted again. The Element objects that you retrieve through loadPreset or loadPresetAsync can be inserted freely, because these functions create a copy of the Element objects when reading them.
Available in: Controller.
Arguments
Example
To explore the following script:
- Download Program.vstpreset.
- Drag the preset on the MediaBay to import it to the user folder for VST presets.
- Create an empty program and add a script module.
- Paste the script into the text editor of the script module and execute the script.
-- Append the bus from Program.vstpreset into the current program.

-- Get the file path for user VST presets.
path = getUserPresetPath()

-- Load the VST preset.
loadedProgram = loadPreset(path.."/Program/Program.vstpreset")

-- Get the first bus from the loaded program.
bus = loadedProgram:getBus()

-- Append the bus.
if bus then
    this.program:appendBus(bus)
end
See also: appendEffect, appendLayer, appendLayerAsync, appendMidiModule, appendZone, Bus
/ HALion Developer Resource / HALion Script / Reference /
appendEffect
appendEffect(effect)
Description
Function to add an effect to the specified destination bus. The destination bus is determined by its Bus object. You can use getBus or findBusses to determine the destination bus. The effect to be added is determined by its Effect object. You can use getEffect or findEffects to determine the effect. The new effect will be added behind the existing effects. To insert an effect at a specific position in the bus, use insertEffect instead.
❕ An Element object can only have one parent. It cannot be child of multiple parents. Therefore, an Element object that you retrieved from the running plug-in instance must be removed before it can be inserted again. The Element objects that you retrieve through loadPreset or loadPresetAsync can be inserted freely, because these functions create a copy of the Element objects when reading them.
Available in: Controller.
Arguments
| Argument | Description | Value Type |
|---|---|---|
| effect | The Effect object of the insert effect that you want to append. | Effect |
Example
To explore the following script:
- Download Program.vstpreset.
- Drag the preset on the MediaBay to import it to the user folder for VST presets.
- Create an empty program and add a script module.
- Paste the script into the text editor of the script module and execute the script.
-- Insert an effect from Program.vstpreset into the current program.

-- Get the file path for user VST presets.
path = getUserPresetPath()

-- Load the VST preset.
loadedProgram = loadPreset(path.."/Program/Program.vstpreset")

-- Get the first effect from the loaded program.
effect = loadedProgram:getBus():getEffect()

-- Get the first bus of this program.
bus = this.program:getBus()

-- Append the effect.
if (insert and bus) then
    bus:appendEffect(effect)
end
See also: appendEffect, appendLayer, appendLayerAsync, appendMidiModule, appendZone, Bus
/ HALion Developer Resource / HALion Script / Reference /
appendLayer
appendLayer(layer)
Description
Function to add a layer in the specified destination layer. The layer to be added and the destination layer are both determined by their Layer objects. You can use getLayer or findLayers to determine the layer to be added. For example, this.parent defines the parent layer of the script module as destination layer. The new layer will be added behind the existing layers. To insert a layer at a specific position in the destination layer, use insertLayer or insertLayerAsync instead.
❕ An Element object can only have one parent. It cannot be child of multiple parents. Therefore, an Element object that you retrieved from the running plug-in instance must be removed before it can be inserted again. The Element objects that you retrieve through loadPreset or loadPresetAsync can be inserted freely, because these functions create a copy of the Element objects when reading them.
Available in: Controller.
Arguments
| Argument | Description | Value Type |
|---|---|---|
| layer | The Layer object of the layer that you want to append. | Layer |
Example
To explore the following script:
- Download Program.vstpreset.
- Drag the preset on the MediaBay to import it to the user folder for VST presets.
- Create an empty program and add a script module.
- Paste the script into the text editor of the script module and execute the script.
-- Append the layer from Program.vstpreset into the current program.

-- Get the file path for user VST presets.
path = getUserPresetPath()

-- Load the VST preset.
loadedProgram = loadPreset(path.."/Program/Program.vstpreset")

-- Get the first layer from the loaded program.
layer = loadedProgram:getLayer ()

-- Append the layer.
if layer then
    this.program:appendLayer(layer)
end
See also: appendBus, appendEffect, appendLayerAsync, appendMidiModule, appendZone, Layer
/ HALion Developer Resource / HALion Script / Reference /
appendLayerAsync
appendLayerAsync(layer, callback)
Description
Function to add a layer in the specified destination layer using a separate, parallel thread. Appending a layer in a separate thread can be necessary if the layer is too big to be added in a short time. The layer to be inserted and the destination layer are both determined by their Layer objects. You can use getLayer or findLayers to determine the layer to be inserted. For example, this.parent determines the parent layer of the script module as destination layer. The new layer will be added behind the existing layers. To insert a layer at a specific position in the destination layer, use insertLayer or insertLayerAsync instead. The function returns a LoadProgress object that can be used to monitor the load progress. After the layer is added, the callback function is called. The callback function gets the LoadProgress object as default argument.
❕ An Element object can only have one parent. It cannot be child of multiple parents. Therefore, an Element object that you retrieved from the running plug-in instance must be removed before it can be inserted again. The Element objects that you retrieve through loadPreset or loadPresetAsync can be inserted freely, because these functions create a copy of the Element objects when reading them.
Available in: Controller.
Arguments
| Argument | Description | Value Type |
|---|---|---|
| layer | The Layer object of the layer that you want to append. | Layer |
| callback | Callback function that is called when the layer is added. The callback function gets the LoadProgress object as argument. | function, optional |
Return Values
Returns a LoadProgress object.
Example
-- Start with an empty program, remove any existing layers.

layers = this.parent:findLayers()

if layers then
   for i, layer in ipairs(layers) do
       this.parent:removeLayer(layer)
   end
end

-- Table with layer presets from Skylab.
layerPresets = {
   { name = "Ambient Pad 01", path = "vstsound://724ACB205EFF46F885735D1B216C37AD/.AppData/Steinberg/Skylab/Sub Presets/Layer Presets/Ambient Pads/Ambient Pad 01.vstpreset" },
   { name = "Ambient Pad 02", path = "vstsound://724ACB205EFF46F885735D1B216C37AD/.AppData/Steinberg/Skylab/Sub Presets/Layer Presets/Ambient Pads/Ambient Pad 02.vstpreset" },
   { name = "Ambient Pad 03", path = "vstsound://724ACB205EFF46F885735D1B216C37AD/.AppData/Steinberg/Skylab/Sub Presets/Layer Presets/Ambient Pads/Ambient Pad 03.vstpreset" },
   { name = "Ambient Pad 04", path = "vstsound://724ACB205EFF46F885735D1B216C37AD/.AppData/Steinberg/Skylab/Sub Presets/Layer Presets/Ambient Pads/Ambient Pad 04.vstpreset" },
}
-- Create a table with the preset names.
function getPresetNames()
   presetNames = {}
   for i, preset in ipairs(layerPresets) do
       presetNames[i] = preset.name
   end
end

getPresetNames()

-- Remove the old layer after the new one was added.
function removeOldLayer(progressInfo)
   local newPreset = progressInfo.root
   if oldPreset then
       this.parent:removeLayer(oldPreset)
       print(oldPreset.name.." removed.")
   end
   oldPreset = newPreset
end

-- Append the preset in a separate thread.
function appendNewLayer(progressInfo)
   if progressInfo.root then
       this.parent:appendLayerAsync(progressInfo.root, removeOldLayer)
       print("Appending "..progressInfo.root.name.."...")
   end
end

-- Load the preset in a separate thread.
function onSelectPresetChanged()
   progress = 0
   progressInf = loadPresetAsync(layerPresets[SelectPreset].path, appendNewLayer)
   print("Loading "..layerPresets[SelectPreset].name.."...")
end

-- Define a parameter for selecting the preset to be loaded.
defineParameter("SelectPreset", "Select Preset", 1, presetNames, onSelectPresetChanged)

-- Monitor the load progress with onIdle.
progress = 1
function onIdle()
   if progress < 1 then
       progress = progressInf.progress
       print("Progress: "..(progressInf.progress * 100).."%")
   end
end
See also: appendBus, appendEffect, appendLayer, appendMidiModule, appendZone, LoadProgress
/ HALion Developer Resource / HALion Script / Reference /
appendMidiModule
appendMidiModule(module)
Description
Function to add a MIDI module in the specified destination layer. The destination layer is determined by its Layer object. For example, this.parent specifies the parent layer of the script module as destination layer. The MIDI module to be added is determined by its MidiModule object. You can use getMidiModule or findMidiModules to determine the desired MIDI module. The new MIDI module will be added behind the existing MIDI modules. To insert a MIDI module at a specific position in the destination layer, use insertMidiModule instead.
❕ An Element object can only have one parent. It cannot be child of multiple parents. Therefore, an Element object that you retrieved from the running plug-in instance must be removed before it can be inserted again. The Element objects that you retrieve through loadPreset or loadPresetAsync can be inserted freely, because these functions create a copy of the Element objects when reading them.
Available in: Controller.
Arguments
| Argument | Description | Value Type |
|---|---|---|
| module | The MidiModule object of the MIDI module that you want to append. | MidiModule |
Example
To explore the following script:
- Download Program.vstpreset.
- Drag the preset on the MediaBay to import it to the user folder for VST presets.
- Create an empty program and add a script module.
- Paste the script into the text editor of the script module and execute the script.
-- Append a MIDI module from Program.vstpreset into the current program.

-- Get the file path for user VST presets.
path = getUserPresetPath()

-- Load the VST preset.
loadedProgram = loadPreset(path.."/Program/Program.vstpreset")

-- Get the first MIDI module from the loaded program.
module = loadedProgram:getMidiModule()

-- Append the MIDI module.
if module then
    this.program:appendMidiModule(module)
end
See also: appendBus, appendEffect, appendLayer, appendLayerAsync, appendZone, MidiModule
/ HALion Developer Resource / HALion Script / Reference /
appendZone
appendZone(zone)
Description
Function to add a zone in the specified destination layer. The destination layer is determined by its Layer object. For example, this.parent specifies the parent layer of the script module as destination layer. The zone to be added is determined by its Zone object. You can use getZone or findZones to determine the zone. The new zone will be added behind the existing zones. To insert a zone at a specific position in the destination layer, use insertZone instead.
❕ An Element object can only have one parent. It cannot be child of multiple parents. Therefore, an Element object that you retrieved from the running plug-in instance must be removed before it can be inserted again. The Element objects that you retrieve through loadPreset or loadPresetAsync can be inserted freely, because these functions create a copy of the Element objects when reading them.
Available in: Controller, Processor.
Arguments
Example
To explore the following script:
- Download Program.vstpreset.
- Drag the preset on the MediaBay to import it to the user folder for VST presets.
- Create an empty program and add a script module.
- Paste the script into the text editor of the script module and execute the script.
-- Append a zone from Program.vstpreset into the current program.

-- Get the file path for user VST presets.
path = getUserPresetPath()

-- Load the VST preset.
loadedProgram = loadPreset(path.."/Program/Program.vstpreset")

-- Get the first zone from the loaded program.
zone = loadedProgram:getZone()

-- Append the zone.
if zone then
    this.program:appendZone(zone)
end
See also: appendBus, appendEffect, appendLayer, appendLayerAsync, appendMidiModule, Zone
/ HALion Developer Resource / HALion Script / Reference /
assignAutomation
assignAutomation(element, nameOrID, index, scope)
Description
Function to assign a parameter to an automation parameter. The arguments element and nameOrID specify the parameter to be assigned. The index argument determines to which automation parameter the parameter will be assigned. If the index argument is nil or not set, the parameter will be assigned to the next free automation parameter. The scope determines the part of the program that will be affected by the automation parameter. You specify the scope by setting the scope argument to the Element object that corresponds to the desired part of the program. The function returns the index to which the automation parameter was assigned to. This is useful if the automation parameter was assigned to the next free automation parameter.
Available in: Controller.
Arguments
| Argument | Description | Value Type |
|---|---|---|
| element | The Element object of the parameter to be assigned. | Element |
| nameOrID | The name or ID of the parameter. | string or number |
| index | The index of the automation parameter, or nil. | number or nil, optional |
| scope | The Element object that will be affected by the automation parameter. (Since HALion 6.1) | Element |
Return Values
Returns the index to which the automation parameter was assigned to.
Example
-- Assign filter cutoff, resonance and envelope amount to the next free automation.
zones = this.program:findZones(true)
parameters = { "Filter.Cutoff", "Filter.Resonance", "Filter.EnvAmount" }
for i, parameter in ipairs(parameters) do
    local automationIndex
    automationIndex = assignAutomation(zones[1], parameter, automationIndex, this.program)
end
See also: forgetAutomation, getAutomationIndex
/ HALion Developer Resource / HALion Script / Reference /
AudioFile.open
AudioFile.open(filename)
Description
The AudioFile.open function creates an AudioFile object of the specified audio file. The AudioFile object can be used to retrieve information from the audio file, for example, the sample rate, bit depth, length in samples, etc. The location of the audio file can be a folder or a VST Sound archive.
Available in: Controller.
Arguments
| Argument | Description | Value Type |
|---|---|---|
| filename | The file path and name of the audio file. | string |
Return Values
Returns an AudioFile object of the specified audio file.
Example
-- Open an audio file from Skylab.
fname = "vstsound://F29C895D6D8E4D6C9BCBBA5198412192/.samples/Ambient Pad 01/Ambient Pad 01 - C3.tg3c"
af = AudioFile.open(fname)
-- Print the sample rate and bit depth.
print("Sample Rate: "..af.rate)
print("Bit Depth: "..af.bits)
/ HALion Developer Resource / HALion Script / Reference /
beat2ms
beat2ms(beats)
Description
Function to convert a number of beats to the equivalent duration in milliseconds. One beat equals a quarter note. The current tempo is taken into account.
Available in: Processor.
Arguments
| Argument | Description | Value Type |
|---|---|---|
| beats | The desired duration in number of beats and fractions of it. | number |
Return Values
Returns the specified number of beats (quarter notes) as duration in milliseconds.
Example
-- Print the position in the current bar in milliseconds when triggering a note.

function onNote(event)
    posInBar = getBeatTimeInBar()
    if (posInBar ~= -1) then
        posInBarMs = beat2ms(posInBar)
        print(string.format("%.3f ms", posInBarMs))
    else
        print("Playback is stopped.")
    end
end
See also: ms2beat, ms2samples, samples2ms
/ HALion Developer Resource / HALion Script / Reference /
Bus Constructor
Bus()
(Since HALion 6.4.0)
Description
Constructor to create a new Bus object.
Available in: Controller.
Return Values
Returns a new Bus object.
Example
-- The following function creates different types of objects in the Program Tree.
-- The objects in the Program Tree do not have a name. You will see only their icons.

function createProgram()
  local inst = this.program.instance
  local prg = Program()
  local bus = Bus()
  prg:appendBus(bus)
  inst:setProgram(prg, 1)
  local layer = Layer()
  prg:appendLayer(layer)
  layer:appendZone(Zone())
  local mm = MidiModule('MIDI Player')
  layer:appendMidiModule(mm)
  local fx = Effect('Distortion')
  bus:appendEffect(fx)
end

createProgram()
See also: Program Constructor, Layer Constructor, Zone Constructor, MidiModule Constructor, Effect Constructor
/ HALion Developer Resource / HALion Script / Reference /
Bypass Masks
(Since HALion 6.4.0)
Description
Enumerator to determine the values that determine if a bus or effect follows the global inserts and Aux bypass buttons of the plug-in. The values must be applied to the bypassMask field of the desired Bus or Effect object. See the example below for details.
Available in: Controller.
Bypass Masks
The values are determined with these names:
| Value | Name |
|---|---|
| 0 | BypassMask.noBypass |
| 2 | BypassMask.bypassInserts |
| 4 | BypassMask.bypassAux |
Example
bus = this.parent:getBus()

bypassSettings = {
    {name = "No Bypass",            value = BypassMask.noBypass },
    {name = "Follow Inserts",       value = BypassMask.bypassInserts },
    {name = "Follow Aux",           value = BypassMask.bypassAux },
    {name = "Follow Inserts & Aux", value = BypassMask.bypassInserts + BypassMask.bypassAux },
}

bypassSettingsNames = {}

for i = 1, #bypassSettings do
    bypassSettingsNames[i] = bypassSettings[i].name
end

function onBypassSettingChanged()
    bus.bypassMask = bypassSettings[GlobalBypass].value
    print(bus.name, bus.bypassMask)
end

defineParameter("GlobalBypass", nil, 1, bypassSettingsNames, onBypassSettingChanged)
/ HALion Developer Resource / HALion Script / Reference /
calcModulation
calcModulation()
Description
Function to generate the modulation signals that have been defined with defineModulation. The function is executed every 32 samples.
Available in: Processor.
Return Values
Returns one or more modulation signals. Multiple modulation signals can be returned as a tuple or as a table. If the modulation is defined as unipolar, the signal must be in the range from 0.0 to 1.0. If the modulation is defined as bipolar, the signal must be in the range from -1.0 to 1.0.
Examples
-- Modulation signals returned as tuple.

freq = 1
phase = 0
pi = math.pi

defineModulation('Ramp Up', false)
defineModulation('Sine', true)
defineModulation('Ramp Down', false)

function calcModulation()
    rate = getSamplingRate() / 32
    phase = phase + freq / rate
    if phase >= 1 then
        phase = phase - 1
    end
    return phase, math.sin(2 * pi * phase), 1 - phase
end
-- Modulation signals returned as table.

freq = 1
phase = 0
pi = math.pi
local mod = {}

defineModulation('Ramp Up', false)
defineModulation('Sine', true)
defineModulation('Ramp Down', false)

function calcModulation()
    rate = getSamplingRate() / 32
    phase = phase + freq / rate
    if phase >= 1 then
        phase = phase - 1
    end
    mod[1] = phase
    mod[2] = math.sin(2 * pi * phase)
    mod[3] = 1 - phase
    return mod
end
See also: defineModulation
/ HALion Developer Resource / HALion Script / Reference /
cancelDecompose
cancelDecompose()
(Since HALion 7.0)
Description
Function to cancel the decompose function for an audio file. You specify the audio file with the AudioFile object that is returned by the AudioFile.open function. To cancel the decompose of a specific audio file, the AudioFile object of the cancelDecompose function must match the AudioFile object of the corresponding decompose function.
Available in: Controller.
Example
outputModes = { "Tonal", "Noise", "All", "Mix", }

defineParameter { name = "Decompose", default = false, onChanged = function() if Decompose then onDecompose() end end }
defineParameter { name = "Cancel", default = false}
defineParameter { name = "Sensitivity", default = -24, min = -96, max = 0, increment = 0.1 }
defineParameter { name = "Cutoff", default = 20000, min = 20, max = 20000, increment = 1 }
defineParameter { name = "Duration", default = 80, min = 0, max = 100, increment = 0.1 }
defineParameter { name = "TonalLevel", default = 0, min = -96, max = 12, increment = 0.1 }
defineParameter { name = "NoiseLevel", default = 0, min = -96, max = 12, increment = 0.1 }
defineParameter { name = "Start", default = 0, min = 0, max = 1000, increment = 1 }
defineParameter { name = "Length", default = 0, min = 0, max = 1000, increment = 1 }
defineParameter { name = "OutputMode", default = DecomposeOutputMode.all, strings = outputModes }
defineParameter { name = "OutputPath", default = "" }
defineParameter { name = "Subfolder", default = "" }

function onDecomposeFinished(audioFile, file1, file2)
    print("Progress: 100%")
    print(audioFile.fileName, audioFile.length)
    if file1 then
        local afile1 = AudioFile.open(file1)
        print(afile1.fileName, afile1.length)
    end
    if file2 then
        local afile2 = AudioFile.open(file2)
        print(afile2.fileName, afile2.length)
    end
end

function onDecompose()
    zones = this.parent:findZones(true)
    for i, zone in ipairs(zones) do
        local samplePath = zone:getParameter("SampleOsc.Filename")
        local afile = AudioFile.open(samplePath)
        local startSamples = Start * afile.rate/1000
        local lengthSamples = Length * afile.rate/1000
        if not Subfolder == "" then
            if OutputPath == "" then
                OutputPath = getDecomposeOutputPath(samplePath)..Subfolder
            else
                OutputPath = OutputPath..Subfolder
            end
        end
        print("Decompose: "..samplePath)
        afile:decompose{
            callback = onDecomposeFinished,
            start = startSamples,
            length = lengthSamples,
            sensitivity = Sensitivity,
            cutoff = Cutoff,
            duration = Duration,
            tonalLevel = TonalLevel,
            noiseLevel = NoiseLevel,
            outputMode = OutputMode,
            outputPath = OutputPath,
        }
        while afile:getDecomposeProgress() < 1 do
            if Cancel then
                afile:cancelDecompose()
                break
            end
            local progress, errorMessage = afile:getDecomposeProgress()
            if errorMessage then
                print(errorMessage)
                break
            end
            local progressPercent = 100 * progress
            print(string.format("Progress: %2d%%", progressPercent))
            wait(2000)
        end
        if Cancel then
            Cancel = false
            print("Decompose Canceled!")
            break
        end
    end
    print("Decompose finished.")
    Decompose = false
end
See also: decompose, getDecomposeProgress, Decompose Output Modes, getDecomposeSettings, getDecomposeOutputPath
/ HALion Developer Resource / HALion Script / Reference /
cancelPitchAnalysis
cancelPitchAnalysis(channel)
(Since HALion 6.3)
Description
Function to cancel a pitch analysis you started with analyzePitch. You specify the audio file with the AudioFile object that is returned by the AudioFile.open function. The channel argument specifies the channel of the audio file. The AudioFile object and the channel argument must match the call to analyzePitch.
Available in: Controller.
Arguments
| Argument | Description | Value Type |
|---|---|---|
| channel | Use this to specify the channel of the audio file that is being analyzed. | number, optional |
Example
channelNames = { [0] = "All", "Left", "Right" }

defineParameter( "Channel", nil, 0, channelNames)
defineParameter( "Start", nil, false, function() if Start then onStart() end end)
defineParameter( "Cancel", nil, false)

-- Requires the Skylab content.
path = "vstsound://724ACB205EFF46F885735D1B216C37AD/.AppData/Steinberg/Skylab/Sub Presets/Layer Presets/Ambient Pads/Ambient Pad 01.vstpreset"
layer = loadPreset(path)

function onPitchAnalysisFinished(audioFile, channelNum)
    print("Progress: 100%")
    print(channelNames[channelNum].." channel(s) of "..audioFile.fileName.." analyzed.")
end

function onStart()
    zones = layer:findZones(true)
    for i, zone in ipairs(zones) do
        local samplePath = zone:getParameter("SampleOsc.Filename")
        print("File: "..samplePath)
        local afile = AudioFile.open(samplePath)
        afile:analyzePitch(onPitchAnalysisFinished, Channel)
        while afile:getPitchAnalysisProgress(Channel) < 1 do
            if Cancel then
                afile:cancelPitchAnalysis(Channel)
                break
            end
            local progressPercent = 100 * afile:getPitchAnalysisProgress(Channel)
            print(string.format("Progress: %2d%%", progressPercent))
            wait(2000)
        end
        if Cancel then
            Cancel = false
            print("Canceled!")
            break
        end
        local pitch = afile:getPitch(0, -1, Channel)
        print("Analyzed Pitch: "..pitch)
    end
    print("Done!")
    Start = false
end
See also: analyzePitch, getPitch, getPitchAnalysisProgress
/ HALion Developer Resource / HALion Script / Reference /
changeNoteExpression
changeNoteExpression(noteID, type, value, relative, immediateOrDuration)
Description
Function to change the note expression of a specific note.
Available in: Processor.
Arguments
| Argument | Description | Value Type |
|---|---|---|
| noteID | The ID of the note you want to change. | number |
| type | The note expression type. It can be determined via names or indices. See Note Expression Types for details. | enum or number |
| value | The absolute note expression value in the range of 0.0 to 1.0 (relative = false) or the value that is added (relative = true). | number |
| relative | The value is added to the current amount if this is set to true. The default setting is false. | boolean, optional |
| immediateOrDuration | Change the value immediately or in the specified duration. Set this to true to change the value immediately without controller smoothing. Set a duration in milliseconds to change the value with controller smoothing in the specified time. If not set, this setting defaults to false and the controller smoothing setting in the Options editor is used. | boolean or number, optional |
Example
-- Transform continuous controllers into note expression.

local ids = {}

function onNote(event)
  local id = postEvent(event)
  changeNoteExpression(id, 1, getCC(7)/127, false, true)
  changeNoteExpression(id, 2, getCC(10)/127, false, true)
  changeNoteExpression(id, 3, (getCC(129)/8191) * 0.5 + 0.5, false, true)
  table.insert(ids, id)
  waitForRelease()
  table.remove(ids)
end

function onController(event)

  if event.controller == 7 then -- volume controller
    for i,v in ipairs(ids) do
        changeNoteExpression(v, NoteExpressionType.volume, event.value/127)
    end
  end

  if event.controller == 10 then -- pan controller
    for i,v in ipairs(ids) do
        changeNoteExpression(v, NoteExpressionType.pan, event.value/127)
    end
  end

  if event.controller == 129 then -- pitch bend
    for i,v in ipairs(ids) do
        changeNoteExpression(v, NoteExpressionType.tuning, (event.value/8191) * 0.5 + 0.5)
    end
  end

end
See also: onNoteExpression, getNoteExpression, changeVolume, changeVolumedB, changePan, changeTune, Note Expression Types
/ HALion Developer Resource / HALion Script / Reference /
changePan
changePan(noteID, pan, relative, immediateOrDuration)
Description
Function to change the position of a specific note in the panorama.
Available in: Processor.
Arguments
| Argument | Description | Value Type |
|---|---|---|
| noteID | The ID of the note that you want to change. | number |
| pan | The absolute pan position in the range of -1.0 to 1.0 (relative = false) or the value which is added (relative = true). | number |
| relative | The value is added to the current amount if this is set to ''true''. The default is ''false''. | boolean, optional |
| immediateOrDuration | Change the value immediately or in the specified duration. Set this to true to change the value immediately without controller smoothing. Set a duration in milliseconds to change the value with controller smoothing in the specified time. If not set, this setting defaults to false and the controller smoothing setting in the Options editor is used. | boolean or number, optional |
Example
-- Pan notes depending on the pitch of the MIDI note.
-- E3 == center, E2 == hard left, E4 == hard right

function onNote(event)
  local pan = (event.note - 64) / 12
  local id = postEvent(event)
  changePan(id, pan, false, true)
end
See also: changeVolume, changeVolumedB, changeTune, changeNoteExpression
/ HALion Developer Resource / HALion Script / Reference /
changeTune
changeTune(noteID, tune, relative, immediateOrDuration)
Description
Function to change the tuning of a specific note in semitones.
Available in: Processor.
Arguments
| Argument | Description | Value Type |
|---|---|---|
| noteID | The ID of the note that you want to change. | number |
| tune | The absolute tuning in the range of -120.0 to 120.0 semitones (relative = false) or the value which is added (relative = true). | number |
| relative | The value is added to the current amount if this is set to true. The default is false. | boolean, optional |
| immediateOrDuration | Change the value immediately or in the specified duration. Set this to true to change the value immediately without controller smoothing. Set a duration in milliseconds to change the value with controller smoothing in the specified time. If not set, this setting defaults to false and the controller smoothing setting in the Options editor is used. | boolean or number, optional |
Example
-- Random tune offset per note.

function onNote(event)
  local tune = math.random() * 12 - 6
  local id = postEvent(event)
  changeTune(id, tune, true, true)
end
See also: changeVolume, changeVolumedB, changePan, changeNoteExpression
/ HALion Developer Resource / HALion Script / Reference /
changeVolume
changeVolume(noteID, gain, relative, immediateOrDuration)
Description
Function to change the volume of a specific note. A gain factor greater than 1.0 amplifies the signal and a gain factor smaller than 1.0 attenuates the signal.
Available in: Processor.
Arguments
| Argument | Description | Value Type |
|---|---|---|
| noteID | The ID of the note that you want to change. | number |
| gain | The absolute gain (relative = false) or the value which is added (relative = true). | number |
| relative | The value is added to the current amount if this is set to true. The default is false. | boolean, optional |
| immediateOrDuration | Change the value immediately or in the specified duration. Set this to true to change the value immediately without controller smoothing. Set a duration in milliseconds to change the value with controller smoothing in the specified time. If not set, this setting defaults to ''false'' and the controller smoothing setting in the Options editor is used. | boolean or number, optional |
Example
-- Attenuate notes between C2 and C4.

local lowKey = 48   -- C2
local highKey = 72  -- C4
local keyRange = highKey - lowKey
function onNote(event)
  if event.note > lowKey then
    local gain = (event.note - lowKey)/keyRange
    local id = postEvent(event)
    changeVolume(id, gain, false, true)
   end
end
See also: changeVolumedB, changePan, changeTune, changeNoteExpression
/ HALion Developer Resource / HALion Script / Reference /
changeVolumedB
changeVolumedB(noteID, gain_dB, relative, immediateorDuration)
Description
Function to change the volume of a specific note in decibels (dB). Positive values amplify the signal and negative values attenuate the signal.
Available in: Processor.
Arguments
| Argument | Description | Value Type |
|---|---|---|
| noteID | The ID of the note that you want to change. | number |
| gain_dB | The absolute gain in dB (relative = false) or the value which is added (relative = true). | number |
| relative | The value is added to the current amount if this is set to true. The default is false. | boolean, optional |
| immediateOrDuration | Change the value immediately or in the specified duration. Set this to true to change the value immediately without controller smoothing. Set a duration in milliseconds to change the value with controller smoothing in the specified time. If not set, this setting defaults to false and the controller smoothing setting in the Options editor is used. | boolean or number, optional |
Example
-- Apply note-on velocity with a dynamic range of 40dB.

function onNote(event)
  local id = postEvent(event)
  local gain_dB = (event.velocity/127) * 40 - 40
  changeVolumedB(id, gain_dB, false, true)
end
See also: changeVolume, changePan, changeTune, changeNoteExpression
/ HALion Developer Resource / HALion Script / Reference /
clone
clone(object)
Description
Function to create a copy of the specified object. If you want to modify an object, and you want to keep the original object, you can clone the object before modifying it. The allowed objects are Bus, Effect, Event, Layer, MidiModule, Program and Zone. Event objects can be cloned in the processor or the controller thread. All other objects can only be cloned in the controller thread.
❕ If you clone an event, the ID of the copied event will be -1, because the event has not been played yet. To retrieve an ID, use postEvent or playNote.
Available in: Controller, Processor.
Arguments
| Argument | Description | Value Type |
|---|---|---|
| event | The allowed objects are Bus, Effect, Event, Layer, MidiModule, Program and Zone. | object |
Return Values
Returns a copy of the specified object.
Example
-- Create a copy of the event and transpose it.

function onNote(event)
    eventCopy = clone(event)
    eventCopy.note = event.note + 12
    local id = postEvent(eventCopy)
    waitForRelease()
    releaseVoice(id)
end

-- Create a copy of the program.

function cloneProgram()
  local prg = this.parent
  assert(type(prg) == 'Program')
  local copy_prg = clone(prg)
  assert(type(copy_prg) == 'Program')
  assert(#(copy_prg:findZones(true)) == #(prg:findZones(true)))
end

cloneProgram()
See also: Bus Constructor, Effect Constructor, Event Constructor, Layer Constructor, MidiModule Constructor, Program Constructor, Zone Constructor
/ HALion Developer Resource / HALion Script / Reference /
controlChange
controlChange(controller, value)
Description
Function to generate controller events.
Available in: Processor.
Arguments
| Argument | Description | Value Type |
|---|---|---|
| controller | The controller number. See Controller Numbers for a description of the different controllers. | number |
| value | The controller value in the range of 0 to 127. | number |
Example
-- Invert the values of all MIDI controllers.

function onController(event)
    if event.controller < 120 then
        controlChange(event.controller, 127 - event.value)
    else
        postEvent(event) -- Other controllers are just passed through.
    end
end
See also: onController, getCC, afterTouch, pitchBend
/ HALion Developer Resource / HALion Script / Reference /
Controller Numbers
Description
Continuous controller events are determined by their controller number. Controller numbers from 0 to 127 follow the MIDI specification. Controller numbers above 127 are additional controllers that are specific to HALion.
❕ To limit a function to the continuous controllers of the MIDI specification, use an if statement. See example below.
Available in: Processor.
Additional Controllers
Controllers like aftertouch, pitch bend and other special controllers are determined by controller numbers above 127.
| Number | Controller |
|---|---|
| 128 | Aftertouch |
| 129 | Pitchbend |
| 130 | Controller A |
| 131 | Controller B |
| 132 | Controller C |
| 133 | Controller D |
| 134 | Controller E |
| 135 | Controller F |
| 136 | Controller G |
| 137 | Controller H |
| 138 | Reserved for polyhonic Velocity |
| 139 | Reserved for polyhonic Note Expression Custom 1 |
| 140 | Reserved for polyhonic Note Expression Custom 2 |
| 141 | Reserved for polyhonic Note Expression Custom 3 |
| 142 | Reserved for polyhonic Note Expression Custom 4 |
| 143 | Reserved for polyhonic Note Expression Custom 5 |
| 144 | Reserved for polyhonic Note Expression Custom 6 |
| 145 | Reserved for polyhonic Note Expression Custom 7 |
| 146 | Reserved for polyhonic Note Expression Custom 8 |
| 147 | RPN Pitch Bend Range |
| 148 | RPN Channel Fine Tuning (value range -8191 to 8191 equals -100 to 100 cent) |
| 149 | RPN Channel Coarse Tuning (value range -64 to 63 equals -64 to 63 semitones) |
| 150 | RPN Tuning Program Change |
| 151 | RPN Tuning Bank Select |
| 152 | RPN Modulation Depth Range |
❕ The function onController will not be called by controllers 138 to 146. They are reserved for the polyphonic sources note-on velocity and note expression custom 1-8. You can use the callback functions onNote and onNoteExpression instead.
Example
-- Exclude MIDI mode messages and other special controllers.

function onController(event)
    if event.controller < 120 then
        print("Controller #: "..event.controller..", Value: "..event.value)
        postEvent(event)
    end
end
See also: onController, controlChange, getCC
/ HALion Developer Resource / HALion Script / Reference /
decompose
decompose{arguments}
(Since HALion 7.0)
Description
Function to decompose an audio file into its tonal and noise components. You specify the audio file with the AudioFile object that is returned by the AudioFile.open function. The decompose function can be configured with named arguments. The named arguments are optional and if called without, decompose will be executed with its default settings.
Available in: Controller.
Arguments
| Argument | Description | Value Type |
|---|---|---|
| callback | This callback function is called with the AudioFile object and the file path of the ouput sample(s) as arguments after the original sample has been decomposed. If called without a callback function, decompose will be executed in the same thread. If called with a callback function as argument, decompose will be executed in a separate, parallel thread. | function, optional |
| start | The start position in samples. The created samples are trimmed to this position. The default is 0 samples. | number, optional |
| length | The duration in samples. Set this to less than or equal to 0 to use all samples from the specified start to the end of the sample. By default, everything from start to the end of the sample is decomposed. The created samples are trimmed to this length. | number, optional |
| sensitivity | Determines the minimum level difference that is needed to distinguish the tonal from the noise signals. The sensitivity is specified in dB and the value range is from -96 to 0 dB. The default is -24 dB. | number, optional |
| cutoff | Sets the frequency limit below which the algorithm detects tonal signals. Any signals above the cutoff frequency are classified as noise, regardless of the sensitivity and duration arguments. The cutoff is specified in Hz and the value range is from 20 to 20000 Hz. The default is 20000 Hz. | number, optional |
| duration | Allows you to specify the minimum length for a tonal signal in milliseconds. Signals that are shorter than the specified duration are classified as noise, longer signals are classified as tonal. The value range is fom 0 to 100 ms. The default is 80 ms. | number, optional |
| tonalLevel | Specifies the level of the tonal component in dB. The value range is from -96 to +12 dB. The default is 0 dB. | number, optional |
| noiseLevel | Specifies the level of the noise component in dB. The value range is from -96 to +12 dB. The default is 0 dB. | number, optional |
| outputMode | Defines if only one of the components, both components, or a mix of them is created. See Decompose Output Modes for details. | number, optional |
| outputPath | Specifies the path for the decomposed audio files. If the string is empty, invalid, or nil, the file paths of the decompose settings of the plug-in will be used. The default is nil. | string, optional |
❕ Samples that were loaded from a VST Sound container can only be decomposed if the
ouputPathargument is set to a valid file location. You can use getDecomposeOutputPath to obtain the file location from the decompose settings of the plug-in.
Example
outputModes = { "Tonal", "Noise", "All", "Mix", }

defineParameter { name = "Decompose", default = false, onChanged = function() if Decompose then onDecompose() end end }
defineParameter { name = "Cancel", default = false}
defineParameter { name = "Sensitivity", default = -24, min = -96, max = 0, increment = 0.1 }
defineParameter { name = "Cutoff", default = 20000, min = 20, max = 20000, increment = 1 }
defineParameter { name = "Duration", default = 80, min = 0, max = 100, increment = 0.1 }
defineParameter { name = "TonalLevel", default = 0, min = -96, max = 12, increment = 0.1 }
defineParameter { name = "NoiseLevel", default = 0, min = -96, max = 12, increment = 0.1 }
defineParameter { name = "Start", default = 0, min = 0, max = 1000, increment = 1 }
defineParameter { name = "Length", default = 0, min = 0, max = 1000, increment = 1 }
defineParameter { name = "OutputMode", default = DecomposeOutputMode.all, strings = outputModes }
defineParameter { name = "OutputPath", default = "" }
defineParameter { name = "Subfolder", default = "" }

function onDecomposeFinished(audioFile, file1, file2)
    print("Progress: 100%")
    print(audioFile.fileName, audioFile.length)
    if file1 then
        local afile1 = AudioFile.open(file1)
        print(afile1.fileName, afile1.length)
    end
    if file2 then
        local afile2 = AudioFile.open(file2)
        print(afile2.fileName, afile2.length)
    end
end

function onDecompose()
    zones = this.parent:findZones(true)
    for i, zone in ipairs(zones) do
        local samplePath = zone:getParameter("SampleOsc.Filename")
        local afile = AudioFile.open(samplePath)
        local startSamples = Start * afile.rate/1000
        local lengthSamples = Length * afile.rate/1000
        if not Subfolder == "" then
            if OutputPath == "" then
                OutputPath = getDecomposeOutputPath(samplePath)..Subfolder
            else
                OutputPath = OutputPath..Subfolder
            end
        end
        print("Decompose: "..samplePath)
        afile:decompose{
            callback = onDecomposeFinished,
            start = startSamples,
            length = lengthSamples,
            sensitivity = Sensitivity,
            cutoff = Cutoff,
            duration = Duration,
            tonalLevel = TonalLevel,
            noiseLevel = NoiseLevel,
            outputMode = OutputMode,
            outputPath = OutputPath,
        }
        while afile:getDecomposeProgress() < 1 do
            if Cancel then
                afile:cancelDecompose()
                break
            end
            local progress, errorMessage = afile:getDecomposeProgress()
            if errorMessage then
                print(errorMessage)
                break
            end
            local progressPercent = 100 * progress
            print(string.format("Progress: %2d%%", progressPercent))
            wait(2000)
        end
        if Cancel then
            Cancel = false
            print("Decompose Canceled!")
            break
        end
    end
    print("Decompose finished.")
    Decompose = false
end
See also: cancelDecompose, getDecomposeProgress, Decompose Output Modes, getDecomposeSettings, getDecomposeOutputPath
/ HALion Developer Resource / HALion Script / Reference /
Decompose Output Modes
(Since HALion 7.0)
Description
Enumerator to identify the different decompose output modes.
Available in: Controller.
Decompose Output Modes
The decompose output mode can be determined with these names or indices:
| Index | Name |
|---|---|
| 1 | DecomposeOutputMode.tonal |
| 2 | DecomposeOutputMode.noise |
| 3 | DecomposeOutputMode.all |
| 4 | DecomposeOutputMode.mix |
Example
outputModes = { "Tonal", "Noise", "All", "Mix", }

defineParameter { name = "Decompose", default = false, onChanged = function() if Decompose then onDecompose() end end }
defineParameter { name = "Cancel", default = false}
defineParameter { name = "Sensitivity", default = -24, min = -96, max = 0, increment = 0.1 }
defineParameter { name = "Cutoff", default = 20000, min = 20, max = 20000, increment = 1 }
defineParameter { name = "Duration", default = 80, min = 0, max = 100, increment = 0.1 }
defineParameter { name = "TonalLevel", default = 0, min = -96, max = 12, increment = 0.1 }
defineParameter { name = "NoiseLevel", default = 0, min = -96, max = 12, increment = 0.1 }
defineParameter { name = "Start", default = 0, min = 0, max = 1000, increment = 1 }
defineParameter { name = "Length", default = 0, min = 0, max = 1000, increment = 1 }
defineParameter { name = "OutputMode", default = DecomposeOutputMode.all, strings = outputModes }
defineParameter { name = "OutputPath", default = "" }
defineParameter { name = "Subfolder", default = "" }

function onDecomposeFinished(audioFile, file1, file2)
    print("Progress: 100%")
    print(audioFile.fileName, audioFile.length)
    if file1 then
        local afile1 = AudioFile.open(file1)
        print(afile1.fileName, afile1.length)
    end
    if file2 then
        local afile2 = AudioFile.open(file2)
        print(afile2.fileName, afile2.length)
    end
end

function onDecompose()
    zones = this.parent:findZones(true)
    for i, zone in ipairs(zones) do
        local samplePath = zone:getParameter("SampleOsc.Filename")
        local afile = AudioFile.open(samplePath)
        local startSamples = Start * afile.rate/1000
        local lengthSamples = Length * afile.rate/1000
        if not Subfolder == "" then
            if OutputPath == "" then
                OutputPath = getDecomposeOutputPath(samplePath)..Subfolder
            else
                OutputPath = OutputPath..Subfolder
            end
        end
        print("Decompose: "..samplePath)
        afile:decompose{
            callback = onDecomposeFinished,
            start = startSamples,
            length = lengthSamples,
            sensitivity = Sensitivity,
            cutoff = Cutoff,
            duration = Duration,
            tonalLevel = TonalLevel,
            noiseLevel = NoiseLevel,
            outputMode = OutputMode,
            outputPath = OutputPath,
        }
        while afile:getDecomposeProgress() < 1 do
            if Cancel then
                afile:cancelDecompose()
                break
            end
            local progress, errorMessage = afile:getDecomposeProgress()
            if errorMessage then
                print(errorMessage)
                break
            end
            local progressPercent = 100 * progress
            print(string.format("Progress: %2d%%", progressPercent))
            wait(2000)
        end
        if Cancel then
            Cancel = false
            print("Decompose Canceled!")
            break
        end
    end
    print("Decompose finished.")
    Decompose = false
end
See also: decompose, cancelDecompose, getDecomposeProgress, getDecomposeSettings, getDecomposeOutputPath
/ HALion Developer Resource / HALion Script / Reference /
defineModulation
defineModulation(name, bipolar)
Description
Function to declare a modulation output for the script module, which can be assigned in the modulation matrix of the zone. The declared modulation outputs can be found on the Modulation Module submenu of the modulation matrix's Source menu. This function can be used multiple times to declare different modulation outputs.
❕ This function only declares the modulation output. It does not calculate the modulation signal. The modulation signal must be generated with calcModulation.
Available in: Processor.
Arguments
| Argument | Description | Value Type |
|---|---|---|
| name | The name of the modulation output as it will be shown in the modulation matrix of the zone. | string |
| bipolar | If this is set to true, the output is expected to be in the range from -1.0 to 1.0. If this is set to false, the output is expected to be in the range from 0.0 to 1.0. | boolean |
Example
function onInit()
   defineModulation("Mod 1", false) -- unipolar
   defineModulation("Mod 2", true)  -- bipolar
end
See also: calcModulation
/ HALion Developer Resource / HALion Script / Reference /
defineParameter
On this page:
Description
Function to specify a parameter with the specified name and characteristics. The parameters you define can be used to configure the script module and save its state with the program. They are shown in the Parameter List from where you can connect them to controls on the macro page. For more details see Creating Parameters.
Available in: Controller.
Numeric
defineParameter(name, longName, default, min, max, increment, changeCallback)
Creates a numeric parameter. The default argument defines the value that the parameter will default to. The min and max arguments define the value range of the parameter. The increment argument defines the step size in which the parameter value can be adjusted. The arguments default, min, max and increment can be any integer or floating point value. How many digits are shown after the decimal point for a value string of a parameter is determined by the value of the increment argument. For example:
| Value | Description |
|---|---|
increment = 1 | The parameter will be an integer value and its value string will display no digits after the decimal point. |
increment = 0.001 | The parameter will be a floating point value and its value string will display three digits after the decimal point. |
increment = 0 | The parameter will be a floating point value and its value string will display two digits after the decimal point. |
The automatic formatting of a value can be overridden with the format argument. See Additional Named Arguments for more details.
Indexed String Array
defineParameter(name, longName, default, strings, changeCallback)
Creates a parameter with integer indices that have a text representation given by the string values of an array. The default argument defines the index value that the parameter will default to. The strings argument must be an array with string values starting with index 0 or 1.
Boolean
defineParameter(name, longName, bool, changeCallback)
Creates a boolean parameter. The bool argument also defines the default value of the parameter.
String
defineParameter(name, longName, string, changeCallback)
Creates a parameter with a string value. You can change the string by assigning a new string value to the parameter.
Table
defineParameter(name, longName, table, changeCallback)
Creates a parameter with a table as value. The name argument of the parameter also defines the name of the table. You can access the values of the table using the regular methods, e.g., dot notation.
By Parameter Definition
defineParameter(name, longName, parameterDefinition, changeCallback)
Creates a parameter with the behavior of the specified ParameterDefinition. You can use this to clone the behavior of existing parameters.
By Named Arguments
defineParameter { name = "p", longName = "param", default = 0, min = 0, max = 100, increment = 0.01, onChanged = callback, type = "float", format = "%.2f", readOnly = false, writeAlways = false, automatable = true, persistent = true }
Creates a parameter by named arguments. The only argument to the function is a table with the key/value pairs that define the parameter. The additional keys type, format, readOnly, writeAlways, automatable, processorCallback and persistent give you control over more advanced features. They can only be set with named arguments. See Defining Parameters by Named Arguments for more details.
Arguments
| Argument | Description | Value Type |
|---|---|---|
| name | The name of the parameter. | string |
| longName | The long name of the parameter, e.g., the name of the tool tip. If the argument is nil or not set, the name will be used. | string, optional |
| default | The default value of the parameter. The argument defaults to 0 if not set. | number, optional |
| min | The minimum value of the parameter. The argument defaults to 0 if not set. | number, optional |
| max | The maximum value of the parameter. The argument defaults to 100 if not set. | number, optional |
| increment | The step size of the parameter as floating point value. Set this to 1 for integer steps. The argument defaults to 0 (floating point value, no steps) if not set. | number, optional |
| strings | Creates a parameter with an indexed string array. The index starts with 0 or 1, depending on how you initialize the table. The string values of the array define the text representation of the parameter in the Parameter List. | array, optional |
| bool | Creates a boolean parameter. This argument also defines the default value of the parameter. | bool, optional |
| string | Creates a parameter with a string value. You can change the string by assigning a new string value to the parameter. | string, optional |
| table | Creates a parameter with a table as value. | table, optional |
| parameterDefinition | Creates a parameter with the behavior of the set ParameterDefinition. You can use this to clone the behavior of existing parameters. | ParameterDefinition, optional |
| onChanged | Callback function that is called if the value of the parameter has changed. See Parameter Change Callback for more details. | function, optional |
Example 1
-- Showcase different parameters.

-- Initialize variables.

maxVelocity = 127

-- Change callback of the parameter "Label".

function nameChanged()
    print("name changed to", Label) --Print the value of the parameter.
end

-- Initialize parameters.

defineParameter("Scale", nil, 100)                                          -- Parameter with default 100 and range 0 to 100.
defineParameter("Offset", nil, 0, -100, 100, 1)                             -- Bipolar parameter with integer steps.
defineParameter("Pan", nil, 0, -100, 100, 0.1)                              -- Bipolar parameter with 0.1 steps.
defineParameter("Mode", nil, 1, { "Off", "Normal", "Hyper" })               -- Indexed string array.
defineParameter("Enable", "Enable Filter", true)                            -- Switch with long name.
defineParameter("Label", nil, "untitled", nameChanged)                      -- String parameter.
defineParameter("Intervals", nil, { 0, 4, 7 })                              -- Table parameter.
defineParameter("Volume", nil, this.parent:getParameterDefinition("Level")) -- Parameter with the same behavior as the "Level" parameter of the parent layer.
Additional Named Arguments
(Since HALion 6.1)
If you create a parameter by named arguments, you get access to the following additional arguments. See Definging Parameters by Named Arguments for more details.
| Argument | Description | Value Type |
|---|---|---|
| type | The value type of the parameter (integer, float, boolean, string, variant, or envelope). The type must match the default and increment arguments. | string, optional |
| format | Formats the value string of a float value using the provided arguments. Only the format specifiers for float values are supported, i.e., e, E, f, g, or G. Other format specifiers are not supported. This overrides any automatic formatting from the increment argument. | string, optional |
| readOnly | Setting this to true will prevent the parameter from being changed from outside the script. The argument defaults to false if no value is set. | bool, optional |
| writeAlways | A parameter does not call its change callback if its value is set without being changed. Set this to true if you want to make sure that the change callback of the parameter is called. The argument defaults to false if not set. | bool, optional |
| automatable | Set this to false if you do not want the parameter to be automated. The argument defaults to true if not set. | bool, optional |
| processorCallback | If this is set to true, the parameter change callback will be executed in the processor context with high accuracy. This is required for automated script parameters to update correctly when using Render in Place or Export Audio, for example. If no processor exists, the callback is still run in the controller context. (Since HALion 6.4.20) | bool, optional |
| persistent | The parameter will not be restored from the VST preset if this is set to false. The argument defaults to true if not set. | bool, optional |
The arguments readOnly, writeAlways and automatable are usepful if you have a parameter that is used only for indication, but not for entering values.
Example 2
-- The following parameter is read only, not automatable and not persistent.

defineParameter {
    name = "deltaTime",
    longName = "Delta Time",
    default = 0,
    min = 0,
    max = 2^31,
    type = "float",
    format = "%.3f ms",
    readOnly = true,
    automatable = false,
    persistent = false,
}

-- Measure the time between subsequent notes.

function onNote(event)
    postEvent(event)
    t2 = getTime()
    if t1 then
        deltaTime = t2 - t1
    end
    t1 = t2
end

-- The following parameter change callback is executed in the processor context with high accuracy.

function onP1changed()
   this.parent:setParameterNormalized("Level", P1 / 100)
end

defineParameter{name = "P1", min=0, max=100, onChanged = onP1changed, processorCallback = true}
See also: getParameter, setParameter
/ HALion Developer Resource / HALion Script / Reference /
defineSlotLocal
defineSlotLocal(name)
Description
Function to attain global variables that operate independently per slot. You can call defineSlotLocal before or after the initialization of the corresponding variable, but it is common practice to call the function in advance. For more details see Using Slot Local Variables.
Available in: Controller, Processor.
Arguments
| Argument | Description | Value Type |
|---|---|---|
| name | The name of the global variable. | string |
Example
-- Store held notes in a note buffer and print them out.

-- Declare the note buffer as slot local.
defineSlotLocal("noteBuffer")

-- Initialize the note buffer.
noteBuffer = {}

-- Print all notes in the note buffer.
function printNoteBuffer()
    for note, velocity in pairs(noteBuffer) do
        print("Note# = "..note..", Velocity = "..velocity)
    end
    print()
end

-- Write notes to the buffer and print them.
function onNote(event)
    postEvent(event)
    noteBuffer[event.note] = event.velocity
    printNoteBuffer()
end

-- Remove notes from the buffer and print the remaining ones.
function onRelease(event)
    postEvent(event)
    noteBuffer[event.note] = nil
    printNoteBuffer()
end
See also: Using Slot Local Variables
/ HALion Developer Resource / HALion Script / Reference /
Effect Constructor
Effect(type)
(Since HALion 6.4.0)
Description
Constructor to create a new Effect object of the specified type.
Available in: Controller.
Arguments
| Argument | Description | Value Type |
|---|---|---|
| type | The type of effect. | string |
Return Values
Returns a new Effect object of the specified type.
Example
-- The following function creates different types of objects in the Program Tree.
-- The objects in the Program Tree do not have a name. You will see only their icons.

function createProgram()
  local inst = this.program.instance
  local prg = Program()
  local bus = Bus()
  prg:appendBus(bus)
  inst:setProgram(prg, 1)
  local layer = Layer()
  prg:appendLayer(layer)
  layer:appendZone(Zone())
  local mm = MidiModule('MIDI Player')
  layer:appendMidiModule(mm)
  local fx = Effect('Distortion')
  bus:appendEffect(fx)
end

createProgram()
See also: Program Constructor, Bus Constructor, Layer Constructor, Zone Constructor, MidiModule Constructor
/ HALion Developer Resource / HALion Script / Reference /
endUndoBlock
endUndoBlock()
Description
Function to terminate an undo block. An undo block begins with startUndoBlock. Any changes between the beginning and the termination of the undo block will be summarized into one undo entry in the undo history.
Available in: Controller.
Example
-- Simple demonstration of the syntax, see startUndoBlock for a more detailed example.

-- Begin the undo block.

startUndoBlock("Undo Block") -- Only this entry will display in the undo history.

-- Any changes you want to be summarized in the undo history must be put here.

endUndoBlock() -- Terminate the undo block.
See also: startUndoBlock, getUndoContext, Undo Context Types
/ HALion Developer Resource / HALion Script / Reference /
Event Constructor
Event(type)
Description
Constructor to create a new Event object of the specified type.
Available in: Processor.
Arguments
| Argument | Description | Value Type |
|---|---|---|
| type | The type of event. See Event Types for details. | enum or number |
Return Values
Returns a new Event object of the specified type.
❕ The fields of the Event object must be set after its creation.
Example
-- Create a new note-on event.

function onNote(event)
    local newEvent = Event(EventType.noteOn)
    newEvent.note = event.note + 12
    newEvent.velocity = event.velocity
    local id = postEvent(newEvent)
    waitForRelease()
    releaseVoice(id)
end
See also: Event, Event Types
/ HALion Developer Resource / HALion Script / Reference /
Event Types
Description
Enumerator to identify the different types of events. See Event Constructor and Event for details.
Available in: Processor.
Event Types
| Index | Name | Description |
|---|---|---|
| 1 | EventType.noteOn | Note-on events |
| 2 | EventType.noteOff | Note-off events |
| 3 | EventType.controller | Continuous controller events |
| 4 | EventType.noteExpression | Note expression events |
| 5 | EventType.programChange | Only used for Standard MIDI files |
| 6 | EventType.noteRetrigger | Note-retrigger events (Since HALion 7.0) |
| 7 | EventType.data | System exclusive messages (Since HALion 7.0) |
Example
-- Print the event type.

function printEventType(event)
    if event.type == EventType.noteOn then
        print("Note-on event received!")
    elseif event.type == EventType.noteOff then
        print("Note-off event received!")
    elseif event.type == EventType.controller then
        print("Controller event received!")
    elseif event.type == EventType.noteExpression then
        print("Note Expression event received!")
    elseif event.type == EventType.noteRetrigger then
        print("Note-retrigger event received!")
    elseif event.type == EventType.data then
        print("System exclusive message received!")
    end
end

function onNote(event)
    printEventType(event)
    postEvent(event)
end

function onRelease(event)
    printEventType(event)
    postEvent(event)
end

function onController(event)
    printEventType(event)
    postEvent(event)
end

function onNoteExpression(event)
    printEventType(event)
    -- postEvent(event), not needed for note expression.
end

function onRetrigger(event)
    printEventType(event)
    postEvent(event)
end

function onData(event)
    printEventType(event)
    postEvent(event)
end
See also: Event Constructor, Event
/ HALion Developer Resource / HALion Script / Reference /
fade
fade(noteID, startValue, targetValue, duration, killVoice)
Description
Function to fade the volume of a specific note. The fade is performed from the start to the target value with the specified duration in milliseconds and affects all voices that are triggered by the note. You can start a fade from the current value of a running fade by setting the start value to nil. You can kill the triggered voices if the target value is reached by setting killVoice to true. The fade is applied in addition to any changes from changeVolume, changeVolumedB and changeNoteExpression.
❕ If you start a fade from the current value of a running fade that has not reached its target value yet, the duration of this fade will be shorter. See Example 2 for details.
Available in: Processor.
Arguments
| Argument | Description | Value Type |
|---|---|---|
| noteID | The ID of the note you want to fade. | number |
| startValue | The start value of the fade in the range of 0 to 1.0. Set this to nil to start the fade from the current value of a running fade. | number or nil |
targetValue | The target value of the fade in the range of 0 to 1.0. | number |
| duration | The length of the fade in milliseconds. The target value is set instantaneously if this is set to <= 0. | number |
| killVoice | Set this to true to kill the note when the target value is reached. The default is false. | boolean |
Example 1
-- Simple fade out with kill voice.

function onNote(event)
    id = playNote(event.note, 100, 0) -- The fades affect all voices that are triggered by this note.
    fade(id, nil, 0.0, 1000, true)    -- Start to fade out.
end
function onRelease(event)
    -- postEvent(event), not used.
end
Example 2
-- Play note, then fade out and in and kill the triggered voices.

function onNote(event)
  id = playNote(event.note, 100, 0) -- The fades affect all voices that are triggered by this note.
  fade(id, 1.0, 0.0, 1000)          -- Start to fade out.
  wait(500)                         -- Wait for 500 ms, which is only half of the fade out.
  fade(id, nil, 1.0, 1000, true)    -- The fade in is only 500 ms long, because it has to go only half of the distance.
end

function onRelease(event)
    -- postEvent(event), not used.
end
See also: changeVolume, changeVolumedB, changePan, changeTune, changeNoteExpression
/ HALion Developer Resource / HALion Script / Reference /
findBusses
findBusses(recursive, nameOrFilterFunction)
Description
Function to find busses in the specified Element object. For example, this.parent specifies the parent of the script module as the Element object to be searched in. If recursive is set to true, subelements will also be searched. The function returns an array with the Bus objects of the found busses. Particular busses can be searched by name or via a filter function. If searching by name, findBusses accepts only the Bus objects that match the specified name. The filter function uses the Bus object of each bus as argument. Only those Bus objects that return true for the search criteria defined in the filter function will be accepted by findBusses. Without a name or filter function, the Bus objects of all busses in the searched Element obects will be returned.
Available in: Controller, Processor.
Arguments
| Argument | Description | Value Type |
|---|---|---|
| recursive | If this is set to false, only the specified Element object will be searched. If this is set to true, subelements will also be searched. The default is false. | boolean |
| nameOrFilterFunction | The name of the busses searched for or a filter function. Only the Bus objects that match the name or return true for the search criteria of the filter function will be accepted. Set this to nil to deactivate any name filter or search criteria. | string or function, optional |
Return Values
Returns an array with the Bus objects of the found busses. Returns an empty table if no busses are found.
Example
-- Find all busses and print their names.
busses = this.program:findBusses(true)

if busses[1] then
    for i, bus in ipairs(busses) do
        print(bus.name)
    end
else
    print("Could not find any busses!")
end
See also: findChildren, findEffects, findLayers, findMidiModules, findSlots, findZones, Bus
/ HALion Developer Resource / HALion Script / Reference /
findChildren
findChildren(recursive, nameOrFilterFunction)
Description
Function to find children in the specified Element object. For example, this.parent specifies the parent layer of the script module as the Element object to be searched in. If recursive is set to true, subelements will also be searched. The function returns an array with the Element objects of the found children. Particular children can be searched by name or via a filter function. If searching by name, findChildren accepts only the Element objects that match the specified name. The filter function uses the Element object of each child as argument. Only those Element objects that return true for the search criteria defined in the filter function will be accepted by findChildren. Without a name or filter function, the Element objects of all children in the searched Element object will be returned.
Available in: Controller, Processor.
Arguments
| Argument | Description | Value Type |
|---|---|---|
| recursive | If this is set to false, only the specified Element object will be searched. If this is set to true, subelements will also be searched. The default is false. | boolean |
| nameOrFilterFunction | The name of the children searched for or a filter function. Only the Element objects that match the name or return true for the search criteria of the filter function will be accepted. Set this to nil to deactivate any name filter or search criteria. | string or function, optional |
Return Values
Returns an array with the Element objects of the found children. Returns an empty table if no children are found.
Example
-- Find the MIDI module with the name "Lua Script" and print its type.

scriptModules = this.parent:findChildren(false, "Lua Script")

if scriptModules[1] then
    print(scriptModules[1].type)
end

-- Find all children and print their names.
children = this.program:findChildren(true)

if children[1] then
    for i, child in ipairs(children) do
        print(child.name)
    end
else
    print("Could not find any children!")
end
See also: findBusses, findEffects, findLayers, findMidiModules, findSlots, findZones, Element
/ HALion Developer Resource / HALion Script / Reference /
findEffects
findEffects(recursive, nameOrFilterFunction)
Description
Function to find effects in the specified Element object. For example, this.parent specifies the parent of the script module as the Element object to be searched in. To specifiy a bus to be searched in, use getBus or findBusses. If recursive is set to true, subelements will also be searched. The function returns an array with the Effect objects of the found effects. Particular effects can be searched by name or via a filter function. If searching by name, findEffects accepts only the Effect objects that match the specified name. The filter function uses the Effect object of each effect as argument. Only those Effect objects that return true for the search criteria defined in the filter function will be accepted by findEffects. Without a name or filter function, the Effect objects of all effects in the searched Element objects will be returned.
Available in: Controller, Processor.
Arguments
| Argument | Description | Value Type |
|---|---|---|
| recursive | If this is set to false, only the specified Element object will be searched. If this is set to true, subelements will also be searched. The default is false. | boolean |
| nameOrFilterFunction | The name of the effects searched for or a filter function. Only the Effect objects that match the name or return true for the search criteria of the filter function will be accepted. Set this to nil to deactivate any name filter or search criteria. | string or function, optional |
Return Values
Returns an array with the Effect objects of the found effects. Returns an empty table if no effects are found.
Example
-- Find all effects and print their names.
effects = this.program:findEffects(true)

if effects[1] then
    for i, effect in ipairs(effects) do
        print(effect.name)
    end
else
    print("Could not find any effects!")
end
See also: findBusses, findChildren, findLayers, findMidiModules, findSlots, findZones, Effect
/ HALion Developer Resource / HALion Script / Reference /
findLayers
findLayers(recursive, nameOrFilterFunction)
Description
Function to find layers in the specified layer. For example, this.parent specifies the parent layer of the script module as the layer to be searched in. If recursive is set to true, sublayers will also be searched. The function returns an array with the Layer objects of the found layers. Particular layers can be searched by name or via a filter function. If searching by name, findLayers accepts only the Layer objects that match the specified name. The filter function uses the Layer object of each layer as argument. Only those Layer objects that return true for the search criteria defined in the filter function will be accepted by findLayers. Without a name or filter function, the Layer objects of all layers in the searched layers will be returned.
Available in: Controller, Processor.
Arguments
| Argument | Description | Value Type |
|---|---|---|
| recursive | If this is set to false, only the current layer will be searched. If this is set to true, sublayers will also be searched. The default is false. | boolean |
| nameOrFilterFunction | The name of the layers searched for or a filter function. Only the Layer objects that match the name or return true for the search criteria of the filter function will be accepted. Set this to nil to deactivate any name filter or search criteria. | string or function, optional |
Return Values
Returns an array with the Layer objects of the found layers. Returns an empty table if no layers are found.
Example
-- Find all layers and print their names.

layers = this.program:findLayers(true)

if layers[1] then
    for i, layer in ipairs(layers) do
        print(layer.name)
    end
else
    print("Could not find any layers!")
end
See also: findBusses, findChildren, findEffects, findMidiModules, findSlots, findZones, Layer
/ HALion Developer Resource / HALion Script / Reference /
findMidiModules
findMidiModules(recursive, nameOrFilterFunction)
Description
Function to find MIDI modules in the specified layer. For example, this.parent specifies the parent layer of the script module as the layer to be searched in. If recursive is set to true, sublayers will also be searched. The function returns an array with the MidiModule objects of the found MIDI modules. Particular MIDI modules can be searched by name or via a filter function. If searching by name, findMidiModules accepts only the MidiModule objects that match the specified name. The filter function uses the MidiModule object of each MIDI module as argument. Only those MidiModule objects that return true for the search criteria defined in the filter function will be accepted by findMidiModules. Without a name or filter function, the MidiModule objects of all MIDI modules in the searched layers will be returned.
Available in: Controller, Processor.
Arguments
| Argument | Description | Value Type |
|---|---|---|
| recursive | If this is set to false, only the current layer will be searched. If this is set to true, sublayers will also be searched. The default is false. | boolean |
| nameOrFilterFunction | The name of the MIDI modules searched for or a filter function. Only the MidiModule objects that match the name or return true for the search criteria of the filter function will be accepted. Set this to nil to deactivate any name filter or search criteria. | string or function, optional |
Return Values
Returns an array with the MidiModule objects of the found MIDI modules. Returns an empty table if no MIDI modules are found.
Example
-- Find all MIDI modules and print their names.

modules = this.program:findMidiModules(true)

if modules[1] then
    for i, module in ipairs(modules) do
        print(module.name)
    end
else
    print("Could not find any MIDI modules!")
end
See also: findBusses, findChildren, findEffects, findLayers, findSlots, findZones, MidiModule
/ HALion Developer Resource / HALion Script / Reference /
findSlots
findSlots(nameOrFilterFunction)
Description
Function to find the slots of the plug-in instance. Before calling this function you must access the Instance object with this.program.instance. The function returns an array with the Slot objects of the found slots. Particular slots can be searched by name or via a filter function. If searching by name, findSlots accepts only the Slot objects that match the specified name. The filter function uses the Slot object of each slot as argument. Only those Slot objects that return true for the search criteria defined in the filter function will be accepted by findSlots. Without a name or filter function, the Slot objects of all slots in the instance will be returned.
Available in: Controller, Processor.
Arguments
| Argument | Description | Value Type |
|---|---|---|
| nameOrFilterFunction | The name of the slots searched for or a filter function. Only the Slot objects that match the name or return true for the search criteria of the filter function will be accepted. Set this to nil to deactivate any name filter or search criteria. | string or function, optional |
Return Values
Returns an array with the Slot objects of the found slots. Returns an empty table if no slots are found.
Example
-- Print the names of all slots.

slots = this.program.instance:findSlots()

for i, slot in ipairs(slots) do
        print(slot.name)
end
See also: findBusses, findChildren, findEffects, findLayers, findMidiModules, findZones, Slot
/ HALion Developer Resource / HALion Script / Reference /
findZones
findZones(recursive, nameOrFilterFunction)
Description
Function to find zones in the specified layer. For example, this.parent defines the parent layer of the script module as the layer to be searched in. If recursive is set to true, sublayers will also be searched. The function returns an array with the Zone objects of the found zones. Particular zones can be searched by name or via a filter function. If searching by name, findZones accepts only the Zone objects that match the specified name. The filter function uses the Zone object of each zone as argument. Only those Zone objects that return true for the search criteria defined in the filter function will be accepted by findZones. Without a name or filter function, the Zone objects of all zones in the searched layers will be returned.
Available in: Controller, Processor.
Arguments
| Argument | Description | Value Type |
|---|---|---|
| recursive | If this is set to false, only the current layer will be searched. If this is set to true, sublayers will also be searched. The default is false. | boolean |
| nameOrFilterFunction | The name of the zones searched for or a filter function. Only the Zone objects that match the name or return true for the search criteria of the filter function will be accepted. Set this to nil to deactivate any name filter or search criteria. | string or function, optional |
Return Values
Returns an array with the Zone objects of the found zones. Returns an empty table if no zones are found.
Example
-- Find all zones and print their names.

zones = this.program:findZones(true)

if zones[1] then
    for i, zone in ipairs(zones) do
        print(zone.name)
    end
else
    print("Could not find any zones!")
end
See also: findBusses, findChildren, findEffects, findLayers, findMidiModules, findSlots, Zone
/ HALion Developer Resource / HALion Script / Reference /
forgetAutomation
forgetAutomation(element, nameOrID)
Description
Function to remove the specified parameter from its automation parameter.
Available in: Controller.
Arguments
| Argument | Description | Value Type |
|---|---|---|
| element | The Element object of the parameter to be removed. | Element |
| nameOrID | The name or ID of the parameter. | number |
Example
-- Forget the automation assignments of all parameters of all zones.

zones = this.program:findZones(true)

paramDefs = zones[1].parameterDefinitions

for i, zone in ipairs(zones) do
    for j, paramDef in ipairs(paramDefs) do
        forgetAutomation( zone, paramDef.id)
    end
end
See also: assignAutomation, getAutomationIndex
/ HALion Developer Resource / HALion Script / Reference /
getAllocatedMemory
getAllocatedMemory()
Description
Function to obtain the number of bytes which have been allocated to the script in the memory.
Available in: Processor.
Return Values
Returns the number of bytes which have been allocated to the script in the memory.
Example
-- Print the number of bytes which have been allocated to the script in the memory.

function onNote(event)
    print(getAllocatedMemory())
end
See also: getUsedMemory
/ HALion Developer Resource / HALion Script / Reference /
getAutomationIndex
getAutomationIndex(element, nameOrID)
Description
Function to retrieve the index of the automation parameter to which the specified parameter is assigned.
Available in: Controller.
Arguments
| Argument | Description | Value Type |
|---|---|---|
| element | The Element object of the parameter to be connected. | Element |
| nameOrID | The ID of the parameter. | number |
Return Values
Returns the the index of the automation parameter to which the specified parameter is assigned, or nil if the specified parameter is not assigned.
Example
-- Assign pitch octave, coarse and fine to the next free automation.

zones = this.program:findZones(true)

parameters = { "Pitch.Octave", "Pitch.Coarse", "Pitch.Fine" }

for i, parameter in ipairs(parameters) do
    local automationIndex
    for j, zone in ipairs(zones) do
        assignAutomation(zone, parameter, automationIndex)
        automationIndex = getAutomationIndex(zone, parameter)
    end
end
See also: assignAutomation, forgetAutomation
/ HALion Developer Resource / HALion Script / Reference /
getBarDuration
getBarDuration()
Description
Function to obtain the duration of one bar in milliseconds.
Available in: Processor.
Return Values
Returns the duration of one bar in milliseconds based on the current time signature and tempo. If no time signature or tempo are available, this function returns the value -1.
Example
-- Limit the note length to one bar.

function onNote(event)
  playNote(event.note, event.velocity, getBarDuration())
end
See also: getBeatDuration, getNoteDuration
/ HALion Developer Resource / HALion Script / Reference /
getBeatDuration
getBeatDuration()
Description
Function to obtain the duration of one beat in milliseconds.
Available in: Processor.
Return Values
Returns the duration of one beat in milliseconds. The duration of one beat equals the length of a quarter note based on the current tempo. If no tempo information is available, this function returns the value -1.
Example
-- Play notes with a fixed length of one beat.

function onNote(event)
  playNote(event.note, event.velocity, getBeatDuration())
end
See also: getBarDuration, getNoteDuration
/ HALion Developer Resource / HALion Script / Reference /
getBeatTime
getBeatTime()
Description
Function to obtain the current song position in number of beats (quarter notes).
Available in: Processor.
Return Values
When the host is in playback, the function returns a decimal with the number of beats (quarter notes) since the start of the song. The start of the song equals 0 beats. The function returns -1 if the host is not in playback.
Example
-- Print the song position in number of beats.

function onNote(event)
    posInSong = getBeatTime()
    if (posInSong ~= -1) then
        print(string.format("%.3f beats", posInSong))
    else
        print("Playback is stopped.")
    end
end
See also: getMsTime, getBeatTimeInBar
/ HALion Developer Resource / HALion Script / Reference /
getBeatTimeInBar
getBeatTimeInBar()
Description
Function to obtain the position in the current bar in number of beats (quarter notes).
Available in: Processor.
Return Values
When the host is in playback, the function returns a decimal with the number of beats (quarter notes) since the start of the current bar. The start of the bar equals 0 beats. The function returns -1 if the host is not in playback.
Example
-- Print the position in the current bar.

function onNote(event)
    posInBar = getBeatTimeInBar()
    if (posInBar ~= -1) then
        print(string.format("%.3f beats", posInBar))
    else
        print("Playback is stopped.")
    end
end
See also: getBeatTime, getMsTime
/ HALion Developer Resource / HALion Script / Reference /
getBus
getBus(nameOrPosition)
Description
Function to retrieve the Bus object of a bus in the specified Element object. For example, this.parent specifies the parent of the script module as the Element object to be searched in. This function does not search in subelements. A particular bus can be searched by name or position. The position is the number indexing the busses in the specified Element object. If several busses share the same name, only the first match will be returned. If no argument is set, the function returns the first bus it finds.
Available in: Controller, Processor.
Arguments
| Argument | Description | Value Type |
|---|---|---|
| nameOrPosition | The name or position of the bus. Set this to nil to deactivate the search filter. | string or number, optional |
Return Values
Returns the Bus object of the found bus. Returns nil if no bus is found.
Example
-- Locate the first bus in the program and print its name.

bus = this.program:getBus()

if bus then
    print(bus.name)
else
    print("Could not find a bus!")
end
See also: getChild, getEffect, getLayer, getMidiModule, getSlot, getZone, Bus
/ HALion Developer Resource / HALion Script / Reference /
getCC
getCC(controller)
Description
Function to read the current value of a continuous controller.
Available in: Processor.
Arguments
| Argument | Description | Value Type |
|---|---|---|
| controller | The controller number. See Controller Numbers for a description of the different controllers. | number |
Return Values
Returns the current value of the continuous controller specified by the argument.
Example
-- Replace the note-on velocity with the value of the modulation wheel.

function onNote(event)
    playNote(event.note, getCC(1))
end
See also: onController, controlChange
/ HALion Developer Resource / HALion Script / Reference /
getChild
getChild(nameOrPosition)
Description
Function to retrieve the Element object of a child in the specified Element object. For example, this.parent specifies the parent layer of the script module as the Element object to be searched in. This function does not search in subelements. A particular child can be searched by name or position. The position is the number indexing the children in the specified Element object. If several children share the same name, only the first match will be returned. If no argument is set, the function returns the first child it finds.
Available in: Controller, Processor.
Arguments
| Argument | Description | Value Type |
|---|---|---|
| nameOrPosition | The name or position of the child. Set this to nil to deactivate the search filter. | string or number, optional |
Return Values
Returns the Element object of the found child. Returns nil if no child is found.
Example
-- Locate the first child in the program and print its name.

child = this.program:getChild()

if child then
    print(child.name)
else
    print("Could not find a child!")
end
See also: getBus, getEffect, getLayer, getMidiModule, getSlot, getZone, Element
/ HALion Developer Resource / HALion Script / Reference /
getContext
getContext()
Description
Function to obtain the name of the context.
Available in: Controller, Processor.
Return Values
Returns a string with the name of the context in which the function is called.
Example
-- Print the context.

print("Global statement: "..getContext())

function onLoadIntoSlot()
    print("onLoadIntoSlot: "..getContext())
end

function onInit()
    print("onInit: "..getContext())
end
Output Messages:
Global statement: Controller
onLoadIntoSlot: Controller
onInit: Processor
See also: onLoadIntoSlot, onInit
/ HALion Developer Resource / HALion Script / Reference /
getDecomposeOutputPath
getDecomposeOutputPath(filePath)
(Since HALion 7.0)
Description
This function evaluates the decompose settings of the plug-in and the file path of the original sample and returns the file path to the folder in which the decomposed samples are to be be saved. You can use this function to alter the outputPath argument of the decompose function, e.g., to write the decomposed samples in a subfolder. The complete record of the decompose settings of the plug-in can be obtained with getDecomposeSettings.
Available in: Controller.
Arguments
| Argument | Description | Value Type |
|---|---|---|
| filePath | The file path of the original sample. | string |
Return Values
Returns the file path to the folder in which the decomposed samples are to be be saved.
Example
outputModes = { "Tonal", "Noise", "All", "Mix", }

defineParameter { name = "Decompose", default = false, onChanged = function() if Decompose then onDecompose() end end }
defineParameter { name = "Cancel", default = false}
defineParameter { name = "Sensitivity", default = -24, min = -96, max = 0, increment = 0.1 }
defineParameter { name = "Cutoff", default = 20000, min = 20, max = 20000, increment = 1 }
defineParameter { name = "Duration", default = 80, min = 0, max = 100, increment = 0.1 }
defineParameter { name = "TonalLevel", default = 0, min = -96, max = 12, increment = 0.1 }
defineParameter { name = "NoiseLevel", default = 0, min = -96, max = 12, increment = 0.1 }
defineParameter { name = "Start", default = 0, min = 0, max = 1000, increment = 1 }
defineParameter { name = "Length", default = 0, min = 0, max = 1000, increment = 1 }
defineParameter { name = "OutputMode", default = DecomposeOutputMode.all, strings = outputModes }
defineParameter { name = "OutputPath", default = "" }
defineParameter { name = "Subfolder", default = "" }

function onDecomposeFinished(audioFile, file1, file2)
    print("Progress: 100%")
    print(audioFile.fileName, audioFile.length)
    if file1 then
        local afile1 = AudioFile.open(file1)
        print(afile1.fileName, afile1.length)
    end
    if file2 then
        local afile2 = AudioFile.open(file2)
        print(afile2.fileName, afile2.length)
    end
end

function onDecompose()
    zones = this.parent:findZones(true)
    for i, zone in ipairs(zones) do
        local samplePath = zone:getParameter("SampleOsc.Filename")
        local afile = AudioFile.open(samplePath)
        local startSamples = Start * afile.rate/1000
        local lengthSamples = Length * afile.rate/1000
        if not Subfolder == "" then
            if OutputPath == "" then
                OutputPath = getDecomposeOutputPath(samplePath)..Subfolder
            else
                OutputPath = OutputPath..Subfolder
            end
        end
        print("Decompose: "..samplePath)
        afile:decompose{
            callback = onDecomposeFinished,
            start = startSamples,
            length = lengthSamples,
            sensitivity = Sensitivity,
            cutoff = Cutoff,
            duration = Duration,
            tonalLevel = TonalLevel,
            noiseLevel = NoiseLevel,
            outputMode = OutputMode,
            outputPath = OutputPath,
        }
        while afile:getDecomposeProgress() < 1 do
            if Cancel then
                afile:cancelDecompose()
                break
            end
            local progress, errorMessage = afile:getDecomposeProgress()
            if errorMessage then
                print(errorMessage)
                break
            end
            local progressPercent = 100 * progress
            print(string.format("Progress: %2d%%", progressPercent))
            wait(2000)
        end
        if Cancel then
            Cancel = false
            print("Decompose Canceled!")
            break
        end
    end
    print("Decompose finished.")
    Decompose = false
end
See also: decompose, cancelDecompose, getDecomposeProgress, Decompose Output Modes, getDecomposeSettings
/ HALion Developer Resource / HALion Script / Reference /
getDecomposeProgress
getDecomposeProgress()
(Since HALion 7.0)
Description
Function to monitor the progress of the decompose function for an audio file. You specify the audio file with the AudioFile object that is returned by the AudioFile.open function. To get the progress of a specific audio file that is being decomposed, the AudioFile object of the getDecomposeProgress function must match the AudioFile object of the corresponding decompose function. The function returns two values: the progress as a value between 0 and 1 and an error message if the decompose did not succeed.
Available in: Controller.
Return Values
Returns the progress as a float value between 0 and 1, and an error message if the decompose did not succeed. The error message returns nil if the decompose was successful.
Example
outputModes = { "Tonal", "Noise", "All", "Mix", }

defineParameter { name = "Decompose", default = false, onChanged = function() if Decompose then onDecompose() end end }
defineParameter { name = "Cancel", default = false}
defineParameter { name = "Sensitivity", default = -24, min = -96, max = 0, increment = 0.1 }
defineParameter { name = "Cutoff", default = 20000, min = 20, max = 20000, increment = 1 }
defineParameter { name = "Duration", default = 80, min = 0, max = 100, increment = 0.1 }
defineParameter { name = "TonalLevel", default = 0, min = -96, max = 12, increment = 0.1 }
defineParameter { name = "NoiseLevel", default = 0, min = -96, max = 12, increment = 0.1 }
defineParameter { name = "Start", default = 0, min = 0, max = 1000, increment = 1 }
defineParameter { name = "Length", default = 0, min = 0, max = 1000, increment = 1 }
defineParameter { name = "OutputMode", default = DecomposeOutputMode.all, strings = outputModes }
defineParameter { name = "OutputPath", default = "" }
defineParameter { name = "Subfolder", default = "" }

function onDecomposeFinished(audioFile, file1, file2)
    print("Progress: 100%")
    print(audioFile.fileName, audioFile.length)
    if file1 then
        local afile1 = AudioFile.open(file1)
        print(afile1.fileName, afile1.length)
    end
    if file2 then
        local afile2 = AudioFile.open(file2)
        print(afile2.fileName, afile2.length)
    end
end

function onDecompose()
    zones = this.parent:findZones(true)
    for i, zone in ipairs(zones) do
        local samplePath = zone:getParameter("SampleOsc.Filename")
        local afile = AudioFile.open(samplePath)
        local startSamples = Start * afile.rate/1000
        local lengthSamples = Length * afile.rate/1000
        if not Subfolder == "" then
            if OutputPath == "" then
                OutputPath = getDecomposeOutputPath(samplePath)..Subfolder
            else
                OutputPath = OutputPath..Subfolder
            end
        end
        print("Decompose: "..samplePath)
        afile:decompose{
            callback = onDecomposeFinished,
            start = startSamples,
            length = lengthSamples,
            sensitivity = Sensitivity,
            cutoff = Cutoff,
            duration = Duration,
            tonalLevel = TonalLevel,
            noiseLevel = NoiseLevel,
            outputMode = OutputMode,
            outputPath = OutputPath,
        }
        while afile:getDecomposeProgress() < 1 do
            if Cancel then
                afile:cancelDecompose()
                break
            end
            local progress, errorMessage = afile:getDecomposeProgress()
            if errorMessage then
                print(errorMessage)
                break
            end
            local progressPercent = 100 * progress
            print(string.format("Progress: %2d%%", progressPercent))
            wait(2000)
        end
        if Cancel then
            Cancel = false
            print("Decompose Canceled!")
            break
        end
    end
    print("Decompose finished.")
    Decompose = false
end
See also: decompose, cancelDecompose, Decompose Output Modes, getDecomposeSettings, getDecomposeOutputPath
/ HALion Developer Resource / HALion Script / Reference /
getDecomposeSettings
getDecomposeSettings()
(Since HALion 7.0)
Description
Function to obtain the decompose settings of the plug-in. Custom samples originate from disk and library samples originate from VST Sound containers. Depending on the decompose settings specified by the user and on the origin of the samples, decomposed samples are written to different file paths. By evaluating the returned settings, your script can respond to the settings specified by the user.
Available in: Controller.
Fields
| Field | Description | Value Type |
|---|---|---|
| .OriginalFolder | If this is set to true, the decomposed samples from disk will be saved in the same folder as the original sample. This setting affects only samples that are not part of a VST Sound container. | boolean |
| .ProjectFolder | The file path to the project folder of your Steinberg DAW. The decomposed samples from disk or from VST Sound containers will be saved to this project folder if the FileProjectFolderCustom and the FileProjectFolderLibrary settings are set to true. | string |
| .FileFolderNameCustom | The file path to the folder in which the decomposed samples from disk will be saved. This setting applies only if FileProjectFolderCustom is set to false. | string |
| .FileProjectFolderCustom | If this is set to true, the decomposed samples from disk will be saved in the project folder of your Steinberg DAW. If this is set to false, the file path of FileFolderNameCustom will be used instead. | boolean |
| .FileProjectSubFolderCustom | This setting applies only if FileProjectFolderCustom is set to true.The decomposed samples from disk will be saved in the specified subfolder in the project folder of your Steinberg DAW. If this is empty, the decomposed samples will be saved directly to the project folder. | string |
| .FileFolderNameLibrary | The file path to the folder in which the decomposed samples from VST Sound containers will be saved. This setting applies only if FileProjectFolderLibrary is set to false. | string |
| .FileProjectFolderLibrary | If this is set to true, the decomposed samples from VST Sound containers will be saved in the project folder of your Steinberg DAW. If this is set to false, the file path of FileFolderNameLibrary will be used instead. | boolean |
| .FileProjectSubFolderLibrary | This setting applies only if FileProjectFolderLibrary is set to true.The decomposed samples from VST Sound containers will be saved in the specified subfolder in the project folder of your Steinberg DAW. If this is empty, the decomposed samples will be saved directly to the project folder. | string |
| .SubFolder | If this is set to true, the decomposed samples will be saved to Tonal and Noise subfolders. | boolean |
Return Values
Returns a table that lists the decompose settings.
settings = getDecomposeSettings()
for setting, value in pairs(settings) do
    print(setting, value)
end
See also: decompose, cancelDecompose, getDecomposeProgress, Decompose Output Modes, getDecomposeOutputPath
/ HALion Developer Resource / HALion Script / Reference /
getDisplayString
getDisplayString(value)
Description
The internal precision of parameter values is usually higher than the precision of the corresponding display string on the user interface. You can use this function to obtain the display string of the specified parameter and value. You specify the parameter with getParameterDefinition.
Available in: Controller, Processor.
Arguments
| Argument | Description | Value Type |
|---|---|---|
| value | The value for the display string. | number or string |
❕ The data type of the value for getDisplayString must match the data type of the corresponding parameter value.
Return Values
Returns the display string of the specified parameter and value.
Example
-- Get the display string of a value.

value = -2.471
print("value = "..value)
print("Display String = "..this.program:getParameterDefinition("Level"):getDisplayString(-2.471))
See also: getParameterDefinition
/ HALion Developer Resource / HALion Script / Reference /
getEffect
getEffect(nameOrPosition)
Description
Function to retrieve the Effect object of an effect from the specified bus. You can use getBus or findBusses to specify the bus. A particular effect can be searched by name or position. The position is the number indexing the effects in the specified bus. If several effects share the same name, only the first match will be returned. If no argument is set, the function returns the first effect that it finds.
Available in: Controller, Processor.
Arguments
| Argument | Description | Value Type |
|---|---|---|
| nameOrPosition | The name or position of the effect. Set this to nil to deactivate the search filter. | string or number, optional |
Return Values
Returns the Effect object of the found effect. Returns nil if no bus is found.
Example
-- Locate the first bus in the program.

bus = this.program:getBus()

if bus then
    -- Locate the first effect of the bus and print its name.
    effect = bus:getEffect()
    if effect then
        print(effect.name)
    else
        print("Could not find an effect!")
    end
else
    print("Could not find a bus!")
end
See also: getBus, getChild, getLayer, getMidiModule, getSlot, getZone, Effect
/ HALion Developer Resource / HALion Script / Reference /
getElement
getElement()
Description
Function to obtain the Element object of an element that has a macro page. If you call this function in the UI script of a macro page, the Element object of the element to which the macro page is attached will be returned. Depending on the element, the returned object can be of the type program, layer, or MIDI module, for example.
❕ This function can only be called in an UI script.
Available in: UI.
Return Values
Returns the Element object of the element to which the macro page is attached.
Example
-- Must be executed as UI script!
-- Print the name and type of the element that has the macro page attached.

element = getElement()
print(element.name, element.type)

-- Print the name and type of the parent element.

if element.parent then
    print(element.parent.name, element.parent.type)
end
/ HALion Developer Resource / HALion Script / Reference /
getFreeVoices
getFreeVoices()
Description
Function to retrieve the number of free voices of the plug-in instance.
❕ If the initiation of a zone and the call of getFreeVoices happen in the same audio block, the voice count which is returned might not be up-to-date. To prevent this, wait for the next audio block before calling this function.
Available in: Processor.
Return Values
Returns the number of free voices of the plug-in instance.
Example
-- Print the number of free voices of the plug-in.

function printFreeVoices()
    wait(20)  -- Wait for 20 ms to avoid calling getFreeVoices in the same audio block.
    print("Number of free voices: "..getFreeVoices())
end

function onNote(event)
    postEvent(event)
    spawn(printFreeVoices)
end
See also: getVoices, getUsedVoices, getUsedVoicesOfSlot
/ HALion Developer Resource / HALion Script / Reference /
getHostName
getHostName()
Description
Function to retrieve the name of the host software.
Available in: Processor.
Return Values
Returns a string with the name of the host software.
Example
-- Print the name of the host software.

function onInit()
    print(getHostName())
end
See also: getHostVersion, getProductName, getProductVersion
/ HALion Developer Resource / HALion Script / Reference /
getHostVersion
getHostVersion()
Description
Function to retrieve the version of the host software.
Available in: Processor.
Return Values
Returns a string with the version of the host software.
Example
-- Print the version of the host software.

function onInit()
    print(getHostVersion())
end
See also: getHostName, getProductName, getProductVersion
/ HALion Developer Resource / HALion Script / Reference /
getKeyProperties
getKeyProperties()
Description
Function to access the internal key properties array. This array manages the colors and tooltips of the keys on the plug-in keyboard and the instrument names that will be shown in Cubase's Drum Editor when you use Create Drum Map from Instrument in the Inspector. This function does not retrieve colors or tooltips from other MIDI modules like MegaTrig, for example. Therefore, the first time you call getKeySwitches, the returned array will be empty. You must initialize the array by specifying each key property using a table with a set of predefined fields. The valid fields are listed below. The index of the array must be in the range from 0 to 127. Each index addresses the properties of the key with the corresponding note number. You change the properites by creating a table for the desired index/key and then you assign values to the fields .color, .tooltip or .drummap. Making changes to the properties of a key will override any properties the key might have from other MIDI modules, e.g., the tooltip and coloring from a key switch of a MegaTrig module, even if the MIDI module is located earlier in the processing chain, i.e., higher in the hierarchy of the Program Tree. Any key properties from other script modules that are later in the processing chain will also be overridden. The key properties from the first script module in the Program Tree always have priority.
Available in: Controller.
Fields
| Field | Description | Value Type |
|---|---|---|
| .color | The color of the key on the plug-in keyboard. There are twenty-four predefined colors. You set them with a number in the range from 1 to 24. | number |
| .tooltip | The string for the tooltip of the key on the plug-in keyboard. | string |
| .drummap | The string that will be shown as instrument name in Cubase's Drum Editor when you use Create Drum Map from Instrument in the Inspector. | string |
❕ To clear a property, set the respective field to
nil. Setting.coloror.tooltipto nil will use the next valid key properties, i.e., the color and toolip from another MIDI or script module. If no properties from other modules are available, no color and tooltip will be used.
Return Values
Returns the reference to the internal key properties array.
Example 1
-- Set and clear colors on the keyboard.

-- Initialize variabes.
local keys = getKeyProperties()
local keyColor = 1
local noteNumber = 36 -- C1
local blackKeys = { [1] = true, [3] = true, [6] = true, [8] = true, [10] = true }

-- Assign all 24 colors to the white keys of the keyboard starting from C1.
while keyColor <= 24 do
    -- get step in octave
    local step = noteNumber % 12
    -- use only white keys
    if not blackKeys[step] then
        keys[noteNumber] = { color = keyColor }
        keyColor = keyColor + 1
    end
    noteNumber = noteNumber + 1
end

-- Clear the color of the played key.
function onNote(event)
    postEvent(event)
    if keys[event.note] then
        keys[event.note].color = nil
    end
end
Example 2
 -- Set the GM drum map as tooltip and drummap name.

local GMStandardDrumMap = { "Bass Drum 2",     "Bass Drum 1",     "Side Stick",
                            "Snare Drum 1",    "Hand Clap",       "Snare Drum 2",
                            "Low Tom 2",       "Closed Hi-hat",   "Low Tom 1",
                            "Pedal Hi-hat",    "Mid Tom 2",       "Open Hi-hat",
                            "Mid Tom 1",       "High Tom 2",      "Crash Cymbal 1",
                            "High Tom 1",      "Ride Cymbal 1",   "Chinese Cymbal",
                            "Ride Bell",       "Tambourine",      "Splash Cymbal",
                            "Cowbell",         "Crash Cymbal 2",  "Vibra Slap",
                            "Ride Cymbal 2",   "High Bongo",      "Low Bongo",
                            "Mute High Conga", "Open High Conga", "Low Conga",
                            "High Timbale",    "Low Timbale",     "High Agogo",
                            "Low Agogo",       "Cabasa",          "Maracas",
                            "Short Whistle",   "Long Whistle",    "Short Guiro",
                            "Long Guiro",      "Claves",          "High Wood Block",
                            "Low Wood Block",  "Mute Cuica",      "Open Cuica",
                            "Mute Triangle",   "Open Triangle",
                          }

-- Initialize variables.
local keys = getKeyProperties()
local noteNumber = 35 -- Note number of Bass Drum 2.

-- Set the GM drum map.
for i, drumName in ipairs(GMStandardDrumMap) do
    keys[noteNumber + (i - 1)] = { tooltip = drumName, drummap = drumName }
end
See also: getKeySwitches
/ HALion Developer Resource / HALion Script / Reference /
getKeySwitches
getKeySwitches()
Description
Function to access the internal key switch array. This array manages the display of the key switches on the plug-in keyboard and the information that is handed over to Cubase's Expression Map when you use Import Key Switches in the Inspector. This function does not retrieve key switches from other MIDI modules like MegaTrig, for example. The first time you call getKeySwitches, the returned array will be empty. You must initialize the array by specifying each key switch using a table with a set of predefined fields. The valid fields are listed below. The key switches you specify will be displayed on the plug-in keyboard with predefined colors and the information from the .name field displayed as tooltip. You can use getKeyProperties to override the predefined colors. Key colors retrieved from other MIDI modules will be overridden by the key switches specified in the script. If key switches from different script modules are assigned to the same keys, the key switches of the script module that comes earlier in the processing chain will override the key switches of script modules located behind them in the processing chain. The specified key switches can be imported as an Expression Map in Cubase by using Import Key Switches in the Inspector.
❕ Specifying a key switch by using getKeySwitches must not be confused with implementing the playing logic for the key switches. The playing logic must be implemented separately in the MIDI processing part of your script.
Available in: Controller.
Fields
| Field | Description | Value Type |
|---|---|---|
| .name | The name of the key switch. It will be displayed as tooltip on the keyboard and in the Expression Map of Cubase. | string |
| .keyMin | The note number of the lowest key in the range of 0 to 127. | number |
| .keyMax | The note number of the highest key in the range of 0 to 127. If no value is set, this will default to keyMin. | number, optional |
| .keyRemapped | The note number of the remote key in the range of 0 to 127. If no value is set, this will default to -1. | number, optional |
Return Values
Returns the internal key switch array.
Example
-- Define key switches that can be imported as Expression Map in Cubase.

-- Get key switch array.
keySwitches = getKeySwitches()

-- Assign values to name and keyMin.
keySwitches[1] = { name = "Legato",    keyMin = 21 }
keySwitches[2] = { name = "Spiccato",  keyMin = 22 }
keySwitches[3] = { name = "Pizzicato", keyMin = 23 }
keySwitches[4] = { name = "Tremolo",   keyMin = 24 }
See also: getKeyProperties
/ HALion Developer Resource / HALion Script / Reference /
getLayer
getLayer(nameOrPosition)
Description
Function to retrieve the Layer object of a layer in the specified layer. For example, this.parent specifies the parent layer of the script module as the layer to be searched in. The function does not search in sublayers. A particular layer can be searched by name or position. The position is the number indexing the layers in the specified layer. If several layers share the same name, only the first match will be returned. If no argument is set, the function returns the first layer it finds.
Available in: Controller, Processor.
Arguments
| Argument | Description | Value Type |
|---|---|---|
| nameOrPosition | The name or position of the layer. Set this to nil to deactivate the search filter. | string or number, optional |
Return Values
Returns the Layer object of the found layer. Returns nil if no layer is found.
Example
-- Locate the first layer in the program and print its name.

layer = this.program:getLayer()

if layer then
    print(layer.name)
else
    print("Could not find a layer!")
end
See also: getBus, getChild, getEffect, getMidiModule, getSlot, getZone, Layer
/ HALion Developer Resource / HALion Script / Reference /
getMidiModule
getMidiModule(nameOrPosition)
Description
Function to retrieve the MidiModule object of a MIDI module in the specified layer. For example, this.parent defines the parent layer of the script module as the layer to be searched in. This function does not search in sublayers. A particular MIDI module can be searched by name or position. The position is the number indexing the MIDI modules in the specified layer. If several MIDI modules share the same name, only the first match will be returned. If no argument is set, the function returns the first MIDI module it finds.
Available in: Controller, Processor.
Arguments
| Argument | Description | Value Type |
|---|---|---|
| nameOrPosition | The name or position of the MIDI module. Set this to nil to deactivate the search filter. | string or number, optional |
Return Values
Returns the MidiModule object of the found MIDI module. Returns nil if no MIDI module is found.
Example
-- Locate the first MIDI module in the program and print its name.

module = this.program:getMidiModule()

if module then
    print(module.name)
else
    print("Could not find a MIDI module!")
end
See also: getBus, getChild, getEffect, getLayer, getSlot, getZone, MidiModule
/ HALion Developer Resource / HALion Script / Reference /
getModulationMatrixRow
getModulationMatrixRow(rowNumber)
Description
Function to obtain the ModulationMatrixRow object of the specified modulation matrix row. The modulation matrix row is determined by the Zone object of the zone and the index of the modulation matrix row.
Available in: Controller, Processor.
Arguments
| Argument | Description | Value Type |
|---|---|---|
| rowNumber | The index of the modulation matrix row in the range from 1 to 32. | number |
Return Values
The ModulationMatrixRow object of the specified modulation matrix row.
Example
-- Get the element object of the first zone in the program.

zone = this.program:findZones(true)[1]

-- Get the element object of the first modulation matrix row.

modRow = zone:getModulationMatrixRow(1)

-- Print the row number of the specified modulation matrix row.

print(modRow.rowNumber)
See also: ModulationMatrixRow, setSource1, setSource2, getSource1, getSource2, Modulation Source Types, Modulation Destination Types
/ HALion Developer Resource / HALion Script / Reference /
getMsTime
getMsTime()
Description
Function to obtain the current song position in milliseconds.
Available in: Processor.
Return Values
When the host is in playback, the function returns a decimal with the milliseconds since the start of the song. The start of the song equals 0 ms. The function returns -1 if the host is not in playback.
Example
-- Print the song position in milliseconds.
function onNote(event)
posInSongMs = getMsTime()
if (posInSongMs ~= -1) then
print(string.format("%.3f ms", posInSongMs))
else
print("Playback is stopped.")
end
end
See also: getBeatTime, getBeatTimeInBar
/ HALion Developer Resource / HALion Script / Reference /
getNoteDuration
getNoteDuration(note)
Description
Function to measure the time interval between the last note-on or note-retrigger event of the specified note and the call of this function.
Available in: Processor.
Arguments
| Argument | Description | Value Type |
|---|---|---|
| note | The note number in the range of 0 to 127. | number |
Return Values
Returns the time interval in milliseconds.
Example
-- Print the time interval between the note-on or the note-retrigger and the note-off.
function onRelease(event)
postEvent(event)
print(getNoteDuration(event.note), "ms")
end
See also: getBarDuration, getBeatDuration
/ HALion Developer Resource / HALion Script / Reference /
getNoteExpression
getNoteExpression(noteID, type)
Description
Function to read the current value of a note expression of a specific note.
Available in: Processor.
Arguments
| Argument | Description | Value Type |
|---|---|---|
| noteID | The note ID of the associated note. | number |
| type | The note expression type. It can be determined via names or indices. See Note Expression Types for a description of the types, names and indices. | enum or number |
Return Values
Returns the current value of the note expression determined by the arguments. The function returns -1 if the value of the note expression has not been set yet.
Example
-- Print the current value of the volume and pan note expressions.
function onNote(event)
local id = postEvent(event)
changeNoteExpression(id, 1, 0.5, false, true)
print(getNoteExpression(id, NoteExpressionType.volume))
print(getNoteExpression(id, NoteExpressionType.pan))
end
See also: onNoteExpression, changeNoteExpression, Note Expression Types
/ HALion Developer Resource / HALion Script / Reference /
getNoteExpressionProperties
getNoteExpressionProperties()
Description
Function to access the internal array that manages the appearance of the custom note expressions. In HALion, these are found in the Note Expression section and in Cubase, in the Note Expression section of the Inspector. For example, if your script generates note expression events, you can give the associated custom note expressions meaningful names or you can hide them. The first time you call getNoteExpressionProperties, the returned array will be empty. You change the properites by assigning a table with the fields .name or .block to the index of the array that corresponds to the custom note expression. The indices from 4 to 11 correspond to the custom note expressions 1 to 8 (see Note Expression Types for details). The properties defined by this script will override any properties that come later in the processing chain.
❕ The properties of the pre-assigned note expressions volume, pan and tuning cannot be changed
Available in: Controller.
Fields
| Field | Description | Value Type |
|---|---|---|
| .name | The name of the custom note expression. By default, HALion automatically creates a name for the custom note expression if it is assigned in the modulation matrix. The name you set with the .name property and the automatically created name are both displayed. If the .block property is set to true, only the name set with the .name property is displayed. | string, optional |
| .block | If set to true, the properties that come later in the processing chain will not be evaluated. If no value is specified, this is set to false. If the .block property is set to true and the .name property is not set or nil, the name of the custom note expression will not be displayed in HALion and Cubase. | boolean, optional |
Return Values
Returns the reference to the internal note expression properties array.
Example
ne = getNoteExpressionProperties() -- Get the reference to the note expression properties table.
ne[NoteExpressionType.custom1] = { name = "Reserved", block = true } -- Displays only 'Reserved'.
ne[NoteExpressionType.custom2] = { block = true } -- Hides the note expression.
ne[NoteExpressionType.custom3] = { name = "Test", block = false } -- Displays 'Test' and auto created names.
See also: onNoteExpression, changeNoteExpression, getNoteExpression, Note Expression Types
/ HALion Developer Resource / HALion Script / Reference /
getNumQCAssignments
getNumQCAssignments(qc)
Description
Function to retrieve the number of assignments of a quick control on the specified layer. For example, this.parent defines the parent layer of the script module as the layer with the desired quick control. The qc argument is the index of the quick control with the requested assignments.
Available in: Controller.
Arguments
| Argument | Description | Value Type |
|---|---|---|
| qc | The index of the quick control. | number |
Return Values
Returns the number of assignments of the specified layer and quick control.
Example
-- Print the number of assignments of the first quick control on the parent layer.
layer = this.parent
qc = 1
print("Number of assignments on '"..layer.name.."', QC "..qc..": "..layer:getNumQCAssignments(qc)..".")
See also: addQCAssignment, removeQCAssignment, getQCAssignmentParamId, getQCAssignmentScope, getQCAssignmentMin, getQCAssignmentMax, getQCAssignmentCurve, getQCAssignmentMode, getQCAssignmentBypass, setQCAssignmentParamId, setQCAssignmentScope, setQCAssignmentMin, setQCAssignmentMax, setQCAssignmentCurve
/ HALion Developer Resource / HALion Script / Reference /
getOnsets
getOnsets(start, length, peakThreshold, sensThreshold, minLength)
(Since HALion 6.4.0)
Description
Function to analyze the onsets in an audio file. You specify the audio file with the AudioFile object that is returned by the AudioFile.open function. The onset analysis is performed on the sum of all channels in the audio file. The arguments start and length define the time range in the audio file to be analyzed. The peakThreshold and sensThreshold arguments determine the minimum level and the weight of an onset, the minLength argument determines the minimum duration between consecutive onsets.
Available in: Controller.
Arguments
| Argument | Description | Value Type |
|---|---|---|
| start | The start position in samples. | number |
| length | The duration in samples. Set this to equal to or less than 0 to use all samples from the specified start to the end of the sample. | number |
| peakThreshold | The minimum level in decibels. Onsets with a lower level are skipped. The value range is from -96 to 0. | number |
| sensThreshold | The minimum weight in percent. Onsets with a lower weight are skipped. The value range is from 0 to 100. | number |
| minLength | The minimum duration between consecutive onsets in milliseconds. The value range is from 0 to 10000. | number |
Return Values
Returns an array with the positions of the detected onsets.
Example
fname = "vstsound://271CB2CFA75E4295B1C273FA651FE11D/.Samples/g:/projects/yamahacontentserver/Download/Release/ycj/ME_Waveform/Loop145/samples/Loop145_072(2).wav"
af = AudioFile.open(fname)
onsets = af:getOnsets(0, -1, -24, 0, 10)
for i, pos in ipairs(onsets) do
print(i.." ".."Onset: "..pos)
end
See also: AudioFile, AudioFile.open
/ HALion Developer Resource / HALion Script / Reference /
getOutputBus
getOutputBus()
Description
Function to retrieve the currently assigned output bus of a zone or bus.
Available in: Controller, Processor.
Return Values
Returns the Bus object of the currently assigned output bus or nil if the default routing is used.
Example
-- Raise an error if no output bus is assigned.
zone = this.parent:getZone()
assert(zone:getOutputBus(), "No output bus assigned. The default routing is used!")
See also: setOutputBus, Bus
/ HALion Developer Resource / HALion Script / Reference /
getParameter
getParameter(nameOrID)
Description
Function to read the current value of a parameter. The parameter can be determined by name or ID.
Available in: Controller, Processor.
Arguments
| Argument | Description | Value Type |
|---|---|---|
| nameOrID | The name or ID of the parameter. | string or number |
Return Values
Returns the current value of the parameter or nil if the parameter doesn't exist.
Example
-- Print the value of the parent layer's level parameter.
function onLoadIntoSlot()
print("Level = "..this.parent:getParameter("Level")) -- via name
print("Level = "..this.parent:getParameter(38)) -- via ID
end
See also: setParameter, getParameterNormalized, setParameterNormalized, hasParameter
/ HALion Developer Resource / HALion Script / Reference /
getParameterDefinition
getParameterDefinition(nameOrID)
Description
Function to retrieve the ParameterDefinition object for a parameter. The parameter can be determined by name or ID. The ParameterDefinition object describes the properties of a parameter.
Available in: Controller, Processor.
Arguments
| Argument | Description | Value Type |
|---|---|---|
| nameOrID | The name or ID of the parameter. | string or number |
Return Values
Returns the ParameterDefinition object for the specified parameter.
Example
-- Print the parameter definition with corresponding
-- data type of the parent layer's level parameter.
function onLoadIntoSlot()
local def = this.parent:getParameterDefinition("Level")
print("Name = "..def.name..", "..type(def.name))
print("ID = "..def.id..", "..type(def.id))
print("Type = "..def.type..", "..type(def.type))
print("Default = "..def.default..", "..type(def.default))
print("Read Only = "..tostring(def.readOnly)..", "..type(def.readOnly))
print("Min = "..def.min..", "..type(def.min))
print("Max = "..def.max..", "..type(def.max))
print("Unit = "..def.unit..", "..type(def.unit).."\n")
end
See also: ParameterDefinition
/ HALion Developer Resource / HALion Script / Reference /
getParameterNormalized
getParameterNormalized(nameOrID)
Description
Function to read the current value of a parameter in the normalized range from 0 to 1.0. The parameter can be determined by name or ID.
Available in: Controller, Processor.
Arguments
| Argument | Description | Value Type |
|---|---|---|
| nameOrID | The name or ID of the parameter. | string or number |
Return Values
Returns the current value of the parameter in the normalized range from 0 to 1.0 or nil if the parameter doesn't exist. If the parameter is not numeric, the function returns the same as getParameter
Example
-- Print the normalized value of the parent layer's level parameter.
function onLoadIntoSlot()
print("Level = "..this.parent:getParameterNormalized("Level")) -- via name
print("Level = "..this.parent:getParameterNormalized(38)) -- via ID
end
See also: setParameterNormalized, getParameter, setParameter, hasParameter
/ HALion Developer Resource / HALion Script / Reference /
getPeak
getPeak(start, length, rms)
Description
Function to analyze the levels in an audio file. You specify the audio file with the AudioFile object that is returned by the AudioFile.open function. The arguments start and length define the range in the audio file to be analyzed. The rms argument determines whether the peak level or the RMS level of the specified range is returned.
Available in: Controller.
Arguments
| Argument | Description | Value Type |
|---|---|---|
| start | The start position in samples. | number |
| length | The duration in samples. Set this to equal to or less than 0 to use all samples from the specified start to the end of the file. | number |
| rms | If this is set to 0, the peak level of the specified range will be returned. If this is set to a value above 0, the RMS level over the specified range will be calculated. | number |
Return Values
Returns the level of the specifed range as a linear value. The example shows how to convert the value from linear to dB.
Example
function lin2db(lin)
return 20 * math.log(lin) / math.log(10)
end
fname = "vstsound://F29C895D6D8E4D6C9BCBBA5198412192/.samples/Ambient Pad 01/Ambient Pad 01 - C3.tg3c"
af = AudioFile.open(fname)
-- Analyze the peak level in the first 1000 samples.
attpeak = af:getPeak(0, 1000, 0)
-- Analyze the RMS level in the range from 1000 samples till the end of the file.
susrms = af:getPeak(1000, -1, 1)
print("Attack Peak:", attpeak, "(", lin2db(attpeak), "dB )")
print("Sustain RMS:", susrms, "(", lin2db(susrms), "dB )")
See also: AudioFile, AudioFile.open
/ HALion Developer Resource / HALion Script / Reference /
getPitch
getPitch(start, length, channel)
(Since HALion 6.3)
Description
Function to obtain the pitch of an audio file that has been analyzed with analyzePitch. The audio file you want to obtain the pitch from is specified with the AudioFile object that is returned by the AudioFile.open function. The arguments start and length define the range in the audio file that is used for obtaining the pitch. The channel argument specifies the channel of the audio file that was analyzed. The AudioFile object and the channel argument must match the call to analyzePitch. The function returns two values: The pitch as MIDI note number with decimals for cents and a boolean for voiced/unvoiced detection. If length is greater than 20 ms, the average of the pitches in the specified range is returned. If the audio file has not been analyzed in advance, getPitch returns nil.
Available in: Controller.
Arguments
| Argument | Description | Value Type |
|---|---|---|
| start | The start position in samples. | number |
| length | The duration in samples. Set this to less than or equal to 0 to use all samples from the specified start to the end of the file. | number |
| channel | Use this to specify the audio channel that was analyzed. | number, optional |
Return Values
Returns two values:
- A float value representing the pitch as MIDI note number with decimals for cents,
- a boolean for voiced/unvoiced detection. The return value
truemeans that a pitch was detected in the specified range.
If length is greater than 20 ms, the average of the pitches in the specified range is returned. If the audio file has not been analyzed in advance, getPitch returns nil.
Example
channelNames = { [0] = "All", "Left", "Right" }
defineParameter( "Channel", nil, 0, channelNames)
defineParameter( "Start", nil, false, function() if Start then onStart() end end)
defineParameter( "Cancel", nil, false)
-- Requires the Skylab content.
path = "vstsound://724ACB205EFF46F885735D1B216C37AD/.AppData/Steinberg/Skylab/Sub Presets/Layer Presets/Ambient Pads/Ambient Pad 01.vstpreset"
layer = loadPreset(path)
function onPitchAnalysisFinished(audioFile, channelNum)
print("Progress: 100%")
print(channelNames[channelNum].." channel(s) of "..audioFile.fileName.." analyzed.")
end
function onStart()
zones = layer:findZones(true)
for i, zone in ipairs(zones) do
local samplePath = zone:getParameter("SampleOsc.Filename")
print("File: "..samplePath)
local afile = AudioFile.open(samplePath)
afile:analyzePitch(onPitchAnalysisFinished, Channel)
while afile:getPitchAnalysisProgress(Channel) < 1 do
if Cancel then
afile:cancelPitchAnalysis(Channel)
break
end
local progressPercent = 100 * afile:getPitchAnalysisProgress(Channel)
print(string.format("Progress: %2d%%", progressPercent))
wait(2000)
end
if Cancel then
Cancel = false
print("Canceled!")
break
end
local pitch = afile:getPitch(0, -1, Channel)
print("Analyzed Pitch: "..pitch)
end
print("Done!")
Start = false
end
See also: analyzePitch, getPitchAnalysisProgress, cancelPitchAnalysis
/ HALion Developer Resource / HALion Script / Reference /
getPitchAnalysisProgress
getPitchAnalysisProgress(channel)
(Since HALion 6.3)
Description
Function to monitor the progress of analyzePitch. You specify the audio file with the AudioFile object that is returned by the AudioFile.open function. The channel argument specifies the channel of the audio file. The AudioFile object and the channel argument must match the call to analyzePitch. The function returns the progress as a float value between 0 and 1.
Available in: Controller.
Arguments
| Argument | Description | Value Type |
|---|---|---|
| channel | Use this to specify the channel of the audio file that is being analyzed. | number, optional |
Return Values
Returns the progress as a float value between 0 and 1.
Example
channelNames = { [0] = "All", "Left", "Right" }
defineParameter( "Channel", nil, 0, channelNames)
defineParameter( "Start", nil, false, function() if Start then onStart() end end)
defineParameter( "Cancel", nil, false)
-- Requires the Skylab content.
path = "vstsound://724ACB205EFF46F885735D1B216C37AD/.AppData/Steinberg/Skylab/Sub Presets/Layer Presets/Ambient Pads/Ambient Pad 01.vstpreset"
layer = loadPreset(path)
function onPitchAnalysisFinished(audioFile, channelNum)
print("Progress: 100%")
print(channelNames[channelNum].." channel(s) of "..audioFile.fileName.." analyzed.")
end
function onStart()
zones = layer:findZones(true)
for i, zone in ipairs(zones) do
local samplePath = zone:getParameter("SampleOsc.Filename")
print("File: "..samplePath)
local afile = AudioFile.open(samplePath)
afile:analyzePitch(onPitchAnalysisFinished, Channel)
while afile:getPitchAnalysisProgress(Channel) < 1 do
if Cancel then
afile:cancelPitchAnalysis(Channel)
break
end
local progressPercent = 100 * afile:getPitchAnalysisProgress(Channel)
print(string.format("Progress: %2d%%", progressPercent))
wait(2000)
end
if Cancel then
Cancel = false
print("Canceled!")
break
end
local pitch = afile:getPitch(0, -1, Channel)
print("Analyzed Pitch: "..pitch)
end
print("Done!")
Start = false
end
See also: analyzePitch, getPitch, cancelPitchAnalysis
/ HALion Developer Resource / HALion Script / Reference /
getProcessedSamples
getProcessedSamples()
Description
Function to obtain the number of processed samples since the initialization of the plug-in.
Available in: Processor.
Return Values
Returns the number of processed samples since the initialization of the plug-in.
Example
-- Measure the number of processed samples between subsequent notes.
function onNote(event)
postEvent(event)
s2 = getProcessedSamples()
if s1 then
print(string.format("%.f samples", s2 - s1))
end
s1 = s2
end
/ HALion Developer Resource / HALion Script / Reference /
getProductName
getProductName()
Description
Function to retrieve the name of the plug-in.
Available in: Processor.
Return Values
Returns a string with the name of the plug-in.
Example
-- Print the name of the plug-in.
function onInit()
print(getProductName())
end
See also: getProductVersion, getHostName, getHostVersion
/ HALion Developer Resource / HALion Script / Reference /
getProductVersion
getProductVersion()
Description
Function to retrieve the version of the plug-in.
Available in: Controller, Processor.
Return Values
Returns a string with the version of the plug-in.
Example
-- Print the version of the plug-in.
function onInit()
print(getProductVersion())
end
See also: getProductName, getHostName, getHostVersion
/ HALion Developer Resource / HALion Script / Reference /
getProgram
getProgram(index)
Description
Function to retrieve the Program object of a program in the Program Table of the plug-in instance. Before calling this function you must access the Instance object with this.program.instance. The index corresponds to the number of the slot in the Program Table where the program is set. The function returns the Program object of the program with the specified index.
Available in: Controller.
Arguments
| Argument | Description | Value Type |
|---|---|---|
| index | The index of the slot in the Program Table where the program is set. | number |
Return Values
Returns the Program object of the program with the specified index.
Example
-- Print the name of the program in the third slot of the Program Table.
program = this.program.instance:getProgram(3)
print(program.name)
See also: setProgram, Program
/ HALion Developer Resource / HALion Script / Reference /
getQCAssignmentBypass
getQCAssignmentBypass(qc, assignment)
Description
Function to retrieve the bypass state of the specified quick control assignment. The quick control assignment is determined by the Layer object, the index of the quick control and the index of the assignment itself. For example, this.parent defines the parent layer of the script module as the layer that contains the quick control. The qc argument is the index of the quick control and the assignment argument is the index of the assignment with the requested bypass state. The indices of the quick controls and the assignments both start counting from 1.
Available in: Controller.
Arguments
| Argument | Description | Value Type |
|---|---|---|
| qc | The index of the quick control. | number |
| assignment | The index of the quick control assignment. | number |
Return Values
Returns the bypass state of the specified quick control assignment as boolean value.
Example
-- Print the bypass state of the qc assignment.
layer = this.parent
qc = 1
assignment = 1
qcBypass = layer:getQCAssignmentBypass(qc, assignment)
print("Bypass of '"..layer.name.."', QC "..qc..", assignment "..assignment..": "..tostring(qcBypass)..".")
See also: addQCAssignment, removeQCAssignment, getNumQCAssignments, getQCAssignmentParamId, getQCAssignmentScope, getQCAssignmentMin, getQCAssignmentMax, getQCAssignmentCurve, getQCAssignmentMode, setQCAssignmentParamId, setQCAssignmentScope, setQCAssignmentMin, setQCAssignmentMax, setQCAssignmentCurve, setQCAssignmentMode, setQCAssignmentBypass, Quick Control Assignment Modes
/ HALion Developer Resource / HALion Script / Reference /
getQCAssignmentCurve
getQCAssignmentCurve(qc, assignment)
Description
Function to retrieve the curve value of the specified quick control assignment. The quick control assignment is determined by the Layer object, the index of the quick control and the index of the assignment itself. For example, this.parent defines the parent layer of the script module as the layer that contains the quick control. The qc argument is the index of the quick control and the assignment argument is the index of the assignment with the requested curve value. The indices of the quick controls and the assignments both start counting from 1.
Available in: Controller.
Arguments
| Argument | Description | Value Type |
|---|---|---|
| qc | The index of the quick control. | number |
| assignment | The index of the quick control assignment. | number |
Return Values
Returns the curve value of the specified quick control assignment. The value range is -100% to +100%.
Example
-- Print the curve value of the qc assignment.
layer = this.parent
qc = 1
assignment = 1
qcCurve = layer:getQCAssignmentCurve(qc, assignment)
print("Curve value of '"..layer.name.."', QC "..qc..", assignment "..assignment..": "..qcCurve..".")
See also: addQCAssignment, removeQCAssignment, getNumQCAssignments, getQCAssignmentParamId, getQCAssignmentScope, getQCAssignmentMin, getQCAssignmentMax, getQCAssignmentMode, getQCAssignmentBypass, setQCAssignmentParamId, setQCAssignmentScope, setQCAssignmentMin, setQCAssignmentMax, setQCAssignmentCurve, setQCAssignmentMode, setQCAssignmentBypass, Quick Control Assignment Modes
/ HALion Developer Resource / HALion Script / Reference /
getQCAssignmentMax
getQCAssignmentMax(qc, assignment)
Description
Function to retrieve the maximum value of the specified quick control assignment. The quick control assignment is determined by the Layer object, the index of the quick control and the index of the assignment itself. For example, this.parent defines the parent layer of the script module as the layer that contains the quick control. The qc argument is the index of the quick control and the assignment argument is the index of the assignment with the requested maximum value. The indices of the quick controls and the assignments both start counting from 1.
Available in: Controller.
Arguments
| Argument | Description | Value Type |
|---|---|---|
| qc | The index of the quick control. | number |
| assignment | The index of the quick control assignment. | number |
Return Values
Returns the maximum value of the specified quick control assignment.
❕ The value range is always 0 to 100 %, even if the mode of the quick control assignment is set to Relative or Switch Relative.
Example
-- Print the maximum value of the qc assignment as displayed in HALion.
layer = this.parent
qc = 1
assignment = 1
qcMode = layer:getQCAssignmentMode(qc, assignment)
qcMax = layer:getQCAssignmentMax(qc, assignment)
-- Convert to bipolar range if the qc is of the type relative or switch relative.
if (qcMode == QCAssignmentMode.relative or qcMode == QCAssignmentMode.switchRelative) then
qcMax = qcMax * 2 - 100
end
print("Maximum value of '"..layer.name.."', QC "..qc..", assignment "..assignment..": "..qcMax..".")
See also: addQCAssignment, removeQCAssignment, getNumQCAssignments, getQCAssignmentParamId, getQCAssignmentScope, getQCAssignmentMin, getQCAssignmentCurve, getQCAssignmentMode, getQCAssignmentBypass, setQCAssignmentParamId, setQCAssignmentScope, setQCAssignmentMin, setQCAssignmentMax, setQCAssignmentCurve, setQCAssignmentMode, setQCAssignmentBypass, Quick Control Assignment Modes
/ HALion Developer Resource / HALion Script / Reference /
getQCAssignmentMin
getQCAssignmentMin(qc, assignment)
Description
Function to retrieve the minimum value of the specified quick control assignment. The quick control assignment is determined by the Layer object, the index of the quick control and the index of the assignment itself. For example, this.parent defines the parent layer of the script module as the layer that contains the quick control. The qc argument is the index of the quick control and the assignment argument is the index of the assignment with the requested minimum value. The indices of the quick controls and the assignments both start counting from 1.
Available in: Controller.
Arguments
| Argument | Description | Value Type |
|---|---|---|
| qc | The index of the quick control. | number |
| assignment | The index of the quick control assignment. | number |
Return Values
Returns the minimum value of the specified quick control assignment.
❕ The value range is always 0 to 100 %, even if the mode of the quick control assignment is set to Relative or Switch Relative.
Example
-- Print the minimum value of the qc assignment as displayed in HALion.
layer = this.parent
qc = 1
assignment = 1
qcMode = layer:getQCAssignmentMode(qc, assignment)
qcMin = layer:getQCAssignmentMin(qc, assignment)
-- Convert to bipolar range if the qc is of the type relative or switch relative.
if (qcMode == QCAssignmentMode.relative or qcMode == QCAssignmentMode.switchRelative) then
qcMin = qcMin * 2 - 100
end
print("Minimum value of '"..layer.name.."', QC "..qc..", assignment "..assignment..": "..qcMin..".")
See also: addQCAssignment, removeQCAssignment, getNumQCAssignments, getQCAssignmentParamId, getQCAssignmentScope, getQCAssignmentMax, getQCAssignmentCurve, getQCAssignmentMode, getQCAssignmentBypass, setQCAssignmentParamId, setQCAssignmentScope, setQCAssignmentMin, setQCAssignmentMax, setQCAssignmentCurve, setQCAssignmentMode, setQCAssignmentBypass, Quick Control Assignment Modes
/ HALion Developer Resource / HALion Script / Reference /
getQCAssignmentMode
getQCAssignmentMode(qc, assignment)
Description
Function to retrieve the mode that is set for the specified quick control assignment. The quick control assignment is determined by the Layer object, the index of the quick control and the index of the assignment itself. For example, this.parent defines the parent layer of the script module as the layer that contains the quick control. The qc argument is the index of the quick control and the assignment argument is the index of the assignment with the requested mode. The indices of the quick controls and the assignments both start counting from 1.
Available in: Controller, Processor.
Arguments
| Argument | Description | Value Type |
|---|---|---|
| qc | The index of the quick control. | number |
| assignment | The index of the quick control assignment. | number |
Return Values
Returns the mode that is set for the specified quick control assignment as a number. The mode can be determined via names or indices. See Quick Control Assignment Modes for details.
Example
-- Print the mode of the qc assignment.
layer = this.parent
qc = 1
assignment = 1
qcMode = layer:getQCAssignmentMode(qc, assignment)
if qcMode == QCAssignmentMode.absolute then
qcModeName = "Absolute"
elseif qcMode == QCAssignmentMode.relative then
qcModeName = "Relative"
elseif qcMode == QCAssignmentMode.switch then
qcModeName = "Switch"
elseif qcMode == QCAssignmentMode.switchRelative then
qcModeName = "Switch Relative"
end
print("Mode of '"..layer.name.."', QC "..qc..", assignment "..assignment..": "..qcModeName..".")
See also: addQCAssignment, removeQCAssignment, getNumQCAssignments, getQCAssignmentParamId, getQCAssignmentScope, getQCAssignmentMin, getQCAssignmentMax, getQCAssignmentCurve, getQCAssignmentBypass, setQCAssignmentParamId, setQCAssignmentScope, setQCAssignmentMin, setQCAssignmentMax, setQCAssignmentCurve, setQCAssignmentMode, setQCAssignmentBypass, Quick Control Assignment Modes
/ HALion Developer Resource / HALion Script / Reference /
getQCAssignmentParamId
getQCAssignmentParamId(qc, assignment)
Description
Function to retrieve the parameter ID of the parameter that is connected to the specified quick control assignment. The quick control assignment is determined by the Layer object, the index of the quick control and the index of the assignment itself. For example, this.parent defines the parent layer of the script module as the layer that contains the quick control. The qc argument is the index of the quick control and the assignment argument is the index of the assignment with the requested parameter. The indices of the quick controls and the assignments both start counting from 1.
Available in: Controller.
Arguments
| Argument | Description | Value Type |
|---|---|---|
| qc | The index of the quick control. | number |
| assignment | The index of the quick control assignment. | number |
Return Values
Returns the parameter ID of the parameter connected to the specified quick control assignment.
Example
-- Print the parameter ID of the parameter connected to the qc assignment.
layer = this.parent
qc = 1
assignment = 1
paramID = layer:getQCAssignmentParamId(qc, assignment)
print("Parameter ID of '"..layer.name.."', QC "..qc..", assignment "..assignment..": "..paramID..".")
See also: addQCAssignment, removeQCAssignment, getNumQCAssignments, getQCAssignmentScope, getQCAssignmentMin, getQCAssignmentMax, getQCAssignmentCurve, getQCAssignmentMode, getQCAssignmentBypass, setQCAssignmentParamId, setQCAssignmentScope, setQCAssignmentMin, setQCAssignmentMax, setQCAssignmentCurve, setQCAssignmentMode, setQCAssignmentBypass, Quick Control Assignment Modes
/ HALion Developer Resource / HALion Script / Reference /
getQCAssignmentScope
getQCAssignmentScope(qc, assignment)
Description
Function to retrieve the Element object that is set as scope for the specified quick control assignment. The quick control assignment is determined by the Layer object of the layer, the index of the quick control and the index of the assignment itself. For example, this.parent defines the parent layer of the script module as the layer that contains the quick control. The qc argument is the index of the quick control and the assignment argument is the index of the assignment with the requested scope. The indices of the quick controls and the assignments both start counting from 1.
Available in: Controller.
Arguments
| Argument | Description | Value Type |
|---|---|---|
| qc | The index of the quick control. | number |
| assignment | The index of the quick control assignment. | number |
Return Values
Returns the element object that is set as scope for the specified quick control assignment.
Example
-- Print the scope for the qc assignment.
layer = this.parent
qc = 1
assignment = 1
scope = layer:getQCAssignmentScope(qc, assignment).name -- use only the name of the returned element
print("Scope of '"..layer.name.."', QC "..qc..", assignment "..assignment..": "..scope..".")
See also: addQCAssignment, removeQCAssignment, getNumQCAssignments, getQCAssignmentParamId, getQCAssignmentMin, getQCAssignmentMax, getQCAssignmentCurve, getQCAssignmentMode, getQCAssignmentBypass, setQCAssignmentParamId, setQCAssignmentScope, setQCAssignmentMin, setQCAssignmentMax, setQCAssignmentCurve, setQCAssignmentMode, setQCAssignmentBypass, Quick Control Assignment Modes
/ HALion Developer Resource / HALion Script / Reference /
getSamplingRate
getSamplingRate()
Description
Function to retrieve the sample rate from the host software.
Available in: Processor.
Return Values
Returns the sample rate of the host software in Hertz (i.e., samples per seconds).
Example
-- Print the sample rate of the host software.
function onInit()
fs = getSamplingRate()
print(fs, "Hz")
end
/ HALion Developer Resource / HALion Script / Reference /
getScriptExecTimeOut
getScriptExecTimeOut()
Description
Function to read the duration of the script execution time-out either for the controller or the processor thread, depending on where getScriptExecTimeOut is called. The duration for the script execution time-out is returned in milliseconds. The default is 5000 ms for the controller thread and 1000 ms for the processor thread.
Available in: Controller, Processor.
Return Values
Returns the duration of the script execution time-out in milliseconds either for the controller or the processor thread.
Example
-- Print the script execution time-out of the controller and the processor thread.
print("Script execution time-out of "..getContext()..": "..getScriptExecTimeOut().." ms.")
function onInit()
print("Script execution time-out of "..getContext()..": "..getScriptExecTimeOut().." ms.")
end
See also: setScriptExecTimeOut
/ HALion Developer Resource / HALion Script / Reference /
getScriptVersion
getScriptVersion()
Description
Function to retrieve the version of the script engine.
Available in: Processor.
Return Values
Returns a string with the version of the script engine.
Example
-- Print the version of the script engine.
function onInit()
print(getScriptVersion())
end
/ HALion Developer Resource / HALion Script / Reference /
getSlot
getSlot(nameOrIndex)
Description
Function to retrieve the Slot object of a slot of the plug-in instance. Before calling this function you must access the Instance object with this.program.instance. A particular slot can be searched by name or index. The index equals the slot numbering in the Slot Rack. If no argument is set, the function returns the first slot it finds.
Available in: Controller, Processor.
Arguments
| Argument | Description | Value Type |
|---|---|---|
| nameOrIndex | The name or index of the slot. Set this to nil to deactivate the search filter. | string or number, optional |
Return Values
Returns the Slot object of the found slot. Returns nil if no slot is found.
Example
-- Print the name of slot index 3.
slot = this.program.instance:getSlot(3)
print(slot.name)
See also: getBus, getChild, getEffect, getLayer, getMidiModule, getZone, Slot
/ HALion Developer Resource / HALion Script / Reference /
getSlotIndex
getSlotIndex()
Description
Function to retrieve the index of the slot in which the program is loaded.
Available in: Processor.
Return Values
Returns the index of the slot in which the program is loaded.
Example
-- Print the slot index with onInit and onNote.
function onInit()
print("Program loaded in slot #:", getSlotIndex())
end
function onNote(event)
postEvent(event)
print("Note-on event received in slot #:", getSlotIndex())
end
/ HALion Developer Resource / HALion Script / Reference /
getSource1
getSource1()
Description
Function to retrieve the 1st modulation source of a row in the modulation matrix. The row is specified with the Zone object of the zone and the index of the modulation matrix row.
Available in: Processor.
Return Values
Returns up to three values, i.e., source, sourceInfo1 and sourceInfo2. The number of return values depends on the modulation source. See Modulation Source Types for details.
Example
-- Print modulation sources.
function printSource(source)
if source.source == ModulationSource.midiControl then
print("MIDI Ctrl, Controller Number: "..source.info1)
elseif source.source == ModulationSource.quickControl then
print("Quick Ctrl, Layer: "..source.info1.name..", QC Index: "..source.info2)
elseif source.source == ModulationSource.modulationModule then
print("MIDI Module, Module: "..source.info1.name..", Output: "..source.info2)
elseif source.source == ModulationSource.noteExpression then
print("Note Expression, Custom NE: "..source.info1)
elseif source.source == ModulationSource.sampleAndHold then
print("Sample & Hold, Index: "..source.info1)
else
print("Standard Modulation, Index: "..source.source)
end
end
-- Get the zone object of the first zone.
zone = this.program:findZones(true)[1]
-- Run through all 32 modulation rows of the zone and print source1 if assigned.
for i=1, 32 do
local modRow = zone:getModulationMatrixRow(i)
local source1 = {}
source1.source, source1.info1, source1.info2 = modRow:getSource1()
if source1.source ~= ModulationSource.unassigned then
print("Modulation Row "..i..", Source 1:")
printSource(source1)
end
end
See also: ModulationMatrixRow, getModulationMatrixRow, setSource1, setSource2, getSource2, Modulation Source Types, Modulation Destination Types
/ HALion Developer Resource / HALion Script / Reference /
getSource2
getSource2()
Description
Function to retrieve the 2nd modulation source of a row in the modulation matrix. The row is specified with the Zone object of the zone and the index of the modulation matrix row.
Available in: Controller.
Return Values
Returns up to three values, i.e., source, sourceInfo1 and sourceInfo2. The number of return values depends on the modulation source. See Modulation Source Types for details.
❕ The 2nd modulation source has an additional sample & hold. See Modulation Source Types for details.
Example
-- Print modulation sources.
function printSource(source)
if source.source == ModulationSource.midiControl then
print("MIDI Ctrl, Controller Number: "..source.info1)
elseif source.source == ModulationSource.quickControl then
print("Quick Ctrl, Layer: "..source.info1.name..", QC Index: "..source.info2)
elseif source.source == ModulationSource.modulationModule then
print("MIDI Module, Module: "..source.info1.name..", Output: "..source.info2)
elseif source.source == ModulationSource.noteExpression then
print("Note Expression, Custom NE: "..source.info1)
elseif source.source == ModulationSource.sampleAndHold then
print("Sample & Hold, Index: "..source.info1)
else
print("Standard Modulation, Index: "..source.source)
end
end
-- Get the zone object of the first zone.
zone = this.program:findZones(true)[1]
-- Run through all 32 modulation rows of the zone and print source2 if assigned.
for i=1, 32 do
local modRow = zone:getModulationMatrixRow(i)
local source2 = {}
source2.source, source2.info1, source2.info2 = modRow:getSource2()
if source2.source ~= ModulationSource.unassigned then
print("Modulation Row "..i..", Source 2:")
printSource(source2)
end
end
See also: ModulationMatrixRow, getModulationMatrixRow, setSource1, setSource2, getSource1, Modulation Source Types, Modulation Destination Types
/ HALion Developer Resource / HALion Script / Reference /
getTempo
getTempo()
Description
Function to read the tempo of the host software.
Available in: Processor.
Return Values
Returns the current tempo in beats per minute (BPM). If no tempo information is available, this function returns the value -1.
Example
-- Print the playing speed of subsequent notes in percentage of the host tempo.
local T = {}
function onNote(event)
postEvent(event)
T[2] = getTime()
if T[1] ~= nil then
speedInPercent = 60000 / (T[2] - T[1]) / getTempo() * 100
print(string.format("%.1f %s", speedInPercent, "%"))
end
T[1] = T[2]
end
See also: getTimeSignature
/ HALion Developer Resource / HALion Script / Reference /
getTime
getTime()
Description
Function to obtain the time in milliseconds since the initialization of the script.
❕ The function starts to count from 0 ms each time that you reload or reset the script.
Available in: Processor.
Return Values
Returns the time in milliseconds since the initialization of the script.
Example
-- Measure the time between subsequent notes.
function onNote(event)
postEvent(event)
t2 = getTime()
if t1 then
print(string.format("%.3f ms", t2 - t1))
end
t1 = t2
end
/ HALion Developer Resource / HALion Script / Reference /
getTimeSignature
getTimeSignature()
Description
Function to read the time signature from the host software.
Available in: Processor.
Return Values
Returns the numerator and denominator of the time signature. If no time signature information is available, the value -1 is returned for both the numerator and the denominator.
Example
-- Print the time signature of the host software.
function onInit()
num, denom = getTimeSignature()
print(num.."/"..denom)
end
See also: getTempo
/ HALion Developer Resource / HALion Script / Reference /
getUndoContext
getUndoContext()
(Since HALion 6.1)
Description
Function to check if the current script execution is part of an undo or redo operation.
Available in: Controller.
Return Values
The function returns
- 1 if the changes come from an undo operation,
- 2 if the changes come from a redo operation,
nilif the changes do not come from an undo or redo operation.
Enumerators
You can use the following enumerators to identify the Undo Context Types.
| Index | Undo Context |
|---|---|
| 1 | UndoContext.inUndo |
| 2 | UndoContext.inRedo |
Example
-- Do nothing if the change callback is executed as part of an undo or redo operation.
function onP1Changed()
if getUndoContext() then
return -- do nothing
end
-- The following code is only executed if it is not part of an undo or redo operation.
local oldName = this.name
local newName = "Some Name "..p1
startUndoBlock("Name of '"..oldName.."' set to '"..newName.."'")
this:setName(newName)
endUndoBlock()
end
defineParameter("p1", onP1Changed)
See also: startUndoBlock, endUndoBlock, Undo Context Types
/ HALion Developer Resource / HALion Script / Reference /
getUsedMemory
getUsedMemory()
Description
Function to obtain the amount of memory that is used by the script.
Available in: Processor.
Return Values
Returns the number of bytes in the memory that are used by the script.
Example
-- Print the used memory in bytes.
function onNote(event)
print(getUsedMemory())
end
See also: getAllocatedMemory
/ HALion Developer Resource / HALion Script / Reference /
getUsedVoices
getUsedVoices()
Description
Function to obtain the number of used voices of the plug-in instance.
❕ If the initiation of a zone and the call to this function happen in the same audio block, the voice count which is returned might not be up-to-date. To prevent this, wait for the next audio block before calling this function.
Available in: Processor.
Return Values
Returns the number of used voices of the plug-in instance.
Example
-- Print the number of used voices of the plug-in.
function printUsedVoices()
wait(20) -- Wait for 20 ms to avoid calling getUsedVoices in the same audio block.
print("Number of used voices: "..getUsedVoices())
end
function onNote(event)
postEvent(event)
spawn(printUsedVoices)
end
See also: getVoices, getFreeVoices, getUsedVoicesOfSlot
/ HALion Developer Resource / HALion Script / Reference /
getUsedVoicesOfSlot
getUsedVoicesOfSlot()
Description
Function to obtain the number of used voices of the slot in which a program is loaded.
❕ If the initiation of a zone and the call to this function happen in the same audio block, the voice count which is returned might not be up-to-date. To prevent this, wait for the next audio block before calling this function.
Available in: Processor.
Return Values
Returns the number of used voices of the corresponding slot.
Example
-- Print the number of used voices of the slot.
function printUsedVoicesOfSlot()
wait(20) -- Wait for 20 ms to avoid calling getUsedVoicesOfSlot in the same audio block.
print("Number of used voices: "..getUsedVoicesOfSlot())
end
function onNote(event)
postEvent(event)
spawn(printUsedVoicesOfSlot)
end
See also: getVoices, getFreeVoices, getUsedVoices
/ HALion Developer Resource / HALion Script / Reference /
getUserPresetPath
getUserPresetPath(product)
Description
Function to obtain the file path for the user VST presets of a product. If no product is set, the function returns the file path of the current plug-in.
Available in: Controller.
Arguments
| Argument | Description | Value Type |
|---|---|---|
| product | The name of the product. | string, optional |
Return Values
Returns the file path for the user VST presets of the specified product.
Example
-- Print the user VST preset path for the current plug-in and Halion Sonic.
plugInPresetPath = getUserPresetPath()
halionSonicPresetPath = getUserPresetPath("HALion Sonic")
print(plugInPresetPath)
print(halionSonicPresetPath)
See also: getUserSubPresetPath
/ HALion Developer Resource / HALion Script / Reference /
getUserSubPresetPath
getUserSubPresetPath(product)
(Since HALion 7.0)
Description
Function to obtain the file path for the user sub presets of a product. If no product is set, the function returns the file path of the current plug-in.
Available in: Controller.
Arguments
| Argument | Description | Value Type |
|---|---|---|
| product | The name of the product. | string, optional |
Return Values
Returns the file path for the user sub presets of the specified product.
Example
-- Print the user subpreset path for the current plug-in and Halion Sonic.
plugInSubPresetPath = getUserSubPresetPath()
halionSonicSubPresetPath = getUserSubPresetPath("HALion Sonic")
print(plugInSubPresetPath)
print(halionSonicSubPresetPath)
See also: getUserPresetPath
/ HALion Developer Resource / HALion Script / Reference /
getVoices
getVoices()
Description
Function to retrieve the maximum number of voices of the plug-in instance as set in the Options editor.
Available in: Processor.
Return Values
Returns the maximum number of voices of the plug-in instance.
Example
-- Print the maximum number of voices.
function onNote(event)
print("Maximum Number of Voices: "..getVoices())
end
See also: getFreeVoices, getUsedVoices, getUsedVoicesOfSlot
/ HALion Developer Resource / HALion Script / Reference /
getZone
getZone(nameOrPosition)
Description
Function to retrieve the Zone object of a zone in the specified layer. For example, this.parent defines the parent layer of the script module as the layer to be searched in. This function does not search in sublayers. A particular zone can be searched by name or position. The position is the number indexing the zones in the specified layer. If several zones share the same name, only the first match will be returned. If no argument is set, the function returns the first zone it finds.
Available in: Controller, Processor.
Arguments
| Argument | Description | Value Type |
|---|---|---|
| nameOrPosition | The name or position of the zone. Set this to nil to deactivate the search filter. | string or number, optional |
Return Values
Returns the Zone object of the found zone. Returns nil if no zone is found.
Example
-- Get the first zone in the program and print its name.
zone = this.program:getZone()
if zone then
print(zone.name)
else
print("Could not find a zone!")
end
See also: getBus, getChild, getEffect, getLayer, getMidiModule, getSlot, Zone
/ HALion Developer Resource / HALion Script / Reference /
hasParameter
hasParameter(nameOrID)
Description
Function to check if a parameter exists. The parameter can be determined by name or ID.
Available in: Controller, Processor.
Arguments
| Argument | Description | Value Type |
|---|---|---|
| nameOrID | The name or ID of the parameter. | string or number |
Return Values
Returns true if the parameter exists or false if not.
Example
-- Check if the elements in the Program Tree have filter cutoff.
function onLoadIntoSlot()
childs = this.program:findChildren(true)
for i, child in ipairs(childs) do
if child:hasParameter("Filter.Cutoff") then
print(child.name.." has filter cutoff.")
else
print(child.name.." has no filter cutoff.")
end
end
end
See also: getParameter, setParameter, getParameterNormalized, setParameterNormalized
/ HALion Developer Resource / HALion Script / Reference /
insertBus
insertBus(bus, position)
Description
Function to insert a bus at the specified position in the destination layer. The bus to be inserted is determined by its Bus object. You can use getBus or findBusses to determine the bus. The destination layer is determined by its Layer object. For example, this.parent sets the parent layer of the script module as destination layer. The position is the number indexing the existing busses in the destination layer. The new bus will be inserted before the specified position. To add the bus at the end, use appendBus instead.
❕ An Element object can only have one parent. It cannot be child of multiple parents. Therefore, an Element object that you retrieved from the running plug-in instance must be removed before it can be inserted again. The Element objects that you retrieve through loadPreset or loadPresetAsync can be inserted freely, because these functions create a copy of the Element objects when reading them.
Available in: Controller.
Arguments
| Argument | Description | Value Type |
|---|---|---|
| bus | The Bus object of the bus that you want to insert. | Bus |
| position | The position where the bus is inserted. | number |
Example
To explore the following script:
- Download Program.vstpreset.
- Drag the preset on the MediaBay to import it to the user folder for VST presets.
- Create an empty program and add a script module.
- Paste the script into the text editor of the script module and execute the script.
-- Insert the bus from Program.vstpreset into the current program.
-- Get the file path for user VST presets.
path = getUserPresetPath()
-- Load the VST preset.
loadedProgram = loadPreset(path.."/Program/Program.vstpreset")
-- Get the first bus from the loaded program.
bus = loadedProgram:getBus()
-- Insert the bus.
if bus then
this.program:insertBus(bus, 1)
end
See also: insertEffect, insertLayer, insertLayerAsync, insertMidiModule, insertZone, Bus
/ HALion Developer Resource / HALion Script / Reference /
insertEffect
insertEffect(effect, position)
Description
Function to insert an effect at a specific position in a destination bus. The effect to be inserted is determined by its Effect object. You can use getEffect or findEffects to determine the effect. The destination bus is determined by its Bus object. You can use getBus or findBusses to determine the destination bus. The position is the number indexing the effects in the destination bus. The new effect will be inserted before the specified position. To add the effect at the end, use appendEffect instead.
❕ An Element object can only have one parent. It cannot be child of multiple parents. Therefore, an Element object that you retrieved from the running plug-in instance must be removed before it can be inserted again. The Element objects that you retrieve through loadPreset or loadPresetAsync can be inserted freely, because these functions create a copy of the Element objects when reading them.
Available in: Controller.
Arguments
| Argument | Description | Value Type |
|---|---|---|
| effect | The element object of the effect that you want to insert. | Effect |
| position | The position where the effect is inserted. | number |
Example
To explore the following script:
- Download Program.vstpreset.
- Drag the preset on the MediaBay to import it to the user folder for VST presets.
- Create an empty program and add a script module.
- Paste the script into the text editor of the script module and execute the script.
-- Insert an effect from Program.vstpreset into the current program.
-- Get the file path for user VST presets.
path = getUserPresetPath()
-- Load the VST preset.
loadedProgram = loadPreset(path.."/Program/Program.vstpreset")
-- Get the first effect from the loaded program.
effect = loadedProgram:getBus():getEffect()
-- Get the first bus of this program.
bus = this.program:getBus()
-- Insert the effect.
if (effect and bus) then
bus:insertEffect(effect, 1)
end
See also: insertBus, insertLayer, insertLayerAsync, insertMidiModule, insertZone, Effect
/ HALion Developer Resource / HALion Script / Reference /
insertEnvelopePoint
insertEnvelopePoint(envelopeArray, index, level, duration, curve)
Description
Function to insert an envelope point in the specified envelope. You specify the envelope by calling getParameter with the EnvelopePoints parameter of the desired envelope as argument. If you call getParameter with the EnvelopePoints parameter as argument, an array with the current envelope points will be returned. Each index of the array represents an envelope point with the fields .level, .duration and .curve. The insertEnvelopePoint function modifies this array. To apply the changes, you must use setParameter with the EnvelopePoints parameter of the envelope as argument and the array as value.
Available in: Controller, Processor.
Arguments
| Argument | Description | Value Type |
|---|---|---|
| envelopeArray | An array with envelope points. Each index of the array represents an envelope point with the fields .level, .duration and .curve. To obtain the envelope array of an envelope, use getParameter with the EnvelopePoints parameter of the desired envelope as argument. | table |
| index | The index of the point where the new point will be inserted. The new point will be inserted before this point. | number |
| level | The level of the new point in the range from 0 to 1 for the filter and amplitude envelope or -1 to 1 for the pitch and user envelope. | number |
| duration | The duration of the new point in the range from 0 to 30 seconds. The duration of the first point is always 0 seconds. | number |
| curve | The curve of the new point in the range from -1 to 1. | number |
Example
-- Reset the amplitude envelope.
-- Default envelope times in seconds.
attack = 0
decay = 1
sustain = 1
release = 1
zone = this.program:getZone()
-- Get the envelope points of the amplitude envelope.
ampEnvPoints = zone:getParameter("Amp Env.EnvelopePoints")
ampSustainPoint = zone:getParameter("Amp Env.SustainIndex")
-- Set the envelope points to 4.
while #ampEnvPoints > 4 do
removeEnvelopePoint(ampEnvPoints, #ampEnvPoints)
end
while #ampEnvPoints < 4 do
insertEnvelopePoint(ampEnvPoints, #ampEnvPoints, 0, 1, 0)
end
-- Adjust the position of the sustain point.
ampSustainPoint = #ampEnvPoints - 1
-- Set first point.
ampEnvPoints[1].level = 0
ampEnvPoints[1].duration = 0
ampEnvPoints[1].curve = 0
-- Set second point.
ampEnvPoints[2].level = 1
ampEnvPoints[2].duration = attack
ampEnvPoints[2].curve = 0
-- Set third point.
ampEnvPoints[3].level = sustain
ampEnvPoints[3].duration = decay
ampEnvPoints[3].curve = 0
-- Set fourth point.
ampEnvPoints[4].level = 0
ampEnvPoints[4].duration = release
ampEnvPoints[4].curve = 0
-- Set the envelope points of the amplitude envelope.
zone:setParameter("Amp Env.EnvelopePoints", ampEnvPoints)
zone:setParameter("Amp Env.SustainIndex", ampSustainPoint)
See also: removeEnvelopePoint
/ HALion Developer Resource / HALion Script / Reference /
insertEvent
insertEvent(eventsTable, event)
Description
Function to insert an event in the specified events table according to its PPQ position. The events table is part of a tracks table which is part of the MIDI sequence table. See MIDI Sequence Table for details.
Available in: Controller.
Arguments
| Argument | Description | Value Type |
|---|---|---|
| eventsTable | The table record referencing the events table. | table |
| event | The Event object to be inserted. | Event |
Example
-- Produce a minor scale and write it to a MIDI file.
-- Create the MIDI sequence table.
midiSequence = { tracks = { { events = {} } } }
-- Initialize variables.
minorScaleIntervals = { 0, 2, 3, 5, 7, 8, 10, 12 }
root = 60 -- C3
ppqPosition = 0
-- Produce the events of the minor scale.
for i, interval in ipairs(minorScaleIntervals) do
local note = root + interval
-- Create note-on event.
local noteOn = Event(EventType.noteOn)
noteOn.note = note
noteOn.velocity = 100
noteOn.ppqPosition = ppqPosition
-- Create note-off event.
local noteOff = Event(EventType.noteOff)
noteOff.note = note
noteOff.ppqPosition = ppqPosition + 1
-- Insert the events in the MIDI sequence table.
insertEvent(midiSequence.tracks[1].events, noteOn)
insertEvent(midiSequence.tracks[1].events, noteOff)
ppqPosition = ppqPosition + 1
end
-- Write the MIDI sequence table as .mid file to disk.
saveState = writeMidiFile ("c:/temp/test.mid", midiSequence) --[[ Please set the file path to the desired
location on your system before you run
the script. ]]
if saveState then
print("The MIDI file was successfully written.")
else
print("The MIDI file could not be written!")
end
See also: readMidiFile, writeMidiFile, sortEvents, MIDI Sequence Table, MIDI File Format Types
/ HALion Developer Resource / HALion Script / Reference /
insertLayer
insertLayer(layer, position)
Description
Function to insert a layer at a specific position in a destination layer. The layer to be inserted and the destination layer are both determined by their Layer objects. You can use getLayer or findLayers to determine the layer to be inserted. For example, this.parent determines the parent layer of the script module as destination layer. The position is the number indexing the existing layers in the destination layer. The new layer will be inserted before the specified position. To add the layer at the end, use appendLayer or appendLayerAsync instead.
❕ An Element object can only have one parent. It cannot be child of multiple parents. Therefore, an Element object that you retrieved from the running plug-in instance must be removed before it can be inserted again. The Element objects that you retrieve through loadPreset or loadPresetAsync can be inserted freely, because these functions create a copy of the Element objects when reading them.
Available in: Controller.
Arguments
| Argument | Description | Value Type |
|---|---|---|
| layer | The Layer object of the layer that you want to insert. | Layer |
| position | The position where the layer is to be inserted. | number |
Example
To explore the following script:
- Download Program.vstpreset.
- Drag the preset on the MediaBay to import it to the user folder for VST presets.
- Create an empty program and add a script module.
- Paste the script into the text editor of the script module and execute the script.
-- Insert a layer from Program.vstpreset into the current program.
-- Get the file path for user VST presets.
path = getUserPresetPath()
-- Load the VST preset.
loadedProgram = loadPreset(path.."/Program/Program.vstpreset")
-- Get the first layer from the loaded program.
layer = loadedProgram:getLayer ()
-- Insert the layer.
if layer then
this.program:insertLayer(layer, 1)
end
See also: insertBus, insertEffect, insertLayerAsync, insertMidiModule, insertZone, Layer
/ HALion Developer Resource / HALion Script / Reference /
insertLayerAsync
insertLayerAsync(layer, position, callback)
Description
Function to insert a layer at a specified position in a destination layer using a separate, parallel thread. Inserting a layer in a separate thread can be necessary if the layer is too big to be inserted in a short time. The layer to be inserted and the destination layer are both determined by their Layer objects. You can use getLayer or findLayers to determine the layer to be inserted. For example, this.parent determines the parent layer of the script module as destination layer. The position is the number indexing the existing layers in the destination layer. The new layer will be inserted before the specified position. To add the layer at the end, use appendLayer or appendLayerAsync instead. The function returns a LoadProgress object that can be used to monitor the load progress. After the layer is inserted, the callback function is called. The callback function gets the LoadProgress object as default argument.
❕ An Element object can only have one parent. It cannot be child of multiple parents. Therefore, an Element object that you retrieved from the running plug-in instance must be removed before it can be inserted again. The Element objects that you retrieve through loadPreset or loadPresetAsync can be inserted freely, because these functions create a copy of the Element objects when reading them.
Available in: Controller.
Arguments
| Argument | Description | Value Type |
|---|---|---|
| layer | The Layer object of the layer that you want to insert. | Layer |
| position | The position where the layer is to be inserted. | number |
| callback | Callback function that is called when the layer is inserted. The callback function gets the LoadProgress object as argument. | function, optional |
Return Values
Returns a LoadProgress object.
Example
-- Start with an empty program, remove all existing layers.
layers = this.parent:findLayers()
if layers then
for i, layer in ipairs(layers) do
this.parent:removeLayer(layer)
end
end
-- Table with layer presets from Skylab.
layerPresets = {
{ name = "Ambient Pad 01", path = "vstsound://EB86867EFF8E44FEA8FE366F676E25BE/.AppData/Steinberg/Skylab/Sub Presets/Layer Presets/Ambient Pads/Ambient Pad 01.vstpreset" },
{ name = "Ambient Pad 02", path = "vstsound://EB86867EFF8E44FEA8FE366F676E25BE/.AppData/Steinberg/Skylab/Sub Presets/Layer Presets/Ambient Pads/Ambient Pad 02.vstpreset" },
{ name = "Ambient Pad 03", path = "vstsound://EB86867EFF8E44FEA8FE366F676E25BE/.AppData/Steinberg/Skylab/Sub Presets/Layer Presets/Ambient Pads/Ambient Pad 03.vstpreset" },
{ name = "Ambient Pad 04", path = "vstsound://EB86867EFF8E44FEA8FE366F676E25BE/.AppData/Steinberg/Skylab/Sub Presets/Layer Presets/Ambient Pads/Ambient Pad 04.vstpreset" },
}
-- Create a table with the preset names.
function getPresetNames()
presetNames = {}
for i, preset in ipairs(layerPresets) do
presetNames[i] = preset.name
end
end
getPresetNames()
-- Remove the old layer after the new one was added.
function removeOldLayer(progressInfo)
local newPreset = progressInfo.root
if oldPreset then
this.parent:removeLayer(oldPreset)
print(oldPreset.name.." removed.")
end
oldPreset = newPreset
end
-- Insert the preset in a separate thread.
function insertNewLayer(progressInfo)
if progressInfo.root then
this.parent:insertLayerAsync(progressInfo.root, 1, removeOldLayer)
print("Inserting "..progressInfo.root.name.."...")
end
end
-- Load the preset in a separate thread.
function onSelectPresetChanged(layerPreset)
loadPresetAsync(layerPreset.path, insertNewLayer)
print("Loading "..layerPreset.name.."...")
end
-- Define a parameter for selecting the preset to be loaded.
defineParameter("SelectPreset", "Select Preset", 1, presetNames, function() onSelectPresetChanged(layerPresets[SelectPreset]) end)
See also: insertBus, insertEffect, insertLayer, insertMidiModule, insertZone, Layer, LoadProgress
/ HALion Developer Resource / HALion Script / Reference /
insertMidiModule
insertMidiModule(module, position)
Description
Function to insert a MIDI module at the specified position in the determined destination layer. The MIDI module to be inserted is determined by its MidiModule object. You can use getMidiModule or findMidiModules to determine the desired MIDI module. The destination layer is determined by its Layer object. For example, this.parent determines the parent layer of the script module as destination layer. The position is the number indexing the existing MIDI modules in the destination layer. The new MIDI module will be inserted before the specified position. To add the MIDI module at the end, use appendMidiModule instead.
❕ An Element object can only have one parent. It cannot be child of multiple parents. Therefore, an Element object that you retrieved from the running plug-in instance must be removed before it can be inserted again. The Element objects that you retrieve through loadPreset or loadPresetAsync can be inserted freely, because these functions create a copy of the Element objects when reading them.
Available in: Controller.
Arguments
| Argument | Description | Value Type |
|---|---|---|
| module | The MidiModule object of the MIDI module that you want to insert. | MidiModule |
| position | The position where the MIDI module is inserted. | number |
Example
To explore the following script:
- Download Program.vstpreset.
- Drag the preset on the MediaBay to import it to the user folder for VST presets.
- Create an empty program and add a script module.
- Paste the script into the text editor of the script module and execute the script.
-- Insert a MIDI module from Program.vstpreset into the current program.
-- Get the file path for user VST presets.
path = getUserPresetPath()
-- Load the VST preset.
loadedProgram = loadPreset(path.."/Program/Program.vstpreset")
-- Get the first MIDI module from the loaded program.
module = loadedProgram:getMidiModule()
-- Insert the MIDI module.
if module then
this.program:insertMidiModule(module, 1)
end
See also: insertBus, insertEffect, insertLayer, insertLayerAsync, insertZone, MidiModule
/ HALion Developer Resource / HALion Script / Reference /
insertZone
insertZone(zone, position)
Description
Function to insert a zone at the specified position in the determined layer. The zone to be inserted is determined by its Zone object. You can use getZone or findZones to determine the desired zone. The destination layer is determined by its Layer object. For example, this.parent determines the parent layer of the script module as destination layer. The position is the number indexing the existing zones in the destination layer. The new zone will be inserted before the specified position. To add the zone at the end, use appendZone instead.
❕ An Element object can only have one parent. It cannot be child of multiple parents. Therefore, an Element object that you retrieved from the running plug-in instance must be removed before it can be inserted again. The Element objects that you retrieve through loadPreset or loadPresetAsync can be inserted freely, because these functions create a copy of the Element objects when reading them.
Available in: Controller.
Arguments
| Argument | Description | Value Type |
|---|---|---|
| zone | The Zone object of the zone that you want to insert. | Zone |
| position | The position where the zone is inserted. | number |
Example
To explore the following script:
- Download Program.vstpreset.
- Drag the preset on the MediaBay to import it to the user folder for VST presets.
- Create an empty program and add a script module.
- Paste the script into the text editor of the script module and execute the script.
-- Insert a zone from Program.vstpreset into the current program.
-- Get the file path for user VST presets.
path = getUserPresetPath()
-- Load the VST preset.
loadedProgram = loadPreset(path.."/Program/Program.vstpreset")
-- Get the first zone from the loaded program.
zone = loadedProgram:getZone()
-- Insert the zone.
if zone then
this.program:insertZone(zone, 1)
end
See also: insertBus, insertEffect, insertLayer, insertLayerAsync, insertMidiModule, Zone
/ HALion Developer Resource / HALion Script / Reference /
isKeyDown
isKeyDown(note)
Description
Function to detect whether a key with a specific note number is held or not.
Available in: Processor.
Arguments
| Argument | Description | Value Type |
|---|---|---|
| note | The note number in the range of 0 to 127. | number |
Return Values
Returns true if the key with the specified note number is held and false if the key has been released. The note events must come from outside the script, e.g., from the host software or another MIDI module.
Example
-- Detect if a key is held.
function onNote(event)
print("Note-on:")
print("Note# "..event.note..", "..tostring(isKeyDown(event.note)))
print("Note# "..(event.note + 12)..", "..tostring(isKeyDown(event.note + 12)).."\n")
end
function onRelease(event)
print("Note-off:")
print("Note# "..event.note..", "..tostring(isKeyDown(event.note)))
print("Note# "..(event.note + 12)..", "..tostring(isKeyDown(event.note + 12)).."\n")
end
function onRetrigger(event)
print("Note-retrigger:")
print("Note# "..event.note..", "..tostring(isKeyDown(event.note)))
print("Note# "..(event.note + 12)..", "..tostring(isKeyDown(event.note + 12)).."\n")
end
See also: isOctaveKeyDown, isNoteHeld
/ HALion Developer Resource / HALion Script / Reference /
isNoteHeld
isNoteHeld()
Description
Function to detect inside the onNote callback function if a note is held or not.
❕ isNoteHeld is specific to the onNote callback function. Calling this function inside other callback functions is not permitted.
Available in: Processor.
Return Values
Returns true if onNote has received a note-on event and false if onNote has received a corresponding note-off event. The note events must come from outside the script, e.g., from the host software or another MIDI module.
Example
-- Detect inside onNote, if a note is held.
function onNote(event)
print("Note #: "..event.note..", "..tostring(isNoteHeld()))
waitForRelease()
print("Note #: "..event.note..", "..tostring(isNoteHeld()))
end
See also: isKeyDown, isOctaveKeyDown
/ HALion Developer Resource / HALion Script / Reference /
isOctaveKeyDown
isOctaveKeyDown(note)
Description
Function to detect whether a key is held or not, regardless of the octave.
Available in: Processor.
Arguments
| Argument | Description | Value Type |
|---|---|---|
| note | The note number which specifies the key in the range of 0 to 127. | number |
Return Values
Returns true if the specified key is held, no matter in which octave. The function returns false if the specified key and any octave keys have been released. The note events must come from outside the script, e.g., from the host software or another MIDI module.
Example
-- Detect whether a key is held, no matter in which octave.
function onNote(event)
print("Note-on:")
print("Note #: "..event.note..", "..tostring(isOctaveKeyDown(event.note)))
print("Note #: "..(event.note+7)..", "..tostring(isOctaveKeyDown(event.note+7)))
print("Note #: "..(event.note + 12)..", "..tostring(isOctaveKeyDown(event.note + 12)).."\n")
end
function onRelease(event)
print("Note-off:")
print("Note #: "..event.note..", "..tostring(isOctaveKeyDown(event.note)))
print("Note #: "..(event.note+7)..", "..tostring(isOctaveKeyDown(event.note+7)))
print("Note #: "..(event.note + 12)..", "..tostring(isOctaveKeyDown(event.note + 12)).."\n")
end
function onRetrigger(event)
print("Note-retrigger:")
print("Note #: "..event.note..", "..tostring(isOctaveKeyDown(event.note)))
print("Note #: "..(event.note+7)..", "..tostring(isOctaveKeyDown(event.note+7)))
print("Note #: "..(event.note + 12)..", "..tostring(isOctaveKeyDown(event.note + 12)).."\n")
end
See also: isKeyDown, isNoteHeld
/ HALion Developer Resource / HALion Script / Reference /
isPlaying
isPlaying()
Description
Function to detect whether the host is in playback.
Available in: Processor.
Return Values
Returns true if the host is in playback and false if not.
Example
-- Detect if the host is in playback.
function onNote(event)
if isPlaying() then
print("Playback is running.")
else
print("Playback is stopped.")
end
end
/ HALion Developer Resource / HALion Script / Reference /
Layer Constructor
Layer()
(Since HALion 6.4.0)
Description
Constructor to create a new Layer object.
Available in: Controller.
Return Values
Returns a new Layer object.
Example
-- The following function creates different types of objects in the Program Tree.
-- The objects in the Program Tree do not have a name. You will see only their icons.
function createProgram()
local inst = this.program.instance
local prg = Program()
local bus = Bus()
prg:appendBus(bus)
inst:setProgram(prg, 1)
local layer = Layer()
prg:appendLayer(layer)
layer:appendZone(Zone())
local mm = MidiModule('MIDI Player')
layer:appendMidiModule(mm)
local fx = Effect('Distortion')
bus:appendEffect(fx)
end
createProgram()
See also: Program Constructor, Bus Constructor, Zone Constructor, MidiModule Constructor, Effect Constructor
/ HALion Developer Resource / HALion Script / Reference /
loadPreset
loadPreset(path)
Description
Function to load the elements of a VST preset. Depending on whether you load a layer, program or multi-program VST preset, the function returns either an Element object of the type Layer, Program or Instance. You can use the returned Element object to insert layers, zones, MIDI modules, busses, effects, etc. from the VST preset into the program or HALion instance where the script is executed.
Available in: Controller.
Arguments
| Argument | Description | Value Type |
|---|---|---|
| path | The path and file name of the VST preset. | string |
Return Values
Returns an Element object of the type Layer, Program or Instance, depending on whether a layer, program or multi-program VST preset was loaded.
Example
To explore the following script:
- Download Layer.vstpreset.
- Drag the preset on the MediaBay to import it to the user folder for VST presets.
- Create an empty program and add a script module.
- Paste the script into the text editor of the script module and execute the script.
-- Insert Layer.vstpreset as sublayer into the current program.
-- Get the file path for user VST presets.
path = getUserPresetPath()
-- Load the VST preset
layer = loadPreset(path.."/Layer/Layer.vstpreset")
program = this.program
-- Insert the previously loaded VST preset as sublayer.
if layer then
program:insertLayer(layer, 1)
end
See also: loadPresetAsync
/ HALion Developer Resource / HALion Script / Reference /
loadPresetAsync
loadPresetAsync(path, callback)
Description
Function to load the elements of a VST preset in a separate, parallel thread. Loading the VST preset in a separate thread can be necessary if the preset is too big to be loaded in a short time. The function returns a LoadProgress object that can be used to get information on the load progress and the loaded elements, for example. After the preset is loaded, the callback function is called. The callback function gets the LoadProgress object as default argument.
Available in: Controller.
Arguments
| Argument | Description | Value Type |
|---|---|---|
| path | The path and file name of the VST preset. | string |
| callback | Callback function that is called after the preset is loaded. The callback function gets the LoadProgress object as argument. | function, optional |
Return Values
Returns a LoadProgress object.
Example
-- Start with an empty program, remove any existing layers.
layers = this.parent:findLayers()
if layers then
for i, layer in ipairs(layers) do
this.parent:removeLayer(layer)
end
end
-- Table with layer presets from Skylab.
layerPresets = {
{ name = "Ambient Pad 01", path = "vstsound://724ACB205EFF46F885735D1B216C37AD/.AppData/Steinberg/Skylab/Sub Presets/Layer Presets/Ambient Pads/Ambient Pad 01.vstpreset" },
{ name = "Ambient Pad 02", path = "vstsound://724ACB205EFF46F885735D1B216C37AD/.AppData/Steinberg/Skylab/Sub Presets/Layer Presets/Ambient Pads/Ambient Pad 02.vstpreset" },
{ name = "Ambient Pad 03", path = "vstsound://724ACB205EFF46F885735D1B216C37AD/.AppData/Steinberg/Skylab/Sub Presets/Layer Presets/Ambient Pads/Ambient Pad 03.vstpreset" },
{ name = "Ambient Pad 04", path = "vstsound://724ACB205EFF46F885735D1B216C37AD/.AppData/Steinberg/Skylab/Sub Presets/Layer Presets/Ambient Pads/Ambient Pad 04.vstpreset" },
}
-- Create a table with the preset names.
function getPresetNames()
presetNames = {}
for i, preset in ipairs(layerPresets) do
presetNames[i] = preset.name
end
end
getPresetNames()
-- Remove the old layer after the new one was added.
function removeOldLayer(progressInfo)
local newPreset = progressInfo.root
if oldPreset then
this.parent:removeLayer(oldPreset)
print(oldPreset.name.." removed.")
end
oldPreset = newPreset
end
-- Append the preset in a separate thread.
function appendNewLayer(progressInfo)
if progressInfo.root then
this.parent:appendLayerAsync(progressInfo.root, removeOldLayer)
print("Appending "..progressInfo.root.name.."...")
end
end
-- Load the preset in a separate thread.
function onSelectPresetChanged()
progress = 0
progressInf = loadPresetAsync(layerPresets[SelectPreset].path, appendNewLayer)
print("Loading "..layerPresets[SelectPreset].name.."...")
end
-- Define a parameter for selecting the preset to be loaded.
defineParameter("SelectPreset", "Select Preset", 1, presetNames, onSelectPresetChanged)
-- Monitor the load progress with onIdle.
progress = 1
function onIdle()
if progress < 1 then
progress = progressInf.progress
print("Progress: "..(progressInf.progress * 100).."%")
end
end
See also: loadPreset, LoadProgress
/ HALion Developer Resource / HALion Script / Reference /
messageBox
messageBox(stringOrConfigTable)
On this page:
- Description
- Arguments
- Configuration Table
- Return Values
- Message Box Types
- Message Box Results
- Example
Description
Function to open a modal message box. If the argument is a single string, the text will be displayed in the default message box. Alternatively, you can customize the message box by using a configuration table, e.g., if you want to display the text with a warning icon.
Available in: Controller.
Arguments
| Argument | Description | Value Type |
|---|---|---|
| stringOrConfigTable | The message as a string or the configuration table that customizes the message box. | string or table |
Configuration Table
The message box can be configured by creating a table with the following fields:
| Field | Description | Value Type |
|---|---|---|
| .type | The type of the message box defines which icon will be displayed. It can be determined via names or indices. The default is MessageBoxType.information. | enum or number |
| .text | The text that will be displayed. | string |
| .button1 | This button is always displayed. The default string is "OK". | string, optional |
| .button2 | This button will only be displayed if you assign a string to this field. | string, optional |
| .button3 | This button will only be displayed if you assign a string to this field. | string, optional |
Return Values
Returns the result of the message box, i.e., which action closed the message box, as a number.
Message Box Types
Enumerator to identify the types of the message box. The type of the message box also defines which icon will be displayed.
| Index | Name |
|---|---|
| 1 | MessageBoxType.warning |
| 2 | MessageBoxType.question |
| 3 | MessageBoxType.information |
Message Box Results
Enumerator to identify the results of the message box.
| Index | Name |
|---|---|
| 1 | MessageBoxResult.escape |
| 2 | MessageBoxResult.button1 |
| 3 | MessageBoxResult.button2 |
| 4 | MessageBoxResult.button3 |
Example
-- Customized message box.
myMessage = {}
myMessage.type = MessageBoxType.question
myMessage.text = "Click the button with the correct answer!\n1 + 1 = ?"
myMessage.button1 = "1"
myMessage.button2 = "2"
myMessage.button3 = "3"
repeat
result = messageBox(myMessage)
until result == MessageBoxResult.button2 or result == MessageBoxResult.escape
/ HALion Developer Resource / HALion Script / Reference /
MIDI File Format Types
Description
Enumerator to identify the different MIDI file formats.
- Format 0: The data is stored in one single multi-channel track.
- Format 1: The data is stored in separate tracks to be played simultaneously.
MidiFileFormat.singleMultiChannelTrack refers to format 0 and MidiFileFormat.simultaneousTracks to format 1.
❕ Format 2 is seldomly used and therefore not supported.
Available in: Controller.
MIDI File Format Types
| Index | Name |
|---|---|
| 0 | MidiFileFormat.singleMultiChannelTrack |
| 1 | MidiFileFormat.simultaneousTracks |
Example
To explore the following script:
- Download Format 0.mid and Format 1.mid.
- Create an empty program and add a script module.
- Paste the script into the text editor of the script module and adjust the file path of readMidiFile to the location of the files on your system.
- Execute the script.
-- Detect the format of the MIDI files.
midiseq = {}
midiseq[1] = readMidiFile("c:/temp/Format 0.mid")
midiseq[2] = readMidiFile("c:/temp/Format 1.mid") --[[ please set the file path to the location
of the files on your system before you run
the script ]]
for i, seq in ipairs(midiseq) do
if seq.format == MidiFileFormat.singleMultiChannelTrack then
print(seq.songname..".mid has MIDI file format 0.")
elseif seq.format == MidiFileFormat.simultaneousTracks then
print(seq.songname..".mid has MIDI file format 1.")
else
print("Midi file format of "..seq.songname.." not supported!")
end
end
See also: MIDI Sequence Table, readMidiFile, writeMidiFile, insertEvent, sortEvents
/ HALion Developer Resource / HALion Script / Reference /
MidiModule Constructor
MidiModule(type)
(Since HALion 6.4.0)
Description
Constructor to create a new MidiModule object of the specified type.
Available in: Controller.
Arguments
| Argument | Description | Value Type |
|---|---|---|
| type | The type of MIDI module. | string |
Return Values
Returns a new MidiModule object of the specified type.
Example
-- The following function creates different types of objects in the Program Tree.
-- The objects in the Program Tree do not have a name. You will see only their icons.
function createProgram()
local inst = this.program.instance
local prg = Program()
local bus = Bus()
prg:appendBus(bus)
inst:setProgram(prg, 1)
local layer = Layer()
prg:appendLayer(layer)
layer:appendZone(Zone())
local mm = MidiModule('MIDI Player')
layer:appendMidiModule(mm)
local fx = Effect('Distortion')
bus:appendEffect(fx)
end
createProgram()
See also: Program Constructor, Bus Constructor, Layer Constructor, Zone Constructor, Effect Constructor
/ HALion Developer Resource / HALion Script / Reference /
MIDI Sequence Table
On this page:
Description
MIDI Files are managed through a special predefined table: the MIDI sequence table. This table allows you to change values and add or remove notes like with normal Lua tables, but the structure of that table must remain as defined below.
Available in: Controller.
MIDI Sequence Fields
| Field | Description | Value Type |
|---|---|---|
| .format | The MIDI file format. It can be determined via names or indices.
| enum or number |
| .smpteformat | The SMPTE format.
| number |
| .division | Specifies the ticks used for the SMPTE format. The default is 480 ticks. | number |
| .tempo | The original tempo in beats per minute. The default is 120 BPM. | number |
| .signature | The time signature of the MIDI file as a table. Numerator and denominator are separate fields of that table (see Signature Table below). | table |
| .songname | The name of the song. | string |
| .tracks | The tracks of the MIDI file as an array with the index starting at 1. Name, channel and event are separate fields of that table (see Tracks Table below). | table |
Signature Table
| Field | Description | Value Type |
|---|---|---|
| .numerator | The numerator of the time signature. The default is 4. | number |
| .denominator | The denominator of the time signature. The default is 4. | number |
Tracks Table
| Field | Description | Value Type |
|---|---|---|
| .name | The name of the track. | string |
| .channel | The MIDI channel of the track. The default is 1. | number |
| .events | The events of the track as an array with the index starting at 1. The events are stored as Event objects. | table |
Example
To explore the following script:
- Download C Major Scale.mid.
- Create an empty program and add a script module.
- Paste the script into the text editor of the script module and adjust the file path of readMidiFile to the location of the file on your system.
- Execute the script.
-- Read information from a MIDI file.
midiseq = readMidiFile("c:/temp/C Major Scale.mid") --[[ please set the file path to the location
of the file on your system before you run
the script ]]
-- Information from the header chunk.
print("Standard MIDI File Format:", midiseq.format)
print("SMPTE:", midiseq.smpteformat)
print("Division:", midiseq.division)
-- Information from the track chunk.
print("Tempo:", midiseq.tempo)
print("Signature:", midiseq.signature.numerator, "/", midiseq.signature.denominator)
print("Song Name:", midiseq.songname)
print("Number of Tracks:", #midiseq.tracks)
print("Name of 1st Track:", midiseq.tracks[1].name)
print("Channel of 1st Track:", midiseq.tracks[1].channel)
print("Number of Events in 1st Track", #midiseq.tracks[1].events, "\n")
See also: readMidiFile, writeMidiFile, insertEvent, sortEvents, MIDI File Format Types
/ HALion Developer Resource / HALion Script / Reference /
Modulation Destination Types
On this page:
Description
Enumerator to identify the modulation destinations.
Available in: Controller.
| Index | Destination |
|---|---|
| 0 | ModulationDestination.unassigned |
| 1 | ModulationDestination.pitch |
| 2 | ModulationDestination.cutoff |
| 3 | ModulationDestination.resonance |
| 4 | ModulationDestination.distortion |
| 5 | ModulationDestination.morphX |
| 6 | ModulationDestination.morphY |
| 7 | ModulationDestination.cutoffOffset |
| 8 | ModulationDestination.resonanceOffset |
| 9 | ModulationDestination.level |
| 10 | ModulationDestination.volume1 |
| 11 | ModulationDestination.volume2 |
| 12 | ModulationDestination.pan |
| 13 | ModulationDestination.sampleStart |
| 14 | ModulationDestination.speedFactor |
| 15 | ModulationDestination.formantShift |
| 16 | ModulationDestination.grainPosition |
| 17 | ModulationDestination.grainDirection |
| 18 | ModulationDestination.grainDuration |
| 19 | ModulationDestination.grainLength |
| 20 | ModulationDestination.grainPitch |
| 21 | ModulationDestination.grainFormant |
| 22 | ModulationDestination.grainLevel |
| 23 | ModulationDestination.osc1Pitch |
| 24 | ModulationDestination.osc1Level |
| 25 | ModulationDestination.osc1Waveform |
| 26 | ModulationDestination.osc1MultiDetune |
| 27 | ModulationDestination.osc1MultiPan |
| 28 | ModulationDestination.osc1MultiVoices |
| 29 | ModulationDestination.osc2Pitch |
| 30 | ModulationDestination.osc2Level |
| 31 | ModulationDestination.osc2Waveform |
| 32 | ModulationDestination.osc2MultiDetune |
| 33 | ModulationDestination.osc2MultiPan |
| 34 | ModulationDestination.osc2MultiVoices |
| 35 | ModulationDestination.osc3Pitch |
| 36 | ModulationDestination.osc3Level |
| 37 | ModulationDestination.osc3Waveform |
| 38 | ModulationDestination.osc3MultiDetune |
| 39 | ModulationDestination.osc3MultiPan |
| 40 | ModulationDestination.osc3MultiVoices |
| 41 | ModulationDestination.subOscLevel |
| 42 | ModulationDestination.ringModLevel |
| 43 | ModulationDestination.noiseLevel |
| 44 | - |
| 45 | - |
| 46 | ModulationDestination.lfo1Freq |
| 47 | ModulationDestination.lfo1Shape |
| 48 | ModulationDestination.lfo2Freq |
| 49 | ModulationDestination.lfo2Shape |
| 50 | ModulationDestination.ampEnvAttack |
| 51 | ModulationDestination.ampEnvDecay |
| 52 | ModulationDestination.ampEnvSustain |
| 53 | ModulationDestination.ampEnvRelease |
| 54 | ModulationDestination.filterEnvAttack |
| 55 | ModulationDestination.filterEnvDecay |
| 56 | ModulationDestination.filterEnvSustain |
| 57 | ModulationDestination.filterEnvRelease |
| 58 | ModulationDestination.pitchEnvStartLev |
| 59 | ModulationDestination.pitchEnvAttack |
| 60 | ModulationDestination.pitchEnvAttLev |
| 61 | ModulationDestination.pitchEnvDecay |
| 62 | ModulationDestination.pitchEnvSustain |
| 63 | ModulationDestination.pitchEnvRelease |
| 64 | ModulationDestination.pitchEnvRelLev |
| 65 | ModulationDestination.userEnvStartLev |
| 66 | ModulationDestination.userEnvAttack |
| 67 | ModulationDestination.userEnvAttLev |
| 68 | ModulationDestination.userEnvDecay |
| 69 | ModulationDestination.userEnvSustain |
| 70 | ModulationDestination.userEnvRelease |
| 71 | ModulationDestination.userEnvRelLev |
| 72 | ModulationDestination.stepModFreq |
| 73 | ModulationDestination.stepModSlope |
| 74 | ModulationDestination.bus1 |
| 75 | ModulationDestination.bus2 |
| 76 | ModulationDestination.bus3 |
| 77 | ModulationDestination.bus4 |
| 78 | ModulationDestination.bus5 |
| 79 | ModulationDestination.bus6 |
| 80 | ModulationDestination.bus7 |
| 81 | ModulationDestination.bus8 |
| 82 | ModulationDestination.bus9 |
| 83 | ModulationDestination.bus10 |
| 84 | ModulationDestination.bus11 |
| 85 | ModulationDestination.bus12 |
| 86 | ModulationDestination.bus13 |
| 87 | ModulationDestination.bus14 |
| 88 | ModulationDestination.bus15 |
| 89 | ModulationDestination.bus16 |
| 90 | ModulationDestination.xlfoRateX |
| 91 | ModulationDestination.xlfoRateY |
| 92 | ModulationDestination.audioIn |
| 93 | ModulationDestination.wavetable1Pitch |
| 94 | ModulationDestination.wavetable1Level |
| 95 | ModulationDestination.wavetable1Pan |
| 96 | ModulationDestination.wavetable1MultiDetune |
| 97 | ModulationDestination.wavetable1MultiPan |
| 98 | ModulationDestination.wavetable1MultiSpread |
| 99 | ModulationDestination.wavetable1MultiVoices |
| 100 | ModulationDestination.wavetable1Pos |
| 101 | - |
| 102 | ModulationDestination.wavetable1Dir |
| 103 | - |
| 104 | ModulationDestination.wavetable1Speed |
| 105 | - |
| 106 | ModulationDestination.wavetable2Pitch |
| 107 | ModulationDestination.wavetable2Level |
| 108 | ModulationDestination.wavetable2Pan |
| 109 | ModulationDestination.wavetable2MultiDetune |
| 110 | ModulationDestination.wavetable2MultiPan |
| 111 | ModulationDestination.wavetable2MultiSpread |
| 112 | ModulationDestination.wavetable2MultiVoices |
| 113 | ModulationDestination.wavetable2Pos |
| 114 | - |
| 115 | ModulationDestination.wavetable2Dir |
| 116 | - |
| 117 | ModulationDestination.wavetable2Speed |
| 118 | - |
| 119 | ModulationDestination.wavetableSubPitch |
| 120 | ModulationDestination.wavetableSubLevel |
| 121 | ModulationDestination.wavetableSubPan |
| 122 | ModulationDestination.wavetableNoiseSpeed |
| 123 | ModulationDestination.wavetableNoiseLevel |
| 124 | ModulationDestination.wavetableNoisePan |
| 125 | ModulationDestination.wavetable1FormantShift |
| 126 | ModulationDestination.wavetable2FormantShift |
| 127 | ModulationDestination.wavetable1FormantScale |
| 128 | ModulationDestination.wavetable2FormantScale |
| 129 | ModulationDestination.wavetable1FilterShift |
| 130 | ModulationDestination.wavetable2FilterShift |
| 131 | ModulationDestination.wavetable1FilterScale |
| 132 | ModulationDestination.wavetable2FilterScale |
| [...] | - |
| 141 | ModulationDestination.wavetable1TargetSpeed |
| 142 | ModulationDestination.wavetable2TargetSpeed |
| 143 | - |
| 144 | - |
| 145 | ModulationDestination.wavetable1Acceleration |
| 146 | ModulationDestination.wavetable2Acceleration |
| [...] | - |
| 150 | ModulationDestination.fmOp1Level |
| 151 | ModulationDestination.fmOp2Level |
| 152 | ModulationDestination.fmOp3Level |
| 153 | ModulationDestination.fmOp4Level |
| 154 | ModulationDestination.fmOp5Level |
| 155 | ModulationDestination.fmOp6Level |
| 156 | ModulationDestination.fmOp7Level |
| 157 | ModulationDestination.fmOp8Level |
| 158 | ModulationDestination.fmOp1Pitch |
| 159 | ModulationDestination.fmOp2Pitch |
| 160 | ModulationDestination.fmOp3Pitch |
| 161 | ModulationDestination.fmOp4Pitch |
| 162 | ModulationDestination.fmOp5Pitch |
| 163 | ModulationDestination.fmOp6Pitch |
| 164 | ModulationDestination.fmOp7Pitch |
| 165 | ModulationDestination.fmOp8Pitch |
| 166 | ModulationDestination.fmOp1TimeScale |
| 167 | ModulationDestination.fmOp2TimeScale |
| 168 | ModulationDestination.fmOp3TimeScale |
| 169 | ModulationDestination.fmOp4TimeScale |
| 170 | ModulationDestination.fmOp5TimeScale |
| 171 | ModulationDestination.fmOp6TimeScale |
| 172 | ModulationDestination.fmOp7TimeScale |
| 173 | ModulationDestination.fmOp8TimeScale |
| 174 | ModulationDestination.fmFeedback |
| 175 | ModulationDestination.fmModuatorLevel |
| 176 | ModulationDestination.fmModulatorTimeScale |
| 177 | ModulationDestination.fmCarrierTimeScale |
| 178 | ModulationDestination.spectralUnisonVoices |
| 179 | ModulationDestination.spectralUnisonDetune |
| 180 | ModulationDestination.spectralUnisonPan |
| 181 | ModulationDestination.spectralUnisonSpread |
| 182 | ModulationDestination.spectralPos |
| 183 | ModulationDestination.spectralDir |
| 184 | ModulationDestination.spectralSpeed |
| 185 | ModulationDestination.spectralTargetSpeed |
| 186 | ModulationDestination.spectralAcceleration |
| 187 | ModulationDestination.spectralLevel |
| 188 | ModulationDestination.spectralPurity |
| 189 | ModulationDestination.spectralInharmonicity |
| 190 | ModulationDestination.spectralFormantShift |
| 191 | ModulationDestination.spectralFormantScale |
| 192 | ModulationDestination.spectralFilterShift |
| 193 | ModulationDestination.spectralFilterScale |
| 194 | ModulationDestination.spectralLowCutAmount |
| 195 | ModulationDestination.spectralBlurTime |
| 196 | ModulationDestination.spectralBlurDepth |
| 197 | ModulationDestination.spectralBlurMix |
| 198 | ModulationDestination.spectralStackLevel1 |
| 199 | ModulationDestination.spectralStackLevel2 |
| 200 | ModulationDestination.spectralStackLevel3 |
| 201 | ModulationDestination.spectralStackLevel4 |
| 202 | ModulationDestination.spectralStackLevel5 |
| 203 | ModulationDestination.spectralStackLevel6 |
| 204 | ModulationDestination.spectralStackLevel7 |
| 205 | ModulationDestination.spectralStackLevel8 |
Example
-- Define modulation destinations.
defineSlotLocal("modDestinations")
modDestinations = {
{ name = "-", index = ModulationDestination.unassigned },
{ name = "Pitch", index = ModulationDestination.pitch },
{ name = "Cutoff", index = ModulationDestination.cutoff },
{ name = "Resonance", index = ModulationDestination.resonance },
{ name = "Distortion", index = ModulationDestination.distortion }
}
-- Create a table with the names of the modulation destinations.
function getModDestNames()
modDestNames = {}
for i=1, #modDestinations do
modDestNames[i] = modDestinations[i].name
end
end
getModDestNames()
-- Parameter change callback to set the modulation destination.
function onModDestChanged(row, modDestinationParam)
local modRow = this.parent:getZone():getModulationMatrixRow(row)
local modDestination = modDestinations[modDestinationParam]
modRow:setParameter("Destination.Destination", modDestination.index)
end
-- Define parameters for modulation matrix destinations 1-4.
defineParameter("ModDestination1", "Modulation Destination 1", 1, modDestNames, function() onModDestChanged(1, ModDestination1) end)
defineParameter("ModDestination2", "Modulation Destination 2", 1, modDestNames, function() onModDestChanged(2, ModDestination2) end)
defineParameter("ModDestination3", "Modulation Destination 3", 1, modDestNames, function() onModDestChanged(3, ModDestination3) end)
defineParameter("ModDestination4", "Modulation Destination 4", 1, modDestNames, function() onModDestChanged(4, ModDestination4) end)
See also: ModulationMatrixRow, getModulationMatrixRow, setSource1, setSource2, getSource1, getSource2, Modulation Source Types
/ HALion Developer Resource / HALion Script / Reference /
Modulation Source Types
On this page:
Description
Enumerator to identify the different modulation sources.
Available in: Controller.
Arguments
| Index | source | sourceInfo1 | sourceInfo2 | Comment |
|---|---|---|---|---|
| 0 | ModulationSource.unassigned | - | - | |
| 1 | ModulationSource.lfo1 | - | - | |
| 2 | ModulationSource.lfo2 | - | - | |
| 3 | ModulationSource.ampEnv | - | - | |
| 4 | ModulationSource.filterEnv | - | - | |
| 5 | ModulationSource.pitchEnv | - | - | |
| 6 | ModulationSource.userEnv | - | - | |
| 7 | ModulationSource.stepMod | - | - | |
| 8 | ModulationSource.glide | - | - | |
| 9 | ModulationSource.keyFollow | - | - | |
| 10 | ModulationSource.noteOnVelocity | - | - | |
| 11 | ModulationSource.noteOnVelocitySquared | - | - | |
| 12 | ModulationSource.noteOnVelocityNormalized | - | - | |
| 13 | ModulationSource.noteOffVelocity | - | - | |
| 14 | ModulationSource.pitchBend | - | - | |
| 15 | ModulationSource.modWheel | - | - | |
| 16 | ModulationSource.aftertouch | - | - | |
| 17 | ModulationSource.midiControl | MIDI controller number (0 - 127). | - | |
| 18 | ModulationSource.quickControl | Element object of the layer. | Index of the quick control (1 - 11). | |
| 19 | ModulationSource.modulationModule | Element object of the MIDI module. | Number of the output channel. | |
| 20 | ModulationSource.noteExpression | Number of the custom note expression (1-8). | - | |
| 21 | ModulationSource.noise | - | - | |
| 22 | ModulationSource.output | - | - | |
| 23 | ModulationSource.bus1 | - | - | |
| 24 | ModulationSource.bus2 | - | - | |
| 25 | ModulationSource.bus3 | - | - | |
| 26 | ModulationSource.bus4 | - | - | |
| 27 | ModulationSource.bus5 | - | - | |
| 28 | ModulationSource.bus6 | - | - | |
| 29 | ModulationSource.bus7 | - | - | |
| 30 | ModulationSource.bus8 | - | - | |
| 31 | ModulationSource.bus9 | - | - | |
| 32 | ModulationSource.bus10 | - | - | |
| 33 | ModulationSource.bus11 | - | - | |
| 34 | ModulationSource.bus12 | - | - | |
| 35 | ModulationSource.bus13 | - | - | |
| 36 | ModulationSource.bus14 | - | - | |
| 37 | ModulationSource.bus15 | - | - | |
| 38 | ModulationSource.bus16 | - | - | |
| 39 | ModulationSource.xlfoX | - | - | |
| 40 | ModulationSource.xlfoY | - | - | |
| 41 | ModulationSource.sampleAndHold | Index of the S&H (0 - 5). | - | Source 2 only. |
Example
-- Define the modulation sources and infos in an array.
modSources = {
{ source = ModulationSource.lfo1, bipolar = 1 },
{ source = ModulationSource.midiControl, bipolar = 0, sourceInfo1 = 1 },
{ source = ModulationSource.quickControl, bipolar = 1, sourceInfo1 = this.program, sourceInfo2 = 1 },
{ source = ModulationSource.modulationModule, bipolar = 0, sourceInfo1 = this, sourceInfo2 = 1 },
{ source = ModulationSource.modulationModule, bipolar = 0, sourceInfo1 = this, sourceInfo2 = 2 },
{ source = ModulationSource.noteExpression, bipolar = 0, sourceInfo1 = 1 }
}
-- Define two modulation outputs for the script module.
defineModulation("50%", false)
defineModulation("100%", false)
-- Calculate the modulation outputs.
function calcModulation()
return 0.5, 1
end
-- Get the element object of the first zone.
zone = this.program:findZones(true)[1]
-- Assign the modulation sources to source 1 in the modulation rows 1 to 6.
for i=1, #modSources do
local modRow = zone:getModulationMatrixRow(i)
modRow:setSource1(modSources[i].source, modSources[i].sourceInfo1, modSources[i].sourceInfo2)
modRow:setParameter("Source1.Polarity", modSources[i].bipolar) -- Set the default polarity of the source.
end
-- Assign the sample & hold to source 2 in modulation row 1.
modRow = zone:getModulationMatrixRow(1)
modRow:setSource2(ModulationSource.sampleAndHold, 0)
See also: ModulationMatrixRow, getModulationMatrixRow, setSource1, setSource2, getSource1, getSource2, Modulation Destination Types
/ HALion Developer Resource / HALion Script / Reference /
ms2beat
ms2beat(ms)
Description
Function to convert a duration in milliseconds to the equivalent number of beats. One beat equals a quarter note. The current tempo is taken into account.
Available in: Processor.
Arguments
| Argument | Description | Value Type |
|---|---|---|
| ms | The duration in milliseconds. | number |
Return Values
Returns the number of beats (quarter notes) that is the equivalent of the specified duration.
Example
-- Print the note length in number of beats.
function onRelease(event)
postEvent(event)
local noteLength = ms2beat(getNoteDuration(event.note))
print(noteLength, "beats")
end
See also: beat2ms, ms2samples, samples2ms
/ HALion Developer Resource / HALion Script / Reference /
ms2samples
ms2samples(ms)
Description
Function to convert a duration in milliseconds to the equivalent number of samples. The conversion takes into account the sample rate at which the plug-in runs.
Available in: Processor.
Arguments
| Argument | Description | Value Type |
|---|---|---|
| ms | The duration in milliseconds. | number |
Return Values
Returns the number of samples that is the equivalent of the specified duration in milliseconds.
Example
-- Print the duration 1000 ms in number of samples.
function onNote(event)
print(ms2samples(1000), "samples")
end
See also: samples2ms, ms2beat, beat2ms
/ HALion Developer Resource / HALion Script / Reference /
Note Expression Types
Description
Enumerator to identify the different note expression types.
❕ The note expression types volume, pan and tuning are pre-assigned internally and respond immediately. The custom note expression types must be assigned manually in the modulation matrix before they can be used.
Available in: Processor.
Note Expression Types
| Index | Name |
|---|---|
| 1 | NoteExpressionType.volume |
| 2 | NoteExpressionType.pan |
| 3 | NoteExpressionType.tuning |
| 4 | NoteExpressionType.custom1 |
| 5 | NoteExpressionType.custom2 |
| 6 | NoteExpressionType.custom3 |
| 7 | NoteExpressionType.custom4 |
| 8 | NoteExpressionType.custom5 |
| 9 | NoteExpressionType.custom6 |
| 10 | NoteExpressionType.custom7 |
| 11 | NoteExpressionType.custom8 |
Example
-- Detect the type of note expression.
function onNoteExpression(event)
if event.noteExpressionType == NoteExpressionType.volume then
print('Note Expression of type "Volume" received!')
elseif event.noteExpressionType == NoteExpressionType.pan then
print('Note Expression of type "Pan" received!')
elseif event.noteExpressionType == NoteExpressionType.tuning then
print('Note Expression of type "Tuning" received!')
elseif event.noteExpressionType > 3 then
print('Note Expression of type "Custom" received!')
end
end
See also: onNoteExpression, changeNoteExpression, getNoteExpression, getNoteExpressionProperties
/ HALion Developer Resource / HALion Script / Reference /
onAfterTouch
onAfterTouch(event)
Description
This callback function is called when the script module receives a channel aftertouch event.
❕ If the script doesn't implement onAfterTouch, all aftertouch events will be passed on to onController.
Available in: Processor.
Arguments
Fields
| Field | Description | Value Type |
|---|---|---|
| .type | The type of event (3 = controller). See Event Types for details. | number |
| .value | The aftertouch value in the range of 0 to 127. | number |
Example
-- Print the aftertouch value.
function onAfterTouch(event)
postEvent(event)
print("Aftertouch: "..event.value)
end
See also: afterTouch, onController, onPitchBend
/ HALion Developer Resource / HALion Script / Reference /
onController
onController(event)
Description
This callback function is called when the script module receives a continuous controller event. If the script doesn't implement onAfterTouch or onPitchBend, the respective aftertouch or pitch bend events will be passed on to onController. This way, continuous controller, aftertouch and pitch bend events can be treated in the same callback function onController.
Available in: Processor.
Arguments
Fields
| Field | Description | Value Type |
|---|---|---|
| .type | The type of event (3 = controller). See Event Types for details. | number |
| .controller | The controller number. See Controller Numbers for a description of the different controllers. | number |
| .value | The controller value in the range of 0 to 127. | number |
Example
-- Exclude MIDI mode messages and other special controllers.
function onController(event)
if event.controller < 120 then
print("Controller #: "..event.controller..", Value: "..event.value)
postEvent(event)
end
end
See also: controlChange, getCC, onAfterTouch, onPitchBend
/ HALion Developer Resource / HALion Script / Reference /
onData
onData(event)
(Since HALion 7.0)
Description
This callback is called when the script module receives a system exclusive message.
Available in: Processor.
Arguments
Fields
| Field | Description | Value Type |
|---|---|---|
| .type | The type of event (7 = data). See Event Types for details. | number |
| .data | An array with the bytes of the system exclusive message. To determine the number of bytes in the system-exclusive message, use the length operator #. For the interpretation of these values, please consult the documentation of the MIDI data format of the device that is sending the system exclusive message. | table |
| .dataType | Currently, there is only one data type (0 = sysex). | number |
Example
function onData(event)
print (event)
local sysex = event.data
for i,b in ipairs(sysex) do
print (b)
end
end
/ HALion Developer Resource / HALion Script / Reference /
onIdle
onIdle()
Description
This callback function is called periodically if the script is idle. Use this to monitor the progress of load operations, for example.
Available in: Controller.
Example
-- Start with an empty program, remove any existing layers.
layers = this.parent:findLayers()
if layers then
for i, layer in ipairs(layers) do
this.parent:removeLayer(layer)
end
end
-- Table with layer presets from Skylab.
layerPresets = {
{ name = "Ambient Pad 01", path = "vstsound://724ACB205EFF46F885735D1B216C37AD/.AppData/Steinberg/Skylab/Sub Presets/Layer Presets/Ambient Pads/Ambient Pad 01.vstpreset" },
{ name = "Ambient Pad 02", path = "vstsound://724ACB205EFF46F885735D1B216C37AD/.AppData/Steinberg/Skylab/Sub Presets/Layer Presets/Ambient Pads/Ambient Pad 02.vstpreset" },
{ name = "Ambient Pad 03", path = "vstsound://724ACB205EFF46F885735D1B216C37AD/.AppData/Steinberg/Skylab/Sub Presets/Layer Presets/Ambient Pads/Ambient Pad 03.vstpreset" },
{ name = "Ambient Pad 04", path = "vstsound://724ACB205EFF46F885735D1B216C37AD/.AppData/Steinberg/Skylab/Sub Presets/Layer Presets/Ambient Pads/Ambient Pad 04.vstpreset" },
}
-- Create a table with the preset names.
function getPresetNames()
presetNames = {}
for i, preset in ipairs(layerPresets) do
presetNames[i] = preset.name
end
end
getPresetNames()
-- Remove the old layer after the new one was added.
function removeOldLayer(progressInfo)
local newPreset = progressInfo.root
if oldPreset then
this.parent:removeLayer(oldPreset)
print(oldPreset.name.." removed.")
end
oldPreset = newPreset
end
-- Append the preset in a separate thread.
function appendNewLayer(progressInfo)
if progressInfo.root then
this.parent:appendLayerAsync(progressInfo.root, removeOldLayer)
print("Appending "..progressInfo.root.name.."...")
end
end
-- Load the preset in a separate thread.
function onSelectPresetChanged()
progress = 0
progressInf = loadPresetAsync(layerPresets[SelectPreset].path, appendNewLayer)
print("Loading "..layerPresets[SelectPreset].name.."...")
end
-- Define a parameter for selecting the preset to be loaded.
defineParameter("SelectPreset", "Select Preset", 1, presetNames, onSelectPresetChanged)
-- Monitor the load progress with onIdle.
progress = 1
function onIdle()
if progress < 1 then
progress = progressInf.progress
print("Progress: "..(progressInf.progress * 100).."%")
end
end
/ HALion Developer Resource / HALion Script / Reference /
onInit
onInit()
Description
This callback function is called after executing any global statements and the onLoadIntoSlot callback function. It is the first callback function that is called when the processor thread is initialized. You can use this function to initialize variables with information from the context, for example.
❕ The program must be loaded in the Slot Rack and contain at least one zone. Otherwise, onInit won't be called.
Available in: Processor.
Example
-- Print the time signature and tempo of the host software.
function onInit()
num, denom = getTimeSignature()
tempo = getTempo()
print(num.."/"..denom)
print(tempo.." BPM")
end
See also: onLoadIntoSlot
/ HALion Developer Resource / HALion Script / Reference /
onLoad
onLoad(data)
Description
This callback function is called when the script module is loaded as part of a preset or project. The data that is passed on is the data that was returned by onSave when the script module was saved.
Available in: Controller.
Arguments
| Argument | Description | Value Type |
|---|---|---|
| data | The data that was returned by onSave. | table (as is usual) |
Example
-- Print the last three notes when calling onNote, onSave or onLoad.
-- The last three notes are remembered even after restoring the program.
local lastNotes = {}
function printLastNotes(callbackName)
print("Last three notes when calling "..callbackName..":")
for i = 1, 3 do
if lastNotes[i] then
print(i..":", "Note#:", lastNotes[i].noteNumber,", Velocity:", lastNotes[i].velocity)
else
print(i..":", "Note#: ---, Velocity: ---")
end
end
print()
end
-- Play some notes to fill the table.
function onNote(event)
postEvent(event)
table.insert(lastNotes, 1, {noteNumber = event.note, velocity = event.velocity})
if #lastNotes > 3 then -- Store maximum three notes.
table.remove(lastNotes)
end
printLastNotes("onNote")
end
-- This will be called when the program is saved.
function onSave()
local data = {}
data.lastNotes = lastNotes
printLastNotes("onSave")
return data -- Any data in this table will be stored.
end
-- This will be called when the program is restored.
function onLoad(data)
lastNotes = data.lastNotes -- Read the values from the data table.
printLastNotes("onLoad")
end
See also: onSave
/ HALion Developer Resource / HALion Script / Reference /
onLoadIntoSlot
onLoadIntoSlot()
Description
This callback function is called when the program is loaded into the Slot Rack. Any global statements are executed in advance. onInit is called after onLoadIntoSlot.
Available in: Controller.
Example
-- Print a message when loading the program into the slot rack.
function onLoadIntoSlot()
print('"Hello" from the Slot Rack.')
end
See also: onRemoveFromSlot, onInit
/ HALion Developer Resource / HALion Script / Reference /
onLoadSubPreset
onLoadSubPreset(section, data)
Description
This callback function is called when loading a subpreset with a corresponding Preset Browser template. The callback will only be called if the scope of the Preset Browser template is set correctly.
- If the MacroPage with the Preset Browser template is attached to an element other than the script module (e.g., the program), the scope must be set to the script module (e.g., @0:Script Module).
- If the MacroPage with the Preset Browser template is attached to the script module, the scope does not need to be set.
In addition, the Preset Browser Custom template allows you to define a section for the subpreset. When you load a subpreset, the defined section and the data stored in the subpreset will be passed on to the callback. The data is the same data that was returned by onSaveSubPreset when the subpreset was saved. You can manage different subsets of parameters by using the section as condition for an if statement that restores only the parameters of interest.
❕ Scope and section are template parameters. You can set them in the MacroPage Designer on the properties pane of the Preset Browser and Preset Browser Custom templates.
Available in: Controller.
Arguments
| Argument | Description | Value Type |
|---|---|---|
| section | The section as defined in the Preset Browser Custom template. | string |
| data | The data that was returned by onSaveSubPreset. |
Example
--[[
The corresponding MacroPage needs two Preset Browser templates:
One with the section set to Pitch and the other with the section set to Filter.
The Preset Browser template with the section Pitch stores/restores the
parameters Pitch.Coarse and Pitch.Fine.
The Preset Brrowser template with the section Filter stores/restores the
parameters Filter.Cutoff and Filter.Resonance.
--]]
-- Get the values of p1 and p2 from the first zone of the program.
function getZoneData(p1, p2)
local data = {}
local zone = this.program:findZones(true)
if zone[1] then
data.p1 = zone[1]:getParameter(p1)
data.p2 = zone[1]:getParameter(p2)
end
return data
end
-- Set the values of p1 and p2 in the first zone of the program.
function setZoneData(p1, p2, data)
local zone = this.program:findZones(true)
if zone[1] then
zone[1]:setParameter(p1, data.p1)
zone[1]:setParameter(p2, data.p2)
end
end
-- Save data with the subpreset.
function onSaveSubPreset(section)
if section == "Pitch" then
return getZoneData("Pitch.Coarse", "Pitch.Fine" ) -- This is called from the preset template Pitch.
elseif section == "Filter" then
return getZoneData("Filter.Cutoff", "Filter.Resonance") -- This is called from the preset template Filter.
end
end
-- Restore data from the subpreset.
function onLoadSubPreset(section, data)
if section == "Pitch" then
setZoneData("Pitch.Coarse", "Pitch.Fine", data) -- This is called from the preset template Pitch.
elseif section == "Filter" then
setZoneData("Filter.Cutoff", "Filter.Resonance", data) -- This is called from the preset template Filter.
end
end
See also: onSaveSubPreset
/ HALion Developer Resource / HALion Script / Reference /
onNote
onNote(event)
Description
This callback function is called when the script module receives a note-on event.
Available in: Processor.
Arguments
| Argument | Description | Value Type |
|---|---|---|
| event | Event object of the type noteOn. | Event |
Fields
| Field | Description | Value Type |
|---|---|---|
| .type | The type of event (1 = noteOn). See Event Types for details. | number |
| .id | The note ID of the note-on event. | number |
| .note | The note number in the range of 0 to 127. | number |
| .velocity | The note-on velocity in the range of 0 to 127. | number |
| .tuning | The tune offset in semitones. | number |
Example
-- Print note ID, note number and velocity.
function onNote(event)
local id = postEvent(event)
print("ID: "..id..", Note #: "..event.note..", Velocity: "..event.velocity..", Tuning: "..event.tuning)
end
See Also: postEvent, playNote, releaseVoice, onRetrigger
/ HALion Developer Resource / HALion Script / Reference /
onNoteExpression
onNoteExpression(event)
Description
This callback function is called when the script module receives a note expression event.
❕ Note expression events are always processed by the engine, regardless of whether the event is posted or not. Therefore, the use of postEvent is not necessary.
Available in: Processor.
Arguments
Fields
| Field | Description | Value Type |
|---|---|---|
| .type | The type of event (4 = noteExpression). See Event Types for details. | number |
| .id | The ID of the associated note-on event. | number |
| .noteExpressionType | The type of note expression event. See Note Expression Types for details. | number |
| .value | The note expression value in the range of 0 to 1.0. | number |
Example
-- Change note expression for the root note and a generated note.
local ids = {}
function onNote(event)
local id = postEvent(event)
ids[id] = playNote(event.note + 7, event.velocity)
waitForRelease()
ids[id] = nil
end
function onNoteExpression(event)
if ids[event.id] then
changeNoteExpression(ids[event.id], event.noteExpressionType, event.value)
end
-- postEvent(event) is not required for onNoteExpression.
end
See also: changeNoteExpression, getNoteExpression, Note Expression Types
/ HALion Developer Resource / HALion Script / Reference /
onPitchBend
onPitchBend(event)
Description
This callback function is called when the script module receives a pitch bend event. The .value field of the Event object contains the pitch bend value as a signed integer in the range from -8191 to 8191. The .bend field contains the pitch bend value as a floating point number in the range from -1.0 to 1.0. Use .bend for greater accuracy.
❕ If your script doesn't implement onPitchBend, all pitch bend events will be passed on to onController.
Available in: Processor.
Arguments
Fields
| Field | Description | Value Type |
|---|---|---|
| .type | The type of event (3 = controller). See Event Types for details. | number |
| .bend | The pitch bend value in the range of -1.0 to 1.0. | number |
| .value | The pitch bend value in the range of -8191 to 8191. | number |
Example
-- Print event.value and event.bend.
function onPitchBend(event)
print("event.value: "..event.value.."\n".."event.bend: "..event.bend)
postEvent(event)
end
See also: pitchBend, onController, onAfterTouch
/ HALion Developer Resource / HALion Script / Reference /
onRelease
onRelease(event)
Description
This callback function is called when the script module receives a note-off event.
Available in: Processor.
Arguments
Fields
Note-off events use the following fields of the Event object.
| Field | Description | Value Type |
|---|---|---|
| .type | The type of event (2 = noteOff). See Event Types for details. | number |
| .id | The note ID of the note-off event. | number |
| .note | The note number in the range of 0 to 127. | number |
| .velocity | The note-off velocity in the range of 0 to 127. | number |
| .tuning | The tuning offset in semitones. | number |
Example
-- Print all held notes.
local heldNotes = {}
function stringOfNotes()
local ret =""
for note, velocity in pairs(heldNotes) do
ret = ret.." "..tostring(note)
end
return ret
end
function onNote(event)
heldNotes[event.note] = event.velocity
print("Held notes:", stringOfNotes())
local id = postEvent(event)
end
function onRelease(event)
heldNotes[event.note] = nil
print("Held notes:", stringOfNotes())
postEvent(event)
end
See also: onNote, postEvent, playNote, releaseVoice, onRetrigger, setBypassNoteOff
/ HALion Developer Resource / HALion Script / Reference /
onRemoveFromSlot
onRemoveFromSlot()
Description
This callback function is called when the program is removed from the Slot Rack.
Available in: Controller.
Example
-- Print a message when removing the program from the Slot Rack.
function onRemoveFromSlot()
print('"Goodbye" from the Slot Rack.')
end
See also: onLoadIntoSlot
/ HALion Developer Resource / HALion Script / Reference /
onRetrigger
onRetrigger(event)
(Since HALion 7.0)
Description
This callback function is called when the script module receives a note-retrigger event.
❕ Note-retrigger events occur only if Mono and Retrigger are active for the corresponding program or layer.
Available in: Processor.
Arguments
Fields
Note-retrigger events use the following fields of the Event object.
| Field | Description | Value Type |
|---|---|---|
| .type | The type of event (6 = noteRetrigger). See Event Types for details. | number |
| .id | The note ID of the note-off event. | number |
| .note | The note number in the range of 0 to 127. | number |
| .velocity | The note-off velocity in the range of 0 to 127. | number |
| .tuning | The tuning offset in semitones. | number |
❕ The note ids of the note-retrigger events cannot be used in functions like releaseVoice, changeVolume, changeNoteExpression, etc. You must use the note id of the original note-on event instead. See Example 2 for details.
Example 1
notes = {}
function onNote(event)
local id = postEvent(event)
print(event)
local ids = notes[event.note]
if ids == nil then
ids = {}
notes[event.note] = ids
end
table.insert(ids, id)
end
-- transpose the note-retrigger event
function onRetrigger(event)
print(event)
local id = playNote(event.note + 12, event.velocity, 0)
table.insert(notes[event.note], id)
end
function onRelease(event)
print(event)
for i, noteId in ipairs(notes[event.note]) do
releaseVoice(noteId)
end
notes[event.note] = nil
end
Example 2
notes = {}
retrigger = {}
function onNote(event)
local id = postEvent(event)
print(event)
retrigger[event.note] = false
local ids = notes[event.note]
if ids == nil then
ids = {}
notes[event.note] = ids
end
table.insert(ids, id)
end
-- send the note-retrigger event after 500 ms into release and retrigger only once
function onRetrigger(event)
if not retrigger[event.note] then
postEvent(event)
print(event)
retrigger[event.note] = true
wait(500)
if notes[event.note] then
for i, noteId in ipairs(notes[event.note]) do
releaseVoice(noteId)
print("releaseVoice with id "..noteId)
end
end
end
end
function onRelease(event)
postEvent(event)
print(event)
notes[event.note] = nil
end
See also: onNote, onRelease, releaseVoice, postEvent, playNote
/ HALion Developer Resource / HALion Script / Reference /
onSave
onSave()
Description
This callback function is called when the script module is saved as part of a preset or project. The data you pass on to the return statement will be stored with the preset or project. The data can be of any type, but it is common practice to use a table that can easily be extended with more fields. When the script module is restored, the onLoad callback will receive the stored data.
Available in: Controller.
Return Values
The returned data will be stored as part of the preset or project.
Example
-- Print the last three notes when calling onNote, onSave or onLoad.
-- The last three notes are remembered even after restoring the program.
local lastNotes = {}
function printLastNotes(callbackName)
print("Last three notes when calling "..callbackName..":")
for i = 1, 3 do
if lastNotes[i] then
print(i..":", "Note#:", lastNotes[i].noteNumber,", Velocity:", lastNotes[i].velocity)
else
print(i..":", "Note#: ---, Velocity: ---")
end
end
print()
end
-- Play some notes to fill the table.
function onNote(event)
postEvent(event)
table.insert(lastNotes, 1, {noteNumber = event.note, velocity = event.velocity})
if #lastNotes > 3 then -- Store maximum three notes.
table.remove(lastNotes)
end
printLastNotes("onNote")
end
-- This will be called when the program is saved.
function onSave()
local data = {}
data.lastNotes = lastNotes
printLastNotes("onSave")
return data -- Any data in this table will be stored.
end
-- This will be called when the program is restored.
function onLoad(data)
lastNotes = data.lastNotes -- Read the values from the data table.
printLastNotes("onLoad")
end
See also: onLoad
/ HALion Developer Resource / HALion Script / Reference /
onSaveSubPreset
onSaveSubPreset(section)
Description
This callback function is called when saving a subpreset with a corresponding Preset Browser template. The callback will only be called if the scope of the Preset Browser template is set correctly.
- If the MacroPage with the Preset Browser template is attached to an element other than the script module (e.g., the program), the scope must be set to the script module (e.g., @0:Script Module).
- If the MacroPage with the Preset Browser template is attached to the script module itself, the scope does not need to be set.
In addition, the Preset Browser Custom template allows to define a section for the subpreset. When you save a subpreset, the section will be passed on from the Preset Browser Custom template to the callback. You can manage different subsets of parameters by using the section as condition for an if statement that stores only the parameters of interest. The data you pass on to the return statement will be stored with the subpreset. The data can be of any type, but it is common practice to use a table that can easily be extended with more fields. When the subpreset is restored, the onLoadSubPreset callback will receive the stored data.
❕ Scope and section are template parameters. You can set them in the MacroPage Designer on the properties pane of the Preset Browser and Preset Browser Custom templates.
Available in: Controller.
Arguments
| Argument | Description | Value Type |
|---|---|---|
| section | The section as defined in the Preset Browser Custom template. | string |
Return Values
The returned data will be stored in a subpreset.
Example
--[[
The corresponding MacroPage needs two Preset Browser templates:
One with the section set to Pitch and the other with the section set to Filter.
The Preset Browser template with the section Pitch stores/restores the
parameters Pitch.Coarse and Pitch.Fine.
The Preset Brrowser template with the section Filter stores/restores the
parameters Filter.Cutoff and Filter.Resonance.
--]]
-- Get the values of p1 and p2 from the first zone of the program.
function getZoneData(p1, p2)
local data = {}
local zone = this.program:findZones(true)
if zone[1] then
data.p1 = zone[1]:getParameter(p1)
data.p2 = zone[1]:getParameter(p2)
end
return data
end
-- Set the values of p1 and p2 in the first zone of the program.
function setZoneData(p1, p2, data)
local zone = this.program:findZones(true)
if zone[1] then
zone[1]:setParameter(p1, data.p1)
zone[1]:setParameter(p2, data.p2)
end
end
-- Save data with the subpreset.
function onSaveSubPreset(section)
if section == "Pitch" then
return getZoneData("Pitch.Coarse", "Pitch.Fine" ) -- This is called from the preset template Pitch.
elseif section == "Filter" then
return getZoneData("Filter.Cutoff", "Filter.Resonance") -- This is called from the preset template Filter.
end
end
-- Restore data from the subpreset.
function onLoadSubPreset(section, data)
if section == "Pitch" then
setZoneData("Pitch.Coarse", "Pitch.Fine", data) -- This is called from the preset template Pitch.
elseif section == "Filter" then
setZoneData("Filter.Cutoff", "Filter.Resonance", data) -- This is called from the preset template Filter.
end
end
See also: onLoadSubPreset
/ HALion Developer Resource / HALion Script / Reference /
onTriggerPad
onTriggerPad(number)
Description
This callback function is called when the script module receives a trigger event from a trigger pad. The Trigger Pads module must be placed before the script module. Trigger events are produced when the pad is pressed with the mouse, when a trigger note is played via MIDI or by calling playTriggerPad from another script module.
❕ To be able to alter the trigger events, the function onTriggerPad does not pass on the trigger events automatically. To pass on the trigger events to subsequent modules, playTriggerPad must be called. See example below.
Available in: Processor.
Arguments
| Argument | Description | Value Type |
|---|---|---|
| number | The number of the trigger pad in the range from 1 to 8. | number |
Example
-- Print the pad number and pass the trigger event on.
function onTriggerPad(n)
print("Trigger Pad: "..n)
playTriggerPad(n)
end
See also: playTriggerPad
/ HALion Developer Resource / HALion Script / Reference /
onUnhandledEvent
onUnhandledEvent(event)
Description
This callback function is called when the script module receives an event that is not handled by the specific event callback functions, e.g., onNote, onRelease, onRetrigger, onController and onNoteExpression. If none of the specific callback functions are defined, onUnhandledEvent will receive all incoming events.
Available in: Processor.
Arguments
Example
-- Print unhandled events.
function onUnhandledEvent(event)
print(event)
postEvent(event)
end
See also: onNote, onRelease, onRetrigger, onController, onNoteExpression
/ HALion Developer Resource / HALion Script / Reference /
openURL
openURL(address)
Description
Function to open a website in the web browser.
Available in: Controller.
Arguments
| Argument | Description | Value Type |
|---|---|---|
| address | The internet address of the website. | string |
Example
-- Open www.steinberg.net in the web browser.
openURL("www.steinberg.net")
/ HALion Developer Resource / HALion Script / Reference /
pitchBend
pitchBend(value)
Description
Function to generate pitch bend events.
Available in: Processor.
Arguments
| Argument | Description | Value Type |
|---|---|---|
| value | The pitch bend value in the range of -1.0 to 1.0. | number |
Example
-- Invert pitch bend values.
function onPitchBend(event)
local invPB = event.bend * -1
pitchBend(invPB)
print("Inverse PB: "..invPB)
end
See also: onPitchBend, controlChange, afterTouch
/ HALion Developer Resource / HALion Script / Reference /
playNote
playNote(note, velocity, duration, layerOrZone, volume, pan, tune)
Description
Function to generate note events.
- If
durationis -1, the generated note plays for as long as the key that called playNote is held. - If
durationis greater than 0, the note plays for as long as the key is held, with the maximum duration specified in milliseconds. - If
durationis 0, playNote generates only the note-on event. The release can be managed manually with onRelease or with releaseVoice and the ID returned by playNote.
Available in: Processor.
Arguments
| Argument | Description | Value Type |
|---|---|---|
| note | The note number of the note in the range of 0 to 127. | number |
| velocity | The velocity of the note in the range of 0 to 127. | number |
| duration | The length of the note in milliseconds. The default is -1. | number, optional |
| layerOrZone | The layer or zone to receive the note. Only elements that come after the script module are addressable. The default is nil (all layers). | Layer or Zone, optional |
| volume | The initial volume in the range of 0 to 1.0. The default is 1.0. | number, optional |
| pan | The initial pan position in the range of -1.0 to 1.0. The default is 0. | number, optional |
| tune | The initial tuning in the range of -120.0 to 120.0. The default is 0. | number, optional |
Return Values
Returns the note ID of the generated note.
Example
-- Play a major scale with each note.
local majorScaleIntervals = { 0, 2, 4, 5, 7, 9, 11, 12 }
function onNote(event)
for index, interval in ipairs(majorScaleIntervals) do
local id = playNote(event.note + interval, event.velocity, 0)
wait(getBeatDuration() * 0.5)
releaseVoice(id)
end
end
See also: onNote, postEvent, onRelease, releaseVoice, onRetrigger
/ HALion Developer Resource / HALion Script / Reference /
playTriggerPad
playTriggerPad(number)
Description
Function to send the trigger events of the Trigger Pads to subsequent modules of the script module.
❕ This function does not trigger the pads of the Trigger Module. It only changes the state of the trigger pads in the depending modules, for example, to switch between the variations of a FlexPhraser or MIDI Player.
Available in: Processor.
Arguments
| Argument | Description | Value Type |
|---|---|---|
| number | The number of the trigger pad in the range from 1 to 8. | number |
Example
--[[
Cycle up through different variations with each note-on.
The example assumes there is a FlexPhraser or MIDI Player with
variations 1-8 assigned to the trigger pads 1-8.
--]]
variation = 1
function onNote(event)
if variation > 8 then
variation = 1
end
playTriggerPad(variation)
postEvent(event)
variation = variation + 1
end
See also: onTriggerPad
/ HALion Developer Resource / HALion Script / Reference /
postEvent
postEvent(event, delay)
Description
Function to post the event to the engine. The second argument is optional. It allows you to delay the event by a specific time in milliseconds.
Available in: Processor.
Arguments
| Argument | Description | Value Type |
|---|---|---|
| event | The Event object that will be posted. | Event |
| delay | Delay time in milliseconds. The default is 0 ms. | number, optional |
Return Values
Returns a note ID in case of a note-on event, nil for any other type of event. For this reason, assigning the return value of postEvent to a variable is only meaningful in the onNote callback.
Example
local delayTime = 1000
-- Post event and print note ID.
function onNote(event)
local id = postEvent(event, delayTime)
print("ID: "..id)
end
-- Post event and print note ID.
function onRelease(event)
postEvent(event, delayTime)
print("ID: "..event.id)
end
-- Post event, then print controller number and value.
function onController(event)
postEvent(event)
print("Controller #: "..event.controller..", Value: "..event.value)
end
See also: onNote, playNote, onRelease, releaseVoice, onRetrigger
/ HALion Developer Resource / HALion Script / Reference /
printRaw
printRaw(value1, value2, ...)
Description
Receives any number of arguments and prints their values to the output window of the script module. In contrast to Lua's print function, printRaw does not insert a space character after every value and does not add a line feed on the end.
Available in: Controller, Processor.
Arguments
| Argument | Description |
|---|---|
| value1, value2, ... | The values to be printed. Multiple arguments must be separated with commas. |
Example
-- Print valriables a and b to the output window using printRaw.
function onInit()
a = 10
b = 20
printRaw("Variable a is", a)
printRaw("Variable b is", b)
end
Output Messages:
Variable a is10Variable b is20
/ HALion Developer Resource / HALion Script / Reference /
Program Constructor
Program()
(Since HALion 6.4.0)
Description
Constructor to create a new Program object.
Available in: Controller.
Return Values
Returns a new Program object.
Example
-- The following function creates different types of objects in the Program Tree.
-- The objects in the Program Tree do not have a name. You will see only their icons.
function createProgram()
local inst = this.program.instance
local prg = Program()
local bus = Bus()
prg:appendBus(bus)
inst:setProgram(prg, 1)
local layer = Layer()
prg:appendLayer(layer)
layer:appendZone(Zone())
local mm = MidiModule('MIDI Player')
layer:appendMidiModule(mm)
local fx = Effect('Distortion')
bus:appendEffect(fx)
end
createProgram()
See also: Bus Constructor, Layer Constructor, Zone Constructor, MidiModule Constructor, Effect Constructor
/ HALion Developer Resource / HALion Script / Reference /
Quick Control Assignment Modes
Description
Enumerator to identify the different quick control assignment modes.
Available in: Controller.
Quick Control Assignment Modes
| Index | Name |
|---|---|
| 1 | QCAssignmentMode.absolute |
| 2 | QCAssignmentMode.relative |
| 3 | QCAssignmentMode.switch |
| 4 | QCAssignmentMode.switchRelative |
Example
-- Print the mode of the qc assignment.
layer = this.parent
qc = 1
assignment = 1
qcMode = layer:getQCAssignmentMode(qc, assignment)
if qcMode == QCAssignmentMode.absolute then
qcModeName = "Absolute"
elseif qcMode == QCAssignmentMode.relative then
qcModeName = "Relative"
elseif qcMode == QCAssignmentMode.switch then
qcModeName = "Switch"
elseif qcMode == QCAssignmentMode.switchRelative then
qcModeName = "Switch Relative"
end
print("Mode of '"..layer.name.."', QC "..qc..", assignment "..assignment..": "..qcModeName..".")
See also: addQCAssignment, removeQCAssignment, getNumQCAssignments, getQCAssignmentParamId, getQCAssignmentScope, getQCAssignmentMin, getQCAssignmentMax, getQCAssignmentCurve, getQCAssignmentMode, getQCAssignmentBypass, setQCAssignmentParamId, setQCAssignmentScope, setQCAssignmentMin, setQCAssignmentMax, setQCAssignmentCurve, setQCAssignmentMode, setQCAssignmentBypass
/ HALion Developer Resource / HALion Script / Reference /
readMidiFile
readMidiFile(path)
Description
Function to read a MIDI file (.mid). The function creates a MIDI sequence table that contains the data of the MIDI file. See MIDI Sequence Table for details on the fields of the MIDI sequence table.
Available in: Controller.
Arguments
| Argument | Description | Value Type |
|---|---|---|
| path | The path and file name of the MIDI file. | string |
Return Values
Returns a MIDI sequence table. See MIDI Sequence Table for details.
Example
To explore the following script:
- Download C Major Scale.mid.
- Create an empty program and add a script module.
- Paste the script into the text editor of the script module and adjust the file path of readMidiFile to the location of the file on your system.
- Execute the script.
-- Read note-on events from a MIDI file and play them.
midiSequence = readMidiFile("c:/temp/C Major Scale.mid") --[[ Please set the file path to the location
of the file on your system before you run
the script.]]
numberOfEvents = #midiSequence.tracks[1].events
i = 1
print(midiSequence.songname..".mid loaded!")
function onNote(event)
-- Start from the beginning if the last event has been reached.
if i >= numberOfEvents then
i = 1
end
-- Find the next note-on event.
repeat
event = midiSequence.tracks[1].events[i]
i = i + 1
if i > numberOfEvents then
return
end
until event.type == EventType.noteOn
-- Print and play the note-on events.
print(event)
local id = playNote(event.note, event.velocity, 0)
wait(getBeatDuration()*0.5)
releaseVoice(id)
end
See also: writeMidiFile, insertEvent, sortEvents, MIDI Sequence Table, MIDI File Format Types
/ HALion Developer Resource / HALion Script / Reference /
releaseVoice
releaseVoice(noteID)
Description
Function to release a note with a specific note ID.
Available in: Processor.
Arguments
| Argument | Description | Value Type |
|---|---|---|
| noteID | The note ID of the note you want to release. | number |
Example
-- Generate major chords.
local notes = {}
function onNote(event)
local id1 = playNote(event.note, event.velocity)
local id2 = playNote(event.note + 4, event.velocity)
local id3 = playNote(event.note + 7, event.velocity)
local ids = notes[event.note]
if ids == nil then
ids = {}
notes[event.note] = ids
end
table.insert(ids, id1)
table.insert(ids, id2)
table.insert(ids, id3)
end
function onRelease(event)
for i,v in ipairs(notes[event.note]) do
releaseVoice(v)
end
notes[event.note] = nil
end
See also: onNote, postEvent, playNote, onRelease
/ HALion Developer Resource / HALion Script / Reference /
removeBus
removeBus(busOrPosition)
Description
Function to remove a bus from the specified layer. For example, this.parent specifies the parent layer of the script module as the layer that contains the bus. The bus to be removed is determined by its Bus object or its position. You can use getBus or findBusses to determine the Bus object. The position is the number that indexes the busses in the specified layer.
Available in: Controller.
Arguments
| Argument | Description | Value Type |
|---|---|---|
| busOrPosition | The Bus object or the position of the bus to be removed. | Bus or number |
Example
-- Remove all busses from the program.
busses = this.program:findBusses(true)
for i, bus in ipairs(busses) do
this.parent:removeBus(bus)
end
See also: removeEffect, removeLayer, removeMidiModule, removeZone, Bus
/ HALion Developer Resource / HALion Script / Reference /
removeEffect
removeEffect(effectOrPosition)
Description
Function to remove an effect from a bus. You can use getBus or findBusses to define the bus that contains the effect. The effect to be removed is determined by its Effect object or its position. You can use getEffect or findEffects to determine the Effect object. The position is the number indexing the effects in the bus.
Available in: Controller.
Arguments
| Argument | Description | Value Type |
|---|---|---|
| insertOrPosition | The Effect object or the position of the effect to be removed. | Effect or number |
Example
-- Remove all effects from the program.
busses = this.program:findBusses(true)
for i, bus in ipairs(busses) do
effects = bus:findEffects(true)
for j, effect in ipairs(effects) do
bus:removeEffect(effect)
end
end
See also: removeBus, removeLayer, removeMidiModule, removeZone, Effect
/ HALion Developer Resource / HALion Script / Reference /
removeEnvelopePoint
removeEnvelopePoint(envelopeArray, index)
Description
Function to remove an envelope point from the specified envelope. You specify the envelope by calling getParameter with the EnvelopePoints parameter of the desired envelope as argument. If you call getParameter with the EnvelopePoints parameter as argument, an array with the current envelope points will be returned. Each index of the array represents an envelope point with the fields .level, .duration and .curve. The removeEnvelopePoint function modifies this array. To apply the changes, you must use setParameter with the EnvelopePoints parameter of the envelope as argument and the array as value.
Available in: Controller, Processor.
Arguments
| Argument | Description | Value Type |
|---|---|---|
| envelopeArray | An array with envelope points. Each index of the array represents an envelope point with the fields .level, .duration and .curve. To obtain the envelope array of an envelope, use getParameter with the EnvelopePoints parameter of the desired envelope as argument. | table |
| index | The index of the point to be removed. | number |
Example
-- Reset the amplitude envelope.
-- Default envelope times in seconds.
attack = 0
decay = 1
sustain = 1
release = 1
zone = this.program:getZone()
-- Get the envelope points of the amplitude envelope.
ampEnvPoints = zone:getParameter("Amp Env.EnvelopePoints")
ampSustainPoint = zone:getParameter("Amp Env.SustainIndex")
-- Set the envelope points to 4.
while #ampEnvPoints > 4 do
removeEnvelopePoint(ampEnvPoints, #ampEnvPoints)
end
while #ampEnvPoints < 4 do
insertEnvelopePoint(ampEnvPoints, #ampEnvPoints, 0, 1, 0)
end
-- Adjust the position of the sustain point.
ampSustainPoint = #ampEnvPoints - 1
-- Set first point.
ampEnvPoints[1].level = 0
ampEnvPoints[1].duration = 0
ampEnvPoints[1].curve = 0
-- Set second point.
ampEnvPoints[2].level = 1
ampEnvPoints[2].duration = attack
ampEnvPoints[2].curve = 0
-- Set third point.
ampEnvPoints[3].level = sustain
ampEnvPoints[3].duration = decay
ampEnvPoints[3].curve = 0
-- Set fourth point.
ampEnvPoints[4].level = 0
ampEnvPoints[4].duration = release
ampEnvPoints[4].curve = 0
-- Set the envelope points of the amplitude envelope.
zone:setParameter("Amp Env.EnvelopePoints", ampEnvPoints)
zone:setParameter("Amp Env.SustainIndex", ampSustainPoint)
See also: insertEnvelopePoint
/ HALion Developer Resource / HALion Script / Reference /
removeFromParent
removeFromParent()
Description
Function to remove an element in the Program Tree from the parent element. The function can remove elements of the type Layer, Zone, MidiModule, Bus and Effect. It can even remove the script module that calls the function.
Available in: Controller.
Example
-- Remove the second child element.
childs = this.program:findChildren(true)
if childs[2] then
childs[2]:removeFromParent()
end
-- Remove the program bus.
bus = this.program:getBus("Program-Bus")
if bus then
bus:removeFromParent()
end
/ HALion Developer Resource / HALion Script / Reference /
removeLayer
removeLayer(layerOrPosition)
Description
Function to remove a layer from the specified layer. For example, this.parent specifies the parent layer of the script module as the layer that contains the layer to be removed. The layer is determined by its Layer object or its position. You can use getLayer or findLayers to determine the Layer object. The position is the number indexing the layers within the specified layer.
Available in: Controller.
Arguments
| Argument | Description | Value Type |
|---|---|---|
| layerOrPosition | The Layer object or the position of the layer to be removed. | Layer or number |
Example
-- Remove all layers from the program.
layers = this.program:findLayers(true)
for i, layer in ipairs(layers) do
layer.parent:removeLayer(layer)
end
See also: removeBus, removeEffect, removeMidiModule, removeZone, Layer
/ HALion Developer Resource / HALion Script / Reference /
removeMidiModule
removeMidiModule(moduleOrPosition)
Description
Function to remove a MIDI module from the specified layer. For example, this.parent specifies the parent layer of the script module as the layer that contains the MIDI module. The MIDI module to be removed is determined by its MidiModule object or its position. You can use getMidiModule or findMidiModules to determine the MidiModule object. The position is the number that indexes the MIDI modules in the specified layer.
Available in: Controller.
Arguments
| Argument | Description | Value Type |
|---|---|---|
| moduleOrPosition | The MidiModule object or the position of the MIDI module to be removed. | MidiModule or number |
Example
-- Remove all MIDI modules from the program except the script module.
modules = this.program:findMidiModules(true)
for i, module in ipairs(modules) do
if module ~= this then -- Exclude script module.
module.parent:removeMidiModule(module)
end
end
See also: removeBus, removeEffect, removeLayer, removeZone, MidiModule
/ HALion Developer Resource / HALion Script / Reference /
removeQCAssignment
removeQCAssignment(qc, assignment)
Description
Function to remove a quick control assignment from the specified layer and quick control. For example, this.parent defines the parent layer of the script module as the layer that contains the quick control. The qc argument is the index of the quick control with the assignment to be removed. The assignment argument is the index of the quick control assignment to be removed. The indices of the quick controls and the assignments both start counting from 1.
Available in: Controller.
Arguments
| Argument | Description | Value Type |
|---|---|---|
| qc | The index of the quick control with the assignment to be removed. | number |
| assignment | The index of the quick control assignment to be removed. | number |
Example
-- Remove all quick control assignments from the specified layer and qc.
function clearQC(layer, qc)
local assignments = layer:getNumQCAssignments(qc)
if assignments > 0 then
for i = assignments, 1, -1 do
layer:removeQCAssignment(qc, i)
end
print(assignments.." assignments have been removed from '"..layer.name.."', QC "..qc..".")
else
print("No assignments found on '"..layer.name.."', QC "..qc..".")
end
end
clearQC(this.parent, 1)
See also: addQCAssignment, getNumQCAssignments, getQCAssignmentParamId, getQCAssignmentScope, getQCAssignmentMin, getQCAssignmentMax, getQCAssignmentCurve, getQCAssignmentMode, getQCAssignmentBypass, setQCAssignmentParamId, setQCAssignmentScope, setQCAssignmentMin, setQCAssignmentMax, setQCAssignmentCurve, setQCAssignmentMode, setQCAssignmentBypass
/ HALion Developer Resource / HALion Script / Reference /
removeZone
removeZone(zoneOrPosition)
Description
Function to remove a zone from the specified layer. For example, this.parent specifies the parent layer of the script module as the layer that contains the zone. The zone to be removed is determined by its Zone object or its position. You can use getZone or findZones to determine the Zone object. The position is the number that indexes the zones in the specified layer.
Available in: Controller.
Arguments
| Argument | Description | Value Type |
|---|---|---|
| zoneOrPosition | The Zone object or position of the zone to be removed. | Zone or number |
Example
-- Remove all zones from the program.
zones = this.program:findZones(true)
for i, zone in ipairs(zones) do
zone.parent:removeZone(zone)
end
See also: removeBus, removeEffect, removeLayer, removeMidiModule, Zone
/ HALion Developer Resource / HALion Script / Reference /
runAsync
runAsync(func, arg1, arg2, ...)
Description
Executes a function in the controller thread. By calling runAsync in the processor thread, you can invoke a function that is executed in the controller thread. The execution of runAsync takes at least one audio block, or longer, depending on the function which was called. The callback which called runAsync is put on hold until the function has completed. Please be aware of this when using runAsync.
Available in: Processor.
Arguments
| Argument | Description | Value Type |
|---|---|---|
| func | The name of the function to be called. | function |
| arg1, arg2, ... | The arguments of the function. | optional |
Example
-- Color held keys.
keyOnColor = 5
keys = getKeyProperties()
function setColorOfKey(event, keyColor)
if keyColor then
keys[event.note] = { color = keyColor }
else
keys[event.note].color = nil
end
print(event.note)
end
function onNote(event)
postEvent(event)
runAsync(setColorOfKey, event, keyOnColor)
print("onNote")
end
function onRelease(event)
postEvent(event)
runAsync(setColorOfKey, event)
print("onRelease")
end
See also: runSync, spawn, wait, waitBeat, waitForRelease
/ HALion Developer Resource / HALion Script / Reference /
runSync
runSync(func, id)
(Since HALion 6.1)
Description
Executes a function in the processor thread. By calling runSync in the controller thread, you can invoke a function that is executed in the processor thread. For example, by calling runSync in a parameter change callback, you can invoke an event function like playNote, releaseVoice, controlChange, etc. The callback that called runSync is not stopped and continues its execution. The specified function will be exectued in the next audio block. If id is specified, another call to runSync with the same ID overwrites the previous function if it has not been executed yet. Only the last function with the same ID will be executed in the next audio block.
Available in: Controller.
Arguments
| Argument | Description | Value Type |
|---|---|---|
| func | The name of the function to be called. | function |
| id | If this is specified, another call to runSync with the same ID overwrites the previous function if it has not been executed yet. Only the last function with the same ID will be executed in the next audio block. | variant, optional |
Example
-- Fade all voices, triggered by a script parameter.
defineSlotLocal("noteIDs")
noteIDs = {}
function onNote(event)
local id = postEvent(event)
table.insert(noteIDs, id)
end
function syncFadeAllVoices()
for i, id in ipairs(noteIDs) do
fade(id, nil, 0, 1000, true)
end
noteIDs = {}
end
function fadeAllVoices()
if fadeVoices then
runSync(syncFadeAllVoices, 1)
end
end
defineParameter("fadeVoices", "Fade All Voices", false, fadeAllVoices)
See also: runAsync, spawn, wait, waitBeat, waitForRelease
/ HALion Developer Resource / HALion Script / Reference /
samples2ms
samples2ms(samples)
Description
Function to convert a number of samples to the equivalent duration in milliseconds. The sample rate at which the plug-in runs is taken into account.
Available in: Processor.
Arguments
| Argument | Description | Value Type |
|---|---|---|
| samples | The number of samples. | number |
Return Values
Returns the specified number of samples as duration in milliseconds.
Example
-- Print the project sample rate in ms.
function onNote(event)
fs = getSamplingRate()
print(samples2ms(fs), "ms")
end
See also: ms2samples, ms2beat, beat2ms
/ HALion Developer Resource / HALion Script / Reference /
savePreset
savePreset(filename, layer, plugin, attr)
(Since HALion 7.0)
Description
Function to save a layer as VST preset to disk.
Available in: Controller.
Arguments
| Argument | Description | Value Type |
|---|---|---|
| filename | The absolute path and name of the VST preset. | string |
| layer | Specifies the Layer element which is to be saved. | Layer |
| plugin | Determines the plug-in for the VST preset. You can choose H7 (HALion 7) or HS (HALion Sonic). | string, optional |
| attr | Set this to program to save a program VST preset. If this is not set, a layer VST preset will be saved. Alternatively, you can provide a table with MediaBay attributes and values. | string, optional |
MediaBay Attributes
| Attribute | Value | Value Type |
|---|---|---|
| MediaAuthor | "Author" | string |
| MediaComment | "Comment" | string |
| MediaLibraryManufacturerName | "ManufacturerName" | string |
| MediaLibraryName | "LibraryName" | string |
| MediaRating | 3 | integer |
| MusicalArticulations | "Articulation1|Articulation2|..." | string |
| MusicalCategory | "Category" | string |
| MusicalInstrument | "Category|Subcategory" | string |
| MusicalMoods | "Mood1|Mood2|..." | string |
| MusicalProperties | "Property1|Property2|..." | string |
| MusicalStyle | "Style" | string |
| MusicalSubStyle | "Style|Substyle" | string |
| VST3UnitTypePath | "program" or "program/layer" | string |
❕ See MediaBay Guideline for more information about the attributes and how to use them.
Example
posStart, posEnd = string.find(getUserSubPresetPath(), "Steinberg/")
fileLocation = string.sub(getUserSubPresetPath(), 1, posEnd)
defineParameter("FileName", nil, "test.vstpreset")
defineParameter("SavePreset", nil, false, function() if SavePreset then onSavePresetChanged() end end)
setScriptExecTimeOut(20000)
attr = {MediaRating = 3, MusicalProperties = "Soft|Bright|Rich", VST3UnitTypePath = "program",}
function onSavePresetChanged()
FileName = fileLocation..FileName
local layer = this.parent:getLayer()
local saved = savePreset(FileName, layer, "HS", attr)
print(saved)
SavePreset = false
end
/ HALion Developer Resource / HALion Script / Reference /
setBypassNoteOff
(Since HALion 7.1.0)
setBypassNoteOff(note, enable)
Description
The Halion engine keeps track of notes triggered by playNote. If note-off events are left unhandled in the onRelease callback and the script module is bypassed or removed from the slot, note events that were triggered by playNote may cause hanging notes. This can be avoided by calling this function in the onRelease callback. The setBypassNoteOff function forces a note-off to be sent for the note specified by the note argument. A note-off is only sent if the function's enable argument is true. The enable argument is optional and defaults to true if not set. When set to false, it disables the sending of a note-off.
Available in: Processor.
Arguments
| Argument | Description | Value Type |
|---|---|---|
| note | The MIDI note number. | number |
| enable | A note-off will only be sent if this argument is true. The argument defaults to true if not set. When set to false, it disables the sending of a note-off. | boolean, optional |
Example
lastID = -1
function doNote()
if lastID ~= -1 then
releaseVoice(lastID)
end
if note ~= -1 then
lastID = playNote(note, 100)
else
lastID = -1
end
end
function onPlayNote()
runSync(doNote)
end
function onRelease(ev)
if note == -1 then
postEvent(ev)
else
setBypassNoteOff(note) -- Hanging Notes may occur if this is missing.
end
end
defineParameter("note", nil, -1, -1, 127, onPlayNote)
/ HALion Developer Resource / HALion Script / Reference /
setName
setName(name)
Description
Function to change the name of an element in the Program Tree.
Available in: Controller.
Arguments
| Argument | Description | Value Type |
|---|---|---|
| name | The new name for the element. | string |
Example
-- Print current name of the script module.
print(this.name)
-- Set the name of the script module to "My Element".
this:setName("My Element")
-- Print the new name of the script module.
print(this.name)
/ HALion Developer Resource / HALion Script / Reference /
setOutputBus
setOutputBus(bus)
Description
Function to assign the output of a zone or bus to the specified output bus. The sending zone or bus is determined by its Element object. The receiving output bus is specified by its Bus object. Setting the output bus to nil enables the default signal routing for the zone or bus.
❕ Output busses that are higher up in the hierarchy of the Program Tree can be assigned freely. If the sending bus and the receiving output bus have the same parent layer, the output bus must come later in the signal flow.
Available in: Controller.
Arguments
| Argument | Description | Value Type |
|---|---|---|
| bus | The Bus object of the bus that you want to assign, or nil. | Bus or nil |
Example
-- Assign the output of the zone to the Master output bus of the plug-in.
zone = this.parent:getZone()
masterbus = this.program.instance:getBus(1)
zone:setOutputBus(masterbus)
print("Output of "..zone.name.." is assigned to "..masterbus.name..".")
See also: getOutputBus, Bus
/ HALion Developer Resource / HALion Script / Reference /
setParameter
setParameter(nameOrID, value, undo)
Description
Function to set the value of a parameter. The parameter can be determined by name or ID. The function will have no effect if the parameter does not exist.
Available in: Controller, Processor.
Arguments
| Argument | Description | Value Type |
|---|---|---|
| nameOrID | The name or ID of the parameter. | string or number |
| value | The value that you want to set. | The new value must match the data type of the parameter. |
| undo | Determines if the parameter change will be part of the undo. This argument is only evaluated in the controller context. A parameter change in the processor context never has undo. If setParameter is called in the controller context it will be part of the undo, unless you set this argument to false. For example, you should set this to false if the call to setParameter is made within a parameter callback that is already part of the undo, and if the order of execution of these parameter changes is important. | boolean, optional |
Example
-- Set the value of the Level parameter of the parent layer.
function onLoadIntoSlot()
this.parent:setParameter("Level", 0) -- Set via name.
this.parent:setParameter(38, 0) -- Set via ID.
end
See also: getParameter, getParameterNormalized, setParameterNormalized, hasParameter
/ HALion Developer Resource / HALion Script / Reference /
setParameterNormalized
setParameterNormalized(nameOrID, value, undo)
Description
Function to set the value of a parameter in the normalized range from 0 to 1.0. The parameter can be determined by name or ID. This function has no effect if the parameter does not exist or if the value is of the type string.
Available in: Controller, Processor.
Arguments
| Argument | Description | Value Type |
|---|---|---|
| nameOrID | The name or ID of the parameter. | string or number |
| value | The value you want to set in the normalized range from 0 to 1.0. | number |
| undo | Determines if the parameter change will be part of the undo. This argument is only evaluated in the controller context. A parameter change in the processor context never has undo. If setParameter is called in the controller context it will be part of the undo, unless you set this argument to false. For example, you should set this to false if the call to setParameter is made within a parameter callback that is already part of the undo, and if the order of execution of these parameter changes is important. | boolean, optional |
Example
-- Set the normalized value of the parent layer's level parameter.
function onLoadIntoSlot()
this.parent:setParameterNormalized("Level", 0.5) -- Set via name.
this.parent:setParameterNormalized(38, 0.5) -- Set via ID.
end
See also: getParameterNormalized, getParameter, setParameter, hasParameter
/ HALion Developer Resource / HALion Script / Reference /
setProgram
setProgram(programOrNil, index)
Description
Function to set a program in the specified slot of the Program Table or the Slot Rack of the plug-in instance. Before calling this function, you must access the Instance object with this.program.instance. The program is determined by its Program object. To specify the slot in the Program Table, you must use the index argument. To specify the slot in the Slot Rack, you must use a Slot object, for example, via getSlot. The program can be removed from the Slot Rack by using nil as argument.
❕ An Element object can only have one parent. It cannot be child of multiple parents. Therefore, each program can exist only once in the Program Table. Furthermore, an Element object that you retrieved from the running plug-in instance cannot be added twice to the Program Table. It must be removed before it can be added again. The Element objects that you retrieve through loadPreset or loadPresetAsync can be added freely to the Program Table, because these functions create a copy of the Element objects when reading them.
Available in: Controller.
Arguments
| Argument | Description | Value Type |
|---|---|---|
| programOrNil | The Program object of the program. Programs can be removed from the Slot Rack by using nil. | Program or nil |
| index | The index of the slot in the Program Table where you want to set the program. | number, optional |
Example
To explore the following script:
- Download Program.vstpreset.
- Drag the preset on the MediaBay to import it to the user folder for VST presets.
- Create an empty program and add a script module.
- Paste the script into the text editor of the script module and execute the script.
-- Set Program.vstpreset in slot 3 of the Program Table and slot 1 of the Slot Rack.
-- Get the file path for user VST presets.
path = getUserPresetPath()
-- Load the VST preset.
loadedProgram = loadPreset(path.."/Program/Program.vstpreset")
-- Set loadedProgram in slot 3 of the Program Table.
this.program.instance:setProgram(loadedProgram, 3)
-- Set program in slot 1 of the Slot Rack.
program = this.program.instance:getProgram(3)
this.program.instance:getSlot(1):setProgram(program)
-- Clear slot 2 of the Slot Rack.
this.program.instance:getSlot(2):setProgram(nil)
See also: getProgram, Program
/ HALion Developer Resource / HALion Script / Reference /
setQCAssignmentBypass
setQCAssignmentBypass(qc, assignment, bypass)
Description
Function to set the bypass state of the specified quick control assignment. The quick control assignment is determined by the Layer object, the index of the quick control and the index of the assignment itself. For example, this.parent defines the parent layer of the script module as the layer that contains the quick control. The qc argument is the index of the quick control and the assignment argument is the index of the assignment. The indices of the quick controls and the assignments both start counting from 1. The bypass argument sets the bypass state of the quick control assignment.
Available in: Controller.
Arguments
| Argument | Description | Value Type |
|---|---|---|
| qc | The index of the quick control. | number |
| assignment | The index of the quick control assignment. | number |
| bypass | The bypass state to be set. | boolean |
Example
-- Bypass the specified quick control assignment.
layer = this.parent
qc = 1
assignment = 1
layer:setQCAssignmentBypass(qc, assignment, true)
See also: setQCAssignmentParamId, setQCAssignmentScope, setQCAssignmentMin, setQCAssignmentMax, setQCAssignmentCurve, setQCAssignmentMode, addQCAssignment, removeQCAssignment, getNumQCAssignments, getQCAssignmentParamId, getQCAssignmentScope, getQCAssignmentMin, getQCAssignmentMax, getQCAssignmentCurve, getQCAssignmentMode, getQCAssignmentBypass, Quick Control Assignment Modes
/ HALion Developer Resource / HALion Script / Reference /
setQCAssignmentCurve
setQCAssignmentCurve(qc, assignment, curve)
Description
Function to set the curve value of the specified quick control assignment. The quick control assignment is determined by the Layer object, the index of the quick control and the index of the assignment itself. For example, this.parent defines the parent layer of the script module as the layer that contains the quick control. The qc argument is the index of the quick control and the assignment argument is the index of the assignment. The indices of the quick controls and the assignments both start counting from 1. The curve argument sets the curve value of the quick control assignment.
Available in: Controller.
Arguments
| Argument | Description | Value Type |
|---|---|---|
| qc | The index of the quick control. | number |
| asignment | The index of the quick control assignment. | number |
| curve | The curve value in the range -100 % to +100 %. | number |
Example
-- Set the curve of the quick control assignment to -100 %.
layer = this.parent
qc = 1
assignment = 1
layer:setQCAssignmentCurve(qc, assignment, -100)
See also: setQCAssignmentParamId, setQCAssignmentScope, setQCAssignmentMin, setQCAssignmentMax, setQCAssignmentMode, setQCAssignmentBypass, addQCAssignment, removeQCAssignment, getNumQCAssignments, getQCAssignmentParamId, getQCAssignmentScope, getQCAssignmentMin, getQCAssignmentMax, getQCAssignmentCurve, getQCAssignmentMode, getQCAssignmentBypass, Quick Control Assignment Modes
/ HALion Developer Resource / HALion Script / Reference /
setQCAssignmentMax
setQCAssignmentMax(qc, assignment max)
Description
Function to set the maximum value of the specified quick control assignment. The quick control assignment is determined by the Layer object, the index of the quick control and the index of the assignment itself. For example, this.parent defines the parent layer of the script module as the layer that contains the quick control. The qc argument is the index of the quick control and the assignment argument is the index of the assignment. The indices of the quick controls and the assignments both start counting from 1. The max argument sets the maximum value of the quick control assignment.
Available in: Controller.
Arguments
| Argument | Description | Value Type |
|---|---|---|
| qc | The index of the quick control. | number |
| assignment | The index of the quick control assignment. | number |
| max | The maximum value to be set. | number |
❕ The value range is always 0 to 100 %, even if the mode of the quick control assignment is set to Relative or Switch Relative.
Example
-- Set the maximum value of the quick control assignment depending on the mode.
layer = this.parent
qc = 1
assignment = 1
qcMode = layer:getQCAssignmentMode(qc, assignment)
if (qcMode == QCAssignmentMode.relative or qcMode == QCAssignmentMode.switchRelative) then
qcMax = 75
else
qcMax = 100
end
layer:setQCAssignmentMax(qc, assignment, qcMax)
See also: setQCAssignmentParamId, setQCAssignmentScope, setQCAssignmentMin, setQCAssignmentCurve, setQCAssignmentMode, setQCAssignmentBypass, addQCAssignment, removeQCAssignment, getNumQCAssignments, getQCAssignmentParamId, getQCAssignmentScope, getQCAssignmentMin, getQCAssignmentMax, getQCAssignmentCurve, getQCAssignmentMode, getQCAssignmentBypass, Quick Control Assignment Modes
/ HALion Developer Resource / HALion Script / Reference /
setQCAssignmentMin
setQCAssignmentMin(qc, assignment, min)
Description
Function to set the minimum value of the specified quick control assignment. The quick control assignment is determined by the Layer object, the index of the quick control and the index of the assignment itself. For example, this.parent defines the parent layer of the script module as the layer that contains the quick control. The qc argument is the index of the quick control and the assignment argument is the index of the assignment. The indices of the quick controls and the assignments both start counting from 1. The min argument sets the minimum value of the quick control assignment.
Available in: Controller.
Arguments
| Argument | Description | Value Type |
|---|---|---|
| qc | The index of the quick control. | number |
| assignment | The index of the quick control assignment. | number |
| min | The minimum value to be set. | number |
❕ The value range is always 0 to 100 %, even if the mode of the quick control assignment is set to Relative or Switch Relative.
Example
-- Set the minimum value of the quick control assignment depending on the mode.
layer = this.parent
qc = 1
assignment = 1
qcMode = layer:getQCAssignmentMode(qc, assignment)
if (qcMode == QCAssignmentMode.relative or qcMode == QCAssignmentMode.switchRelative) then
qcMin = 25
else
qcMin = 0
end
layer:setQCAssignmentMin(qc, assignment, qcMin)
See also: setQCAssignmentParamId, setQCAssignmentScope, setQCAssignmentMax, setQCAssignmentCurve, setQCAssignmentMode, setQCAssignmentBypass, addQCAssignment, removeQCAssignment, getNumQCAssignments, getQCAssignmentParamId, getQCAssignmentScope, getQCAssignmentMin, getQCAssignmentMax, getQCAssignmentCurve, getQCAssignmentMode, getQCAssignmentBypass, Quick Control Assignment Modes
/ HALion Developer Resource / HALion Script / Reference /
setQCAssignmentMode
setQCAssignmentMode(qc, assignment, mode)
Description
Function to set the mode of the specified quick control assignment. The quick control assignment is determined by the Layer object, the index of the quick control and the index of the assignment itself. For example, this.parent defines the parent layer of the script module as the layer that contains the quick control. The qc argument is the index of the quick control and the assignment argument is the index of the assignment. The indices of the quick controls and the assignments both start counting from 1. The mode argument sets the mode of the quick control assignment.
Available in: Controller.
Arguments
| Argument | Description | Value Type |
|---|---|---|
| qc | The index of the quick control. | number |
| asignment | The index of the quick control assignment. | number |
| mode | The mode to be set. It can be determined via names or indices. See Quick Control Assignment Modes for details. | enum or number |
Example
-- Set the mode of the quick control assignment to absolute and adjust min and max to full range.
layer = this.parent
qc = 1
assignment = 1
layer:setQCAssignmentMode(qc, assignment, QCAssignmentMode.absolute)
layer:setQCAssignmentMin(qc, assignment, 0)
layer:setQCAssignmentMax(qc, assignment, 100)
See also: setQCAssignmentParamId, setQCAssignmentScope, setQCAssignmentMin, setQCAssignmentMax, setQCAssignmentCurve, setQCAssignmentBypass, addQCAssignment, removeQCAssignment, getNumQCAssignments, getQCAssignmentParamId, getQCAssignmentScope, getQCAssignmentMin, getQCAssignmentMax, getQCAssignmentCurve, getQCAssignmentMode, getQCAssignmentBypass, Quick Control Assignment Modes
/ HALion Developer Resource / HALion Script / Reference /
setQCAssignmentParamId
setQCAssignmentParamId(qc, assignment, paramID)
Description
Function to set the parameter ID for connecting the corresponding parameter to the specified quick control assignment. The quick control assignment is determined by the Layer object, the index of the quick control and the index of the assignment itself. For example, this.parent defines the parent layer of the script module as the layer that contains the quick control. The qc argument is the index of the quick control and the assignment argument is the index of the assignment. The indices of the quick controls and the assignments both start counting from 1. The paramID argument selects the parameter to be connected with the quick control assignment.
Available in: Controller.
Arguments
| Argument | Description | Value Type |
|---|---|---|
| qc | The index of the quick control. | number |
| assignment | The index of the quick control assignment. | number |
| paramID | The ID of the parameter to be connected. | number |
Example
-- Connect the coarse parameter of the zone to the specified quick control assignment.
layer = this.parent
zones = layer:findZones(true)
zone = zones[1]
qc = 1
assignment = 1
coarseParamID = zone:getParameterDefinition("Pitch.Coarse").id
layer:setQCAssignmentParamId(qc, assignment, coarseParamID)
See also: setQCAssignmentScope, setQCAssignmentMin, setQCAssignmentMax, setQCAssignmentCurve, setQCAssignmentMode, setQCAssignmentBypass, addQCAssignment, removeQCAssignment, getNumQCAssignments, getQCAssignmentParamId, getQCAssignmentScope, getQCAssignmentMin, getQCAssignmentMax, getQCAssignmentCurve, getQCAssignmentMode, getQCAssignmentBypass, Quick Control Assignment Modes
/ HALion Developer Resource / HALion Script / Reference /
setQCAssignmentScope
setQCAssignmentScope(qc, assignment, scope)
Description
Function to set the scope for the specified quick control assignment. The quick control assignment is determined by the Layer object, the index of the quick control and the index of the assignment itself. For example, this.parent defines the parent layer of the script module as the layer that contains the quick control. The qc argument is the index of the quick control and the assignment argument is the index of the assignment. The indices of the quick controls and the assignments both start counting from 1. The scope is defined by the Element object that you assign to the scope argument.
Available in: Controller.
Arguments
| Argument | Description | Value Type |
|---|---|---|
| qc | The index of the quick control. | number |
| assignments | The index of the quick control assignment. | number |
| scope | The Element object to be used as scope. | Element |
Example
-- Set the scope to the first zone that was found.
layer = this.parent
zones = layer:findZones(true)
zone = zones[1]
qc = 1
assignment = 1
layer:setQCAssignmentScope(qc, assignment, zone)
See also: setQCAssignmentParamId, setQCAssignmentMin, setQCAssignmentMax, setQCAssignmentCurve, setQCAssignmentMode, setQCAssignmentBypass, addQCAssignment, removeQCAssignment, getNumQCAssignments, getQCAssignmentParamId, getQCAssignmentScope, getQCAssignmentMin, getQCAssignmentMax, getQCAssignmentCurve, getQCAssignmentMode, getQCAssignmentBypass, Quick Control Assignment Modes
/ HALion Developer Resource / HALion Script / Reference /
setScriptExecTimeOut
setScriptExecTimeOut(duration)
Description
Function to specify the maximum allowed execution time of a function call in the script. If the execution of a function call exceeds the execution time-out, the script will end with an execution error. This prevents the infinite execution of scripts, e.g., in case of an infinite loop. The script execution time-out can be defined separately for the controller and the processor thread. Which execution time-out is set, depends on where setScriptExecTimeOut is called. The duration for the script execution time-out is specified in milliseconds. The default is 5000 ms for the controller thread and 1000 ms for the processor thread.
Available in: Controller, Processor.
Arguments
| Argument | Description | Value Type |
|---|---|---|
| duration | The duration for the script execution time-out in milliseconds. | number |
Example
-- Half the default script execution time-out of the controller and the processor thread.
-- Controller thread.
setScriptExecTimeOut(getScriptExecTimeOut() / 2)
print("Execution time-out of "..getContext()..": "..getScriptExecTimeOut().." ms.")
-- Processor thread.
function onInit()
setScriptExecTimeOut(getScriptExecTimeOut() / 2)
print("Execution time-out of "..getContext()..": "..getScriptExecTimeOut().." ms.")
end
See also: getScriptExecTimeOut
/ HALion Developer Resource / HALion Script / Reference /
setSource1
setSource1(source, sourceInfo1, sourceInfo2)
Description
Function to set the 1st modulation source of a row in the modulation matrix. The row is specified with the Zone object of the zone and the index of the modulation matrix row.
Available in: Controller.
Arguments
| Argument | Description | Value Type |
|---|---|---|
| source | The modulation source. It can be determined via names or indices. See Modulation Source Types for details. Standard modulation sources like the LFOs or the envelopes can be set directly. Special modulation sources like MIDI controllers or MIDI modules can only be set by also specifiying sourceInfo1 and sourceInfo2. | enum or number |
| sourceInfo1 | Optional argument to specify the MIDI controller number or the MIDI module, for example. See example for details. | number or MidiModule, optional |
| sourceInfo2 | Optional argument to select the modulation output of a MIDI module, for example. See example for details. | number, optional |
Example
-- Define the modulation sources and infos in an array.
modSources = {
{ source = ModulationSource.lfo1, bipolar = 1 },
{ source = ModulationSource.midiControl, bipolar = 0, sourceInfo1 = 1 },
{ source = ModulationSource.quickControl, bipolar = 1, sourceInfo1 = this.program, sourceInfo2 = 1 },
{ source = ModulationSource.modulationModule, bipolar = 0, sourceInfo1 = this, sourceInfo2 = 1 },
{ source = ModulationSource.modulationModule, bipolar = 0, sourceInfo1 = this, sourceInfo2 = 2 },
{ source = ModulationSource.noteExpression, bipolar = 0, sourceInfo1 = 1 }
}
-- Define two modulation outputs for the script module.
defineModulation("50%", false)
defineModulation("100%", false)
-- Calculate the modulation outputs.
function calcModulation()
return 0.5, 1
end
-- Get the element object of the first zone.
zone = this.program:findZones(true)[1]
-- Assign the modulation sources to source 1 in the modulation rows 1 to 6.
for i=1, #modSources do
local modRow = zone:getModulationMatrixRow(i)
modRow:setSource1(modSources[i].source, modSources[i].sourceInfo1, modSources[i].sourceInfo2)
modRow:setParameter("Source1.Polarity", modSources[i].bipolar) -- Set the default polarity of the source.
end
-- Assign the sample & hold to source 2 in modulation row 1.
modRow = zone:getModulationMatrixRow(1)
modRow:setSource2(ModulationSource.sampleAndHold, 0)
See also: ModulationMatrixRow, getModulationMatrixRow, setSource2, getSource1, getSource2, Modulation Source Types, Modulation Destination Types
/ HALion Developer Resource / HALion Script / Reference /
setSource2
setSource2(source, sourceInfo1, sourceInfo2)
Description
Function to set the 2nd modulation source of a row in the modulation matrix. The row is specified with the Zone object of the zone and the index of the modulation matrix row.
Available in: Controller.
Arguments
| Argument | Description | Value Type |
|---|---|---|
| source | The modulation source. It can be determined via names or indices. See Modulation Source Types for details. Standard modulation sources like the LFOs or the envelopes can be set directly. Special modulation sources like MIDI controllers or MIDI modules can only be set by also specifiying sourceInfo1 and sourceInfo2. | enum or number |
| sourceInfo1 | Optional argument to specify the MIDI controller number or the MIDI module, for example. See example for details. | number or MidiModule, optional |
| sourceInfo2 | Optional argument to select the modulation output of a MIDI module, for example. See example for details. | number, optional |
Example
-- Define the modulation sources and infos in an array.
modSources = {
{ source = ModulationSource.lfo1, bipolar = 1 },
{ source = ModulationSource.midiControl, bipolar = 0, sourceInfo1 = 1 },
{ source = ModulationSource.quickControl, bipolar = 1, sourceInfo1 = this.program, sourceInfo2 = 1 },
{ source = ModulationSource.modulationModule, bipolar = 0, sourceInfo1 = this, sourceInfo2 = 1 },
{ source = ModulationSource.modulationModule, bipolar = 0, sourceInfo1 = this, sourceInfo2 = 2 },
{ source = ModulationSource.noteExpression, bipolar = 0, sourceInfo1 = 1 }
}
-- Define two modulation outputs for the script module.
defineModulation("50%", false)
defineModulation("100%", false)
-- Calculate the modulation outputs.
function calcModulation()
return 0.5, 1
end
-- Get the element object of the first zone.
zone = this.program:findZones(true)[1]
-- Assign the modulation sources to source 1 in the modulation rows 1 to 6.
for i=1, #modSources do
local modRow = zone:getModulationMatrixRow(i)
modRow:setSource1(modSources[i].source, modSources[i].sourceInfo1, modSources[i].sourceInfo2)
modRow:setParameter("Source1.Polarity", modSources[i].bipolar) -- Set the default polarity of the source.
end
-- Assign the sample & hold to source 2 in modulation row 1.
modRow = zone:getModulationMatrixRow(1)
modRow:setSource2(ModulationSource.sampleAndHold, 0)
See also: ModulationMatrixRow, getModulationMatrixRow, setSource1, getSource1, getSource2, Modulation Source Types, Modulation Destination Types
/ HALion Developer Resource / HALion Script / Reference /
setZoneFMXAlgo
setZoneFMXAlgo(zone, algo)
(Since HALion 7.0)
Description
Function to set the algorithm of the FM zone. The zone argument sets the target FM zone by its Zone object. You can use getZone or findZones to determine the Zone object of the target FM zone. The algo argument is the index that corresponds to the desired FM-X algorithm preset of the FM zone.
Available in: Controller.
Arguments
| Argument | Description | Value Type |
|---|---|---|
| zone | The Zone object of the FM zone. | Zone |
| algo | The index that corresponds to the desired FM-X algorithm preset of the FM zone. The index ranges from 1 to 88. | number |
Example
algorithms = {}
for i = 1, 88 do
algorithms[i] = ("Algorithm "..i)
end
function onSelectAlgorithmChanged()
local zone = this.parent:getZone()
setZoneFMXAlgo(zone, SelectAlgorithm)
end
defineParameter("SelectAlgorithm", nil, 1, algorithms, onSelectAlgorithmChanged)
/ HALion Developer Resource / HALion Script / Reference /
sortEvents
sortEvents(eventsTable)
Description
Function to sort the events of the specified events table according to their PPQ position. The function sorts the events from first to last PPQ position. The events table is part of a tracks table which is part of the MIDI sequence table. See MIDI Sequence Table for details.
Available in: Controller.
Arguments
| Argument | Description | Value Type |
|---|---|---|
| eventsTable | The table record referencing the events table. | table |
Example
-- Produce a minor scale with reverse PPQ positions, then sort it.
-- Create MIDI sequence table.
midiSequence = { tracks = { { events = {} } } }
-- Initialize variables.
minorScaleIntervals = { 0, 2, 3, 5, 7, 8, 10, 12 }
root = 60 -- C3
ppqPosition = 7
-- Produce a minor scale with reverse PPQ positions.
for i, interval in ipairs(minorScaleIntervals) do
local note = root + interval
-- Create note-on event.
local noteOn = Event(EventType.noteOn)
noteOn.note = note
noteOn.velocity = 100
noteOn.ppqPosition = ppqPosition
-- Create note-off event.
local noteOff = Event(EventType.noteOff)
noteOff.note = note
noteOff.ppqPosition = ppqPosition + 1
-- Insert the events in the MIDI sequence table with Lua's table.insert function.
table.insert(midiSequence.tracks[1].events, noteOn)
table.insert(midiSequence.tracks[1].events, noteOff)
ppqPosition = ppqPosition -1
end
print("Sorting before sortEvents:")
for i, event in ipairs(midiSequence.tracks[1].events) do
print(i, event)
end
print() -- Empty line.
sortEvents(midiSequence.tracks[1].events)
print("Sorting after sortEvents:")
for i, event in ipairs(midiSequence.tracks[1].events) do
print(i, event)
end
print() -- Empty line.
See also: readMidiFile, writeMidiFile, insertEvent, MIDI Sequence Table, MIDI File Format Types
/ HALion Developer Resource / HALion Script / Reference /
spawn
spawn(func, arg1, arg2, ...)
Description
Calls a Lua function and executes it in a separate, parallel thread.
Available in: Controller, Processor.
Arguments
| Argument | Description | Value Type |
|---|---|---|
| func | The name of the function to be called. | function |
| arg1, arg2, ... | The arguments of the function. | optional |
Example
-- Play echos after releasing the note.
function echoNotes(event, echos)
local duration = getBeatDuration()
for i=1, echos do
wait(duration*0.5)
playNote(event.note+7*i, event.velocity*1/i, duration*0.25)
end
print("Spawn function of Note", event.note, "ended at", getTime())
end
function onNote(event)
postEvent(event)
waitForRelease()
spawn(echoNotes, event, 3)
print("Note", event.note, "was released at", getTime())
end
See also: runAsync, runSync, wait, waitBeat, waitForRelease
/ HALion Developer Resource / HALion Script / Reference /
startUndoBlock
startUndoBlock(name, id)
Description
Function to combine multiple undo entries into one undo block. For example, if your script inserts several elements into the program, you might want to be able to remove all the elements in one single undo operation. The function returns an ID for identifying the undo block. This ID can be used as second argument in later calls to startUndoBlock for combining the undo blocks that refer to this ID. The name argument will be used as entry in the undo history. If multiple undo blocks are combined, only the name of the last undo block will be used. This function must be terminated using endUndoBlock. If startUndoBlock is called within a callback function, endUndoBlock is called automatically when the callback function ends.
Available in: Controller.
Arguments
| Argument | Description | Value Type |
|---|---|---|
| name | This will be displayed as entry in the undo history. | string |
| id | Set this to combine the undo blocks that refer to this ID. (Since HALion 6.1) | number |
Return Values
Returns an ID that can be used to identify the undo block.
Example 1
-- Change param1, then param2.
-- The changes of param1 and param2 are combined into one undo entry.
function param1Changed()
id = startUndoBlock("param1 Changed")
end
function param2Changed()
startUndoBlock("param2 Changed", id)
end
defineParameter{ name = "param1", onChanged = param1Changed }
defineParameter{ name = "param2", onChanged = param2Changed }
Example 2
To explore the following script:
- Download Program.vstpreset.
- Drag the preset on the MediaBay to import it to the user folder for VST presets.
- Create an empty program and add a script module.
- Paste the script into the text editor of the script module and execute the script.
- Check the entries in the undo history with and without undo block.
-- Insert elements from Program.vstpreset into the current program.
-- Get the file path for user VST presets.
path = getUserPresetPath()
-- Load the VST preset.
loadedProgram = loadPreset(path.."/Program/Program.vstpreset")
-- Get elements from loadedProgram.
midiModule = loadedProgram:findMidiModules()[1] -- First MIDI module in loadedProgram.
subLayer = loadedProgram:findLayers()[1] -- First layer in loadedProgram.
bus = loadedProgram:findBusses()[1] -- First bus in loadedProgram.
program = this.program
-- Begin the undo block.
startUndoBlock("Insert Modules") -- Only this entry will display in the undo history.
-- Insert the elements.
if midiModule then
program:insertMidiModule(midiModule, 1)
end
if subLayer then
program:insertLayer(subLayer, 1)
end
if bus then
program:insertBus(bus, 1)
end
endUndoBlock() -- Terminate the undo block.
See also: endUndoBlock, getUndoContext, Undo Context Types
/ HALion Developer Resource / HALion Script / Reference /
startWriteOutputToFile
startWriteOutputToFile(filename, append, silent)
(Since HALion 7.0)
Description
Function to write the ouput of print functions to a file. Only the print functions between startWriteOutputToFile and stopWriteOutputToFile are considered.
Available in: Controller.
Arguments
| Argument | Description | Value Type |
|---|---|---|
| filename | The absolute path and name of the file. | string |
| append | Appends the output to the file if this is set to true. | boolean |
| silent | Hides the console output if this is set to true. | boolean |
Example
posStart, posEnd = string.find(getUserSubPresetPath(), "Steinberg/")
fileLocation = string.sub(getUserSubPresetPath(), 1, posEnd)
defineParameter("FileName", nil, "mapping.csv")
defineParameter("PrintSilent", nil, false)
defineParameter("WriteMapping", nil, false, function() if WriteMapping then writeMapping() end end)
zones = this.parent:findZones(true)
mapping = {
{param = "Name", value = function(zone) return zone.name end},
{param = "File Name", value = function(zone) return zone:getParameter("SampleOsc.Filename") end},
{param = "Root Key", value = function(zone) return zone:getParameter("SampleOsc.Rootkey") end},
}
function writeMapping()
FileName = fileLocation..FileName
startWriteOutputToFile(FileName, false, PrintSilent) -- First line of csv file.
for i, map in ipairs(mapping) do
if i < #mapping then
printRaw(map.param, ";")
else
print(map.param)
end
end
stopWriteOutputToFile()
startWriteOutputToFile(FileName, true, PrintSilent) -- Add one line for each zone.
for i, zone in ipairs(zones) do
for j, map in ipairs(mapping) do
if j < #mapping then
printRaw(map.value(zone), ";")
else
print(map.value(zone))
end
end
end
stopWriteOutputToFile()
WriteMapping = false
end
See also: stopWriteOutputToFile
/ HALion Developer Resource / HALion Script / Reference /
stopWriteOutputToFile
stopWriteOutputToFile()
(Since HALion 7.0)
Description
Stops writing the ouput to the file. See startWriteOutputToFile for further details.
Available in: Controller.
Example
posStart, posEnd = string.find(getUserSubPresetPath(), "Steinberg/")
fileLocation = string.sub(getUserSubPresetPath(), 1, posEnd)
defineParameter("FileName", nil, "mapping.csv")
defineParameter("PrintSilent", nil, false)
defineParameter("WriteMapping", nil, false, function() if WriteMapping then writeMapping() end end)
zones = this.parent:findZones(true)
mapping = {
{param = "Name", value = function(zone) return zone.name end},
{param = "File Name", value = function(zone) return zone:getParameter("SampleOsc.Filename") end},
{param = "Root Key", value = function(zone) return zone:getParameter("SampleOsc.Rootkey") end},
}
function writeMapping()
FileName = fileLocation..FileName
startWriteOutputToFile(FileName, false, PrintSilent) -- First line of csv file.
for i, map in ipairs(mapping) do
if i < #mapping then
printRaw(map.param, ";")
else
print(map.param)
end
end
stopWriteOutputToFile()
startWriteOutputToFile(FileName, true, PrintSilent) -- Add one line for each zone.
for i, zone in ipairs(zones) do
for j, map in ipairs(mapping) do
if j < #mapping then
printRaw(map.value(zone), ";")
else
print(map.value(zone))
end
end
end
stopWriteOutputToFile()
WriteMapping = false
end
See also: startWriteOutputToFile
/ HALion Developer Resource / HALion Script / Reference /
Undo Context Types
(Since HALion 6.1)
Description
Enumerator to identify the undo context.
Available in: Controller.
| Index | Undo Context |
|---|---|
| 1 | UndoContext.inUndo |
| 2 | UndoContext.inRedo |
See also: getUndoContext, startUndoBlock, endUndoBlock
/ HALion Developer Resource / HALion Script / Reference /
VoiceGroupsData Table
(Since HALion 6.4.10)
Description
Voice Groups are managed via a predefined table: the VoiceGroupsData table. This table can be obtained by making a call to getParameter with "VoiceManager.VoiceGroupsData" as parameter. The voice groups are referenced by their index. Each voice group has the fields .maxPolyphony, .exclusiveGroup and .stealMode. You can change the correspondig values, but the structure of this table must remain unaltered. The values are set by making a call to setParameter. See the example below for more details.
Available in: Controller.
Fields
| Field | Description | Value Type |
|---|---|---|
| .maxPolyphony | The maximum polyphony of the voice group. The value range is from 1 to 128. | number |
| .exclusiveGroup | The exclusive group of the voice group. The value range is from 0 to 32. Set this to 0 to switch the exclusive group off. | number |
| .stealMode | The steal mode of the voice group. See Voice Group Steal Modes for details. | number |
Example
-- Activate the voice groups for the parent layer.
layer = this.parent
layer:setParameter("VoiceManager.Voice Management", 1) -- Set Voice Manager to "On".
layer:setParameter("VoiceManager.VoiceGroups", true) -- Activate the Voice Groups.
voiceGroups = layer:getParameter("VoiceManager.VoiceGroupsData")
for i = 1, 128 do
voiceGroups[i].maxPolyphony = 4
voiceGroups[i].exclusiveGroup = 0 -- Set exclusive group to "Off".
voiceGroups[i].stealMode = StealMode.lastNotePriority
end
layer:setParameter("VoiceManager.VoiceGroupsData", voiceGroups)
See also: Voice Group Steal Modes
/ HALion Developer Resource / HALion Script / Reference /
Voice Group Steal Modes
(Since HALion 6.4.10)
Description
Enumerator to identify the different voice group steal modes.
Available in: Controller.
Arguments
The voice group steal modes can be determined with these names or indices:
| Index | Name |
|---|---|
| 1 | StealMode.lastNotePriority |
| 2 | StealMode.firstNotePriority |
| 3 | StealMode.lowNotePriority |
| 4 | StealMode.highNotePriority |
| 5 | StealMode.stealLowestAmplitude |
| 6 | StealMode.stealReleasedNotes |
Example
-- Activate the voice groups for the parent layer.
layer = this.parent
layer:setParameter("VoiceManager.Voice Management", 1) -- Set Voice Manager to "On".
layer:setParameter("VoiceManager.VoiceGroups", true) -- Activate the Voice Groups.
voiceGroups = layer:getParameter("VoiceManager.VoiceGroupsData")
for i = 1, 128 do
voiceGroups[i].maxPolyphony = 4
voiceGroups[i].exclusiveGroup = 0 -- Set exclusive group to "Off".
voiceGroups[i].stealMode = StealMode.lastNotePriority
end
layer:setParameter("VoiceManager.VoiceGroupsData", voiceGroups)
See also: VoiceGroupsData Table
/ HALion Developer Resource / HALion Script / Reference /
wait
wait(ms)
Description
Function to suspend the execution of a callback for a specific time in milliseconds.
❕ If the wait function is used in the Controller thread, it operates at a lower rate and is therefore less accurate.
Available in: Controller, Processor.
Arguments
| Argument | Description | Value Type |
|---|---|---|
| ms | Time in ms. | number |
Example
-- Delay notes which have not been released for 1000 ms.
local initTime = getTime()
local releaseTime = {}
function onNote(event)
local noteOnTime = getTime()
wait(1000)
if noteOnTime > (releaseTime[event.note] or initTime) then
postEvent(event)
end
end
function onRelease(event)
releaseTime[event.note] = getTime()
postEvent(event)
end
See also: waitBeat, waitForRelease, spawn, runAsync, runSync
/ HALion Developer Resource / HALion Script / Reference /
waitBeat
waitBeat(beats)
Description
Function to suspend the execution of a callback for a specific time. This time is specified in number of beats. One beat equals the length of a quarter note based on the current tempo.
❕ If the waitBeat function is used in the Controller thread, it operates at a lower rate and is therefore less accurate.
Available in: Controller, Processor.
Arguments
| Argument | Description | Value Type |
|---|---|---|
| beats | Time in number of quarter notes and fractions of it. | number |
Example
-- Change tuning periodically after one beat.
function onNote(event)
local id = postEvent(event)
while isNoteHeld() do
waitBeat(1)
local tune = math.random() * 12 - 6
changeTune(id, tune, false, false)
end
end
See also: wait, waitForRelease, spawn, runAsync, runSync
/ HALion Developer Resource / HALion Script / Reference /
waitForRelease
waitForRelease()
Description
Function to suspend the execution of the onNote callback until the note that called onNote gets released either by a corresponding note-off or sustain pedal off.
Available in: Processor.
Example
-- Print the note length in milliseconds.
function onNote(event)
postEvent(event)
local noteOnTime = getTime()
waitForRelease()
local noteOffTime = getTime()
local noteLength = noteOffTime - noteOnTime
print(noteLength.." ms")
end
See also: wait, waitBeat, spawn, runAsync, runSync
/ HALion Developer Resource / HALion Script / Reference /
writeMidiFile
writeMidiFile(path, midiSequence)
Description
Function to write a MIDI file (.mid) to disk.
Available in: Controller.
Arguments
| Argument | Description | Value Type |
|---|---|---|
| path | The path and file name of the MIDI file. | string |
| midiSequence | The MIDI sequence table that contains the data. The structure of the table is defined in the MIDI Sequence Table. | table |
Return Values
Returns true if the MIDI file was written successfully and false if not.
Example
-- Produce a minor scale and write it to a MIDI file.
-- Create the MIDI sequence table.
midiSequence = { tracks = { { events = {} } } }
-- Initialize variables.
minorScaleIntervals = { 0, 2, 3, 5, 7, 8, 10, 12 }
root = 60 -- C3
ppqPosition = 0
-- Produce the events of the minor scale.
for i, interval in ipairs(minorScaleIntervals) do
local note = root + interval
-- Create note-on event.
local noteOn = Event(EventType.noteOn)
noteOn.note = note
noteOn.velocity = 100
noteOn.ppqPosition = ppqPosition
-- Create note-off event.
local noteOff = Event(EventType.noteOff)
noteOff.note = note
noteOff.ppqPosition = ppqPosition + 1
-- Insert the events in the MIDI sequence table.
insertEvent(midiSequence.tracks[1].events, noteOn)
insertEvent(midiSequence.tracks[1].events, noteOff)
ppqPosition = ppqPosition + 1
end
-- Write the MIDI sequence table as .mid file to disk.
saveState = writeMidiFile ("c:/temp/test.mid", midiSequence) --[[ Please set the file path to the desired
location on your system before you run
the script. ]]
if saveState then
print("The MIDI file was successfully written.")
else
print("The MIDI file could not be written!")
end
See also: readMidiFile, insertEvent, sortEvents, MIDI Sequence Table, MIDI File Format Types
/ HALion Developer Resource / HALion Script / Reference /
Zone Constructor
Zone()
(Since HALion 6.4.0)
Description
Constructor to create a new Zone object.
Available in: Controller.
Return Values
Returns a new Zone object.
Example
-- The following function creates different types of objects in the Program Tree.
-- The objects in the Program Tree do not have a name. You will see only their icons.
function createProgram()
local inst = this.program.instance
local prg = Program()
local bus = Bus()
prg:appendBus(bus)
inst:setProgram(prg, 1)
local layer = Layer()
prg:appendLayer(layer)
layer:appendZone(Zone())
local mm = MidiModule('MIDI Player')
layer:appendMidiModule(mm)
local fx = Effect('Distortion')
bus:appendEffect(fx)
end
createProgram()
See also: Program Constructor, Bus Constructor, Layer Constructor, MidiModule Constructor, Effect Constructor
HALion Macro Page
In this section of the documentation, you find additional information about macro page editing and a reference to all objects like Resources, Controls, and Templates used on HALion macro pages.
- To make yourself familiar with the basic concepts and the usage of the Macro Page Designer, please read the steinberg.help documentation.
- To explore existing macro pages, read the section Example Macro Pages.
- To find examples for the usage of templates, read the section Exploring Templates.
/ HALion Developer Resource / HALion Macro Page /
Example Macro Pages
To learn more about macro pages and how to set them up, you can load the presets of Anima, Skylab, Eagle, Raven, Studio Strings, and Hot Brass. All presets of these instruments use macro pages that were entirely built with the Macro Page Designer. By exploring these example macro pages you can see how these macro pages are set up and how they are connected to the engine parameters.
- Load a preset from Anima, Skylab, Eagle, Raven, Studio Strings, or Hot Brass.
- Open the Macro Page Designer.
- Select the first Layer in the Program Tree. The Macro Page Designer will display the respective macro page.
- In the Macro Page Designer, explore the GUI, Templates, and Ressources tree.
- Examine the Properties of the selected element in the tree to see how it is connected to the engine and UI parameters.
Using Templates from the Example Macro Pages
The macro pages of Anima, Skylab, Eagle, Raven, Studio Strings, and Hot Brass are installed as independent VST Sounds for HALion and for HALion Sonic, which means that you can use the templates from both these instruments for your own macro pages, too.
In the Resource/Library Browser, you have access to the templates of these macro pages.
- In the Resource/Library Browser, navigate to the library that contains the template that you want to use.
- Drag the template from the Resource/Library Browser to the canvas of your macro page or to a group on the canvas.
/ HALion Developer Resource / HALion Macro Page /
Exploring Templates
Controls Libraries
HALion provides a large number of preconfigured templates that can directly be used on macro pages. These are packed into three libraries: Basic Controls, Additional Controls and Vector Controls.
Basic Controls
The Basic Controls library contains standard controls like knobs, sliders, text fields, switches, etc., as well as a collection of advanced templates that can be used to accomplish more complex tasks such as loading subpresets or wavetables or control more complex modules like the FlexPhraser, the Step Modulator, or HALion's multi-stage envelope. You can access the libraries using the Resource/Library Browser of the Macro Page Designer.
The Basic Controls library also contains an example macro page that gives an overview of the available templates.
To get access to this macro page:
- Download the program Init Basic Controls.vstpreset.
- Drag the program to the Slot Rack.
The Basic Controls macro page contains multiple pages to demonstrate the usage of the available templates. Each template examplifies how the connections to the engine and UI parameters have to be set up to work correctly.
To explore the templates:
- In the Macro Page Designer, activate Test Macro Page
 and navigate to the page that contains the template that you want to use.
 - Deactivate Test Macro Page
 and select the template on the macro page.
 - Examine the Properties of the template to see how it is connected to the engine and UI parameters.
- Click Edit Element
 to examine how the template is built up.
For further details on the available templates, see the Templates reference pages.
Additional and Vector Controls
The Additional Controls and Vector Controls libraries provide further templates for knobs, sliders and switches with an individual look. The templates in the Vector Controls library use Scalable Vector Graphics (SVG), which offer more customization options for your macro page designs. You can use the provided templates just like the ones from the Basic Controls library.
/ HALion Developer Resource / HALion Macro Page /
Resources
Resources are the most basic objects and are used by controls to display graphics, animations, or text. The following types of resources are available:
/ HALion Developer Resource / HALion Macro Page / Resources /
Bitmap
Description
The Bitmap resource requires either a 24-bit png file with alpha channel or a bmp file without alpha channel. Many elements refer to bitmap resources, which can be assigned once a resource has been created. Keep in mind that each individual image is managed by the OS and costs performance. Therefore, it is recommended to work with a lower number of images, create sections within these images and use the sections wherever an image resource is required. In this case, HALion's GUI framework handles the section resources and the OS only has to deal with a few images.
Properties
| Poperty | Description |
|---|---|
| Name | The name of the Bitmap resource. |
| Path | Specifies the path and file name of the used bitmap. |
| Alpha | Defines the opacity of the bitmap from 0 (transparent) to 255 (opaque). |
| Frames | Defines the number of subframes in a bitmap. Bitmaps with frames can be used as animations in controls like knobs, sliders, and animations. |
| Scale Mode | This mode defines how a bitmap is adapted in size when the control that is using it is set to Scalable and sized smaller or larger than the original bitmap.
|
| Margin | Left, Top, Right, Bottom: As soon as a margin is set, the margin area is not stretched or tiled, but only the area outside. This can be used to define frames, for example, where the four corners of the bitmap are preserved in size and only the rest of the bitmap is stretched. |
/ HALion Developer Resource / HALion Macro Page / Resources /
Color
(Since HALion 7.0)
Description
This resource allows you to define colors that can be used wherever colors can be assigned, e.g., in controls or other resources.
Properties
| Poperty | Description |
|---|---|
| Name | The name of the Color resource. |
| Red | Defines the amount of red in the color. The number 0 signifies no representation of the color and 255 signifies the highest possible concentration of the color. |
| Green | Defines the amount of green in the color. The number 0 signifies no representation of the color and 255 signifies the highest possible concentration of the color. |
| Blue | Defines the amount of blue in the color. The number 0 signifies no representation of the color and 255 signifies the highest possible concentration of the color. |
| Alpha | Defines the opacity of the color from 0 (transparent) to 255 (opaque). |
| # | Allows you to specify the color as a hex color code in the format RRGGBBAA. |
/ HALion Developer Resource / HALion Macro Page / Resources /
Decor (Resource)
(Since HALion 7.0)
Description
This resource allows you to specify rectangular shapes as graphical elements to create background frames, group frames, etc. The rectangular shape can be drawn as an outline, filled, or both. The fill style can either be a solid color, a linear gradient, or a radial gradient. Furthermore, the rectangle can have rounded corners with an adjustable radius. Decor resources can be assigned in all controls that make use of bitmap resources.
Properties
| Poperty | Description |
|---|---|
| Name | The name of the Decor resource. |
| Size | Here, you can specify the initial width and height of the rectangle. If the control in which the decor is used is set to be scalable, the size of the decor is adapted accordingly. |
| Fill Style | Decors can be filled. You can choose from the following fill styles:
|
| Radius | Specifies the roundness of the rectangle corners. |
| Line Width | Specifies the width of the outline. |
| Angle | Specifies the angle of the Linear Gradient fill style in degrees. |
| Stretch | Allows you to compress (values < 1.0) or expand (values > 1.0) the Linear Gradient or Radial Gradient. |
| Center X/Y | Specifies the center of the Radial Gradient. Negative values move the center to the left and top, postive values to the right and bottom. |
| Line Color | Defines the color of the outline. |
| Color | Specifies the fill color for the Solid fill style. |
| Start Color | Specifies the top fill color for the Linear Gradient fill style. |
| End Color | Specifies the bottom fill color for the Linear Gradient fill style. |
| Inner Color | Specifies the inner fill color for the Radial Gradient fill style. |
| Outer Color | Specifies the outer fill color for the Radial Gradient fill style. |
/ HALion Developer Resource / HALion Macro Page / Resources /
Font
Description
Font resources are used to define different text styles which are referenced by labels, text fields, and other controls that display text.
Each resource specifies which of the system fonts (available for both Mac and PC) are used, which font size, color, alpha channel value, and style (bold, italic, underlined). If you want to use a custom truetype font, you can specify this truetype font file in the custom font field. Even when you are working with custom fonts, it is still good practice to specify a system font to function as fallback solution for characters that might not exist in a specific truetype font.
❕ When distributing libraries that include TrueType fonts, only include those fonts that can be freely distributed. Do not include fonts that need to be licensed.
❕ TrueType fonts must be based on Unicode tables to work correctly.
Properties
| Poperty | Description |
|---|---|
| Name | The name of the Font resource. |
| Font | Allows you to select the system font to be used. These fonts are available on Windows and Mac or have their equivalents on Mac. If a custom TrueType font is to be be used instead, you can define it under Custom. In this case, the specified system family is only used as a fallback solution for characters that do not exist in the custom font file. For text edit controls that pop up a text edit field, the system font is also used to display the text during editing. |
| Size | Defines the font size in points. |
| Style | Defines the font style for the system font: bold, italic, underline. |
| Color | Colors can be defined in different ways:
Alpha: Sets the transparency (256 fully opaque, 0 fully transparent). When adjusting the alpha value, the preview field blends against a light grey background. The resulting color in the macro page will look different, depending on the local background color. Color Picker:
|
| Custom | Allows you to add a custom font. Drag and drop a TrueType file on the custom field or click the open icon to choose the location and file. |
/ HALion Developer Resource / HALion Macro Page / Resources /
Section
Description
A section is a portion of a bitmap defined by a rectangle that has a x/y-position, a width and a height.
A section can be used instead of an image resource and has the advantage to use less OS graphic resources. Therefore, it is useful to add only a few image resources combining graphical elements, which are then used as references in the various sections.
Sections can also be used for animations, by setting the Frames property to the number of subframes that can be found within the section. Furthermore, sections can be scaled by the controls in which they are assigned. Select the Scale Mode and Margins to define the scaling behavior.
Properties
| Poperty | Description |
|---|---|
| Name | The name of the section. |
| Pos X | The x-coordinate of the first pixel (upper left corner). |
| Pos Y | The y-coordinate of the first pixel (upper left corner). |
| Width | The horizontal size in pixels. |
| Height | The vertical size in pixels. |
| Frames | Defines the number of subframes in a bitmap. Bitmaps with frames can be used as animations in controls like knobs, sliders, and animations. |
| Scale Mode | This mode defines how a bitmap is adapted in size when the control that is using it is set to Scalable and sized smaller or larger than the original bitmap.
|
| Margin | Left, Top, Right, Bottom: As soon as a margin is set, the margin area is not stretched or tiled, but only the area outside. This can be used to define frames, for example, where the four corners of the bitmap are preserved in size and only the rest of the bitmap is stretched. |
/ HALion Developer Resource / HALion Macro Page / Resources /
SVG
(Since HALion 7.0)
Description
A Scalable Vector Graphics (SVG) resource requires a standard SVG file and can be used in all controls as an alternative to Bitmap resources. In the simplest case the SVG is used as it is, without any further changes, but it is also possible to modify it in the Macro Page Designer. The various subobjects that make up the SVG, such as groups and paths, can be manipulated individually. Each object can be addressed by its object ID and the pairs of properties and values. These values can either be static numbers or Lua expressions that can be used to calculate values. In the Lua expression you can use N, the normalized control value, V, the value of the connected parameter, or S, the string representation of the connected parameter. This enables you to animate the properties of the SVG objects such as color, rotation, position, etc. when used in Knobs, Sliders, Switches, or Animation controls. Only the aforementioned controls support animation. The Lua expression must be entered as follows: $(expression). In the following screenshot you can see the Lua expression $(N*360), for example.
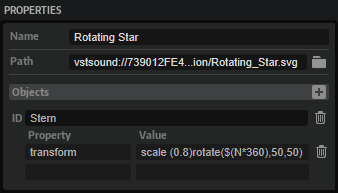
Properties
| Poperty | Description |
|---|---|
| Name | The name of the SVG resource. |
| Path | Specifies the path and filename of the used SVG file. |
| Objects | Click the + button to add an object that you want to modify. |
| ID | Specifies the ID of the object inside the SVG. Objects that should be changeable must have an ID. Some SVG editors require you to name an object for it to get an ID, some assign IDs automatically. To be sure, check the SVG file in a text editor. |
| Property | Specifies the property that you want to change. For example, fill allows you to change the fill color of the object. Please refer to the SVG specification to learn more about properties. |
| Value | Specifies the value of the property. For example, white as a standard SVG color, or rgb(255,00,00) as a user-defined color. Please refer to the SVG specification to learn more about how to define values for particular properties.You can also use Color resources that are defined in the macro page. To use a Color resource the value must be set like this: |
Steinberg-specific SVG Property
| Poperty | Description |
|---|---|
| smtg:radiusScaling | This is a Steinberg-specific property that allows you to modify the SVG 'rect' property, so that the corner radius is not scaled with the control element. Set the value to 0 to turn off radius scaling. |
/ HALion Developer Resource / HALion Macro Page /
Controls
A control is a basic element, like a text field, menu, switch, knob, etc., that can be added to a macro page. Controls have properties for their behavior and their appearance. Depending on the type of control, they can be directly connected to engine and script parameters or have a display functionality. Most controls use resources like Bitmaps, SVGs, Fonts and Sections to define their graphical appearance.
- Animation
- Decor (Control)
- Disable
- Drag Group
- Drop
- Group
- Image
- Internal
- Knob
- Label
- Live Data View
- Menu
- Meter
- Range Slider
- Slider
- Stack
- Step Modulator
- Switch
- Template
- Template List
- Text
- Waveform
- Wavetable
- Wavetable 3D
- XY
/ HALion Developer Resource / HALion Macro Page / Controls /
Animation
Description
Used to display animations or graphical option menus.
Properties
| Poperty | Description |
|---|---|
| Name | The name of the element. This name will be displayed in the GUI Tree. |
| Position/Size | Position X, Position Y, Width, Height: Position and size of the element in pixels. Position X/Y defines the position of the upper left corner. |
| Attach | Defines how an element behaves when its parent element is resized. You can set the following parameters:
|
| Tooltip | Text that appears as a tooltip when the mouse hovers over the element. |
| Value | Drag and drop a parameter from the Parameter List to this text field to establish a connection. The assigned parameter will be displayed. Alternatively, you can export the property, which can then be used as a template parameter on a template instance. |
| Show Value | Activate this if you want to display a tooltip with the current parameter value when using the control. This option can be exported to the template level. The exported parameter can then be activated by setting it to true (the default is false). |
| Style | |
| Bitmap | Bitmap refers to:
|
| SVG Parameter (Since HALion 7.0) | If you use SVGs with animatable properties, they appear in the SVG Parameter section. You can connect SVG Parameter just like value parameters with engine, MIDI, or UI script parameters. In this way, the connected parameters can animate different properties of SVG child objects, such as color, position, rotation and so on. |
/ HALion Developer Resource / HALion Macro Page / Controls /
Decor (Control)
(Since HALion 6.4.20)
Description
This control allows you to add rectangular shapes as graphical elements to create background frames, group frames, etc. The rectangular shape can be drawn as an outline, filled, or both. The fill style can either be a solid color, a linear gradient, or a radial gradient. Furthermore, the rectangle can have rounded corners with an adjustable radius.
Properties
| Poperty | Description |
|---|---|
| Name | The name of the element. This name will be displayed in the GUI Tree. |
| Position/Size | Position X, Position Y, Width, Height: Position and size of the element in pixels. Position X/Y defines the position of the upper left corner. |
| Attach | Defines how an element behaves when its parent element is resized. You can set the following parameters:
|
| Tooltip | Text that appears as a tooltip when the mouse hovers over the element. |
| Fill Style | Decors can be filled. You can choose from the following fill styles:
|
| Radius | Specifies the roundness of the rectangle corners. |
| Line Width | Specifies the width of the outline. |
| Angle | Specifies the angle of the Linear Gradient fill style in degrees. |
| Stretch | Allows you to compress (values < 1.0) or expand (values > 1.0) the Linear Gradient or Radial Gradient. |
| Center X/Y | Specifies the center of the Radial Gradient. Negative values move the center to the left and top, postive values to the right and bottom. |
| Line Color | Defines the color of the outline. |
| Color | Specifies the fill color for the Solid fill style. |
| Start Color | Specifies the top fill color for the Linear Gradient fill style. |
| End Color | Specifies the bottom fill color for the Linear Gradient fill style. |
| Inner Color | Specifies the inner fill color for the Radial Gradient fill style. |
| Outer Color | Specifies the outer fill color for the Radial Gradient fill style. |
/ HALion Developer Resource / HALion Macro Page / Controls /
Disable
Description
The Disable control allows you to put all child controls out of function. To indicate this, all children of the Disable control are drawn grayed out and semitransparent. To disable the control, connect a parameter to the value property and specify the value that should cause the disabling. You can also specify multiple values, e.g., to disable a parameter that should only be available for specific states of another parameter. If you want the control to be enabled for a particular value and disabled for the rest of the values, activate the Enable option.
Properties
| Poperty | Description |
|---|---|
| Name | The name of the element. This name will be displayed in the GUI Tree. |
| Position/Size | Position X, Position Y, Width, Height: Position and size of the element in pixels. Position X/Y defines the position of the upper left corner. |
| Attach | Defines how an element behaves when its parent element is resized. You can set the following parameters:
|
| Tooltip | Text that appears as a tooltip when the mouse hovers over the element. |
| Value | Drag and drop a parameter from the Parameter List to this text field to establish a connection. The assigned parameter will be displayed. Alternatively, you can export the property, which can then be used as a template parameter on a template instance. |
| Enable | Activate this option if you want to enable the control for the specified values. |
| Hide | Activate this option if you want to hide the control for the specified values. |
| 0-31 | Activate the values for which you want to disable or enable the control (depends on the Enable and Hide settings). |
/ HALion Developer Resource / HALion Macro Page / Controls /
Drag Group
(Since HALion 7.0)
On this page:
Description
The Drag Group control allows you to implement drag operations. You can drag a simple text information or excecute more complex script functions. As a drop target you can use either the Drop control, or an external target. The graphical representation of the dragged object includes a snapshot of all controls that exists inside the Drag Group.
Properties
| Poperty | Description |
|---|---|
| Name | The name of the element. This name will be displayed in the GUI Tree. |
| Scope | Allows you to define which part of the Program Tree is affected by the controls inside the Group. |
| Drag Info | The Drag Info can be used as follows:
|
| Position/Size | Position X, Position Y, Width, Height: Position and size of the element in pixels. Position X/Y defines the position of the upper left corner. |
| Attach | Defines how an element behaves when its parent element is resized. You can set the following parameters:
|
| Tooltip | Text that appears as a tooltip when the mouse hovers over the element. |
Drag Group Callbacks
❕ For an example of how to use Drag Group Callbacks, see Drag-and-Drop Sample Import.
onDropGetInfo
onDropGetInfo(viewname, draginfo)
Description
Callback for the source of the drag operation when the operation starts. The text in draginfo is taken from the Drag Info property of the control.
Arguments
| Argument | Description | Value Type |
|---|---|---|
| viewname | The name of the dragging view. | string |
| draginfo | The text specified by the Drag Info property. | string |
Return Values
The function can return a table with the following keys:
| Return Value | Description | Value Type |
|---|---|---|
| copy | Set this to true if copying is allowed, false if not. | boolean |
| move | Set this to true if moving is allowed, false if not. | boolean |
| info | The draginfo argument of the subsequent callbacks is determined by this return value. By default, 'info' returns the string specified by the Drag Info property. By modifying the 'info' return value you can control the response of the subsequent callbacks. | string |
| files | A table with file paths for evaluation by external software when the drop operation is executed there. | table with file paths as strings |
| data (Since HALion 7.1.0) | A table with filenames and region information, created when dropping a region from Cubase, for example. | See Data Field Format. |
Data Field Format
The data field contains tables with filenames and region information.
{ files = { "fn1", "fn2", ... } }
{ regions = { { filename = "fn1", start = 123, length = 456 }, { filename = "fn2", start = 456, length = 789 }, ... } } }
onDropInsert
onDropInsert(viewname, draginfo, copy, data)
Description
Callback for the target of the drag operation when the drop is executed.
Arguments
| Argument | Description | Value Type |
|---|---|---|
| viewname | The name of the targeted view. | string |
| draginfo | This string is specified by the 'info' return value of the onDropGetInfo callback when the drag operation starts. | string |
| copy | Indicates if the drag is a copy operation. | string |
| data (Since HALion 7.1.0) | A table with filenames and region information when dropping a region from Cubase, for example. | See Data Field Format. |
onDropFeedback
(Since HALion 7.1.0)
onDropFeedback(viewname, draginfo, copy, data)
Description
Callback for the target of the drag operation when a drag object is held over it.
Arguments
| Argument | Description | Value Type |
|---|---|---|
| viewname | The name of the targeted view. | string |
| draginfo | This string is specified by the 'info' return value of the onDropGetInfo callback when the drag operation starts. | string |
| copy | Indicates if the drag is a copy operation. | string |
| data | A table with filenames and region information when dropping a region from Cubase, for example. | See Data Field Format. |
onDropDone
onDropDone(viewname, draginfo, copy, data)
Description
This callback is called when the drop operation is complete.
Arguments
| Argument | Description | Value Type |
|---|---|---|
| viewname | The name of the source view. | string |
| draginfo | This string is specified by the 'info' return value of the onDropGetInfo callback when the drag operation starts. | string |
| copy | Indicates if the drag is a copy operation. | string |
| data (Since HALion 7.1.0) | A table with filenames and region information when dropping a region from Cubase, for example. | See Data Field Format. |
/ HALion Developer Resource / HALion Macro Page / Controls /
Drop
Description
The Drop control allows you to create an area where you can drop objects, like files, folders and other objects that deliver either a string or a path. In addition to the common properties like size, position etc., it provides a number of special properties that allow you to configure the control. The Drop control can show a bitmap to indicate the drop area, display a bitmap if dropping an object is accepted or rejected, and can be configured with a regular expression to accept only files of a specific type.
Properties
| Poperty | Description |
|---|---|
| Name | The name of the element. This name will be displayed in the GUI Tree. |
| Position/Size | Position X, Position Y, Width, Height: Position and size of the element in pixels. Position X/Y defines the position of the upper left corner. |
| Attach | Defines how an element behaves when its parent element is resized. You can set the following parameters:
|
| Tooltip | Text that appears as a tooltip when the mouse hovers over the element. |
| Value | Allows you to connect a parameter that receives the string or the path. |
| Style |
|
| Accept Filter | Allows you to define a regular expression to accept only files of a specific type. |
| Bitmaps |
|
/ HALion Developer Resource / HALion Macro Page / Controls /
Group
Description
A Group has no graphical representation and only serves as a container for other controls and templates. It can be added manually to the GUI Tree and then be positioned, sized, and filled with objects or it can be created automatically using the Group command from the context menu on selected elements in the tree. The size of a Group is automatically adapted when objects are added, but it can also be adjusted manually. Furthermore, you can specify a scope for a Group, which allows you to let all controls inside this Group only affect a specific target.
Properties
| Poperty | Description |
|---|---|
| Name | The name of the element. This name will be displayed in the GUI Tree. |
| Scope | Allows you to define which part of the Program Tree is affected by the controls inside the Group. |
| Position/Size | Position X, Position Y, Width, Height: Position and size of the element in pixels. Position X/Y defines the position of the upper left corner. |
| Attach | Defines how an element behaves when its parent element is resized. You can set the following parameters:
|
| Tooltip | Text that appears as a tooltip when the mouse hovers over the element. |
/ HALion Developer Resource / HALion Macro Page / Controls /
Image
Description
This control allows you to add purely graphical elements without further functionality. The control can be changed in size and adapt the referenced bitmap to the Bitmap resource if this is set to scalable.
Properties
| Poperty | Description |
|---|---|
| Name | The name of the element. This name will be displayed in the GUI Tree. |
| Position/Size | Position X, Position Y, Width, Height: Position and size of the element in pixels. Position X/Y defines the position of the upper left corner. |
| Attach | Defines how an element behaves when its parent element is resized. You can set the following parameters:
|
| Tooltip | Text that appears as a tooltip when the mouse hovers over the element. |
| Bitmap | Bitmap refers to a Bitmap resource which can be:
|
| Scalable | Activate this if you want to be able to resize the element. The assigned Bitmap resources are resized according to the Scale Mode that is defined for the respective Bitmap resource. |
/ HALion Developer Resource / HALion Macro Page / Controls /
Internal
Description
The Internal control is used by Steinberg to implement functionality that could not be realized with standard macro page controls. Internal controls are only used within a few specialized templates. They only work inside these templates and cannot be created manually.
Properties
| Poperty | Description |
|---|---|
| Name | The name of the element. This name will be displayed in the GUI Tree. |
| Position/Size | Position X, Position Y, Width, Height: Position and size of the element in pixels. Position X/Y defines the position of the upper left corner. |
| Attach | Defines how an element behaves when its parent element is resized. You can set the following parameters:
|
| Tooltip | Text that appears as a tooltip when the mouse hovers over the element. |
| View | Used for HALion-specific purposes. The set strings must remain unchanged to ensure the functionality of the control. |
/ HALion Developer Resource / HALion Macro Page / Controls /
Knob
(SVG support since HALion 7.0)
Description
The Knob control allows to create potentiometers by using a Bitmap resource, a Section resource with frames, or a SVG resource. These frames are played as an animation when turning the knob. You can specify whether the Knob control reacts on its entire area or only on those parts where the alpha channel of the bitmap is bigger than 0 (Shaped). Furthermore, the movement of the Knob control can be inverted and set to be Scalable, which allows resizing of the bitmap. The Slider option can be used to display a pop-up slider when using the knob, which can be helpful when working with rather small Knob controls.
Properties
| Poperty | Description |
|---|---|
| Name | The name of the element. This name will be displayed in the GUI Tree. |
| Position/Size | Position X, Position Y, Width, Height: Position and size of the element in pixels. Position X/Y defines the position of the upper left corner. |
| Attach | Defines how an element behaves when its parent element is resized. You can set the following parameters:
|
| Tooltip | Text that appears as a tooltip when the mouse hovers over the element. |
| Value | Drag and drop a parameter from the Parameter List to this text field to establish a connection. The assigned parameter will be displayed. Alternatively, you can export the property, which can then be used as a template parameter on a template instance. |
| Show Value | Activate this if you want to display a tooltip with the current parameter value when using the control. This option can be exported to the template level. The exported parameter can then be activated by setting it to true (the default is false). |
| Bitmap | Bitmap refers to:
|
| Style |
|
/ HALion Developer Resource / HALion Macro Page / Controls /
Label
Description
Labels are intended to display text that names elements such as Knobs, Text fields, etc. A Label can either use one of the available system fonts or a custom font for more decorative text styles, depending on the selected font resource.
Properties
| Poperty | Description |
|---|---|
| Name | The name of the element. This name will be displayed in the GUI Tree. |
| Position/Size | Position X, Position Y, Width, Height: Position and size of the element in pixels. Position X/Y defines the position of the upper left corner. |
| Attach | Defines how an element behaves when its parent element is resized. You can set the following parameters:
|
| Tooltip | Text that appears as a tooltip when the mouse hovers over the element. |
| Font | Allows you to select which Font resource to be used to display the text. |
| Alignment | Defines how the text is aligned. You can choose from the following settings:
|
/ HALion Developer Resource / HALion Macro Page / Controls /
Live Data View
(Since HALion 7.0)
Description
The Live Data View control allows you to visualize the output signal of sources with a LiveViewData parameter, such as LFOs, the Step Modulator, envelopes, etc. You can connect these sources directly to the Data Input of the view. Furthermore, you can configure the appearance of the line.
Properties
| Poperty | Description |
|---|---|
| Name | The name of the element. This name will be displayed in the GUI Tree. |
| Position/Size | Position X, Position Y, Width, Height: Position and size of the element in pixels. Position X/Y defines the position of the upper left corner. |
| Attach | Defines how an element behaves when its parent element is resized. You can set the following parameters:
|
| Tooltip | Text that appears as a tooltip when the mouse hovers over the element. |
| Data Input | Allows you to connect the LiveViewData parameter of a source module. |
| Direction | Defines how the data scrolls through the display:
|
| Time Window | Defines the overall time that is dislayed in the view in ms. |
| Start Values | Allows you to specify a number of pixels that will use a secondary color. |
| Line Width | Adjusts the strength of the waveform line from 1 to 3 pixels. |
| Background | Defines the background bitmap that is drawn behind the curve. If this is used, the background color setting is ignored. |
Colors
| Poperty | Description |
|---|---|
| Line | The primary color of the line. |
| Line Start | The secondary color used for the start values. |
| Backgound | The background color of the view. |
/ HALion Developer Resource / HALion Macro Page / Controls /
Menu
Description
The Menu control allows you to create special switches that open a menu. This menu is filled with the available values delivered by the connected parameter. You can choose to open a tree menu control instead of the standard menu, which is helpful when the number of available options increases. The menu itself can show a Bitmap for its off state and the hover state, but it can also work without any bitmaps. Often, it is used in combination with a dedicated background image and a Text control that shows the selected value. Menu and Text controls are connected to the same parameter.
Properties
| Poperty | Description |
|---|---|
| Name | The name of the element. This name will be displayed in the GUI Tree. |
| Position/Size | Position X, Position Y, Width, Height: Position and size of the element in pixels. Position X/Y defines the position of the upper left corner. |
| Attach | Defines how an element behaves when its parent element is resized. You can set the following parameters:
|
| Tooltip | Text that appears as a tooltip when the mouse hovers over the element. |
| Value | Drag and drop a parameter from the Parameter List to this text field to establish a connection. The assigned parameter will be displayed. Alternatively, you can export the property, which can then be used as a template parameter on a template instance. |
| Style |
|
| Bitmaps |
/ HALion Developer Resource / HALion Macro Page / Controls /
Meter
Description
The Meter control allows you to display incoming values as a meter bar. It displays a background image and a Bitmap for the lit state of the meter to be drawn. The Bitmap for the lit state is drawn clipped on top of the background image. The size of the clipped region depends on the current value. The Meter control can either be drawn horizontally or vertically. The Meter control can be directly connected to parameter outputs of script modules, for example.
❕ For optimal drawing, the Meter control must be placed on the topmost level on the macro page, no other objects must be layered on top.
To display the meter and peak outputs of HALion's busses, a special vu meter template is required that contains two meters and a special logic that allows for the template to be directly connected to any bus. Please use one of these preconfigured meter templates that are part of the Basic Controls library and set the bus parameter to the desired bus, e.g., @bus:0 for the first bus in the program. The graphical resources and sizes can be customized by modifying these templates.
Properties
| Poperty | Description |
|---|---|
| Name | The name of the element. This name will be displayed in the GUI Tree. |
| Position/Size | Position X, Position Y, Width, Height: Position and size of the element in pixels. Position X/Y defines the position of the upper left corner. |
| Attach | Defines how an element behaves when its parent element is resized. You can set the following parameters:
|
| Tooltip | Text that appears as a tooltip when the mouse hovers over the element. |
| Value | Drag and drop a parameter from the Parameter List to this text field to establish a connection. The assigned parameter will be displayed. Alternatively, you can export the property, which can then be used as a template parameter on a template instance. |
| Peak Value | Allows you to connect a parameter that delivers a peak hold value. |
| Style |
|
| Bitmaps |
/ HALion Developer Resource / HALion Macro Page / Controls /
Range Slider
Description
The Range Slider allows you to control two parameters with one control. You can drag the slider handle at both its ends, each representing one parameter. A typical example for the use of such a slider is a control for velocity or key ranges. The Range Slider can also be used as a scroll bar when it is connected to a scroll view or envelope. In this case, the "No Resize" option allows you to deactivate any modification to the ends of the slider handle. The size of the handle is then determined by the zoom level of the scroll view. You can choose between horizontal and vertical range sliders, decide whether the slider should jump to the click position or always move relatively, and you can invert the slider behavior. The Range Slider can also be resized with its Handle and Track bitmaps, according to the Scale Modes that are defined for the respective Bitmap resources. The slider can also be used with a Track bitmap which is drawn in the area that is not covered by the Handle bitmap.
Properties
| Poperty | Description |
|---|---|
| Name | The name of the element. This name will be displayed in the GUI Tree. |
| Position/Size | Position X, Position Y, Width, Height: Position and size of the element in pixels. Position X/Y defines the position of the upper left corner. |
| Attach | Defines how an element behaves when its parent element is resized. You can set the following parameters:
|
| Tooltip | Text that appears as a tooltip when the mouse hovers over the element. |
| Low Value | Allows you to connect the first parameter, e.g., Velocity Low of a layer. |
| High Value | Allows you to connect the second parameter, e.g., Velocity High of a layer. |
| Show Value | Activate this option if you want to display a tooltip with the current parameter value when using the control. This option can be exported to the template level. The exported parameter can then be activated by setting it to true (the default is false). |
| Style |
|
| Bitmaps |
/ HALion Developer Resource / HALion Macro Page / Controls /
Slider
(SVG support since HALion 7.0)
Description
The Slider control allows to create a variety of different slider types. You can choose between horizontal and vertical sliders, decide whether the slider should jump to the click position or move relatively to it. Furthermore, it can also be inverted in its behavior. The Slider can be resized with all its bitmaps according to the Scale Modes that are defined for the respective Bitmap resources. The Slider can use a Background bitmap which can also be an animated bitmap with frames. This allows you to build animated sliders that only display an animation. The Slider can use Pre-Handle and Post-Handle bitmaps, which are drawn from the left edge to the handle position and from the handle position to the right edge (Bottom → Handle → Top, for vertical sliders). When moving the slider, both bitmaps are clipped at the handle position. Alternatively, you can also stretch both bitmaps towards the handle position. The Slider can display a Handle bitmap, which is drawn on top oft the Background, Pre-Handle and Post-Handle bitmaps.
Properties
| Poperty | Description |
|---|---|
| Name | The name of the element. This name will be displayed in the GUI Tree. |
| Position/Size | Position X, Position Y, Width, Height: Position and size of the element in pixels. Position X/Y defines the position of the upper left corner. |
| Attach | Defines how an element behaves when its parent element is resized. You can set the following parameters:
|
| Tooltip | Text that appears as a tooltip when the mouse hovers over the element. |
| Value | Drag and drop a parameter from the Parameter List to this text field to establish a connection. The assigned parameter will be displayed. Alternatively, you can export the property, which can then be used as a template parameter on a template instance. |
| Show Value | Activate this if you want to display a tooltip with the current parameter value when using the control. This option can be exported to the template level. The exported parameter can then be activated by setting it to true (the default is false). |
| Style |
|
| Bitmaps |
|
/ HALion Developer Resource / HALion Macro Page / Controls /
Stack
Description
A Stack allows you to create switchable subpages or views. Each child of the stack is considered as a view that is shown exclusively, depending on the value of the stack. Most of the time, stacks are controlled by radio switches, providing one switch per stack view. If you activate the Fade option, you can add a blending effect when switching between views. If you want to connect the stack value only to a radio switch group to change the visibility of pages on the UI, without connecting the value to an engine or script module parameter, you can define an integer variable, e.g., Var_Pages. Then set the value property of the stack to Var_Pages and do the same for the radio group switches.
Properties
| Poperty | Description |
|---|---|
| Name | The name of the element. This name will be displayed in the GUI Tree. |
| Position/Size | Position X, Position Y, Width, Height: Position and size of the element in pixels. Position X/Y defines the position of the upper left corner. |
| Attach | Defines how an element behaves when its parent element is resized. You can set the following parameters:
|
| Tooltip | Text that appears as a tooltip when the mouse hovers over the element. |
| Value | Drag and drop a parameter from the Parameter List to this text field to establish a connection. The assigned parameter will be displayed. Alternatively, you can export the property, which can then be used as a template parameter on a template instance. |
| Style | Fade: Activate this option if you want to blend views when switching. |
/ HALion Developer Resource / HALion Macro Page / Controls /
Step Modulator
On this page:
Description
The Step Modulator is intended to control HALion's step modulator. It provides all necessary properties to be connected to the engine parameters. Furthermore, there are properties for index, level, and level12 of the selected node and a snap option, which only affect the GUI parameters and not the engine parameters. These properties can be connected using UI variables.
Properties
| Poperty | Description |
|---|---|
| Name | The name of the element. This name will be displayed in the GUI Tree. |
| Position/Size | Position X, Position Y, Width, Height: Position and size of the element in pixels. Position X/Y defines the position of the upper left corner. |
| Attach | Defines how an element behaves when its parent element is resized. You can set the following parameters:
|
| Tooltip | Text that appears as a tooltip when the mouse hovers over the element. |
| Steps | The number of steps. This property must be connected to the engine parameter Steps and further display controls. |
| Slope | The Slope Mode. This property must be connected to the engine parameter Slope to show the slope. Connect additional controls, e.g., a menu, to set the slope mode. |
| Slope Amnt | This property must be connected to the engine parameter SlopeAmount to show the slope. Connect additional controls, e.g., a knob, to set the slope. |
| Show All | Activate this option to show all steps with a fixed width. When dectivated, the width of the individual steps scales with the number of steps as set in Steps, to fill the full size of the control. |
| Advanced Editing (Since HALion 6.4.0) | Activate this option to provide additional editing possibillities. These are either available as context menu entries or as line editing functions using modifier keys (Shift, Alt). These editing functions were originally made to work best inside HALion's Stepmodulator and Flexphraser. In case the control is used to control other custom script modules, where these functions are not needed or need to work differently, they can be deactivated. |
| Play Pos (Since HALion 7.1.0) | Activate this option to show the current playback position on the curve. |
| Height (Since HALion 6.4.10) | Defines how the indivdual step values are displayed.
|
| Step 1-32 | The Step levels. This property can be connected to the engine stepmodulator parameters Step1-32. |
| Length (Since HALion 6.4.0) | If the step modulator is used to control a custom script module, the Length parameter can be used to adjust the length of each step. |
| Enable (Since HALion 6.4.0) | If the step modulator is used to control a custom script module, the Enable parameter can be used to turn individual steps on and off. |
UI Variables
Create variables to connect the Step Modulator properties with the engine and further controls.
| Poperty | Variable | Description | Type | Range |
|---|---|---|---|---|
| Index | index | The index of the selected node. | integer | 1 to 32 |
| Level | level | The level of the selected node. | float | -100 to 100 |
| Level 12 | level12 | The level in fractions of 12 (used when Snap is active). | float | -12 to 12 |
| Snap | snap | Activates the snap line. | integer | 0, 1 |
Colors
| Poperty | Description |
|---|---|
| Step0 | Fill color of all even steps with index 0, 2, 4, ..., 32. |
| Step1 | Fill color of all odd steps with index 1, 3, 5, ..., 31. |
| Back0 | Background color of all even steps with index 0, 2, 4, ..., 32. |
| Back1 | Background color of all odd steps with index 1, 3, 5, ..., 31. |
| Hover0 | Hover fill color of all even steps with index 0, 2, 4, ..., 32. |
| Hover1 | Hover fill color of all odd steps with index 1, 3, 5, ..., 31. |
| Line Hov0 | Line hover color of all even steps with index 0, 2, 4, ..., 32. |
| Line Hov1 | Line hover color of all odd steps with index 1, 3, 5, ..., 31. |
| Line Drag0 | Line drag color of all even steps with index 0, 2, 4, ..., 32. |
| Line Drag1 | Line drag color of all odd steps with index 1, 3, 5, ..., 31. |
| Line Sel0 | Line selection color of all even steps with index 0, 2, 4, ..., 32. |
| Line Sel1 | Line selection color of all odd steps with index 1, 3, 5, ..., 31. |
| Middle Line | Middle grid line color. |
| Snap Line 0 | Primary snap line color. |
| Snap Line 1 | Secondary snap line color. |
| Line Draw | Line draw color. |
/ HALion Developer Resource / HALion Macro Page / Controls /
Switch
On this page:
Description
The Switch control allows you to create different types of switches. It can be configured as an on/off switch with two states or as a multi-state switch with an arbitrary number of states. Furthermore, it can be set to Increment or Decrement, to edit values stepwise. To realize exclusive switches that can act as a radio group, Exclusive mode can be selected. In this mode, each switch can be configured to send a dedicated value and all related switches are connected to the same parameter. The Switch control requires several bitmaps, depending on the specified mode and it can be set to scalable, which allows for resizing of the switch. The used bitmaps are resized according to the Scale Modes that are defined for the respective Bitmap resources.
Properties
| Poperty | Description |
|---|---|
| Name | The name of the element. This name will be displayed in the GUI Tree. |
| Position/Size | Position X, Position Y, Width, Height: Position and size of the element in pixels. Position X/Y defines the position of the upper left corner. |
| Attach | Defines how an element behaves when its parent element is resized. You can set the following parameters:
|
| Tooltip | Text that appears as a tooltip when the mouse hovers over the element. |
| Value | Drag and drop a parameter from the Parameter List to this text field to establish a connection. The assigned parameter will be displayed. Alternatively, you can export the property, which can then be used as a template parameter on a template instance. |
| Mode |
|
| Style |
|
| Bitmaps |
|
| Onvalue | Allows you to define the value that is sent when the switch is turned on. This option is only available in Exclusive mode. If you want to create a switch template that allows you to specify the Onvalue on the instance level of the template, you must export this property.
|
| Popup | The following settings are only available for the Popup style.
|
Examples
Radio buttons
A radio switch group can be realized by connecting several switches, all set to Exclusive mode, to the same parameter. For each switch, the Onvalue must be specified.
Switching pages:
- Create an integer variable, name it "Pages", e.g., and specify a range of 0-2.
- Add three exclusive switches and set their Values to the variable "Pages".
- Set the Onvalues of the switches to 0,1, and 2.
- Add a Stack with three child views and set the stack Value to the variable "Pages", too.
- The switches now allow you to switch between the three views.
Hover Mode Switch
The Hover mode can be used to switch between stack views when hovering over a switch control. Since the switch can also be used invisible, i.e., without any bitmap assigned, it can be layered under a knob control and control a stack view switching between the parameter label and a text view displaying the current parameter value. To see how this can be set up, load one of the knobs from the Additional Controls library.
/ HALion Developer Resource / HALion Macro Page / Controls /
Template
Description
A Template control represents an instance of a template. The number of available template parameters depends on the contents and setup of the template, i.e., the number of controls that are used in it and the number of control parameters that are exported. If a Template has an attached UI script, additional script parameters can be exported.
Properties
| Poperty | Description |
|---|---|
| Name | The name of the element. This name will be displayed in the GUI Tree. |
| Position/Size | Position X, Position Y, Width, Height: Position and size of the element in pixels. Position X/Y defines the position of the upper left corner. |
| Attach | Defines how an element behaves when its parent element is resized. You can set the following parameters:
|
| Tooltip | Text that appears as a tooltip when the mouse hovers over the element. |
| Template | Determines the template to be referenced. |
| Template Parameter | In this section, all parameters that are exported by controls and templates from inside the template are displayed. When using a template, these exported parameters can be set or connected like standard properties. |
/ HALion Developer Resource / HALion Macro Page / Controls /
Template List
On this page:
Description
A Template List can be used to create child templates from a single referenced template, where each instance of the referenced template can be used to control different parameter scopes, for example. The look of the Template List rows and columns is determined by the referenced template which you can choose in the Template property. Depending on the Layout property, the templates are arranged in a row, a column, or in a grid. The templates are arranged without spacing or graphic separators. If spacing or graphic separators are desired, they must be part of the referenced template.
❕ For a better understanding of template lists, read the tutorial Creating a Template List.
Properties
| Poperty | Description |
|---|---|
| Name | The name of the element. This name will be displayed in the GUI Tree and it serves as 'viewname' argument in the Template List Callbacks. |
| Position/Size | Position X, Position Y, Width, Height: Position and size of the element in pixels. Position X/Y defines the position of the upper left corner. |
| Attach | Defines how an element behaves when its parent element is resized. You can set the following parameters:
|
| Layout (Since HALion 6.1) |
|
| Alignment (Since HALion 6.1) | Here you can set how the child templates are positioned in the Template List area.
|
| Tooltip | Text that appears as a tooltip when the mouse hovers over the element. |
| Value | Allows you to read the index of the focused child template. This is useful to synchronize the selection focus across several lists, for example. |
| Style |
|
| Focus Var | Allows you to specify a variable name, e.g., MyFocusVariable, that can be used inside the referenced template, e.g., to switch the focus of a Stack or an Animation control. You can access this variable inside the referenced template with @MyFocusVariable. It is set to 1, if the element has the focus, 0 otherwise. |
| Index Var | Allows you to specify a variable name, e.g., MyIndexVariable, that can be used inside the referenced template to display the index of the list entry. You can access this variable inside the referenced template with @MyIndexVariable. It is set to the index of the element in the list. |
| Scrollbars | Allows you to assign the Bitmap resources that are required to draw the custom scrollbars.
|
Template List Callbacks
(Since HALion 7.0)
To enable the graphic reordering, the Order option must be active and either onTemplateListViewDrop or onTemplateListDrop must be implemented in a UI script.
❕ In order for the onTemplateListDrop function to be called, the Drag Info property of the template referenced in the Template List must be set.
onTemplateListViewDrop
This callback is called when the drop is done. If you need more advanced control over the drag and drop operation, you can use the callbacks described below as an alternative.
onTemplateListViewDrop(viewname, fromindex, toindex)
| Argument | Description | Value Type |
|---|---|---|
| viewname | The name of the Template List. Evaluate this to distinguish between different lists. | string |
| fromindex | Index of the dragged element. | integer |
| toindex | New index of the dropped element. | integer |
❕ The callback onTemplateListViewDrop is a simplified callback that replaces the callbacks onTemplateListDropFeedback, onTemplateListDrop and onTemplateListDropDone from below. The callback onTemplateListViewDrop cannot be combined with the callbacks just mentioned.
onTemplateListGetDragInfo
onTemplateListGetDragInfo(viewname, draginfo, index)
Description
Callback for the source of the drag operation when the operation starts. The string in draginfo is taken from the Drag Info property of the template referenced in the Template List. The Drag Info property must be set inside the referenced template. To enable the graphic reordering of the elements, the Order option must be active and at least the onTemplateListDrop callback must be implemented in a UI script. The onTemplateListDrop callback can be omitted if no graphic reordering is required.
Arguments
| Argument | Description | Value Type |
|---|---|---|
| viewname | The name of the Template List that started the drag operation. Evaluate this to distinguish between different lists. | string |
| draginfo | The string specified by the Drag Info property of the template referenced in the Template List. | string |
| index | The index of the dragged element. | string |
Return Values
The function can return a table with the following keys:
| Return Value | Description | Value Type |
|---|---|---|
| copy | Set this to true if copying is allowed, false if not. If 'copy' is false the Alt/Cmd-key for copying cannot be used. The default for 'copy' is false. | boolean |
| move | Set this to true if moving is allowed, false if not. If 'move' is false the elements in the list will not be reordered when dragging. The default for 'move' is true. | boolean |
| info | The draginfo argument of the subsequent callbacks is determined by this return value. By default, 'info' returns the string specified by the Drag Info property of the template referenced in the Template List. By modifying the 'info' return value you can control the response of the subsequent callbacks. | string |
| files | A table with file paths for evaluation by external software when the drop operation is executed there. | table with file paths as strings |
❕ If both of the 'copy' and 'move' return values are set to
true, the 'copy' argument in the callbacks onTemplateListDrop, onTemplateListDropFeedback, and onTemplateListDropDone will depend upon whether the Alt/Cmd-key was utilized during the drag operation. The 'copy' argument in these callbacks will betrueif the Alt/Cmd-key was used andfalseif it was not. If one or both of the 'copy' and 'move' return values arefalse, the use of the Alt/Cmd-key has no effect, and the 'copy' argument in the mentioned callbacks will depend solely on the 'copy' return value.
onTemplateListDrop
onTemplateListDrop(viewname, draginfo, toindex, offset, copy)
Description
Callback for the target of the drag operation when the drop is executed. In order for the function to be called, the Drag Info property of the template referenced in the Template List must be set. Otherwise, the reordering will not work, even if the Order option of the Template List is active.
Arguments
| Argument | Description | Value Type |
|---|---|---|
| viewname | The name of the targeted Template List. Evaluate this to distinguish between different lists. | string |
| draginfo | This string is specified by the 'info' return value of the onTemplateListGetDragInfo callback when the drag operation starts. | string |
| toindex | Index of the targeted element. | integer |
| offset | The value -1, 0, or 1 indicates if the drop is before, on, or behind the targeted element. | integer |
| copy | Indicates if the drag is a copy operation. | boolean |
onTemplateListDropFeedback
onTemplateListDropFeedback(viewname, draginfo, toindex, offset, copy)
Description
Callback for the target of the drag operation when an element is held over it. If implemented it can control the graphical feedback for the potential drop operation by returning a template to indicate the drop destination or reject dropping the element.
Arguments
| Argument | Description | Value Type |
|---|---|---|
| viewname | The name of the targeted Template List. Evaluate this to distinguish between different lists. | string |
| draginfo | This string is specified by the 'info' return value of the onTemplateListGetDragInfo callback when the drag operation starts. | string |
| toindex | The index of the targeted element. | integer |
| offset | The value -1, 0, or 1 indicates if the drop is before, on, or behind the targeted element. | integer |
| copy | Indicates if drag is a copy operation. | boolean |
Return Values
The function can return a table with the following keys:
| Return Value | Description | Value Type |
|---|---|---|
| accept | Set this to true to allow or false to reject the drop operation. The default is false. | boolean |
| template | Name of a template that will be displayed as 'indicator' for the drop operation. The default is "". | string |
| index | Index of the targeted element, where the 'indicator' should be displayed. | string |
| insert | Set this to true if the 'indicator' should be placed before instead of on the element. The default is false. | boolean |
| resize | Set this to true if the 'indicator' should be resized to the size of the targeted element. The default is false. | boolean |
❕ When using onTemplateListDropFeedback: Since the default of
acceptisfalse, you must at least returnaccept=true.
onTemplateListDropDone
onTemplateListDropDone(viewname, draginfo, index, copy)
This callback is called when the drop operation is complete. Since the arguments of the callback refer to the source of the drag operation, it can be used to make modifications to the corresponding source Template List using additional functions.
Arguments
| Argument | Description | Value Type |
|---|---|---|
| viewname | The name of the Template List that started the drag operation. | string |
| draginfo | This string is specified by the 'info' return value of the onTemplateListGetDragInfo callback when the drag operation starts. | string |
| index | Index of the dragged element. | integer |
| copy | Indicates if the drag was a copy operation. | string |
❕ If you want the change of the order of graphical elements to affect the program structure, e.g. the order of alternating layers or the order of effects within a bus, this must be implemented separately with dedicated functions.
Example
The subsequent example is presented as illustrative guide to kickstart your own solution-building process.
To explore the example:
- Load Template List.vstpreset.
- Open the Macro Page Designer, activate Show/Hide Script Output Messages
 .
. - Click Test Macro Page , then drag and drop elements from the left to the right Template List and vice versa.
- Use the Alt/Cmd-key to copy elements.
- Read the output messages of the script.
Reading the output messages of the script should help to understand how the callbacks work and how to use them.
-- Create row names through a parameter.
rowNames = {}
for i = 1, 5 do
rowNames[i] = "Row "..tostring(i)
end
defineParameter{name="RowNames", strings=rowNames,}
currentViewname = ""
-- The following example accepts dropping of elements only from other template lists.
function onTemplateListGetDragInfo(viewname, draginfo, index)
print("onTemplateListGetDragInfo:", "viewname = "..viewname, "draginfo = "..draginfo, "index = "..index)
currentViewname = viewname
return{info = index, copy=true, move=true}
end
function onTemplateListDropFeedback(viewname, draginfo, toindex, offset, copy)
print("onTemplateListDropFeedback:", "viewname = "..viewname, "draginfo = "..draginfo, "toindex = "..toindex, "offset = "..offset, "copy = "..tostring(copy))
local acceptDrop = false
if viewname ~= currentViewname then
acceptDrop = true
end
return{accept=acceptDrop, insert=false, template="DropFrame", resize=true,}
end
function onTemplateListDrop(viewname, draginfo, toindex, offset, copy)
print("onTemplateListDrop:", "viewname = "..viewname, "draginfo = "..draginfo, "toindex = "..toindex, "offset = "..offset, "copy = "..tostring(copy))
if viewname ~= currentViewname then
local fromindex = tonumber(draginfo)
if copy then
rowNames[toindex] = rowNames[fromindex]
else
local rowName = table.remove(rowNames, fromindex)
table.insert(rowNames, toindex, rowName)
end
defineParameter{name="RowNames", strings=rowNames,}
end
end
function onTemplateListDropDone(viewname, draginfo, index, copy)
print("onTemplateListDropDone:", "viewname = "..viewname, "draginfo = "..draginfo, "index = "..index, "copy = "..tostring(copy))
end
❕ For a more detailed example, see Creating an FX Rack.
/ HALion Developer Resource / HALion Macro Page / Controls /
Text
Description
The Text control can be used to edit either strings or values, depending on the type of parameter that it is connected to. If a parameter is defined as a value, you can increase and decrease the value by clicking on the text control and dragging up and down. For string parameters, you can enter the string. The Fit String and Fit Path options automatically shorten a string if it is getting too long to be displayed completely. For value parameters, you can add a unit that is displayed behind the value. If you want increment and decrement buttons, you can use the "ValueBox Black Flat" template from the Basic Controls library (in the "Flat" folder found in the "Text and Value" folder). This template contains a text control with up and down buttons.
Properties
| Poperty | Description |
|---|---|
| Name | The name of the element. This name will be displayed in the GUI Tree. |
| Position/Size | Position X, Position Y, Width, Height: Position and size of the element in pixels. Position X/Y defines the position of the upper left corner. |
| Attach | Defines how an element behaves when its parent element is resized. You can set the following parameters:
|
| Tooltip | Text that appears as a tooltip when the mouse hovers over the element. |
| Style |
|
| Font | Allows you to select which Font resource to be used to display the text. |
| Units | A unit, such as milliseconds (ms) or decibel (dB), can be displayed with the value. Any string can be used. The value must be displayed in the correct value format to match the selected unit. |
| Alignment | Defines how the text is aligned. You can choose from the following settings:
|
| Val Meter | The following properties are only accessible if the Val Meter style has been activated.
|
/ HALion Developer Resource / HALion Macro Page / Controls /
Waveform
On this page:
Description
The Waveform control allows you to display the sample data of a connected sample file. For simple sample playback, a locator will be shown for the last played note. If you are using the Grain zone instead, the grain locators will be displayed. To display the part of the sample file that is effectively used and not the entire file, you can connect Sample Start/End and Trim Start/End. Furthermore, you can connect the Loop Start/End parameters to display the looped regions with a color overlay. Start Range and Release Start can also be connected to the sample oscillator to display the corresponding markers. In addition, the Waveform control can also display a spectrogram that can be drawn with an adjustable color scheme and opacity. (Since HALion 7.0)
❕ The waveform display does not take into account which loop (A or B) is used or whether the loop is active or not. It will always display markers and regions, as soon as valid connections are made. If you want a waveform display that also reflects the loop states, you can use the Sample Display template instead, because it contains a UI script that manages these states.
Properties
| Poperty | Description |
|---|---|
| Name | The name of the element. This name will be displayed in the GUI Tree. |
| Position/Size | Position X, Position Y, Width, Height: Position and size of the element in pixels. Position X/Y defines the position of the upper left corner. |
| Attach | Defines how an element behaves when its parent element is resized. You can set the following parameters:
|
| Tooltip | Text that appears as a tooltip when the mouse hovers over the element. |
| Normalize | Activate this to normalize the sample level. This can be useful to better visualize samples with low level. |
| Loop Marker | Activate this option to show loop markers as flags instead of overlay rectangles. (Since HALion 7.0) |
| Editable | Activate this option to make markers editable. The responsive editing area for markers depends on whether the Grain Pos parameter is connected. I Grain Pos is enabled, you can drag only the bottom of the marker (20 pixels). This is to avoid conflicts with the Grain Position marker which uses the rest of the display. Otherwise, markers can be dragged along their entire length. (Since HALion 7.0) |
Osc Parameters
| Poperty | Description |
|---|---|
| Filename | Allows you to connect the Filename parameter of the sample oscillator. |
| Play Pos | Allows you to connect the PlayPos parameter of the sample oscillator. This will display a locator for the sample playback. If you are using a Grain or Spectral zone, you must connect this to the PlayData parameter of the grain or spectral oscillator (Since HALion 7.0) instead. This will display a locator for each playing grain or each spectral multi-voice. |
| Grain Pos | Allows you to connect the Position parameter of the grain or spectral oscillator (Since HALion 7.0). This will display a locator for each playing grain or each spectral multi-voice. The locators only work if PlayPos is connected, too. |
| Sample Start | Allows you to connect the Sample End parameter of the sample oscillator. This is required to display the correct sample region, otherwise the whole sample file is shown. |
| Sample End | Allows you to connect the Sample End parameter of the sample oscillator. This is required to display the correct sample region, otherwise the whole sample file is shown. |
| Trim Start | Allows you to connect the Trim Start parameter of the sample oscillator. This is required to display the correct sample region if the sample was trimmed in the Sample Editor. |
| Trim End | Allows you to connect the Trim End parameter of the sample oscillator. This is required to display the correct sample region if the sample was trimmed in the Sample Editor. |
| SLoop Start | Allows you to connect the SustainLoopStart (A or B) parameter of the sample oscillator. This is required if you want to display the sustain loop region. |
| SLoop End | Allows you to connect the SustainLoopEnd (A or B) parameter of the sample oscillator. This is required if you want to display the sustain loop region. |
| RLoop Start | Allows you to connect the ReleaseLoopStart (A or B) parameter of the sample oscillator. This is required if you want to display the release loop region. |
| RLoop End | Allows you to connect the ReleaseLoopEnd (A or B) parameter of the sample oscillator. This is required if you want to display the release loop region. |
| Start Range | Allows you to connect the SampleStartRange parameter of the sample oscillator to show the sample start range marker. |
| Rel Start | Allows you to connect the ReleaseStart parameter of the sample oscillator to show the release start marker. |
| Fade In L | Allows you to connect the FadeInLength parameter of the sample oscillator. This is required if you want to display the influence of a fade in. (Since HALion 7.0) |
| Fade In C | Allows you to connect the FadeInCurve parameter of the sample oscillator. This is required if you want to display the influence of a fade in. (Since HALion 7.0) |
| Fade Out L | Allows you to connect the FadeOutLength parameter of the sample oscillator. This is required if you want to display the influence of a fade out. (Since HALion 7.0) |
| Fade Out C | Allows you to connect the FadeOutCurve parameter of the sample oscillator. This is required if you want to display the influence of a fade out. (Since HALion 7.0) |
| Play Mode | Allows you to connect the PlaybackMode parameter of the sample oscillator. This is required if you want to display the influence of the playback mode. Otherwise, the sample will never be shown reversed. (Since HALion 7.0) |
| Level Env | Allows you to connect the LevelEnvelope parameter of the sample oscillator. This is required if you want to display the influence of a level envelope. (Since HALion 7.0) |
Colors
| Poperty | Description |
|---|---|
| Waveform | The color of the waveform. |
| PlayPos | The color of the playback locators. |
| SusLoop | The color of the sustain loop region. |
| RelLoop | The color of the release loop region. |
| StartRange | The color of the start range marker. |
| RelStart | The color of the release start marker. (Since HALion 7.0) |
Spectral
(Since HALion 7.0)
| Poperty | Description |
|---|---|
| Scheme | Selects the color scheme to be used in the display. |
| FFT Size | Connect a control using an integer variable or a script parameter to select the FFT size of the window that is used for the analysis of the signal. This allows you to adjust the trade-off between temporal resolution and frequency resolution. Larger FFT sizes analyze more frequencies but with less accuracy in the time domain. See FFT Sizes for details. |
| Overlap | Connect a control using an integer variable or a script parameter to select the number of overlapping FFT windows. Increasing the overlap can reduce artifacts, e.g., loosing details such as transients. See Overlap Factors for details. |
| Min Level | Connect a control using a float variable or a script parameter to set the minimum value of the scale (-240 to +20 dB). |
| Max Level | Connect a control using a float variable or a script parameter to set the maximum value of the scale (-220 to +20 dB). |
| Opacity | Connect a control using a float variable or a script parameter to blend between sample and FFT display (-100 to +100) . |
❕ For the FFT display settings to be saved and restored with Programs, they must be connected using script parameters.
FFT Sizes
| Value | FFT Size in Samples |
|---|---|
| -1 | Selects the FFT size automatically depending on the length of the sample. |
| 0 | 32 |
| 1 | 64 |
| 2 | 128 |
| 3 | 256 |
| 4 | 512 |
| 5 | 1024 |
| 6 | 2048 |
| 7 | 4096 |
| 8 | 81912 |
| 9 | 16384 |
| 10 | 32768 |
| 11 | 65536 |
Overlap Factors
| Value | Overlap Factor |
|---|---|
| 0 | No overlap. |
| 1 | 2 x |
| 2 | 4 x |
| 3 | 8 x |
| 4 | 16 x |
| 5 | 32 x |
| 6 | 64 x |
| 7 | 128 x |
/ HALion Developer Resource / HALion Macro Page / Controls /
Wavetable
Description
The Wavetable control allows you to display the resulting wave of the wavetable oscillator in real-time. You can connect it directly to the oscillator and configure the line width and colors.
Properties
| Poperty | Description |
|---|---|
| Name | The name of the element. This name will be displayed in the GUI Tree. |
| Position/Size | Position X, Position Y, Width, Height: Position and size of the element in pixels. Position X/Y defines the position of the upper left corner. |
| Attach | Defines how an element behaves when its parent element is resized. You can set the following parameters:
|
| Tooltip | Text that appears as a tooltip when the mouse hovers over the element. |
| Play Data | Allows you to connect the Play Data parameter of the wavetable oscillator. |
| Line Width | Adjusts the width of the waveform line from 1 to 3 pixels. |
Colors
| Poperty | Description |
|---|---|
| Line 1-8 | The color of the wavetable display. The first color defines the main wave, 2 to 7 can be used to specify different colors for the additional waves of the unison voices. |
/ HALion Developer Resource / HALion Macro Page / Controls /
Wavetable 3D
On this page:
Description
The Wavetable 3D control can be connected directly to the oscillator and display a three-dimensional representation of the wavetable in real time. You can configure the appearance of the representation – that is, the shininess of its surface, its brightness, the scaling factors, view angles, lines and colors, etc. – using the available parameters of the control.
Properties
| Poperty | Description |
|---|---|
| Name | The name of the element. This name will be displayed in the GUI Tree. |
| Position/Size | Position X, Position Y, Width, Height: Position and size of the element in pixels. Position X/Y defines the position of the upper left corner. |
| Attach | Defines how an element behaves when its parent element is resized. You can set the following parameters:
|
| Tooltip | Text that appears as a tooltip when the mouse hovers over the element. |
| Play Data | Allows you to connect the Play Data parameter of the wavetable oscillator. |
| ScaleX | Specifies the scaling factor of the width of the 3D representation. |
| ScaleY | Specifies the scaling factor of the height of the 3D representation. |
| ScaleZ | Specifies the scaling factor of the depth of the 3D representation. |
| Observe A | Rotates the 3D representation horizontally. This property can be cotrolled by dragging the display with the mouse and/or with a connected control. |
| Observe H | Rotates the 3D representation vertically. This property can be cotrolled by dragging the display with the mouse and/or with a connected control. |
| Ambient | Specifies the amount of ambient light. |
| Diffuse | Specifies the general brighteness of the material. |
| Specular | Specifies the intensity of specular highlights of the material. |
| Shininess | Specifies the size of specular highlight areas of the material. |
| Lines | Can be activated to draw a line for each wave of the wavetable. |
| Line Width | Adjusts the width of the lines from 1 to 3 pixels. |
| Loop | Can be activated to draw a line for the loop start and end markers. |
Colors
| Poperty | Description |
|---|---|
| Focus | The color of the wave line that has the focus in the wavetable editor. |
| Back | The color of the display background. |
| Line | The color of the wave lines. |
| Play | The color of the wave line at the current playback position. |
| Min | The color for the lowest amplitude value of the waveform. |
| Max | The color for the highest amplitude value of the waveform. |
| Loop | The color of the loop lines. |
/ HALion Developer Resource / HALion Macro Page / Controls /
XY
Description
The XY control allows you to control two parameters with one two-dimensional control. You can connect a parameter to the X Value, which is then controlled by horizontal movements of the handle and a parameter to the Y Value which is controlled by the vertical movements of the handle. A bitmap can be assigned to the Handle property. The XY control is transparent, which means that only the handle is drawn on the macro page. If you need a background to indicate the area that is used by the control, you can either put an image behind it or create a template and add a background image to it.
Properties
| Poperty | Description |
|---|---|
| Name | The name of the element. This name will be displayed in the GUI Tree. |
| Position/Size | Position X, Position Y, Width, Height: Position and size of the element in pixels. Position X/Y defines the position of the upper left corner. |
| Attach | Defines how an element behaves when its parent element is resized. You can set the following parameters:
|
| Tooltip | Text that appears as a tooltip when the mouse hovers over the element. |
| X Value | Drag and drop a parameter from the Parameter List to this text field to establish a connection. The assigned parameter will be displayed. Alternatively, you can export the property, which can then be used as a template parameter on a template instance. |
| Y Value | Drag and drop a parameter from the Parameter List to this text field to establish a connection. The assigned parameter will be displayed. Alternatively, you can export the property, which can then be used as a template parameter on a template instance. |
| Click Value | Allows you to transmit the information that the XY control has been clicked. The value changes from 0 to 1. The main purpose is to connect it to a UI script that needs to react to mouse clicks. It is not intended to be connected to HALion engine parameters. |
| Hover (Since HALion 7.0) | Enable this option to send the X/Y values when moving the mouse cursor above the X/Y control. This mode should be used with X/Y values that are connected to a UI script. Otherwise, when connected to engine parameters, this will result in a large amount of undo entries. For example, the X/Y control could be used to control a SVG animation that changes two properties over X and Y. The X/Y values that are sent to engine parameters could only be evaluated when the mouse is clicked. |
| Handle | Allows you to assign a Bitmap that is used as a handle. |
/ HALion Developer Resource / HALion Macro Page
Templates
A template is a group of control elements that is created to be used multiple times on a macro page, each time with different property values. The Basic Controls library comes with a large number of templates. Most of the templates are generic, such as knobs, sliders, and switches, and do not need any further documentation. However, there are also more complex templates, prepared for specific tasks, like controlling a MIDI Player module or a Step Modulator. For such templates, you will find further information in this documentation.
All templates described in this section can be found in the Basic Controls library. Additional templates for knobs, sliders, switches etc. can be found in the Additional Controls and the Vector Controls library. See Exploring Templates for information on how to access templates.
- About Box
- Animation Script
- Curve Editor
- Envelope
- Envelope Shaper
- FlexPhraser
- FlexPhraserStepSeq
- FX Meter
- MIDI Player
- Mixer Channel
- Path Browser
- Preset Browser
- Preset Browser Custom
- Sample Display
- Step Modulator (Template)
- Studio EQ Meter
- Wavetable Noise Selector
- Wavetable Selector
/ HALion Developer Resource / HALion Macro Page / Templates /
About Box
On this page:
Description
You can use the Aboutbox template to display information about the library manufacturer and the developers, for example. Its default size matches the standard size of a HALion Sonic macro page and it contains several control elements, such as a background bitmap, several example labels, two switches, and a menu. You can adapt these elements to your own needs.
To explore the functionality and connections:
- Load the Init Basic Controls.vstpreset from the Basic Controls library.
- In the Macro Page Designer, examine the "Aboutbox" template in the Templates Tree and the "Popup Views" variable in the GUI Tree.
To open an about box, a Popup List variable is required, see the "Popup Views" variable in the GUI Tree. The first entry of the Popup List variable must refer to the template name of the about box, in this example: Aboutbox. The page switch "Sw_About Box" in the GUI Tree is used to open the about box. The Value of "Sw_About Box" must be set to @Popup Views and the Onvalue must be set to 1. The "Close switch" inside the Aboutbox template is used to close the about box. Its Value must also be set to @Popup Views and its Onvalue must be set to 0. A click on the opened about box will close it.
In addition, the Aboutbox template contains a switch "Steinberg Website" and a menu "Weblinks" that are used to open webpages. These two controls require a UI script that is attached to the Aboutbox template. The Value of "Steinberg Website" is set to @WebLink and the Value of "Weblinks" is set to @WebHome. These values refer to the parameters that are defined in the UI script and they will open the corresponding webpages, also defined in the UI script. You can edit the UI script to change the URLs.
UI Script
-- define web links
links = {
"http://www.steinberg.net/de/home.html",
"http://www.steinberg.net/de/support.html",
}
function onWebLinkChanged()
openURL (links[WebLink])
end
defineParameter{name="WebLink", default=1, strings=links, onChanged=onWebLinkChanged,writeAlways=true}
-- define single home web link
function onWebHomeChanged()
openURL ("http://www.steinberg.net/de/home.html")
end
defineParameter("WebHome", nil, true, onWebHomeChanged)
Template Properties
| Poperty | Description |
|---|---|
| Name | The name of the template. The first entry of the Popup List variable must refer to this name. |
Components inside the Template
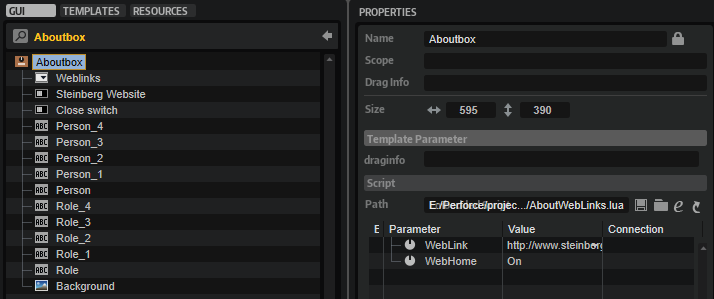
Controls and Subtemplates
| Item | Description |
|---|---|
| Weblinks | A Menu control to display a list of web links. The menu is connected to the UI script using @WebLink as Value. The UI script is attached to the Aboutbox template. Edit the script to change the suggested links. |
| Steinberg Website | A Switch control connected to the UI script using @Webhome as Value. The UI script is attached to the Aboutbox template. Edit the script to change the suggested link. |
| Close switch | A Switch control set to exclusive mode. The Value must be set to the same Popup List variable @Popup Views that is used to open the about box. The Onvalue must be set to 0. |
| Person ..., Role ... | Several Label controls that can be used to mention developers. Alternatively, the labels could also be part of the background bitmap. |
| Background | An Image control for the background bitmap. |
/ HALion Developer Resource / HALion Macro Page / Templates /
Animation Script
On this page:

Description
The Animation Script template can be added to a macro page to run timer-controlled animations. These can be turned on and off by any parameter and the integrated script can be customized to set animation properties, such as the number of frames and the duration of a frame. There are two templates included in the Basic Controls library, the Animation Script template providing only the UI script and the Animation Script Example template, which includes additional components such as a play button, variables, and an example animation to show how the UI script can be connected.
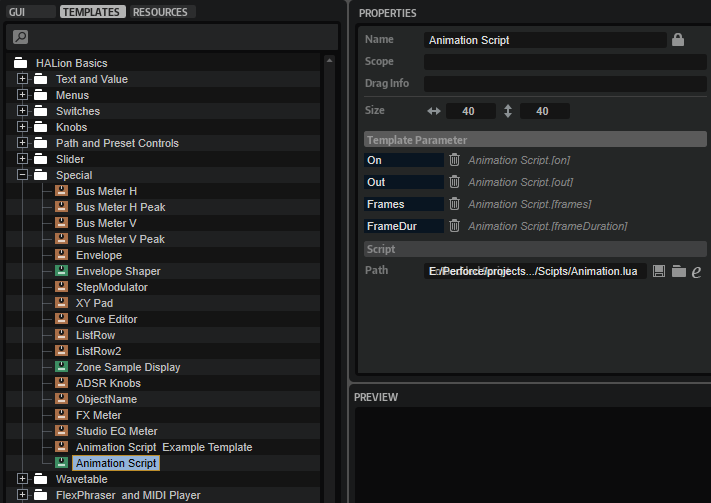
To explore the functionality and connections:
- Load the Init Basic Controls.vstpreset from the Basic Controls library.
- Open the Macro Page Designer, go to the GUI Tree and navigate to "Pages > Animation Page".
- Select "Animation Script Example" and click Edit Element to examine the template.
Template Properties
| Poperty | Description |
|---|---|
| Name | The name of the element. This name will be displayed in the GUI Tree. |
| Position/Size | Position X, Position Y, Width, Height: Position and size of the element in pixels. Position X/Y defines the position of the upper left corner. |
| Attach | Defines how an element behaves when its parent element is resized. You can set the following parameters:
|
| Tooltip | Text that appears as a tooltip when the mouse hovers over the element. |
| Template | Determines the template to be referenced. |
Components inside the Template
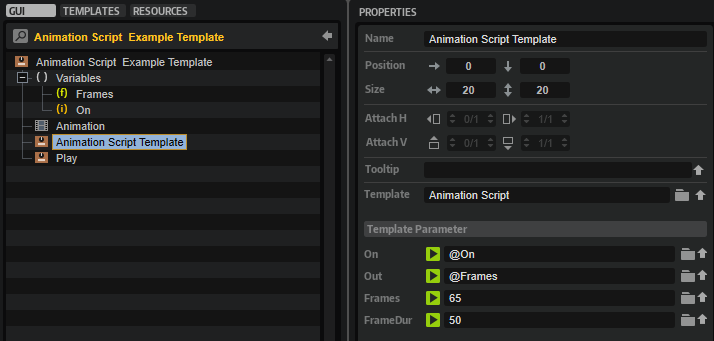
UI Variables
These variables are needed to allow the communication between the Animation control, the Animation Script Template and the PLay button.
| Variable | Description | Type | Range |
|---|---|---|---|
| Frames | A float variable to connect the Out parameter of the Animation Script Template with the Value of the Animation control. | float | 0 - 1.0 |
| On | An integer variable to connect the On parameter of the Animation Script Template with the Play button. | integer | 0 - 1 |
Controls and Subtemplates
| Item | Description |
|---|---|
| Animation | A SVG of a rotating star as an example animation. It is connected to the Animation Script Template by @Frames. |
| Animation Script Template | The template view that contains the UI script for controlling the animation. The template provides the following parameters:
|
| Play | A Switch control to start and stop the animation. It is connected to the Animation Script Template by @On. |
UI Script
function animate()
while on do
if out + inc <= 1 then
out = out + inc
else
out = 0
end
wait(frameDuration)
end
out = 0
end
inc = 0.1
defineParameter{name = "on", default = false, onChanged = animate}
defineParameter{name = "out", default = 0, min = 0, max = 1}
defineParameter{name = "frames", default = 10, min = 1, max = 1000, type = "integer", onChanged = function() inc = 1 / frames end}
defineParameter{name = "frameDuration", default = 50, min = 20, max = 10000, type = "integer"}
/ HALion Developer Resource / HALion Macro Page / Templates /
Curve Editor
On this page:
Description
The Curve Editor template allows you to display and edit curves, such as the custom curve of the Velocity Curve MIDI module or the modulation matrix, for example. The template contains controls to adjust the values of the selected node and the minimum and maximum of the curve. These controls must be part of the template and they must use the UI variables as defined in the template to connect with the Curve Editor Control.
❕ The Curve Editor Control cannot be created manually in the GUI Tree. Please load the template from the Basic Controls library to use it. You can adapt the look and feel of the template to the requirements of your macro page with the Properties and Colors as described below. If certain controls are not required or wanted, they can be removed.
To explore the functionality and connections:
- Load the Init Basic Controls.vstpreset from the Basic Controls library.
- Open the Macro Page Designer, go to the GUI Tree and navigate to "Pages > Curve Editor Page".
- Select "Curve Editor" and click Edit Element to examine the template.
Template Properties
| Poperty | Description |
|---|---|
| Name | The name of the element. This name will be displayed in the GUI Tree. |
| Position/Size | Position X, Position Y, Width, Height: Position and size of the element in pixels. Position X/Y defines the position of the upper left corner. |
| Attach | Defines how an element behaves when its parent element is resized. You can set the following parameters:
|
| Tooltip | Text that appears as a tooltip when the mouse hovers over the element. |
| Template | Determines the template to be referenced. |
Template Parameters
| Parameter | Description |
|---|---|
| Curve Data | Connect this to the FuncData parameter of the Velocity Curve MIDI module, for example. |
| Min | Compresses the curve vertically from the bottom. Connect this to the Minimum parameter of a Velocity Curve MIDI module, for example. |
| Max | Compresses the curve vertically from the top. Connect this to the Maximum parameter of a Velocity Curve MIDI module, for example. |
| Play Pos | Allows you to connect a parameter that sends the current value on the curve, e.g., input to output velocity. |
Components inside the Template
UI Variables
The following variables are needed to allow the communication between the curve editor and other controls in the template.
| Variable | Description | Type | Range |
|---|---|---|---|
| curve | The curvature of the selected node. | float | -10 - 10 |
| valY | The y-value of the selected node. | float | 0 - 1 |
| valX | The x-value of the selected node. | float | 0 - 1 |
| index | The index of the selected node. | integer | 0 - 100 |
Controls and Subtemplates
| Item | Description |
|---|---|
| curveeditor | The Curve Editor control. The properties FuncData, Minimum, and Maximum are exported and thus are available as template parameters. The exported Minimum and Maximum properties and the exported Value property of Slider Min and Slider Max (see below) share the same name for the template parameters and therefore appear only as one template parameter, Min and Max respectively, on the instance level of the template. For more details about the configuration of the control, see Curve Editor Control. |
| Slider Max | A slider template. The Value property of this slider template is exported and thus available as template parameter. It shares the name Maxwith the exported Maximum property of the Curve Editor control. Therefore, both exported properties appear only as one template parameter. |
| Slider Min | A slider template. The Value property of this slider template is exported and thus available as template parameter. It shares the name Minwith the exported Minimum property of the Curve Editor control. Therefore, both exported properties appear only as one template parameter. |
| Edit | A group of valuebox templates for displaying and editing the values of the selected node. The controls are connected to the Curve Editor control by the UI variables defined above. The respective UI variable must be set as Value to establish the connection.
|
| image | A Bitmap resource for an embedded frame around the curve editor. |
Curve Editor Control
The look and feel of the Curve Editor control can be configured with the following properties and colors.
Properties
| Property | Description |
|---|---|
| Name | The name of the element. This name will be displayed in the GUI Tree. |
| Position/Size | Position X, Position Y, Width, Height: Position and size of the element in pixels. Position X/Y defines the position of the upper left corner. |
| Attach | Defines how an element behaves when its parent element is resized. You can set the following parameters:
|
| Tooltip | Text that appears as a tooltip when the mouse hovers over the element. |
| Style |
|
| FuncData | Export this property to the instance level of the template and connect the corresponding template parameter to the FuncData parameter of the Velocity Curve MIDI module, for example. |
| Grid |
|
| Selected Node |
|
| Minimum | Compresses the curve vertically from the bottom. Export this property to the instance level of the template and connect the corresponding template parameter to the Minimum parameter of the Velocity Curve MIDI module, for example. |
| Maximum | Compresses the curve vertically from the top. Export this property to the instance level of the template and connect the corresponding template parameter to the Maximum parameter of the Velocity Curve MIDI module, for example. |
| Play Pos | Allows you to connect a parameter that sends the current value on the curve, e.g., input to output velocity. The Play Pos style must be activated to get access to this. |
Colors
❕ Some colors are only available if the corresponding Style options are active.
| Property | Description |
|---|---|
| Line | Line color between the nodes. |
| Fill | Fill color of the nodes. |
| FillSelected | Fill color of the selected node. |
| FrameFocus | Frame color of the focussed node. |
| Frame | Frame color of the nodes. |
| Hover | Hover frame color of the nodes. |
| Crosshair | Node edit crosshair color. |
| Play Pos | Color of the position indicator of the current value on the curve. |
| Border | Overall border color. |
| Grid V | Vertical grid color. |
| Grid V2 | Vertical fine grid color. |
| Grid V3 | Additional vertical fine grid color. |
| Grid H | Horizontal grid color. |
| Grid H2 | Horizontal fine grid color. |
| Scale | Scale font color. |
/ HALion Developer Resource / HALion Macro Page / Templates /
Envelope
On this page:
Description
The Envelope template allows you to edit HALion's multi-stage envelopes. The template contains controls for scrolling and zooming the envelope and for setting the envelope mode or the values of the selected node, for example. The controls must be part of the template and they must use the UI variables as defined in the template to connect with the Envelope View Control.
❕ The Envelope View Control cannot be created manually in the GUI Tree. Please load the template from the Basic Controls library to use it. You can adapt the look and feel of the template to the requirements of your macro page with the Properties and Colors as described below. If certain controls are not required or wanted, they can be removed.
To explore the functionality and connections:
- Load the Init Basic Controls.vstpreset from the Basic Controls library.
- Open the Macro Page Designer, go to the GUI Tree and navigate to "Pages > Envelope Page".
- Select "Envelope" and click Edit Element to examine the template.
Template Properties
| Poperty | Description |
|---|---|
| Name | The name of the element. This name will be displayed in the GUI Tree. |
| Position/Size | Position X, Position Y, Width, Height: Position and size of the element in pixels. Position X/Y defines the position of the upper left corner. |
| Attach | Defines how an element behaves when its parent element is resized. You can set the following parameters:
|
| Tooltip | Text that appears as a tooltip when the mouse hovers over the element. |
| Template | Determines the template to be referenced. |
Template Parameters
| Parameter | Description |
|---|---|
| Triplet | Connect this to the Triplet parameter of the envelope. |
| Mode | Connect this to the Mode parameter of the envelope. |
| Play Pos | Connect this to the PlaybackPos parameter of the envelope. |
| Loop Start | Connect this to the LoopStart parameter of the envelope. |
| Loop End | Connect this to the LoopEnd parameter of the envelope. |
| Env Points | Connect this to the Envelope Points parameter of the envelope. |
| Sync | Connect this to the Sync parameter of the envelope. |
| Sustain | Connect this to the SustainIndex parameter of the envelope. |
Components inside the Template
UI Variables
These variables are needed to allow the communication between the Envelope View and other controls in the template.
| Variable | Description | Type | Range |
|---|---|---|---|
| beat | Time in beats. | rational | n.a. |
| curve | Curvature of the selected node segment. | float | -10 - 10 |
| level | Level of the selected node. | float | 0 - 100 |
| time | Time of the selected note. | float | 0 - 30000 |
| index | Index of the selected node. | integer | 0 - 128 |
| fixed | Fixed mode of the envelope. | integer | 0, 1 |
| syncnote | Specifies the note grid. | stringlist | 1/1, 1/2, 1/4, 1/8, 1/16, 1/32, 1/64, 1/128, 1/256 |
Controls and Subtemplates
| Item | Description |
|---|---|
| Edit | This Group contains controls that allow you to draw shapes, adjust the selected node and further options of the envelope.
|
| EnvView | This Group contains a group with controls for scrolling and zooming the envelope and the Envelope View.
|
| Env Background | The background bitmap for the envelope. |
Envelope View Control
Properties
In addition to standard properties like size, position, etc., the Envelope View provides further properties and colors to customize its appearance and behavior.
| Poperty | Description |
|---|---|
| Name | The name of the element. This name will be displayed in the GUI Tree. |
| Position/Size | Position X, Position Y, Width, Height: Position and size of the element in pixels. Position X/Y defines the position of the upper left corner. |
| Attach | Defines how an element behaves when its parent element is resized. You can set the following parameters:
|
| Tooltip | Text that appears as a tooltip when the mouse hovers over the element. |
| Style |
|
| Env Value | Exported as Env Points. See Template Parameters above. |
| Mode | Exported as Mode See Template Parameters above. |
| Sync | Exported as Sync See Template Parameters above. |
| Triplet | Exported as Triplet See Template Parameters above. |
| SyncNote | Connected to the corresponding control template by the UI variable @syncnote. |
| Fixed | Connected to the corresponding control template by the UI variable @fixed. |
| Tool | Not used in this template. See Envelope Shaper template for details of this property. |
| ShapeSave | Not used in this template. See Envelope Shaper template for details of this property. |
| ShapeSelect | Not used in this template. See Envelope Shaper template for details of this property. |
| Shape | Not used in this template. See Envelope Shaper template for details of this property. |
| Index | Connected to the corresponding control template by the UI variable @index. |
| Level | Connected to the corresponding control template by the UI variable @level. |
| Time | Connected to the corresponding control template by the UI variable @time. |
| Beat | Connected to the corresponding control template by the UI variable @beat. |
| Curve | Connected to the corresponding control template by the UI variable @curve. |
| Loop Start | Exported as Loop Start. See Template Parameters above. |
| Loop End | Exported as Loop End. See Template Parameters above. |
| Sustain | Exported as Sustain. See Template Parameters above. |
| Play Pos | Exported as Play Pos. See Template Parameters above. |
| Min X | Defines the minimum value of the horizontal zoom. |
| Max X | Defines the maximum value of the horizontal zoom. |
| Min Y | Defines the minimum value of the vertical zoom. |
| Max Y | Defines the maximum value of the vertical zoom. |
Colors
❕ Some colors are available only if the corresponding Style options are enabled.
| Poperty | Description |
|---|---|
| Line | Line color between the nodes. |
| Fill | Fill color of the nodes. |
| FillSelected | Fill color of the selected nodes. |
| FrameFocus | Frame color of the focussed node. |
| Frame | Frame color of the nodes. |
| Hover | Hover frame color of the nodes. |
| Sustain | Color of the Sustain node and line. |
| Synced | Dot color of nodes that are aligned to the sync grid. |
| Crosshair | Node edit crosshair color. |
| Play Pos | Color of the playback position indicator. |
| Border | Overall border color. |
| Grid V | Vertical grid color. |
| Grid V2 | Vertical fine grid color. |
| Grid V3 | Vertical fine grid color. |
| Grid H | Horizontal grid color. |
| Grid H2 | Horizontal fine grid color. |
| Font | Timeline font color. |
| Selector | Selection area fill color. |
| SelFrame | Selection area frame color. |
| Zoom | Zoom area fill color. |
| ZoomFrame | Zoom area frame color. |
| Loop | Loop area fill color. |
| LoopFrame | Loop area frame color. |
/ HALion Developer Resource / HALion Macro Page / Templates /
Envelope Shaper
On this page:
Description
The Envelope Shaper template allows you to edit HALion's multi-stage envelopes. The template contains controls for scrolling and zooming the envelope and for setting the envelope mode or the values of the selected node, for example. In addition, it offers tools for drawing shapes. The controls must be part of the template and they must use the UI variables as defined in the template to connect with the Envelope View Control.
❕ The Envelope View Control cannot be created manually in the GUI Tree. Please load the template from the Basic Controls library to use it. You can adapt the look and feel of the template to the requirements of your macro page with the Properties and Colors as described below. If certain controls are not required or wanted, they can be removed.
To explore the functionality and connections:
- Load the Init Basic Controls.vstpreset from the Basic Controls library.
- Open the Macro Page Designer, go to the GUI Tree and navigate to "Pages > Envelope Shaper Page".
- Select "Envelope ShaperMode" and click Edit Element to examine the template.
Template Properties
| Poperty | Description |
|---|---|
| Name | The name of the element. This name will be displayed in the GUI Tree. |
| Position/Size | Position X, Position Y, Width, Height: Position and size of the element in pixels. Position X/Y defines the position of the upper left corner. |
| Attach | Defines how an element behaves when its parent element is resized. You can set the following parameters:
|
| Tooltip | Text that appears as a tooltip when the mouse hovers over the element. |
| Template | Determines the template to be referenced. |
Template Parameters
| Parameter | Description |
|---|---|
| Mode | Connect this to the Mode parameter of the envelope. |
| Play Pos | Connect this to the PlaybackPos parameter of the envelope. |
| Loop Start | Connect this to the LoopStart parameter of the envelope. |
| Loop End | Connect this to the LoopEnd parameter of the envelope. |
| Env Points | Connect this to the Envelope Points parameter of the envelope. |
| Sync | Connect this to the Sync parameter of the envelope. |
| Sustain | Connect this to the SustainIndex parameter of the envelope. |
Components inside the Template
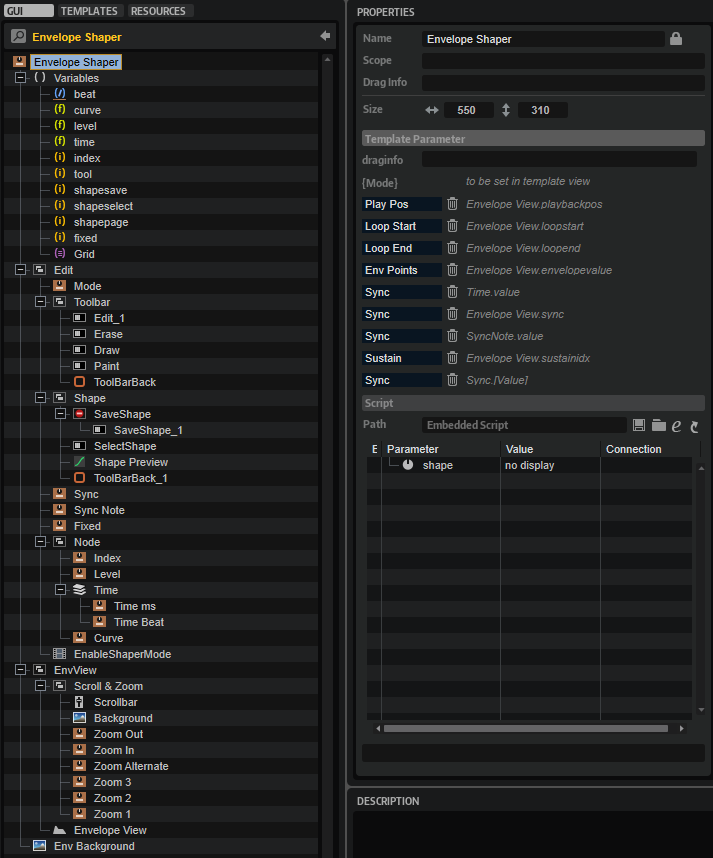
UI Variables
These variables are needed to allow the communication between the Envelope View and other controls in the template.
| Variable | Description | Type | Range |
|---|---|---|---|
| beat | Time in beats. | rational | n.a. |
| curve | Curvature of the selected node segment. | float | -10 - 10 |
| level | Level of the selected node. | float | 0 - 100 |
| time | Time of the selected note. | float | 0 - 30000 |
| index | Index of the selected node. | integer | 0 - 128 |
| tool | The tool for drawing shapes. | integer | 0 - 3 |
| shapesave | Used for saving shapes. | integer | 0 - 1 |
| shapeselect | Used for selecting shapes. | integer | 0 - 1 |
| fixed | Fixed mode of the envelope. | integer | 0, 1 |
| Grid | Specifies the note grid. | stringlist | 1/64, 1/32, 1/16T, 1/16, 1/8T, 1/16D, 1/8, 1/4T, 1/8D, 1/4, 1/2T, 1/4D, 1/2, 1/1T, 1/2D, 4/4, 5/4, 6/4, 7/4, 8/4, 16/4, 32/4, 64/4 |
Controls and Subtemplates
| Item | Description |
|---|---|
| Edit | This Group contains controls that allow you to adjust the selected node and further options of the envelope.
|
| EnvView | This Group contains a group with controls for scrolling and zooming the envelope and the Envelope View. See Envelope View Control for further details.
|
| Env Background | The background bitmap for the envelope. |
Envelope View Control
Properties
In addition to standard properties like size, position, etc., the Envelope View provides further properties and colors to customize its appearance and behavior.
| Poperty | Description |
|---|---|
| Name | The name of the element. This name will be displayed in the GUI Tree. |
| Position/Size | Position X, Position Y, Width, Height: Position and size of the element in pixels. Position X/Y defines the position of the upper left corner. |
| Attach | Defines how an element behaves when its parent element is resized. You can set the following parameters:
|
| Tooltip | Text that appears as a tooltip when the mouse hovers over the element. |
| Style |
|
| Env Value | Exported as Env Points. See Template Parameters above. |
| Mode | Exported as Mode See Template Parameters above. |
| Sync | Exported as Sync See Template Parameters above. |
| Triplet | Not used in this template. See Envelope template for details of this property. |
| SyncNote | Connected to the corresponding control template by the UI variable @Grid. |
| Fixed | Connected to the corresponding control template by the UI variable @fixed. |
| Tool | Connected to the corresponding controls Edit_1, Erase, Draw, and Paint by the UI variable @tool. |
| ShapeSave | Connected to the corresponding control SaveShape_1 by the UI variable @shapesave. |
| ShapeSelect | Connected to the corresponding control SelectShape by the UI variable @shapeselect. |
| ShapePage | Controls the state of the page switches in the shape selector dialog. Must be connected to the corresponding UI variable @shapepage. |
| Shape | Connected to the corresponding control Shape Preview by the UI variable @shape. |
| Index | Connected to the corresponding control template by the UI variable @index. |
| Level | Connected to the corresponding control template by the UI variable @level. |
| Time | Connected to the corresponding control template by the UI variable @time. |
| Beat | Connected to the corresponding control template by the UI variable @beat. |
| Curve | Connected to the corresponding control template by the UI variable @curve. |
| Loop Start | Exported as Loop Start. See Template Parameters above. |
| Loop End | Exported as Loop End. See Template Parameters above. |
| Sustain | Exported as Sustain. See Template Parameters above. |
| Play Pos | Exported as Play Pos. See Template Parameters above. |
| Min X | Defines the minimum value of the horizontal zoom. |
| Max X | Defines the maximum value of the horizontal zoom. |
| Min Y | Defines the minimum value of the vertical zoom. |
| Max Y | Defines the maximum value of the vertical zoom. |
Colors
❕ Some colors are only available if the corresponding Style options are active.
| Poperty | Description |
|---|---|
| Line | Line color between the nodes. |
| Fill | Fill color of the nodes. |
| FillSelected | Fill color of the selected nodes. |
| FrameFocus | Frame color of the focussed node. |
| Frame | Frame color of the nodes. |
| Hover | Hover frame color of the nodes. |
| Sustain | Color of the Sustain node and line. |
| Synced | Dot color of nodes that are aligned to the sync grid. |
| Crosshair | Node edit crosshair color. |
| Playback | Color of the playback position indicator. |
| Border | Overall border color. |
| Grid V | Vertical grid color. |
| Grid V2 | Vertical fine grid color. |
| Grid H | Horizontal grid color. |
| Grid H2 | Horizontal fine grid color. |
| Font | Timeline font color. |
| Selector | Selection area fill color. |
| SelFrame | Selection area frame color. |
| Loop | Loop area fill color. |
| LoopFrame | Loop area frame color. |
| Zoom | Zoom area fill color. |
| ZoomFrame | Zoom area frame color. |
/ HALion Developer Resource / HALion Macro Page / Templates /
FlexPhraser
On this page:
Description
The FlexPhaser template contains controls for selecting the phrases, adjusting the performance parameters like Swing, Gate Scale, etc., and for using the eight variations of the FlexPhraser MIDI module. In addition, there are controls for recording the MIDI output of the FlexPhraser and to export the recorded phrase via drag and drop.
Functionality such as using the eight variations, exporting the recorded MIDI output, etc., cannot be realized with standard macro page controls. The Internal control is used if this is the case. The performance parameters like Swing, Gate Scale, Vel Scale, etc. are connected to the eight variations by corresponding UI variables and they must be part of this template. To ensure the operation of the performance parameters, the eight variations and the MIDI phrase export, the preconfigured properties must not be modified. The look and the size of the controls can be modified freely. All controls for functions that are not needed for your instrument can be omitted on your macro page.
To explore the functionality and connections:
- Load the Init Basic Controls.vstpreset from the Basic Controls library.
- Open the Macro Page Designer, go to the GUI Tree and navigate to "Pages > FlexPhraser Page > Arp Parameter".
- Select "FlexPhraser View" and click Edit Element to examine the template.
❕ The other control templates inside the Arp Parameter group are directly connected to the FlexPhraser MIDI module and do not require detailed explanation. The control template for creating User phrases can be found in the StepSEQ group. See FlexPhraserStepSeq for details.
Template Properties
| Poperty | Description |
|---|---|
| Name | The name of the element. This name will be displayed in the GUI Tree. |
| Position/Size | Position X, Position Y, Width, Height: Position and size of the element in pixels. Position X/Y defines the position of the upper left corner. |
| Attach | Defines how an element behaves when its parent element is resized. You can set the following parameters:
|
| Tooltip | Text that appears as a tooltip when the mouse hovers over the element. |
| Template | Determines the template to be referenced. |
Template Parameters
| Parameter | Description |
|---|---|
| Scope | Defines the path to the FlexPhraser MIDI module to be controlled. For example: @0:FlexPhraser controls the first FlexPhraser in the program. |
| Product | Product specifies the root folder for the location of the subpresets, both for loading and saving. Set this to HALion if you want to load phrases from the standard file path for subpresets. Load From (see below) must be set to StepSEQ Phrases, which specifies the path to the folder that contains the subpresets for the phrases. When saving User phrases, these will be written to ./Documents/Steinberg/HALion/Sub Presets/StepSEQ Phrases on hard disk. They are displayed with a user icon in the phrase selector.If you want to deliver your own phrases as part of your library, you can set Product to the name of your instrument, e.g., You can also include both, the HALion root folder and the root folder of your instrument, by setting Product to |
| Load From | Load From specifies the subpath to the location of the subpresets inside the root folder. The root folder is set by Product (see above). You can specify this subfolder freely. However, if you want to see the factory phrases, Load From must be set to StepSEQ Phrases and Product must contain HALion.Any phrases you want to distribute with your library must be added to the corresponding location inside the VST Sound. For example, if Load From is set to |
| Save To | Allows you to specify the subpath to the location where the subpresets will be saved by default.
|
❕ If you need further control over the content locations, you can specify the required subfolder together with the Product:
MyProductName/StepSEQ Phrases|HALion/StepSEQ Phrases. See configuration 4 in the following table.
Content Locations for Different Configurations
| # | Configuration | Content in Phrase Selector | Default Save Path |
|---|---|---|---|
| 1 | Product = Load From = Save To = | Only phrases from HALion, including any phrases the user has saved on hard disk. | ./Documents/Steinberg/HALion/Sub Presets/StepSEQ Phrases/MySubfolder |
| 2 | Product = Load From = Save To = | Only phrases from the specified library, including any phrases the user has saved with the instrument on hard disk. | ./Documents/Steinberg/MyProductName/Sub Presets/StepSEQ Phrases/MySubfolder |
| 3 | Product = Load From = Save To = | All phrases from HALion, the specified library and any phrases the user has saved on hard disk. | ./Documents/Steinberg/MyProductName/Sub Presets/MyProductName/MySubfolder |
| 4 | Product = Load From = deactivate, leave empty Save To = | All phrases from HALion, the specified library and any phrases the user has saved on hard disk. | ./Documents/Steinberg/MyProductName/Sub Presets/StepSEQ Phrases/MySubfolder |
❕ The location of the phrases inside the VST Sound must match the path defined by Product and Load From, otherwise the phrase selector will not see these phrases. If libraries deliver phrases in multiple VST Sounds, all phrases with the same path will be shown together in the phrase selector.
Components inside the Template

Controls and Subtemplates
To ensure the operation of the controls and subtemplates, the preconfigured properties must not be modified. The look and the size of the controls can be modified freely. All controls for functions that are not needed for your instrument can be omitted on your macro page.
| Item | Description |
|---|---|
| DragMIDI | This Group contains controls for recording the MIDI output of the FlexPhraser and to export the recorded phrase via drag and drop.
|
| User | A switch template that allows you to activate the User mode for the current variation. Its Value must be set to @UserMode. |
| Variation | A Group with three subgroups that provide the necessary elements to switch between variations, to drag variations to the trigger pads, and to open the context menu of the variation switches. The aformentioned functionalities are implemented by Internal controls. Their preconfigured properties should not be modified. Also, the z-order of the subgroups in the GUI Tree is not supposed to change. "Drag Zones" must be topmost, followed by "Variation Popup", and then "Variation Selector" as bottommost group.
|
| Factory/Custom | A Stack containing two pages with controls to manage either the FlexPhraser factory phrases or the User phrases.
|
| Arp Mute | A switch template that allows you to mute the variation. Its Value must be set to @Mute. |
| Arp Octaves | A knob template that adjusts the octave range of the variation. Its Value must be set to @OctaveRange. |
| Arp Vel Scale | A knob template that adjusts the velocity scale of the variation. Its Value must be set to @VelocityScale. |
| Arp Gate Scale | A knob template that adjusts the gate scale of the variation. Its Value must be set to @GateScale. |
| Arp Swing | A knob template that adjusts the swing of the variation. Its Value must be set to @Swing. |
| Arp TempoScale | A value box template that adjusts the note value of the tempo scale of the variation. Its Value must be set to @TempoScale. |
| Tempo | A Disable control that specifies whether the contained "Arp Tempo" template is active. Its Value must be set to @Sync.
|
/ HALion Developer Resource / HALion Macro Page / Templates /
FlexPhraserStepSeq
On this page:
Description
The FlexPhaserStepSeq template allows you to control the User phrase editor of the FlexPhraser. It combines several Step Modulator controls with additional value boxes for Key Transpose and Key Replace and switches that modifiy the entire phrase. These controls are all preconfigured within the template and use dedicated parameters which are not supposed to change. The look and the size of the controls can be modified freely. All controls for functions that are not needed for your instrument can be omitted on your macro page.
To explore the functionality and connections:
- Load the Init Basic Controls.vstpreset from the Basic Controls library.
- Open the Macro Page Designer, go to the GUI Tree and navigate to "Pages > FlexPhraser Page > StepSEQ".
- Select "StepSeq" and click Edit Element to examine the template.
❕ The control templates for selecting phrases and for adjusting the performance parameters can be found in the Arp Parameter group. See FlexPhraser for details.
Template Properties
| Poperty | Description |
|---|---|
| Name | The name of the element. This name will be displayed in the GUI Tree. |
| Position/Size | Position X, Position Y, Width, Height: Position and size of the element in pixels. Position X/Y defines the position of the upper left corner. |
| Attach | Defines how an element behaves when its parent element is resized. You can set the following parameters:
|
| Tooltip | Text that appears as a tooltip when the mouse hovers over the element. |
| Template | Determines the template to be referenced. |
Template Parameters
| Parameter | Description |
|---|---|
| Scope | Defines the path to the FlexPhraser MIDI modue that will be controlled. For example: @0:FlexPhraser controls the first FlexPhraser in the program. |
Components inside the Template
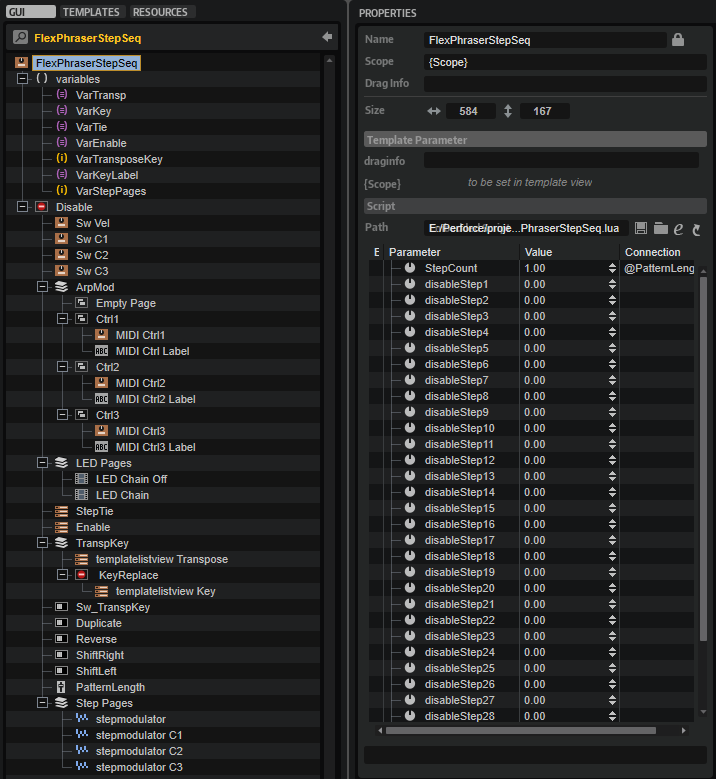
UI Variables
These variables are needed to allow the communication between the Step Modulator control and other controls in the template.
| Variable | Description | Type | Range |
|---|---|---|---|
| VarTransp | List of transpose variables used by the "templatelistview Transpose" template. | string list | @Transpose1 - 32 |
| VarKey | List of key variables used by the "templatelistview Key" template. | string list | @Key1 - 32 |
| VarTie | List of tie variables used by the "StepTie" template. | string list | @Tie1 - 32 |
| VarEnable | List of enable variables used by the "Enable" template. | string list | @Enable1 - 32 |
| VarTransposeKey | Used to switch between the pages of the "TranspKey" stack. | integer | 0, 1 |
| VarKeyLabel | List of numbers used as labels in the "Enable" template. | string list | 1 - 32 |
| VarStepPages | Used to switch between the pages of the "Step Pages" stack. | integer | 0 - 3 |
Controls and Subtemplates
| Item | Description |
|---|---|
| Disable | A Disable control containing all further elements. It is needed to disable the contained elements if the FlexPhraser variation is not set to User mode. Its Value must be set to @UserMode. |
| Sw Vel, Sw C1, Sw C2, Sw C3 | These switches are used to switch between the velocity and controller lane pages. The Value is set to @VarStepPages and the Onvalue is set to the index of the corresponding page. |
| ArpMod | A Stack for switching between the pages that contain the controls for selecting the MIDI controller that is sent by the corresponding controller lane. It is switched by the UI Variable @VarStepPages.
|
| LED pages | A Stack that switches between two LED chain bitmap displays, "LED Chain Off" and "LED Chain". They are both identical. "LED Chain Off" is not connected to the engine and is used when User mode is set to off. "LED Chain" is connected to the engine via @CurrentStep. |
| StepTie | A Template List that controls the Tie parameter of the 32 steps. It uses the "StepTie" template as a switch. The switch will be disabled if the length of the phrase is smaller than the index of the corresponding step. This is controlled by @disableStepParams which is defined and managed in the UI script FlexPhraserStepSeq.lua that is attached to the FlexPhraserStepSeq template. See UI Script for details. |
| Enable | A Template List used to control the Enable parameter of the 32 steps. It uses the "StepSwitch OnOff " template as a switch. The switch will be disabled if the length of the phrase is smaller than the index of the corresponding step. This is is controlled by @disableStepParams which is defined and managed in the UI script FlexPhraserStepSeq.lua that is attached to the FlexPhraserStepSeq template. See UI Script for details. The Label parameter uses the stringlist variable @VarKeyLabel to set the label for each step. |
| TranspKey | A Stack switching between the Key Transpose and Key Replace values. This is controlled by the UI variable @VarTransposeKey. These values are managed by "templatelistview Transpose" and "templatelistview Key". "templatelistview Transpose" uses the string list variable @VarTrans. "templatelistview Key" uses the string list variable @VarKey. Both will be disabled if the length of the phrase is smaller than the index of the corresponding step. This is is controlled by @disableStepParams which is defined and managed in the UI script FlexPhraserStepSeq.lua that is attached to the FlexPhraserStepSeq template. See UI Script for details. |
| Sw_TranspKey | A Switch that toggles between the Key Transpose and Key Replace values. Connected to the "TranspKey" stack by the UI variable @VarTranposeKey. |
| Duplicate | A push button that duplicates the active steps. Connected by the internal variable @Duplicate. This works only inside the FlexPhraserStepSeq template. |
| Reverse | A push button that reverses the order of the active steps. Connected by the internal variable @Reverse. This works only inside the FlexPhraserStepSeq template. |
| ShiftRight | A push button that shifts the active steps to the right. Connected by the internal variable @ShiftPhraseRight. This works only inside the FlexPhraserStepSeq template. |
| ShiftLeft | A push button that shifts the active steps to the left. Connected by the internal variable @ShiftPhraseLeft. This works only inside the FlexPhraserStepSeq template. |
| PatternLength | A Slider to change the number of steps. Connected by @PatternLength which is defined and managed in the UI script FlexPhraserStepSeq.lua that is attached to the FlexPhraserStepSeq template. See UI Script for details. |
| Step Pages | A Stack that contains four Step Modulator controls, one for the step velocity and three for the available controller lanes. It is switched by the UI variable @VarStepPages.
|
UI Script
-- FlexPhraserStepSeq.lua (Manages the disable state of the steps)
function onStepCountChanged()
step = math.floor (StepCount+0.5)
for i = 1, step, 1 do
_G["disableStep"..tostring(i)] = 0
end
for i=step + 1, 32, 1 do
_G["disableStep"..tostring(i)] = 1
end
end
defineParameter("StepCount", nil, 1, 1, 32, onStepCountChanged)
disableStepParams = {}
for i=1,32,1 do
disableStepParams[i]="@disableStep"..tostring(i);
defineParameter("disableStep"..tostring(i), nil, 0,0,1)
end
defineParameter("disableStepParams", nil, 1, disableStepParams)
/ HALion Developer Resource / HALion Macro Page / Templates /
FX Meter
On this page:
Description
The FX Meter template allows you to display input, output, and reduction meters for effects like Compressor, Expander, Limiter, etc. It also contains text controls for peak values and switches for resetting them. The controls are connected by corresponding UI variables. To ensure the operation of the controls, the preconfigured properties must not be modified. The look and the size of the controls can be modified freely including their ressources. Controls that are not needed for your instrument can be omitted on your macro page. For example, if an effect does not need a reduction meter, you can remove it and save this configuration in another template.
To explore the functionality and connections:
- Load the Init Basic Controls.vstpreset from the Basic Controls library.
- Open the Macro Page Designer, go to the GUI Tree and navigate to "Pages > Deco and Meter Page".
- Select "FX Meter" and click Edit Element to examine the template.
Template Properties
| Poperty | Description |
|---|---|
| Name | The name of the element. This name will be displayed in the GUI Tree. |
| Position/Size | Position X, Position Y, Width, Height: Position and size of the element in pixels. Position X/Y defines the position of the upper left corner. |
| Attach | Defines how an element behaves when its parent element is resized. You can set the following parameters:
|
| Tooltip | Text that appears as a tooltip when the mouse hovers over the element. |
| Template | Determines the template to be referenced. |
Template Parameters
| Parameters | Description |
|---|---|
| FXType | Specifies the effect type the controls should connect to. See Effect Types for a list of the supported types. |
| Scope | Determines to which effect the controls should connect. For example, @bus:0/@0:Tube Compressor connects the controls to the first effect named Tube Compressor in the first bus. |
Effect Types
| Module | FX Type | Comment |
|---|---|---|
| Compressor | Compressor | - |
| Expander | Expander | - |
| Limter | Limiter | - |
| Maximizer | Optimiser | - |
| Brickwall Limiter | BrickwallLimiter | - |
| Tube Compressor | TubeCompressor | - |
| Vintage Compressor | VintageCompressor | - |
| Gate | Gate | No reduction meter. |
| Graph EQ | GraphicEQ10 | Only output meter. |
| Morph Filter | MorphFilter | Only output meter. |
| DJ EQ | HiFiEq | Only output meter. |
❕ The Studio EQ effect requires the specialized template Studio EQ Meter.
Components inside the Template
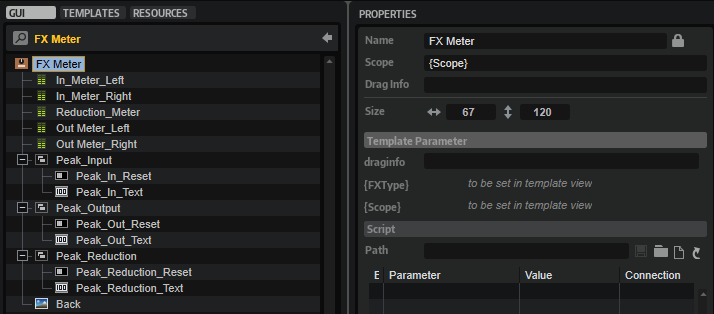
Controls and Subtemplates
| Item | Description |
|---|---|
| In_Meter_Left | A Meter control connected with the left input channel of the effect. Its Value must be set to @VUInL . |
| In_Meter_Right | A Meter control connected with the right input channel of the effect. Its Value must be set to @VUInR . |
| Reduction_Meter | A Meter control connected with the gain reduction output of the effect. Its Value must be set to @GainReduction . |
| Out_Meter_Left | A Meter control connected with the left output channel of the effect. Its Value must be set to @VUOutL . |
| Out_Meter_Right | A Meter control connected with the right output channel of the effect. Its Value must be set to @VUOutR . |
| Peak_Input | A Group with two elements:
|
| Peak_Output | A Group with two elements:
|
| Peak_Reduction | A Group with two elements:
|
| Back | An Image control that provides the background bitmap for the meters. |
/ HALion Developer Resource / HALion Macro Page / Templates /
MIDI Player
On this page:
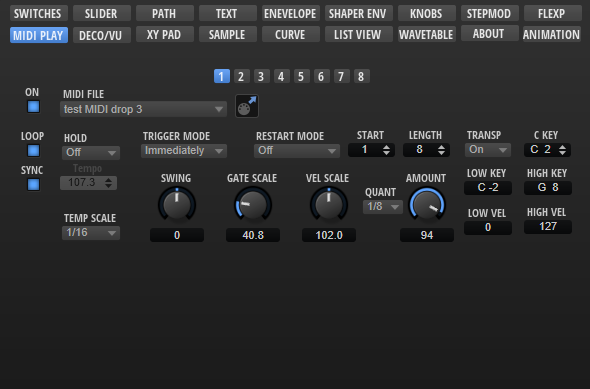
Description
The MIDI Player template contains controls for selecting MIDI files, adjusting the performance parameters like Swing, Gate Scale, etc., and for using the eight variations of the MIDI Player module. In addition, there are controls for exporting the current MIDI File via drag and drop.
Functionality such as using the eight variations, exporting the current MIDI file, etc., cannot be realized with standard macro page controls. The Internal control is used if this is the case. The performance parameters like Swing, Gate Scale, Vel Scale, etc. are connected to the eight variations by corresponding UI variables and they must be part of this template. To ensure the operation of the performance parameters, the eight variations and the MIDI file export, the preconfigured properties must not be modified. The look and the size of the controls can be modified freely. All controls for functions that are not needed for your instrument can be omitted on your macro page.
To explore the functionality and connections:
- Load the Init Basic Controls.vstpreset from the Basic Controls library.
- Open the Macro Page Designer, go to the GUI Tree and navigate to "Pages > MIDI Player Page > MIDI Player Parameter".
- Select "MIDI Player Template" and click Edit Element to examine the template.
❕ The other control templates inside the MIDI Player Parameter group are directly connected to the MIDI Player module and do not require detailed explanation.
Template Properties
| Poperty | Description |
|---|---|
| Name | The name of the element. This name will be displayed in the GUI Tree. |
| Position/Size | Position X, Position Y, Width, Height: Position and size of the element in pixels. Position X/Y defines the position of the upper left corner. |
| Attach | Defines how an element behaves when its parent element is resized. You can set the following parameters:
|
| Tooltip | Text that appears as a tooltip when the mouse hovers over the element. |
| Template | Determines the template to be referenced. |
Template Parameters
| Parameter | Description |
|---|---|
| Scope | Defines the path to the MIDI Player module to be controlled. For example: @0:MIDI Player controls the first MIDI Player module in the program. |
| Product | Product specifies the root folder for the location of the MIDI files (.mid). Set this to HALion if you want to load MIDI files from the standard file path for subpresets. Load From (see below) must be set to MIDI Files, which specifies the path to the folder that contains the MIDI files.If you wish to deliver your own MIDI files as part of your library, you can set Product to the name of your instrument, e.g., You can also include both, the HALion root folder and the root folder of your instrument, by setting Product to |
| Load From | Load From specifies the subpath to the location of the MIDI files inside the root folder. The root folder is set by Product (see above). You can specify this subfolder freely. However, if you want to see the factory MIDI files, Load From must be set to MIDI Files and Product must contain HALion.Any MIDI files you want to distribute with your library must be added to the corresponding location inside the VST Sound. For example, if Load From is set to |
Content Locations for Different Configurations
| # | Configuration | Content visible in MIDI File Selector |
|---|---|---|
| 1 | Product = Load From = | Only MIDI files from HALion, including any MIDI files the user has saved on hard disk. |
| 2 | Product = Load From = | Only MIDI files from the specified library. |
| 3 | Product = Load From = | All MIDI files from HALion, the specified library and any MIDI files the user has saved on hard disk. |
❕ The location of the MIDI files inside the VST Sound must match the path defined by the Product and Load From parameters, otherwise the MIDI File selector cannot access them.
Components inside the Template
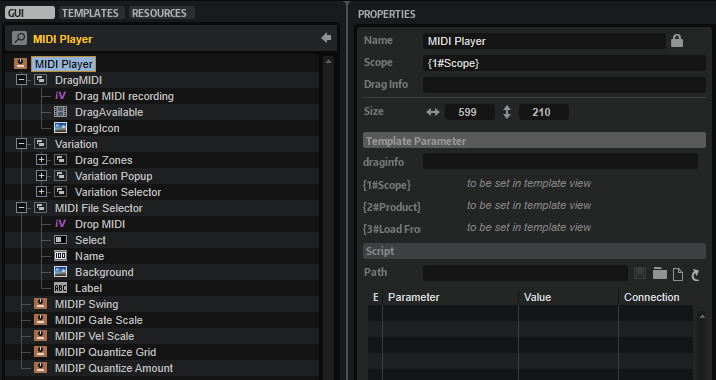
Controls and Subtemplates
To ensure the operation of the controls and subtemplates, the preconfigured properties must not be modified. The look and the size of the controls can be modified freely. All controls for functions that are not needed for your instrument can be omitted on your macro page.
| Item | Description |
|---|---|
| DragMIDI | This Group contains controls for exporting the current MIDI file via drag and drop.
|
| Variation | A Group with three subgroups that provide the necessary elements to switch between variations, to drag variations to the trigger pads, and to open the context menu of the variation switches. The aformentioned functionalities are implemented by Internal controls. Their preconfigured properties should not be modified. Also, the z-order of the subgroups in the GUI Tree is not supposed to change. "Drag Zones" must be topmost, followed by "Variation Popup", and then "Variation Selector" as bottommost group.
|
| MIDI File Selector | This Group contains controls for selecting MIDI files and for loading MIDI files from disk using drag and drop.
|
| MIDIP Swing | A knob template that adjusts the swing of the variation. Its Value must be set to @Swing. |
| MIDIP Gate Scale | A knob template that adjusts the gate scale of the variation. Its Value must be set to @GateScale. |
| MIDIP Vel Scale | A knob template that adjusts the velocity scale of the variation. Its Value must be set to @VelocityScale. |
| MIDIP Quantize Grid | A menu template for selecting the note value of the quantization grid of the variation. Its Value must be set to @QuantizeGrid. |
| MIDIP Quantize Amount | A knob template that adjusts the amount of quantization for the MIDI file of the variation. Its Value must be set to @QuantizeAmount. |
/ HALion Developer Resource / HALion Macro Page / Templates /
Mixer Channel
On this page:
Description
The Mixer Channel template contains all necessary controls for the parameters of a bus. The controls are connected by corresponding UI variables. To ensure the operation of the controls the preconfigured properties must not be modified. The look and the size of the controls can be modified freely including their ressources. Controls that are not needed for your instrument can be omitted on your macro page.
To explore the functionality and connections:
- Load the Init Basic Controls.vstpreset from the Basic Controls library.
- Open the Macro Page Designer, go to the GUI Tree and navigate to "Pages > Deco and Meter Page".
- Select "Mixer Channel" and click Edit Element to examine the template.
Template Properties
| Poperty | Description |
|---|---|
| Name | The name of the element. This name will be displayed in the GUI Tree. |
| Position/Size | Position X, Position Y, Width, Height: Position and size of the element in pixels. Position X/Y defines the position of the upper left corner. |
| Attach | Defines how an element behaves when its parent element is resized. You can set the following parameters:
|
| Tooltip | Text that appears as a tooltip when the mouse hovers over the element. |
| Template | Determines the template to be referenced. |
Template Parameters
| Parameters | Description |
|---|---|
| TargetBusses | Allows you to specify the selectable output busses. For example, if your instrument contains the busses Bus A, Bus B and Bus C and you set TargetBusses to buslist='Bus A; Bus B', only Bus A and Bus B will be shown in the output selector of the channel. Bus C will not be shown. For more options, see Ch_Output below. |
| bus | Determines to which bus the controls should connect. For example, @bus:0 connects the controls to the first bus in the program. |
Components inside the Template
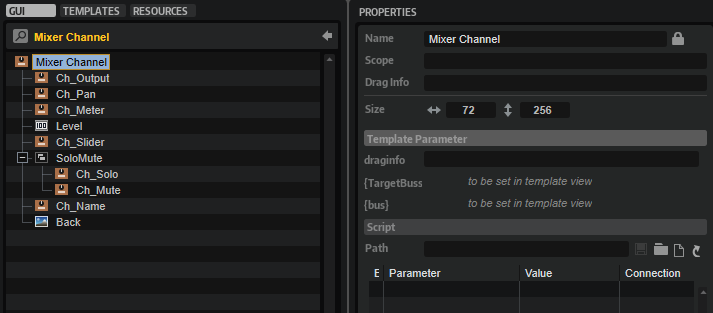
Controls and Subtemplates
| Item | Description |
|---|---|
| Ch_Output | This template contains the necessary elements to specify the output of a bus. It contains the following elements:
@TargetBusMenu local aux noplug shows only the busses higher up in the hierarchy and the aux busses, but none of the plug-in outputs in the menu. |
| Ch_Pan | This template contains the necessary elements to control the pan parameter of the bus. It contains the following elements: |
| Ch_Meter | This template references the Bus Meter V Peak template. All parameters are connected to the bus defined by the Mixer Channel template's bus parameter. The Bus Meter V Peak template contains the following elements:
|
| Ch_Level | A Text control showing the value of the level slider. The Value property must be set to @LogLevel. |
| Ch_Slider | This template contains the necessary elements to control the level of the bus. It contains the following elements: |
| SoloMute | A Group control with two templates: Ch_Solo and Ch_Mute. They provide the solo/mute functionality of the bus.
|
| Ch_Name | This template references the ObjectName template. It displays the name of the object in which it is located. In this case it will display the name of the connected bus. The template contains only one element:
|
| Back: | An Image control that provides the background bitmap. |
/ HALion Developer Resource / HALion Macro Page / Templates /
Path Browser
On this page:
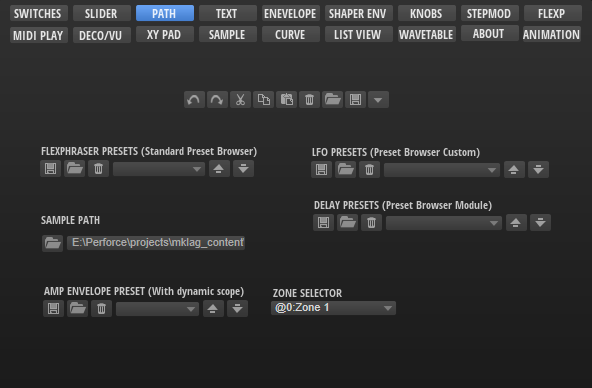
Description
The PathBrowser is a preconfigured template that can be used to open folders and objects, such as sample files, for example. The template can be configured with the available Template Parameters. The look of the controls can be adapted freely by changing the components inside the template. The template also accepts the drop of folders or files from sources like the Explorer or Finder. When clicking the open icon, the OS file browser opens that lets you choose the folder and file. By Clicking OK this file path is set for the parameter that is connected to the Value parameter of the template.
To explore the functionality and connections:
- Load the Init Basic Controls.vstpreset from the Basic Controls library.
- Open the Macro Page Designer, go to the GUI Tree and navigate to "Pages > Path & Preset Page".
- Select "Sample Path - PathBrowser" and click Edit Element to examine the template.
Template Properties
| Poperty | Description |
|---|---|
| Name | The name of the element. This name will be displayed in the GUI Tree. |
| Position/Size | Position X, Position Y, Width, Height: Position and size of the element in pixels. Position X/Y defines the position of the upper left corner. |
| Attach | Defines how an element behaves when its parent element is resized. You can set the following parameters:
|
| Tooltip | Text that appears as a tooltip when the mouse hovers over the element. |
| Template | Determines the template to be referenced. |
Template Parameters
| Parameters | Description |
|---|---|
| Value | Allows you to connect the parameter that requires a path and file name. |
| Typename | Allows you to specify the name of the file type filter that will be shown in the OS file browser. |
| Extension | Allows you to specify a file type filter like .wav or .aiff, so that the OS file browser only shows files of that type. |
| Title | Allows you to specify the title of the OS file browser that will be shown in the caption. |
| Tag | Allows you to specify a unique identifier that is used to memorize the location at which you left the OS file browser the last time. All path browsers that use this tag will point to the same last location. |
Components inside the Template
Controls and Subtemplates
| Item | Description |
|---|---|
| switch | A Switch that opens the OS file browser. Its Value must be set to @Browser. |
| dropview | A Drop control for dropping files and folders. Its Value must be set to @Path. The regular expression for the Accept Filter uses the file extension that is specified by the Extension parameter of the template. |
| text | A Text control for displaying the path. Its Value must be set to @Path. |
| Back | An Image control that provides the background bitmap for the path. |
/ HALion Developer Resource / HALion Macro Page / Templates /
Preset Browser
On this page:
Description
PresetBrowser Module is a preconfigured template that can be used to manage subpresets, such as the presets of a MIDI script module or an audio effect, for example. The Scope parameter determines for which module or effect the preset management applies. The look of the controls can be adapted freely by changing the components inside the template. The template contains switches for Load, Save, and Delete which open the corresponding dialogs.
The PresetBrowser Module template uses the default file path for loading and saving subpresets. User subpresets will be saved to the Documents folder of your OS in the folder of the module or effect you specify with the Scope parameter. You can see the full file path by opening the Save dialog. If you want to deliver your own subpresets as part of your library, the location of your subpresets inside the VST Sound must match this path, otherwise the preset selector cannot access them.
To explore the functionality and connections:
- Load the Init Basic Controls.vstpreset from the Basic Controls library.
- Open the Macro Page Designer, go to the GUI Tree and navigate to "Pages > Path & Preset Page".
- Select "Subpresets Delay - Module" or "Subpresets FlexPhraser - Module" and click Edit Element to examine the template.
Template Properties
| Poperty | Description |
|---|---|
| Name | The name of the element. This name will be displayed in the GUI Tree. |
| Position/Size | Position X, Position Y, Width, Height: Position and size of the element in pixels. Position X/Y defines the position of the upper left corner. |
| Attach | Defines how an element behaves when its parent element is resized. You can set the following parameters:
|
| Tooltip | Text that appears as a tooltip when the mouse hovers over the element. |
| Template | Determines the template to be referenced. |
Template Parameters
| Parameters | Description |
|---|---|
| Scope | The Scope parameter determines for which module or effect the preset management applies. For example, by setting Scope to @bus:0/@0:Tube Compressor the preset management applies to the first effect named Tube Compressor in the first bus. |
Components inside the Template
Controls and Subtemplates
| Item | Description |
|---|---|
| Prev | A Switch control to load the previous preset. Its Value must be set to @SubPresetPrev. |
| Next | A Switch control to load the next preset. Its Value must be set to @SubPresetPrev. |
| Selector | A Switch control to open the preset selector. Its Value must be set to @SubPresetSelectPopup. |
| Name | A Text control to display the name of the preset. Its Value must be set to @SubPresetName. |
| Save | A Switch control to open the save dialog. Its Value must be set to @SubPresetSave. |
| Select | A Switch control to open the preset selector. Its Value must be set to @SubPresetSelectPopup. |
| Delete | A Switch control to open the delete dialog. Its Value must be set to @SubPresetDelete. |
| Back | An Image control that provides the background bitmap for the preset name. |
/ HALion Developer Resource / HALion Macro Page / Templates /
Preset Browser Custom
On this page:
Description
PresetBrowser Custom is a preconfigured template that can be used to manage subpresets, such as the presets of a MIDI script module or an audio effect, for example. The Scope parameter determines for which module, effect, or zone the preset management applies. The optional Section parameter determines for which part of a zone the preset management applies. The parameters Product, Load From, and Save To define the locations for loading and saving presets. The look of the controls can be adapted freely by changing the components inside the template. The template contains switches for Load, Save, and Delete which open the corresponding dialogs.
To explore the functionality and connections:
- Load the Init Basic Controls.vstpreset from the Basic Controls library.
- Open the Macro Page Designer, go to the GUI Tree and navigate to "Pages > Path & Preset Page".
- Select "Subpresets LFO - Custom" and click Edit Element to examine the template.
Template Properties
| Poperty | Description |
|---|---|
| Name | The name of the element. This name will be displayed in the GUI Tree. |
| Position/Size | Position X, Position Y, Width, Height: Position and size of the element in pixels. Position X/Y defines the position of the upper left corner. |
| Attach | Defines how an element behaves when its parent element is resized. You can set the following parameters:
|
| Tooltip | Text that appears as a tooltip when the mouse hovers over the element. |
| Template | Determines the template to be referenced. |
Template Parameters
The template provided with the Init Basic Controls.vstpreset uses LFO1 of the zone as example. The following description uses the Multi Delay effect as example. This way you have two examples you can try out for getting a better understanding of the PresetBrowser Custom template.
| Parameters | Description |
|---|---|
| Scope | The Scope parameter determines for which module or effect the preset management applies. For example, by setting Scope to @bus:0/@0:Multi Delay the preset management applies to the first effect named Multi Delay in the first bus. |
| Product | Product specifies the root folder for the location of the subpresets, both for loading and saving. Set this to HALion if you want to load presets from the standard file path for subpresets. Load From (see below) must be set to the path of the folder that contains the subpresets for the specified effect, e.g., Fx/Delay/Multi Delay for the subpresets of the Multi Delay effect. When saving User subpresets, these will be written to ./Documents/Steinberg/HALion/Sub Presets/ plus the path specified by Load From, e.g., ./Documents/Steinberg/HALion/Sub Presets/Fx/Delay/Multi Delay. They are displayed with a user icon in the preset selector.If you want to deliver your own subpresets as part of your library, you can set Product to the name of your instrument, e.g., You can also include both the HALion root folder and the root folder of your instrument by setting Product to |
| Section | Sections divide parameters into related units. For example, the parameters of zones are divided into sections like Filter, Amp, etc. The Section determines for which parameters the preset management applies. The section names can be found in the Parameter List. For example, set Section to Amp Env to load/save subpresets only for the amp envelope of a zone. If Section is not set, the preset management applies for the entire module, effect, or zone. Defining Section creates a subfolder in the subpreset path that corresponds to the name of the section. Sections can also be used within scripts. See onLoadSubPreset and onSaveSubPreset for details. |
| Load From | Load From specifies the subpath to the location of the subpresets inside the root folder. The root folder is set by Product (see above). You can specify this subfolder freely. However, if you want to see the factory subpresets, Load From must be set to the path that corresponds to the module or effect specified by Scope and Product must contain HALion.Any subpresets you want to distribute with your library must be added to the corresponding location inside the VST Sound. For example, if Load From is set to |
| Save To | Allows you to specify the subpath to the location where the subpresets will be saved by default.
|
| Extension | Allows you to specify a file type filter, so that preset browser only shows files of that type. By default, the preset selector uses .halpreset as file type, which is the common file type for HALion subpresets. If you want to load VST presets, e.g., to exchange layers using a script, set the file type to .vstpreset. |
❕ If you need further control over the content locations, you can specify the required subfolder together with the Product:
MyProductName/Fx/Delay/Multi Delay|HALion/Fx/Delay/Multi Delay. See configuration 4 in the following table.
Content Locations for Different Configurations
| # | Configuration | Content in Preset Selector | Default Save Path |
|---|---|---|---|
| 1 | Product = Load From = Save To = | Only subpresets from HALion, including any subpresets the user has saved on hard disk. | ./Documents/Steinberg/HALion/Sub Presets/Fx/Delay/Multi Delay/MySubfolder |
| 2 | Product = Load From = Save To = | Only subpresets from the specified library, including any subpresets the user has saved with the instrument on hard disk. | ./Documents/Steinberg/MyProductName/Sub Presets/Fx/Delay/Multi Delay/MySubfolder |
| 3 | Product = Load From = Save To = | All subpresets from HALion, the specified library and any subpresets the user has saved on hard disk. | ./Documents/Steinberg/MyProductName/Sub Presets/MyProductName/MySubfolder |
| 4 | Product = Load From = deactivate, leave empty Save To = | All subpresets from HALion, the specified library and any subpresets the user has saved on hard disk. | ./Documents/Steinberg/MyProductName/Sub Presets/Fx/Delay/Multi Delay/MySubfolder |
❕ The location of the subpresets inside the VST Sound must match the path defined by Product and Load From, otherwise the preset selector cannot acces these subpresets. If libraries deliver subpresets in multiple VST Sounds, all subpresets with the same path will be shown together in the preset selector.
Components inside the Template
Controls and Subtemplates
| Item | Description |
|---|---|
| Prev | A Switch control to load the previous preset. Its Value must be set to @SubPresetPrev. |
| Next | A Switch control to load the next preset. Its Value must be set to @SubPresetPrev. |
| Selector | A Switch control to open the preset selector. Its Value must be set to @SubPresetSelectPopup. |
| text | A Text control to display the name of the preset. Its Value must be set to @SubPresetName. |
| Save | A Switch control to open the save dialog. Its Value must be set to @SubPresetSave. |
| Select | A Switch control to open the preset selector. Its Value must be set to @SubPresetSelectPopup. |
| Delete | A Switch control to open the delete dialog. Its Value must be set to @SubPresetDelete. |
| Back | An Image control that provides the background bitmap for the preset name. |
/ HALion Developer Resource / HALion Macro Page / Templates /
Sample Display
On this page:
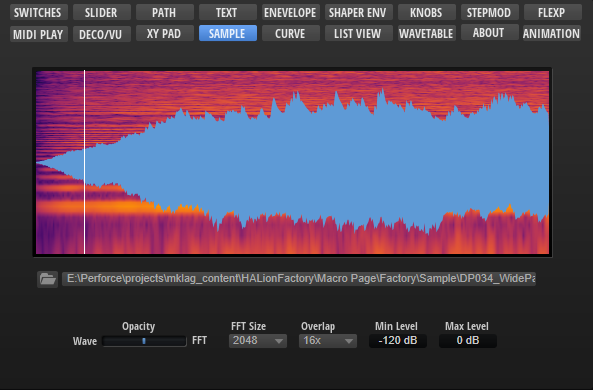
Description
The Sample Display template contains a Waveform control for displaying the sample data of the connected zone. A script that matches the display of the Waveform control with the corresponding SampleOsc parameters of the zone is attached to the template. For example, this script shows or hides the looped regions, depending on whether the loop is active or not, and it decides which loop regions to display, depending on the selected loop (A or B) for the release and sustain loops, respectively. The template itself only provides a Scope parameter to determine which zone to display. The template works for Sample and Grain Zones.
To explore the functionality and connections:
- Load the Init Basic Controls.vstpreset from the Basic Controls library.
- Open the Macro Page Designer, go to the GUI Tree and navigate to "Pages > Sample Page".
- Select "Sample Display" and click Edit Element to examine the template.
Template Properties
| Poperty | Description |
|---|---|
| Name | The name of the element. This name will be displayed in the GUI Tree. |
| Position/Size | Position X, Position Y, Width, Height: Position and size of the element in pixels. Position X/Y defines the position of the upper left corner. |
| Attach | Defines how an element behaves when its parent element is resized. You can set the following parameters:
|
| Tooltip | Text that appears as a tooltip when the mouse hovers over the element. |
| Template | Determines the template to be referenced. |
Template Parameters
| Parameters | Description |
|---|---|
| Scope | Allows you to determine the zone with the sample data to be displayed. The template works for Sample and Grain Zones. If a Sample Zone is connected, the Play Pos property on the Waveform control inside the template must be set to @id:a0064, for Grain Zones this must be set to @id:100064. |
| FFT | Sets the block size of the window that is used for the analysis. This allows you to adjust the trade-off between temporal resolution and frequency resolution. |
| Overlap | Sets the number of overlapping FFT windows. Increasing the overlap can be used to reduce analysis limitations of the FFT windows, which can lead to a loss of details, such as transients. |
| Min Level | Sets the minimum signal level for the FFT. The colors of the FFT are sclaed accordingly reveiling more or less details. |
| Max Level | Sets the maximum signal level for the FFT. The colors of the FFT are sclaed accordingly reveiling more or less details. |
| Opacity | Allows you to seamlessly blend between sample and FFT display. |
The template parameters FFT, Overlap, Min Level, Max Level, and Opacity are connected to their respective control templates through the corresponding parameters of a MIDI script. This configuration ensures that the FFT settings are saved with the presets. However, if you prefer not to include FFT settings in presets, you can connect the template parameters with the control templates by using UI variables. In this manner, the settings will only be preserved with the current project.
MIDI Script
-- define parameters for sample display
defineParameter("FFT", nil, 6, {"32", "64", "128", "256", "512", "1024", "2048", "4096", "8192", "16384", "32768", "65768"})
defineParameter("Overlap", nil, 4, { "No", "2x", "4", "8x", "16x", "32x", "64x", "128x"})
defineParameter("MinLevel", nil , -120, -240, 20, 1.0)
defineParameter("MaxLevel", nil, 0, -220, 0, 1.0)
defineParameter("Opacity", nil, 0, -100, 100, 1.0)
Components inside the Template
Controls and Subtemplates
| Item | Description |
|---|---|
| waveform | The Waveform control for displaying the sample data. If a Sample Zone is connected, the Play Pos property must be set to @id:a0064, for Grain Zones this must be set to @id:100064. The loop properties must be connected to the corresponding parameters of the included UI script: @SusLoopStart, @SusLoopEnd, @RelLoopStart, and @RelLoopEnd. All other properties must be connected to the corresponding parameters of the zone. |
| ZeroLine | An Image control that provides the bitmap for the zero line of the sample display. |
UI Script
kSamplesMax = 0x7fffffff;
function onLoopChanged()
local susMode, susStart, susEnd, relMode, relStart, relEnd;
if LoopSel == 0 then
susMode, susStart, susEnd = SustainLoopModeA, SustainLoopStartA, SustainLoopEndA;
relMode, relStart, relEnd = ReleaseLoopModeA, ReleaseLoopStartA, ReleaseLoopEndA;
else
susMode, susStart, susEnd = SustainLoopModeB, SustainLoopStartB, SustainLoopEndB;
relMode, relStart, relEnd = ReleaseLoopModeB, ReleaseLoopStartB, ReleaseLoopEndB;
end
if susMode == 0 then
susStart, susEnd = 0, 0;
end
if relMode == 0 then
relStart, relEnd = 0, 0;
end
SusLoopStart, SusLoopEnd = susStart, susEnd;
RelLoopStart, RelLoopEnd = relStart, relEnd;
end
defineParameter("LoopSel", "Loop Select", 0, 0, 1, onLoopChanged);
defineParameter("SustainLoopStartA", "Zone Sustain Loop Start A", 0, 0, kSamplesMax, onLoopChanged);
defineParameter("SustainLoopEndA", "Zone Sustain Loop End A", 0, 0, kSamplesMax, onLoopChanged);
defineParameter("SustainLoopModeA", "Zone Sustain Loop Mode A", 0, 0, 10, onLoopChanged);
defineParameter("SustainLoopStartB", "Zone Sustain Loop Start B", 0, 0, kSamplesMax, onLoopChanged);
defineParameter("SustainLoopEndB", "Zone Sustain Loop End B", 0, 0, kSamplesMax, onLoopChanged);
defineParameter("SustainLoopModeB", "Zone Sustain Loop Mode B", 0, 0, 10, onLoopChanged);
defineParameter("ReleaseLoopStartA", "Zone Release Loop Start A", 0, 0, kSamplesMax, onLoopChanged);
defineParameter("ReleaseLoopEndA", "Zone Release Loop End A", 0, 0, kSamplesMax, onLoopChanged);
defineParameter("ReleaseLoopModeA", "Zone Release Loop Mode A", 0, 0, 10, onLoopChanged);
defineParameter("ReleaseLoopStartB", "Zone Release Loop Start B", 0, 0, kSamplesMax, onLoopChanged);
defineParameter("ReleaseLoopEndB", "Zone Release Loop End B", 0, 0, kSamplesMax, onLoopChanged);
defineParameter("ReleaseLoopModeB", "Zone Release Loop Mode B", 0, 0, 10, onLoopChanged);
defineParameter("SusLoopStart", "Display Sustain Loop Start", 0, 0, kSamplesMax);
defineParameter("SusLoopEnd", "Display Sustain Loop End", 0, 0, kSamplesMax);
defineParameter("RelLoopStart", "Display Release Loop Start", 0, 0, kSamplesMax);
defineParameter("RelLoopEnd", "Display Release Loop End", 0, 0, kSamplesMax);
/ HALion Developer Resource / HALion Macro Page / Templates /
Step Modulator(Template)
On this page:

Description
The StepModulator template contains controls for adjusting the steps and their slopes, for shifting the steps left or right and for reversing the steps. To ensure the operation of these controls, the preconfigured properties must not be modified. The look and the size of the controls can be modified freely. All controls for functions that are not needed for your instrument can be omitted on your macro page.
To explore the functionality and connections:
- Load the Init Basic Controls.vstpreset from the Basic Controls library.
- Open the Macro Page Designer, go to the GUI Tree and navigate to "Pages > Step Modulator Page".
- Select "StepModulator" and click Edit Element to examine the template.
❕ The other control templates inside the Step Modulator Page group are directly connected to the Step Modulator of the zone and do not require detailed explanation.
Template Properties
| Poperty | Description |
|---|---|
| Name | The name of the element. This name will be displayed in the GUI Tree. |
| Position/Size | Position X, Position Y, Width, Height: Position and size of the element in pixels. Position X/Y defines the position of the upper left corner. |
| Attach | Defines how an element behaves when its parent element is resized. You can set the following parameters:
|
| Tooltip | Text that appears as a tooltip when the mouse hovers over the element. |
| Template | Determines the template to be referenced. |
Template Parameters
| Parameter | Description |
|---|---|
| Step1-32 | Connect these to the corresponding steps (Step1 to Step32) of the StepMod section of the zone. |
| Steps | Connect this to the Steps parameter of the StepMod section of the zone. |
| Slope | Connect this to the Slope parameter of the StepMod section of the zone. |
| Slope Amt | Connect this to the SlopeAmount parameter of the StepMod section of the zone. |
Components inside the Template
UI Variables
These variables are defined to allow the communication between the stepmodulator control and other controls in the template.
| Variable | Description | Type | Range |
|---|---|---|---|
| level12 | Level in fractions of -12 to 12 semitones (used when Snap is on). | float | -12.0 - 12.0 |
| level | Level of the selected node. | float | 0 - 100.0 |
| index | Index of the selected node. | integer | 1 - 32 |
| snap | Activates snap lines. | integer | 0, 1 |
| shiftleft | Shifts the pattern to the left. | integer | 0, 1 |
| shiftright | Shifts the pattern to the right. | integer | 0, 1 |
| reverse | Reverses the pattern. | integer | 0, 1 |
Controls and Subtemplates
To ensure the operation of the controls and subtemplates, the preconfigured properties must not be modified. The look and the size of the controls can be modified freely. All controls for functions that are not needed for your instrument can be omitted on your macro page.
| Item | Description |
|---|---|
| Snap | A Switch control to activate the Snap option. Its Value must be set to @snap. |
| Lev/Lev12 | This Stack contains two value box templates. The Stack switches between Level100 and Level12 using the UI variable @snap.
|
| Index | A value box template that is connected to the step modulator by the UI variable @index. It selects the step to be edited by the value boxes. |
| stepmodulator | For details see Step Modulator control. |
| image | An Image control that provides the bitmap for the frame of the step modulator. |
| ShiftLeft | A Switch control that is connected to the Shift Left parameter of the step modulator by the UI variable @shiftleft. |
| ShiftRight | A Switch control that is connected to the Shift Right parameter of the step modulator by the UI variable @shiftright. |
| Reverse | A Switch control that is connected to the Reverse parameter of the step modulator by the UI variable @reverse. |
/ HALion Developer Resource / HALion Macro Page / Templates /
Studio EQ Meter
On this page:
Description
The Studio EQ Meter template contains all necessary controls for displaying the output meters of the Studio EQ effect module. The controls are connected by corresponding UI variables. To ensure the operation of the controls, the preconfigured properties must not be modified. The look and the size of the controls can be modified freely, including their ressources. Controls that are not needed for your instrument can be omitted on your macro page.
To explore the functionality and connections:
- Load the Init Basic Controls.vstpreset from the Basic Controls library.
- Open the Macro Page Designer, go to the GUI Tree and navigate to "Pages > Deco and Meter Page".
- Select "Studio EQ Meter" and click Edit Element to examine the template.
Template Properties
| Poperty | Description |
|---|---|
| Name | The name of the element. This name will be displayed in the GUI Tree. |
| Position/Size | Position X, Position Y, Width, Height: Position and size of the element in pixels. Position X/Y defines the position of the upper left corner. |
| Attach | Defines how an element behaves when its parent element is resized. You can set the following parameters:
|
| Tooltip | Text that appears as a tooltip when the mouse hovers over the element. |
| Template | Determines the template to be referenced. |
Template Parameters
| Parameters | Description |
|---|---|
| Scope | Determines to which EQ the controls should connect. For example, @bus:0/@0:Studio EQ connects the controls to the first EQ named Studio EQ in the first bus. |
Components inside the Template
Controls and Subtemplates
| Item | Description |
|---|---|
| Out_Meter_Left | A Meter control that is connected by @VUOutL with the left output channel of the EQ. |
| Out_Meter_Right | A Meter control that is connected by @VUOutR with the right output channel of the EQ. |
| Peak_Output | A Group with three elements:
|
| Back | An Image control that provides the background bitmap for the meter. |
/ HALion Developer Resource / HALion Macro Page / Templates /
Wavetable Noise Selector
On this page:
Description
The Wavetable Noise Selector is a preconfigured template that can be used to select sample files for the noise of a Wavetable Zone. The template can be configured with the available Template Parameters. The Scope parameter determines for which Wavetable Zone the noise selector applies. The Product parameter defines the source folders of the sample files to be displayed in the noise selector. The look of the controls can be adapted freely by changing the components inside the template.
To explore the functionality and connections:
- Load the Init Basic Controls.vstpreset from the Basic Controls library.
- Open the Macro Page Designer, go to the GUI Tree and navigate to "Pages > Wavetable Page".
- Select "WT Noise Selector" and click Edit Element to examine the template.
Template Properties
| Poperty | Description |
|---|---|
| Name | The name of the element. This name will be displayed in the GUI Tree. |
| Position/Size | Position X, Position Y, Width, Height: Position and size of the element in pixels. Position X/Y defines the position of the upper left corner. |
| Attach | Defines how an element behaves when its parent element is resized. You can set the following parameters:
|
| Tooltip | Text that appears as a tooltip when the mouse hovers over the element. |
| Template | Determines the template to be referenced. |
Template Parameters
| Parameters | Description |
|---|---|
| Scope | Determines for which Wavetable Zone the noise selector applies. For example, by setting Scope to @0:Zone 1 the noise selector applies to the first zone with the name Zone 1 that is found in the Program Tree. |
| Product | The Product parameter defines the source folders of the sample files to be displayed in the noise selector. Set this to HALion if you want to load sample files from the default file paths, which includes factory and user sample files. If you wish to deliver your own sample files as part of your library, you can set Product to the name of your instrument, e.g., MyProductName. Thereby, only the sample files for MyProductName will be shown in the noise selector. If Product is set to MyProductName: Then, the sample files must be added to the folder ./MyProductName/Sub Presets/Wavetable/Noises inside the VST Sound, otherwise the noise selector will not see these sample files. You can also include both, the HALion root folder and the root folder of your instrument, by setting Product to MyProductName|HALion. The noise selector will then show the content of both locations. |
| Label | A Label control for displaying a label above the menu. |
❕ If you need further control over the content locations, you can specify the required subfolder together with the Product:
MyProductName/MyNoises|HALion/MyNoises. See configuration 4 in the following table.
Content Locations for Different Configurations
| # | Product/Content | Default File Paths |
|---|---|---|
| 1 | Product = Only sample files from HALion, including any sample files the user has saved on hard disk. | Hard Disk: ./Documents/Steinberg/HALion/Sub Presets/Wavetable/Noises |
| 2 | Product = Only sample files from the specified library, including any sample files the user has saved on hard disk. | VST Sound: ./MyProductName/Sub Presets/Wavetable/Noises Hard Disk: ./Documents/Steinberg/MyProductName/Sub Presets/Wavetable/Noises |
| 3 | Product = All sample files from HALion, the specified library and any sample files the user has saved on hard disk. | VST Sound: ./MyProductName/Sub Presets/Wavetable/Noises Hard Disk: ./Documents/Steinberg/HALion/Sub Presets/Wavetable/Noises ./Documents/Steinberg/MyProductName/Sub Presets/Wavetable/Noises |
| 4 | Product = All sample files from HALion, the specified library and any sample files the user has saved on hard disk. | VST Sound: ./MyProductName/Sub Presets/Wavetable/Noises/MyNoises Hard Disk: ./Documents/Steinberg/HALion/Sub Presets/Wavetable/Noises/MyNoises ./Documents/Steinberg/MyProductName/Sub Presets/Wavetable/Noises/MyNoises |
❕ The location of the sample files inside the VST Sound must match the path defined by Product, otherwise the noise selector will not see these sample files. If libraries deliver sample files in multiple VST Sounds, all sample files with the same path will be shown together in the noise selector.
Components inside the Template
Controls and Subtemplates
| Item | Description |
|---|---|
| group WT | A Group that contains all necessary elements for the noise selector. group noise: Another Group that contains:
|
| label | A Label control for displaying a label above the menu. Its Text property is exported and the default is set to Wavetable Noises. |
/ HALion Developer Resource / HALion Macro Page / Templates /
Wavetable Selector
On this page:
Description
The Wavetable Selector is a preconfigured template that can be used to select the wavetables for Osc 1 and Osc 2 of the Wavetable Zone. The template can be configured with the available Template Parameters. The Scope parameter determines for which Wavetable Zone the wavetable selector applies. The Product and Load From parameters define the source folders of the wavetables to be displayed in the selector. The Osc parameter determines the oscillator of the Wavetable Zone for which the wavetable selector applies. The look of the controls can be adapted freely by changing the components inside the template.
To explore the functionality and connections:
- Load the Init Basic Controls.vstpreset from the Basic Controls library.
- Open the Macro Page Designer, go to the GUI Tree and navigate to "Pages > Wavetable Page".
- Select "WT Selector Osc1" or "WT Selector Osc2" and click Edit Element to examine the template.
Template Properties
| Poperty | Description |
|---|---|
| Name | The name of the element. This name will be displayed in the GUI Tree. |
| Position/Size | Position X, Position Y, Width, Height: Position and size of the element in pixels. Position X/Y defines the position of the upper left corner. |
| Attach | Defines how an element behaves when its parent element is resized. You can set the following parameters:
|
| Tooltip | Text that appears as a tooltip when the mouse hovers over the element. |
| Template | Determines the template to be referenced. |
Template Parameters
| Parameters | Description |
|---|---|
| Scope | Determines for which Wavetable Zone the noise selector applies. For example, by setting Scope to @0:Zone 1 the noise selector applies to the first zone with the name Zone 1 that is found in the Program Tree. |
| Product | The Product parameter defines the root folder of the wavetables to be displayed in the noise selector. Set this to HALion if you want to load wavetables from the default file paths, which includes factory and user wavetables. If you wish to deliver your own wavetables as part of your library, you can set Product to the name of your instrument, e.g., MyProductName. Thereby, only the wavetables for MyProductName will be shown in the noise selector. If Product is set to MyProductName: Then, the sample files must be added to the folder ./MyProductName/Sub Presets/Wavetable/Wavetables inside the VST Sound, otherwise the noise selector cannot access these sample files. You can also include both, the HALion root folder and the root folder of your instrument, by setting Product to MyProductName|HALion. The noise selector will then show the content of both locations. |
| Load From | Load From specifies the subpath to the location of the wavetables inside the root folder. The root folder is set by Product (see above). You can specify this subfolder freely. However, if you want to see the factory subpresets, Load From must be left empty and Product must contain HALion.Any subpresets you want to distribute with your library must be added to the corresponding location inside the VST Sound. For example, if Load From is set to |
| Osc | Determines the oscillator of the Wavetable Zone for which the wavetable selector applies. This must be set either to 1 or 2, which refers to Osc 1 or Osc 2 respectively. |
| Label | A Label control for displaying a label above the menu. |
❕ If you need further control over the content locations, you can specify the required subfolder together with the Product:
MyProductName/MyWavetables|HALion/MyWavetables. Load From must not be set in this case. See configuration 4 in the following table.
Content Locations for Different Configurations
| # | Configuration/Content | Default File Paths |
|---|---|---|
| 1 | Product = Load From = Only wavetables from HALion, including any wavetables the user has saved on hard disk. | Hard Disk: ./Documents/Steinberg/HALion/Sub Presets/Wavetable/Wavetables/MyWavetables |
| 2 | Product = Load From = Only wavetables from the specified library, including any wavetables the user has saved on hard disk. | VST Sound: ./MyProductName/Sub Presets/Wavetable/Wavetables/MyWavetables Hard Disk: ./Documents/Steinberg/MyProductName/Sub Presets/Wavetable/Wavetables/MyWavetables |
| 3 | Product = Load From = All wavetables from HALion, the specified library and any wavetables the user has saved on hard disk. | VST Sound: ./MyProductName/Sub Presets/Wavetable/Wavetables/MyWavetables Hard Disk: ./Documents/Steinberg/HALion/Sub Presets/Wavetable/Wavetables/MyWavetables ./Documents/Steinberg/MyProductName/Sub Presets/Wavetable/Wavetables/MyWavetables |
| 4 | Product = Load From = deactivate, leave empty All wavetables from HALion, the specified library and any wavetables the user has saved on hard disk. | VST Sound: ./MyProductName/Sub Presets/Wavetable/Wavetables/MyWavetables Hard Disk: ./Documents/Steinberg/HALion/Sub Presets/Wavetable/Wavetables/MyWavetables ./Documents/Steinberg/MyProductName/Sub Presets/Wavetable/Wavetables/MyWavetables |
❕ The location of the wavetables inside the VST Sound must match the path defined by Product and Load From, otherwise the wavetable selector cannot access these wavetables. If libraries deliver wavetables in multiple VST Sounds, all wavetables with the same path will be shown together in the wavetable selector.
Components inside the Template
Controls and Subtemplates
| Item | Description |
|---|---|
| group | A Group that contains all necessary elements for the noise selector. |
| Back | An Image control that provides the background bitmap for the name of the sample file. |
| label | A Label control for displaying a label above the menu. Its Text property is exported and the default is set to Wavetable. |
HALion Tutorials & Guidelines
Getting Started
This section provides general information about HALion Libraries and how to create instruments.
Tutorials
The tutorials explain common techniques and best practices for building your instruments.
How-tos
In this section your find short examples focusing on a specific task.
Guidelines
In this section you find Steinberg's guidelines for creating libraries and many details on how to build your own instruments that work in HALion Sonic.
/ HALion Developer Resource / HALion Tutorials & Guidelines /
Getting Started
This section provides general information about HALion Libraries and how to create instruments.
/ HALion Developer Resource / HALion Tutorials & Guidelines / Getting Started /
HALion Libraries
On this page:
HALion allows you to create your own libraries and distribute them as VST Sound files. VST Sound is a Steinberg file format that can be compared to ZIP or ISO files, for example. It contains a file structure with folders and files. The Library Manager allows you to manage the VST Sound files of a library on your computer and to register them to the MediaBay. Once a VST Sound file is registered in the MediaBay, it is mounted, and all compatible Steinberg products can access the folders and files within it. For more details regarding the Library Manager, see steinberg.help / VST Manuals / Library Manager.
HALion libraries incorporate many source files, such as presets, samples, macro pages, MIDI modules, scripts, and sub presets. The Library Creator allows you to write VST Sound files that contain all the necessary source files of a library. A library can be created as a single VST Sound file or as a combination of VST Sound files. For example, you might want to put the presets into one VST Sound file and the samples into another. For more details on using the Library Creator, see steinberg.help / HALion 7 / Library Creator.
Defining Your Target Users
The HALion family consists of the plug-ins HALion and HALion Sonic. HALion allows you to create libraries for both plug-ins.
Before you create a library, you must decide who your target users or customers are and in which plug-in you want the library to work. Please note the following:
- HALion Sonic has restrictions regarding the program structure. The number of instrument layers is limited to four and certain MIDI modules are always needed. HALion does not have these restrictions.
- HALion Sonic libraries are compatible with HALion. HALion libraries are only compatible with HALion.
You could build a library that only HALion users can use, which gives you the freedom to build a program with a different structure, for example. However, this limits the number of potential users.
Most often, you will probably want to build your library so that it works with HALion Sonic, which means that it can be used by everybody. HALion Sonic is freely available for download on the Steinberg website.
| Plug-in | Description | Compatibility |
|---|---|---|
| HALion | HALion libraries have no restrictions. | HALion |
| HALion Sonic | HALion Sonic libraries have restrictions regarding the program structure. The number of instrument layers is limited to four and certain MIDI modules are always needed. See HALion Sonic Program Structure for details. | HALion, HALion Sonic |
❕ In previous versions of HALion Sonic (< 3.2) the maximum size of the macro page was limited to 595 x 390 pixels. The versions 3.2 and higher do not have this restiction. The macro page can be of any reasonable size.
Library Creation Process
Library Creation Workflow
To build a library that works in HALion Sonic, proceed as follows:
- Build the instrument in HALion. In this step, you add sublayers and samples, adjust the mapping, write scripts, build the macro page, etc. When creating the macro page, you must select Create HALion Sonic Macro Page. This creates a canvas with the default size for the HALion Sonic macro page. While working in HALion, the instrument is saved as Program preset.
- Export the program as HALion Sonic Layer preset. This step makes it possible to load the instrument you created in HALion as a Layer in HALion Sonic.
- Load the exported Layer in HALion Sonic. In this step, you should test your instrument thoroughly. If you find issues, you need to go back to the original HALion Program preset from step 1 and correct whatever you found. Then, you must export the instrument again as HALion Sonic Layer preset, load it in HALion Sonic, test it, etc. This is an iterative process. Once your instrument is set up correctly and works the way you want it, you can move on to the next step.
- Load the Layer in HALion Sonic and do the sound design. In this step, you tweak parameters on the macro page, add effects on the Inserts tab, assign quick controls, etc. You can even load more than one layer of your instrument and adjust the parameters on the Program tab. The macro pages of the Layers can be accessed in HALion Sonic via the L1 to L4 tabs.
- Save the sound as HALion Sonic Program. In this step, you should set the MediaBay tags.
- In the Library Creator, build your VST Sound file(s) as HALion Sonic library. The HALion Sonic presets and all the necessary source files of the library are written into the VST Sound files.
Regarding the steps above, designing a library can be divided into three phases:
| Phase | Description |
|---|---|
| I. | The main part of the work usually happens in step 1. |
| II. | Steps 2 through 5 are mainly testing and sound design. |
| III. | Step 6 is the final step, just before the release. |
Library Creation Flowchart
This flowchart shows the complete library creation process from start to end.
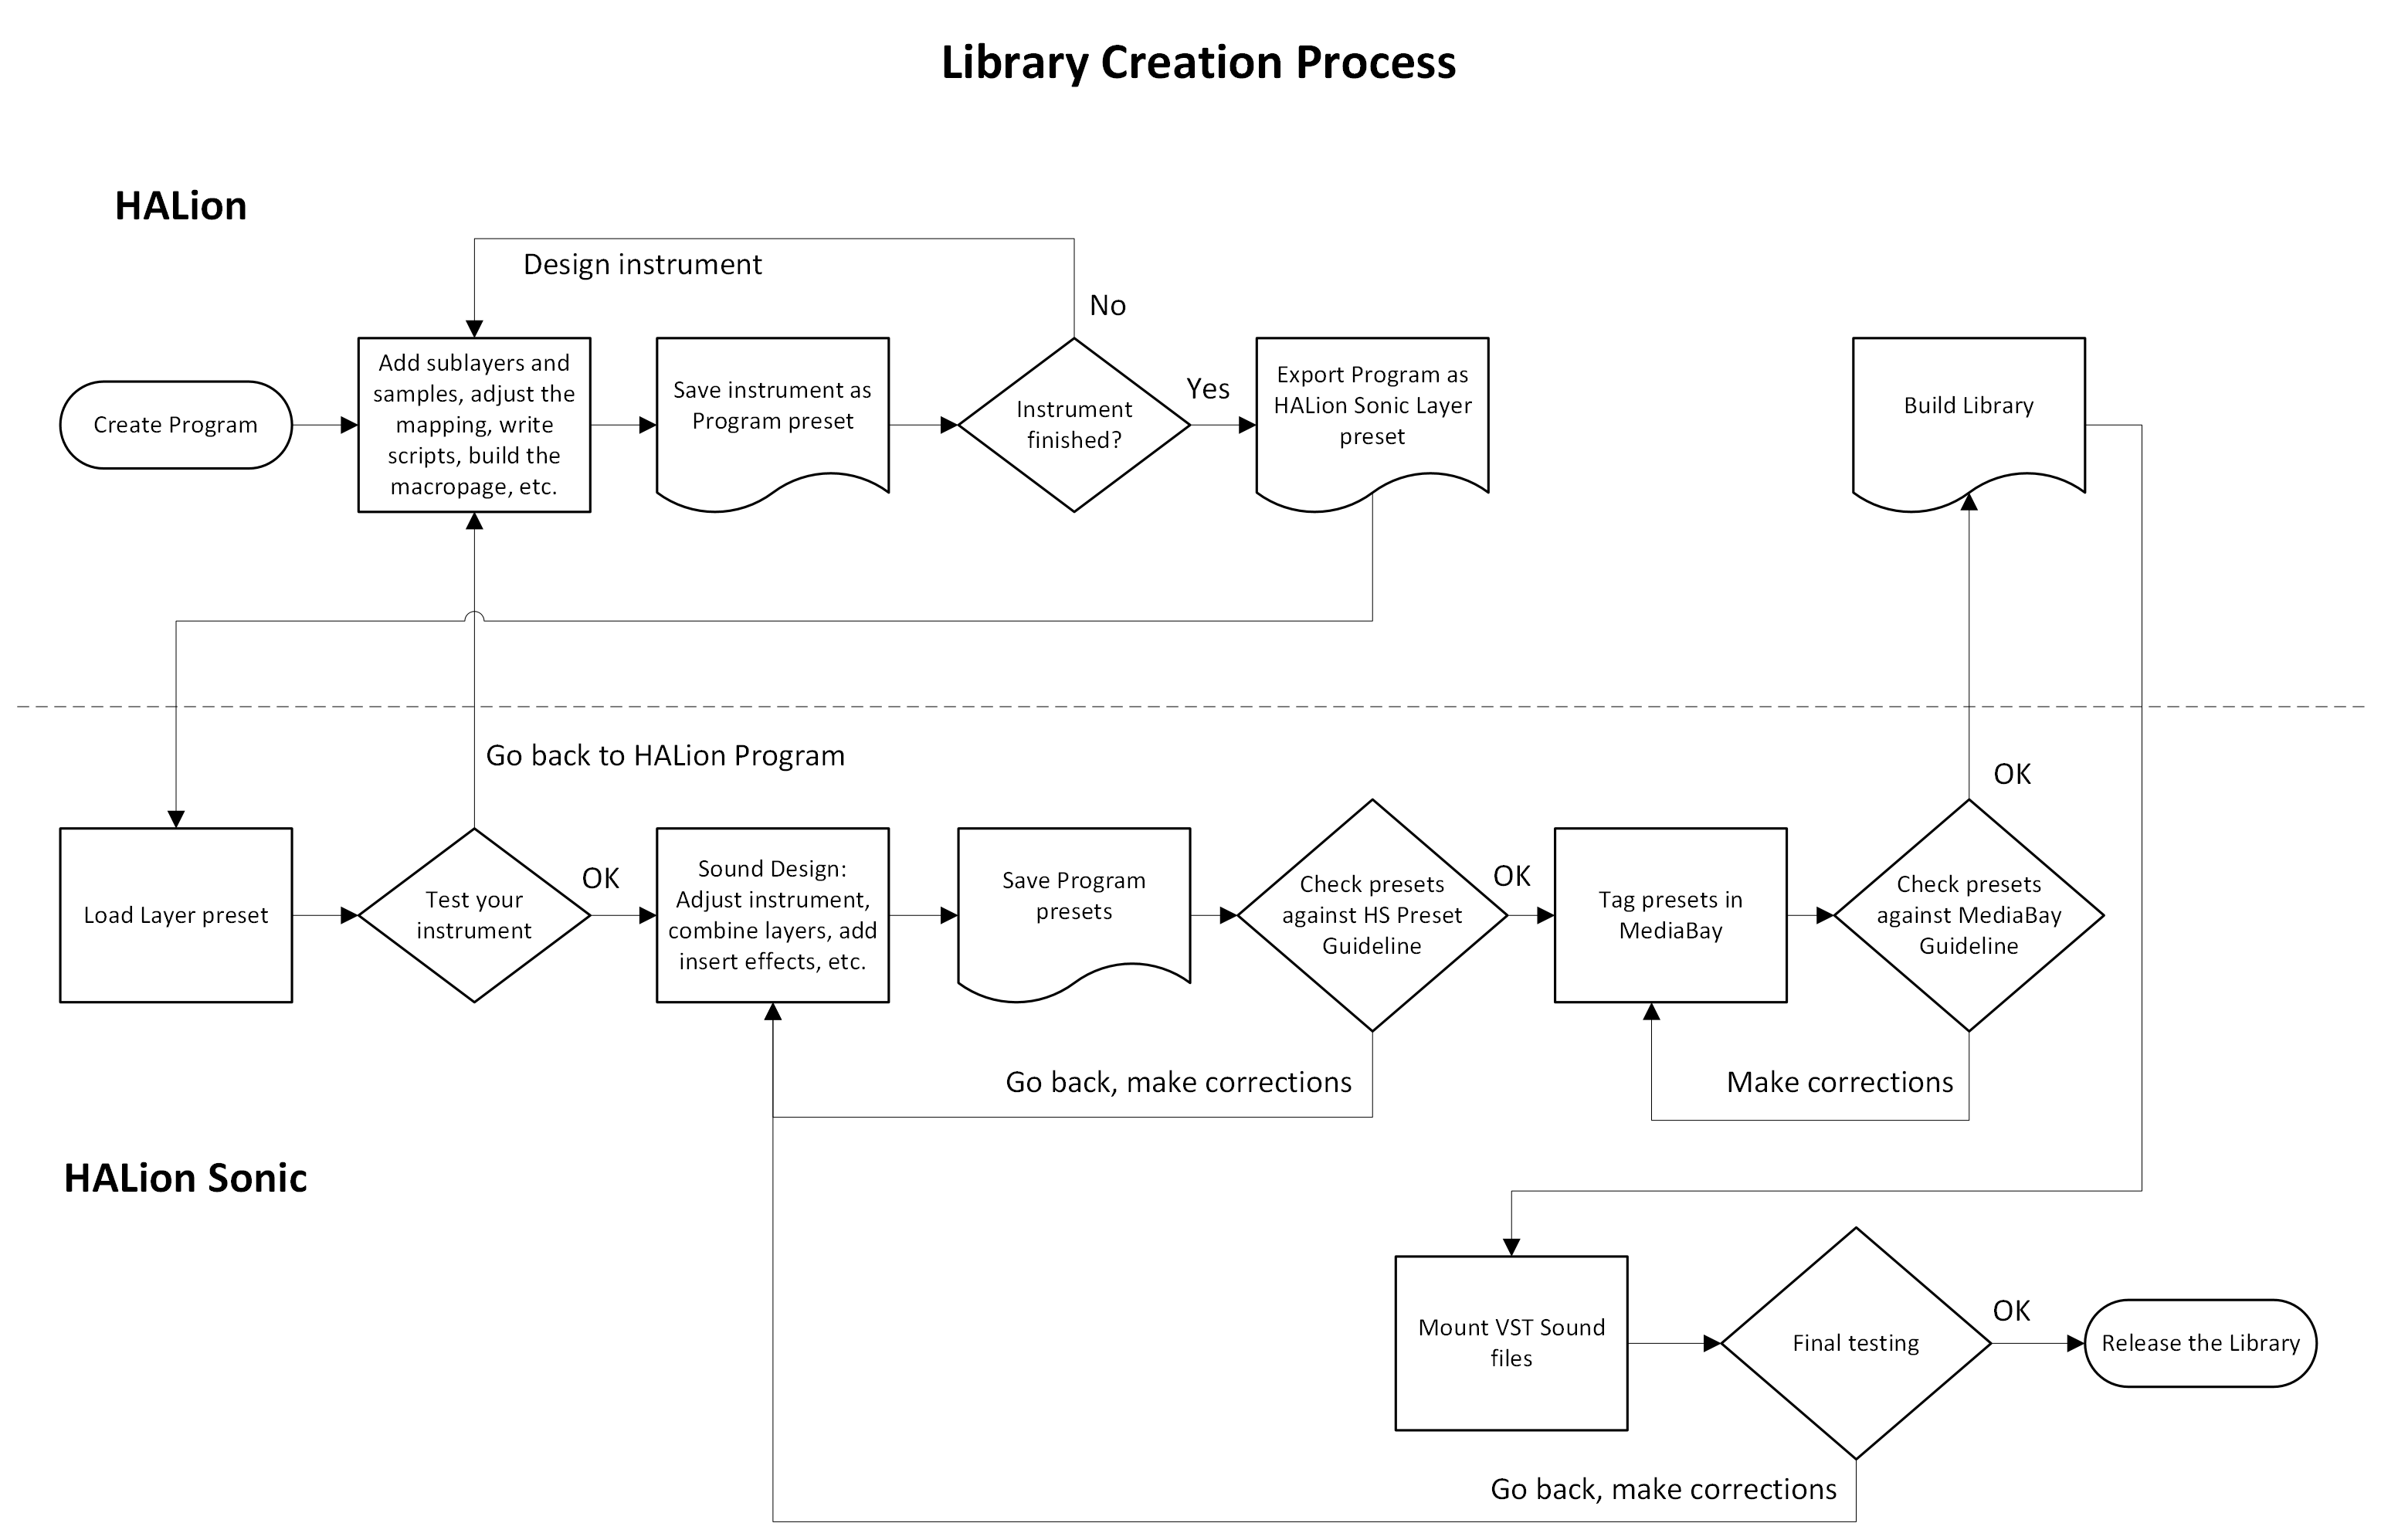
/ HALion Developer Resource / HALion Tutorials & Guidelines / Getting Started /
Creating Instruments
On this page:
- HALion Program Structure
- HALion Sonic Requirements
- HALion Sonic Program Structure
- Final Sound Design
- Correcting Settings
This page provides you with more details on how to build instruments in HALion that work in HALion Sonic, why you must export them as HALion Sonic layer preset, and why you should do the final sound design in HALion Sonic.
HALion Sonic has one compact, easy-to-use interface, as opposed to HALion, which has a much more advanced interface that is fully customizable. HALion Sonic's streamlined interface hides any parameters of HALion that are not needed for a VST workstation. Apart from the visible differences on the interface, there are also differences in the program structure between HALion Sonic and HALion. The program structure of the instrument that you build in HALion must fulfill several requirements in order to work in HALion Sonic.
HALion Program Structure
Libraries usually contain instruments that are designed for a special purpose.
A typical instrument consists of the following:
- Several zones organized in layers.
- A macro page that gives access to the most important parameters.
- A Lua Script MIDI module and/or other MIDI modules.
- A bus and insert effects.
The program structure of your instrument in the Program Tree of HALion might look as simple as this:

HALion Sonic Requirements
The program structure of your instrument must fulfill the following requirements to work in HALion Sonic:
- The macro page must be attached to the top element in the Program Tree. In the example above, this would be the element Instrument. HALion Sonic cannot access the macro page if it is not attached to the top element.
❕ In previous versions of HALion Sonic (< 3.2) the maximum size of the macro page was limited to 595 x 390 pixels. The versions 3.2 and higher do not have this restiction. The macro page can be of any reasonable size.
- The voice management of the top element in the Program Tree must be activated. In the example above, the top element would be the element "Instrument". The Polyphony setting for each layer on HALion Sonic's Program tab will not work if the voice management is not activated.
❕ When activating the voice management, the Polyphony and Key Polyphony should be set to values that match your instrument. The following values have proven to be useful for many instruments: Polyphony = 16 and Key Polyphony = 4.
- The last element in the Program Tree must be one bus with a maximum of four insert effects. In the example above, this would be the element Instrument-Bus. There must be only one bus at the top level. Several busses at the top level are not allowed. The maximum number of insert effects per Layer in HALion Sonic is limited to four. The insert effects are optional. In the example above, the Instrument-Bus does not have any insert effects. In fact, it is good practice to leave the bus empty in HALion and assign the insert effects later on the Inserts tab in HALion Sonic.
❕ HALion Sonic does not accept layer presets that do not match the requirements. When exporting a program as HALion Sonic layer preset, please activate Verify HALion Sonic Layer Structure. By activating this option, HALion will warn you if the program structure does not meet the requirements.
The following elements can be added freely to the program structure:
- You can add as many sublayers and zones as you want.
- You can place MIDI modules below the top element or inside of sublayers as needed.
- You can add additional busses with insert effects inside of sublayers. These effects become an integral part of your instrument. To adjust the effect, you must add controls on the macro page and connect them to the effect parameters.
The following picture shows the instrument from the previous example, with an additional bus and insert effect.
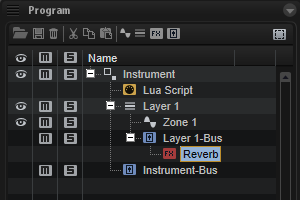
If you follow these guidelines, your instrument will be compatible with HALion Sonic:
- Except for the topmost and the last element in the Program Tree, the program structure can be set up as needed for your instrument.
- Inside the "Instrument" element, you are free to add any element you want.
- You must set up a macro page that provides access to the important parameters. The macro page must be attached to the topmost element.
- The "Instrument-Bus" is already part of the HALion Sonic program structure. You can assign up to four insert effects to it.
HALion Sonic Program Structure
When you design your instrument in HALion, it is created as a program and saved as VST3 program preset. The final sound design is usually done in HALion Sonic. However, before you can load your instrument in HALion Sonic, you must export it as HALion Sonic layer preset. The export in HALion Sonic format allows you to load and test your instrument in HALion Sonic.
To export the program as HALion Sonic layer preset:
- In HALion in the Program Tree, right-click the top-most element and select Import/Export > Export Program as VST3 Preset...
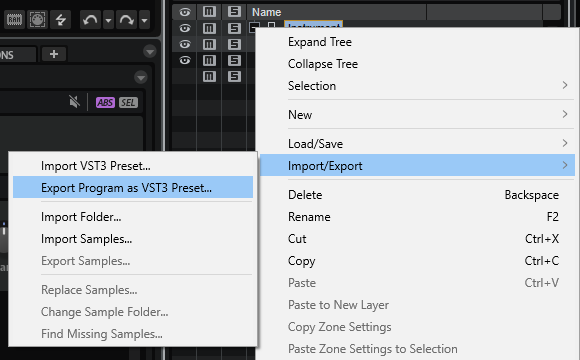
- Choose a location and a file name.
- Activate the options Export as HALion Sonic Layer and Verify HALion Sonic Layer Structure.
- Finally, click OK.
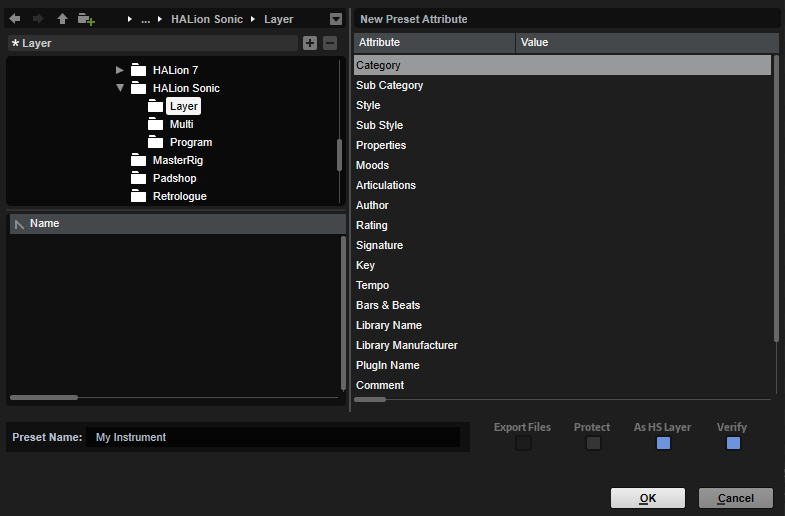
The layout of HALion Sonic's interface and features requires specific MIDI modules and busses. When you load a layer preset in HALion Sonic, any missing MIDI modules, busses, etc. that are required for HALion Sonic to operate are automatically added. For example, if the Instrument-Bus was missing in the example above, HALion Sonic would add this bus when loading the layer preset, because it is needed for the Inserts tab in HALion Sonic.
The following image shows the program structure of the example instrument after these steps:
- In HALion, export the instrument with Export Program as VST3 Preset...
- Load the exported Layer in HALion Sonic and save it as program preset.
- Load this program preset in HALion.
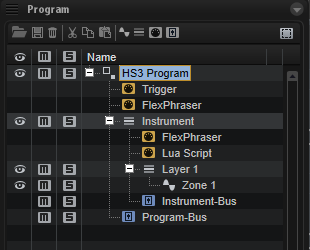
The Trigger Pads, two FlexPhrasers and a Program-Bus were added, because HALion Sonic requires them.
❕ If you load a program preset from HALion Sonic in HALion, do not export the program preset as HALion Sonic layer preset again. If you do so and load this preset in HALion Sonic, the MIDI modules will be added again and the preset will not be compatible anymore. You must use HALion Sonic Edit Mode instead. See Using HS Edit Mode for details.
Once your instrument is set up, the final sound design can start.
Final Sound Design
The exported HALion Sonic layer preset usually serves as your init preset for the final sound design in HALion Sonic.
Finalizing sound design in HALion Sonic has the following advantages:
- The required elements are added automatically.
- You have access to the Program tab, which allows you to combine up to four instruments, for example.
- You have access to the Inserts tab, which allows you to assign insert effects to the layers and the program.
- Additional parameters from HALion are hidden and cannot be adjusted by mistake.
After the sound design, you can save your final sound as HALion Sonic program preset. In this step, you should tag your presets in the MediaBay. See the MediaBay Guideline for more details.
It is recommended to save your sounds as program presets rather than HALion Sonic layer presets, because Steinberg users mainly use the Program filter when browsing for presets in the MediaBay.
Finally, in HALion's Library Creator, add your presets to a VST Sound and choose to build your HALion Sonic library.
Correcting Settings
To correct settings in your instrument, choose one of the two following ways:
Using Export Program as VST3 Preset...
If you need to correct settings in the phase of testing your instrument in HALion Sonic and if you have not performed any serious sound design or saved further presets yet:
- Go back to the original HALion program preset of your instrument.
- Correct the settings as required and your modifications to the original HALion program preset.
- Export the instrument again as HALion Sonic layer preset.
Using HALion Sonic Edit Mode
If you need to correct settings in the phase of sound design and you already created HALion Sonic program presets:
- Load the HALion Sonic program preset of your instrument. HALion Sonic Edit Mode will be activated. This ensures that you cannot accidentally change the program structure that is required by HALion Sonic.
❕ Do not deactivate HALion Sonic Edit Mode, it cannot be activated manually.
- Correct the settings as required and save the program preset. If HALion Sonic Edit Mode is active, the preset will be saved in the HALion Sonic preset format.
HALion Sonic Edit Mode can be switched off permanently with the corresponding setting on the Options page. When loading HALion Sonic program presets, HALion Sonic Edit Mode will only be activated if the setting on the Options page is activated. See HALion Sonic Edit Mode for details.
/ HALion Developer Resource / HALion Tutorials & Guidelines / Getting Started /
Exploring the Turorials and How-tos
On this page:
Many of the tutorials and how-tos provide downloadable VST presets, either as starting point or as fully working example for the introduced topic.
❕ The minimum version for using the example VST presets is HALion 7.1.
Using the Example VST Presets
It is recommended to import the VST preset to the user presets folder.
- Right-click the link to the VST preset and download it.
- Open the download location and drag the preset to HALion's MediaBay. This will import the VST preset to the user presets folder.
- Go to the MediaBay, use the Library Selector to select HALion Tutorials or HALion How-tos.
- In the MediaBay, set the Preset Type pop-up menu to Programs
 and activate the User Content button and deactivate the Factory Content button so that only the user content is shown.
  .
. - Drag the preset from the result list to the Slot Rack.
If you do not want to import the VST preset to the user presets folder, simply drag it from the download location to the Slot Rack.
Using the Example Macro Pages
The example VST presets come with a basic macro page.
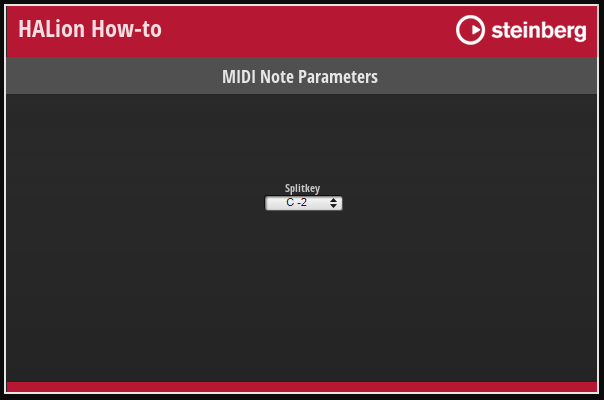
The functionality is as follows:
- The title in the top left tells you if the VST preset belongs to a tutorial or a how-to.
- A click on the Steinberg logo brings you to the Steinberg website.
- The title in the middle tells you the topic the VST preset belongs to. Click this title to open the accompanying page.
- The lower area often contains controls to try out the described functionality.
Accessing the Code Examples
We recommend to read the accompanying page while examining the example VST Preset. This page usually lists MIDI Scripts or UI Scripts, or both. You find the scripts in the VST preset as follows:
MIDI Scripts can be found in the Lua Script MIDI module.
- Go to the Program Tree, select the Lua Script MIDI module and open the internal script editor.
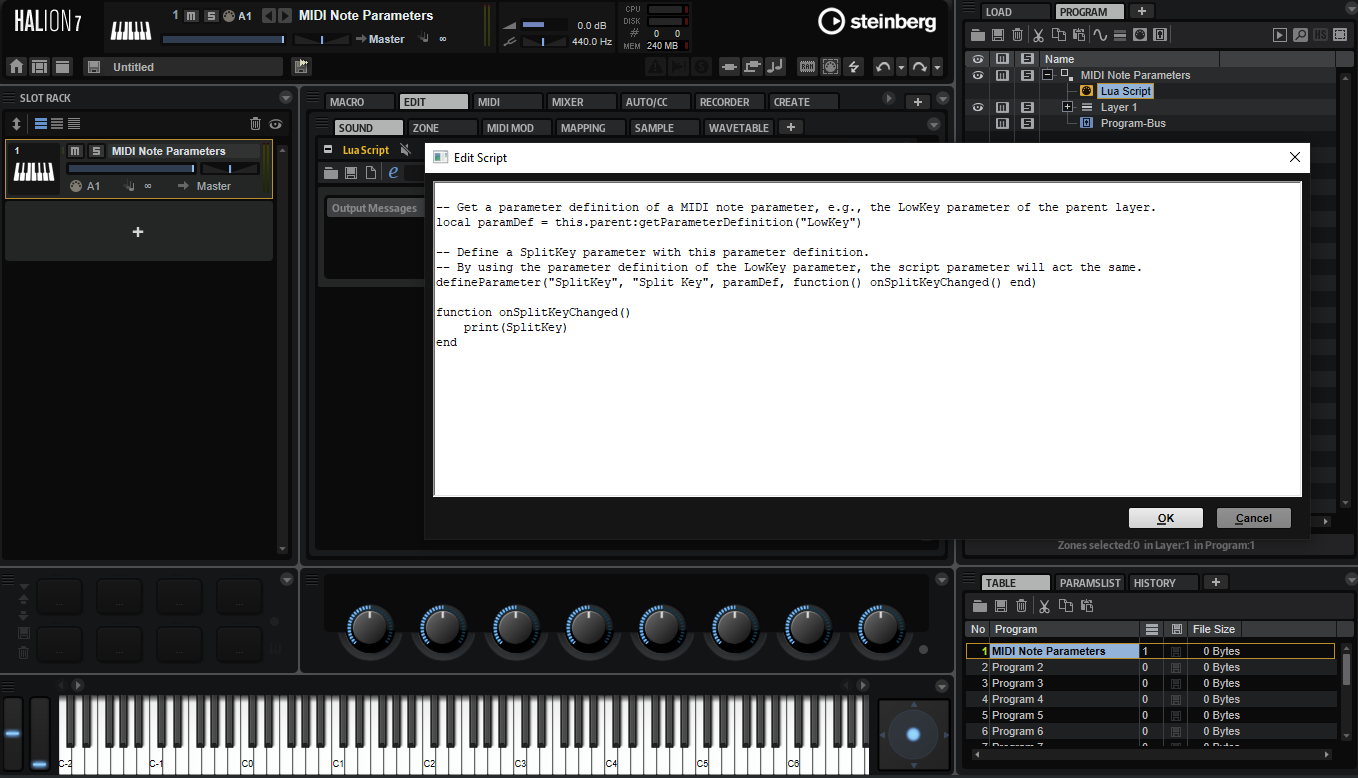
UI Scripts can be found in the Macro Page Designer.
- Go to the Macro Page Designer and open the internal script editor of the macro page.
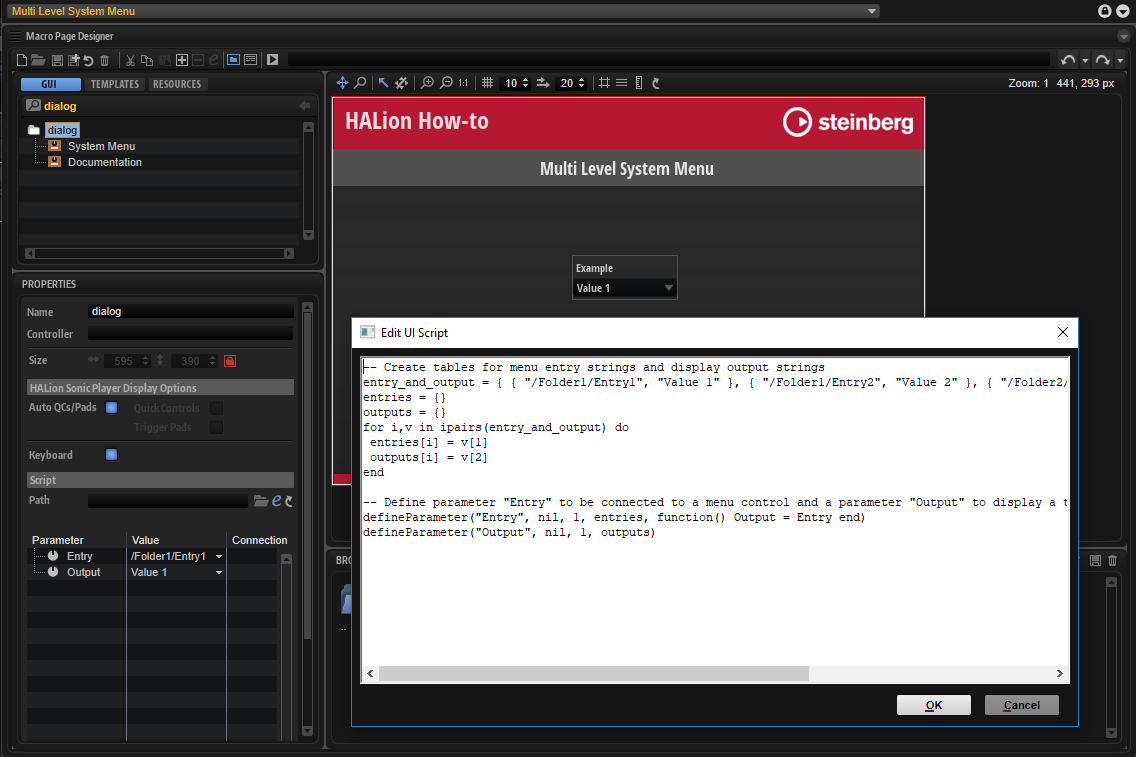
/ HALion Developer Resource / HALion Tutorials & Guidelines /
Tutorials
The tutorials explain common techniques and best practices for building your instruments. By following the instructions step by step you will learn important workflows and skills that make your sound designer life easier.
❕ The minimum version for working through the tutorials is HALion 7.1.
- Creating a Modulation Matrix
- Creating a Template List
- Creating an FX Chain
- Creating an FX Rack
- Using Attribute Rules
- Using Relative Paths
- Using Velocity Crossfades
- Working with Exported Properties
/ HALion Developer Resource / HALion Tutorials & Guidelines / Tutorials /
Creating a Modulation Matrix
On this page:
- Example VST Preset
- Prerequisites
- Workflow Overview
- Adding More Destinations
- Adding an Additional Source
- Increasing the Number of Rows in the Modulation Matrix
- Adding User Envelope Destinations
- Final Example VST Preset
- How the Elements Interact
- Modulation Matrix Examples for Different Zone Types
- Transferring the Modulation Matrix to Your Instrument
- Modulation Matrix with Custom Look
HALion offers a wealth of modulation sources and destinations. When creating an instrument, it is recommended to limit the selection of modulation sources and destinations to those that are required by the instrument. This tutorial describes how to create and customize a modulation matrix using a Template List. The modulation matrix in this tutorial has a configurable number of rows and uses a subset of the available modulation sources and destinations. The number of rows and the selection of modulation sources and destinations are defined in UI and MIDI scripts, respectively. The menus for modulation sources and destinations use definable Custom Multi Level Menus. Only the defined modulation sources and destinations appear on the menus.
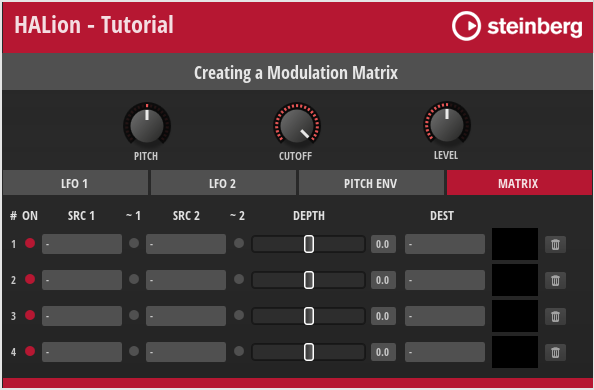
The macro page provides controls for the destinations Pitch, Cutoff, and Level. Page tabs provide access to the controls of the sources LFO 1, LFO 2, and Pitch Env and to the modulation matrix. You can assign sources and destinations using the menus in the modulation matrix or by dragging the page tab of a source to a destination.
When using drag and drop, the next available row in the modulation matrix will be used for the modulation assignment. If no free rows are available, sources cannot be assigned via drag and drop. If this is the case, an icon is shown in the header of the source tab.

Example VST Preset
The modulation matrix in this example uses both UI and MIDI script functionality. The corresponding scripts are provided, but not explained in detail line by line. Instead, the connections and interactions between the UI elements and the UI and MIDI scripts are explained so that you can adjust the number of rows and customize the look of the modulation matrix without the risk of introducing errors. See How the Elements Interact.
The following section describes how to access Templates and edit UI and MIDI scripts.
To explore the templates in this example:
- Open the Macro Page Designer, go to the Templates Tree and select the template that you want to explore.
- Click Edit Element
 to examine the template.
To edit the UI script:
- Open the Macro Page Designer and select the topmost element in the GUI Tree.
- Go to the Properties section and click Edit Script to open the internal script editor.
To edit the MIDI script:
- In the Program Tree, select the Mod Matrix MIDI Module.
- Go to the Sound editor and click Edit Script to open the internal script editor.
The instructions that follow use the internal script editor.
Prerequisites
- You have an instrument with a macro page.
- You have loaded both the preset Creating a Modulation Matrix 01.vstpreset and your instrument in HALion.
Workflow Overview
- Add Resonance and Pan as additional destinations and the user envelope as an additional source.
- Implement the drag and drop functionality to assign the additional destinations and source.
- Add the additional destinations and source to the modulation matrix menus and the associated UI and MIDI scripts.
- Increase the number of rows in the modulation matrix.
- Add the parameters of the user envelope as destinations to the modulation matrix menus and the associated MIDI script.
- Copy the templates and resources from the Example VST Preset to your macro page.
- Copy the code of the UI and MIDI scripts from the Example VST Preset into the corresponding scripts of your instrument.
- Change the look of the modulation matrix to match the look of your instrument.
Adding More Destinations
At the top of the macro page are the Pitch, Cutoff, and Level controls, which also serve as destinations (drop targets) for modulation sources. Let's add Resonance and Pan as additional destinations (drop targets).
Adding the Resonance Control and Drop Target
- In the Macro Page Designer, go to the GUI Tree and navigate to the Upper branch.
- Move the Cutoff group to Position X = 75.
Properties
| Property | Value |
|---|---|
| Position X | 75 |
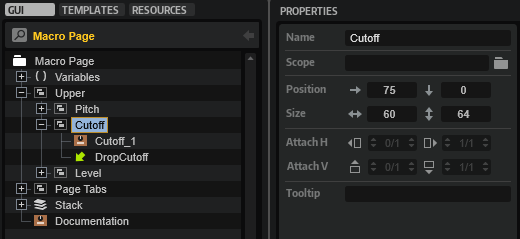
- Duplicate the Cutoff group, then rename the duplicate to "Resonance" and set its Position X to 150.
Properties
| Property | Value |
|---|---|
| Name | Resonance |
| Position X | 150 |
| Position Y | 0 |
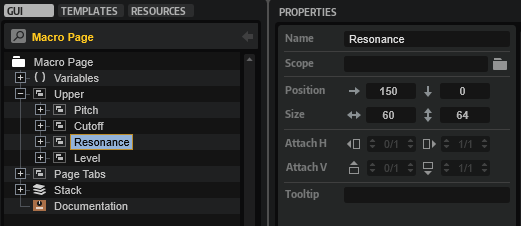
- In the new Resonance group, rename the knob template to "Resonance_1" and set its template parameters as follows:
Properties
| Property | Value |
|---|---|
| Name | Resonance_1 |
Template Parameters
| Template Parameter | Value |
|---|---|
| Value | @0:Layer/@0:Zone/@id:140003 |
| Label | RESONANCE |
| Unit |
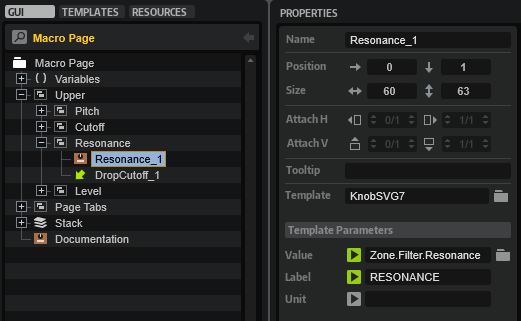
This connects the knob to the Resonance parameter of the zone. The Unit parameter is not used.
- Rename the Drop control to "DropResonance" and set its Value to "@DropResonance".
Properties
| Property | Value |
|---|---|
| Name | DropResonance |
| Value | @DropResonance |
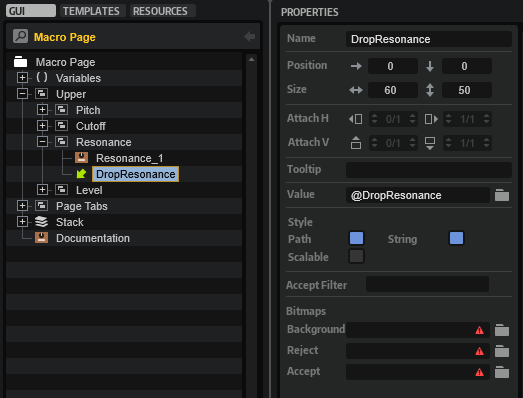
The UI script uses the @DropResonance UI variable to resolve the source that is being dropped.
Adding the Pan Control and Drop Target
The following steps are almost identical to the previous ones, except that a different knob template is used in step 4.
- In the Macro Page Designer, go to the GUI Tree and navigate to the Upper branch.
- Move the Level group to Position X = 225.
Properties
| Property | Value |
|---|---|
| Position X | 225 |
- Duplicate the Level group, then rename the duplicate to "Pan" and set its Position X to 300.
Properties
| Property | Value |
|---|---|
| Name | Pan |
| Position X | 300 |
- In the new Pan group, rename the knob template to "Pan_1", change its template reference to "KnobSVG7_Bi" and set its template parameters as follows:
Properties
| Property | Value |
|---|---|
| Name | Pan_1 |
| Template | KnobSVG7_Bi |
Template Parameters
| Template Parameter | Value |
|---|---|
| Value | @0:Layer/@0:Zone/@id:320014 |
| Label | PAN |
| Unit |
This connects the knob to the Pan parameter of the zone. The Unit parameter is not used.
- Rename the Drop control to "DropPan" and set its Value to "@DropPan".
Properties
| Property | Value |
|---|---|
| Name | DropPan |
| Value | @DropPan |
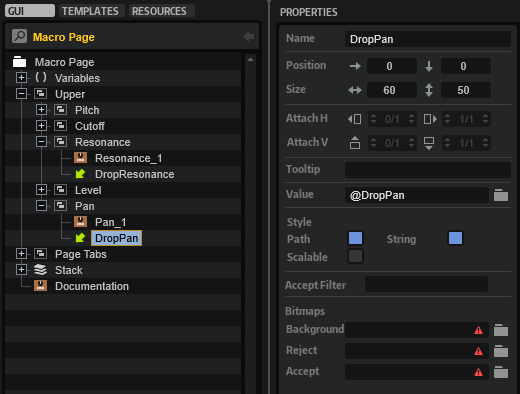
The UI script uses the @DropPan UI variable to resolve the source that is being dropped.
Adding the Drop Targets to the UI Script
Now, you need to define the DropResonance and DropPan parameters in the UI script.
- Open the UI script in the internal script editor and replace the following lines
defineParameter("DropPitch", nil, "", function() addModRow(DropPitch, 2) end)
defineParameter("DropCutoff", nil, "", function() addModRow(DropCutoff, 3) end)
defineParameter("DropLevel", nil, "", function() addModRow(DropLevel, 5) end)
with these lines:
defineParameter("DropPitch", nil, "", function() addModRow(DropPitch, 2) end)
defineParameter("DropCutoff", nil, "", function() addModRow(DropCutoff, 3) end)
defineParameter("DropResonance", nil, "", function() addModRow(DropResonance, 4) end)
defineParameter("DropLevel", nil, "", function() addModRow(DropLevel, 6) end)
defineParameter("DropPan", nil, "", function() addModRow(DropPan, 8) end)
Each destination/drop target has its own parameter. When a source is dropped on a destination/drop target, the parameter's change callback calls addModRow with the string provided by the Drag Info property as the first argument. For more information about the Drag Info property, see Drag Group. The second argument is the index of the destination as defined in the MIDI script. See Adding Resonance and Pan to the MIDI Script. The two arguments are used to create the assignment in the next available row of the modulation matrix.
Adding Resonance and Pan to the MIDI Script
You must add Resonance and Pan to the destinations table in the MIDI script. Otherwise, the assignment will not be correct when you drop a source on the newly added destinations.
- Go to the Program Tree and select the Mod Matrix MIDI Module.
- Open the MIDI script in the internal script editor and add the lines that are marked with a comment.
destinations = {
{ name = "-" , dest = ModulationDestination.unassigned },
{ name = "Pitch" , dest = ModulationDestination.pitch },
{ name = "Cutoff" , dest = ModulationDestination.cutoff },
{ name = "Resonance" , dest = ModulationDestination.resonance }, -- Add this line.
{ name = "Level" , dest = ModulationDestination.level },
{ name = "Volume 1" , dest = ModulationDestination.volume1 },
{ name = "Volume 2" , dest = ModulationDestination.volume1 },
{ name = "Pan" , dest = ModulationDestination.pan }, -- Add this line.
{ name = "LFO 1 Frequency" , dest = ModulationDestination.lfo1Freq },
{ name = "LFO 1 Shape" , dest = ModulationDestination.lfo1Shape },
{ name = "LFO 2 Frequency" , dest = ModulationDestination.lfo2Freq },
{ name = "LFO 2 Shape" , dest = ModulationDestination.lfo2Shape },
{ name = "Pitch Env Init Level" , dest = ModulationDestination.pitchEnvStartLev },
{ name = "Pitch Env Attack" , dest = ModulationDestination.pitchEnvAttack },
{ name = "Pitch Env Att Level" , dest = ModulationDestination.pitchEnvAttLev },
{ name = "Pitch Env Decay" , dest = ModulationDestination.pitchEnvDecay },
{ name = "Pitch Env Sustain" , dest = ModulationDestination.pitchEnvSustain },
{ name = "Pitch Env Release" , dest = ModulationDestination.pitchEnvRelease },
{ name = "Pitch Env Rel Level" , dest = ModulationDestination.pitchEnvRelLev },
}
Adding Resonance and Pan to the Destination Menu
To make Resonance and Pan selectable in the modulation matrix, you must add them to the MenuDestRoot template. The MenuDestRoot template is a Custom Multi Level Menu with a MenuEntry template for each destination. The MenuDestRoot template pops up when you click the DestinationMenu template. The DestinationMenu template is part of the MatrixRow template which is part of the Template List that creates the rows and controls for the modulation matrix.
A destination is selected via the UI variable @MenuValue. MenuValue is a script parameter defined in the UI script of the MenuDestRoot template. Basically, MenuValue is a variable for the selected destination. It is exported and set by the Destination template parameter of the Template List that creates the modulation matrix. MenuValue is also connected to the exclusive switch and the Label control within the MenuEntry template. The exclusive switch controls whether an entry is displayed as selected or not, and the Label control displays the name of the selected destination.
The OnValue of the MenuEntry template corresponds to the index in the destinations table as previously defined in the MIDI script. However, the index of OnValue starts at zero. Therefore, OnValue is always one number below the index of the corresponding destination in the destinations table.
Together, MenuValue and OnValue control which destination is selected and displayed.
Editing the MenuDestRoot Template
- Go to the Templates Tree, navigate to library > Tutorial Controls > Popup > MenuDestRoot and edit the template.
- Select the Level template and set its properties and template parameters as follows:
Properties
| Property | Value |
|---|---|
| Position X | 0 |
| Position Y | 76 |
Template Parameters
| Template Parameter | Value |
|---|---|
| OnValue | 4 |
| Value | @MenuValue |
| Label | Level |
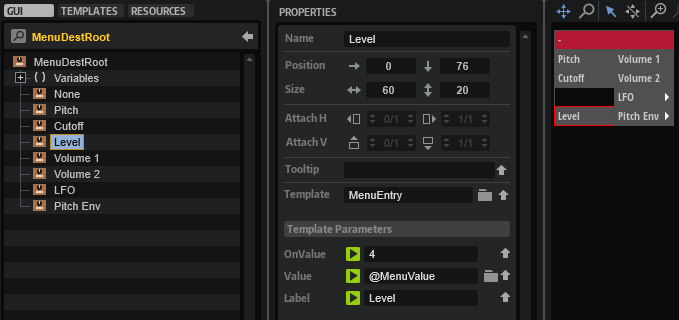
- Select the Cutoff template and duplicate it, then rename the duplicate to "Resonance" and set its properties and template parameters as follows:
Properties
| Property | Value |
|---|---|
| Name | Resonance |
| Position X | 0 |
| Position Y | 57 |
Template Parameters
| Template Parameter | Value |
|---|---|
| OnValue | 3 |
| Value | @MenuValue |
| Label | Resonance |
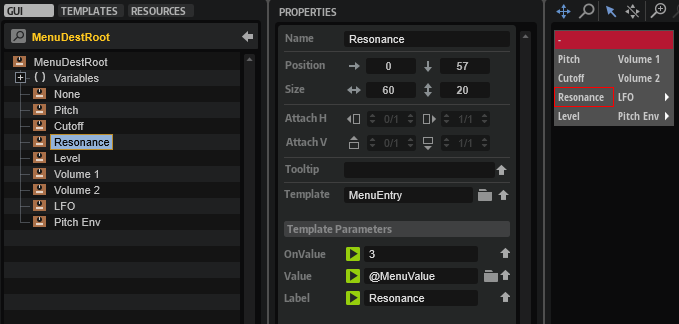
- Duplicate the Level template, then rename the duplicate to "Pan" and set its properties and template parameters as follows:
Properties
| Property | Value |
|---|---|
| Name | Pan |
| Position X | 0 |
| Position Y | 95 |
Template Parameters
| Template Parameter | Value |
|---|---|
| OnValue | 7 |
| Value | @MenuValue |
| Label | Pan |
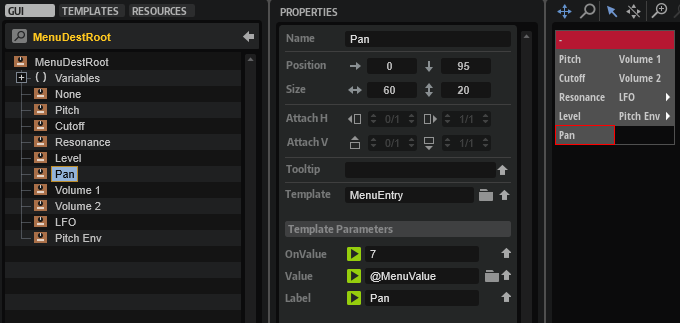
- Select the Volume 1 template and set its OnValue to 5.
Template Parameters
| Template Parameter | Value |
|---|---|
| OnValue | 5 |
| Value | @MenuValue |
| Label | Volume 1 |
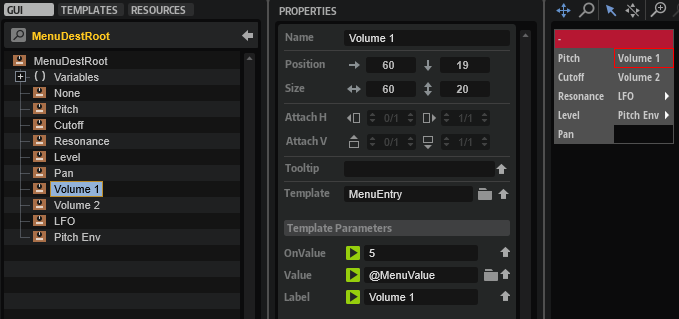
- Select the Volume 2 template and set its OnValue to 6.
Template Parameters
| Template Parameter | Value |
|---|---|
| OnValue | 6 |
| Value | @MenuValue |
| Label | Volume 2 |
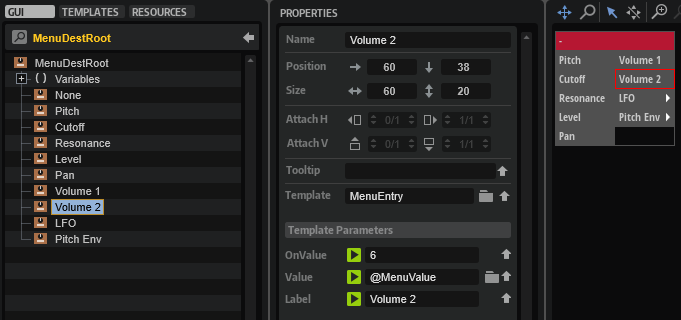
At this point in the tutorial, the new destinations should work with drag and drop and be selectable from the modulation matrix.
❕ If you want to learn more about multi-level pop-up menus, see Custom Multi Level Menus II.
Adding an Additional Source
The page tabs labeled LFO 1, LFO 2 and PITCH ENV give you access to the controls for these modulation sources. They also work as Drag Group controls. You can drag the page tabs to assign the modulation sources to modulation destinations. Let's add the user envelope as an additional source to see how this works.
Adjusting the Page Tabs
You need to adjust the position and size of the current page tabs before adding another page tab.
- In the Macro Page Designer, go to the GUI Tree and navigate to the Page Tabs branch.
- Select the LFO 1 group and set the following properties:
Properties
| Property | Value |
|---|---|
| Position X | 0 |
| Width | 115 |
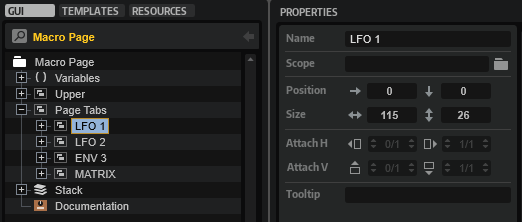
- Select the LFO 2 group and set the following properties:
Properties
| Property | Value |
|---|---|
| Position X | 118 |
| Width | 115 |
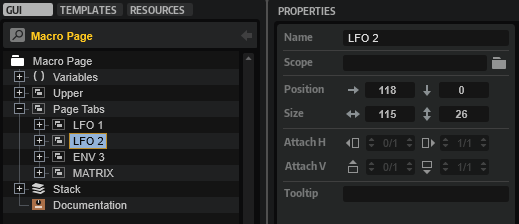
- Select the ENV 3 group and set the following properties:
Properties
| Property | Value |
|---|---|
| Position X | 236 |
| Width | 115 |
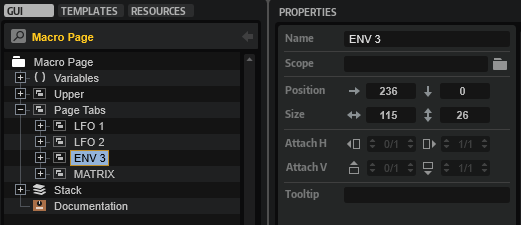
- Select the MATRIX group and set the following properties:
Properties
| Property | Value |
|---|---|
| Position X | 472 |
| Width | 115 |
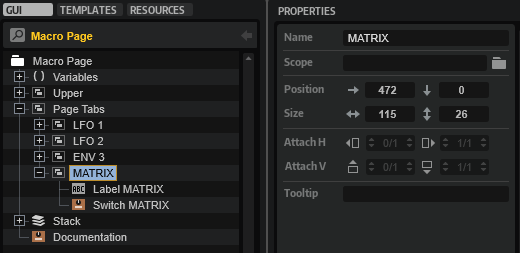
Adding the User Env Page Tab and Drag Group
- Select the ENV 3 group and duplicate it. Set the properties of the duplicate as follows:
Properties
| Property | Value |
|---|---|
| Name | ENV 4 |
| Position X | 354 |
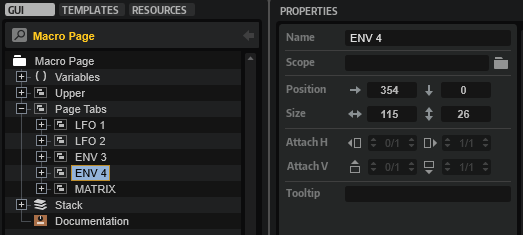
- Select ENV 4 > Stack_4 > Drag_3 > Drag Group_3 and set Drag Info to "ENV4".
Properties
| Property | Value |
|---|---|
| Drag Info | ENV4 |
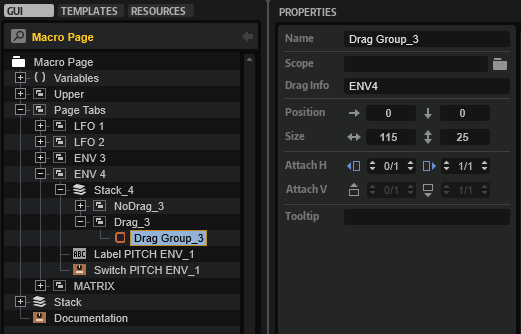
- Select ENV 4 > Label PITCH ENV_1 and set the properties as follows:
Properties
| Property | Value |
|---|---|
| Name | Label USER ENV |
| Text | USER ENV |
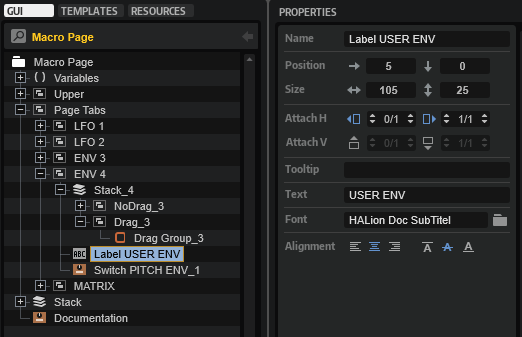
- Select ENV 4 > Switch PITCH ENV_1 and set the properties as follows:
Properties
| Property | Value |
|---|---|
| Name | Switch USER ENV |
| OnValue | 3 |
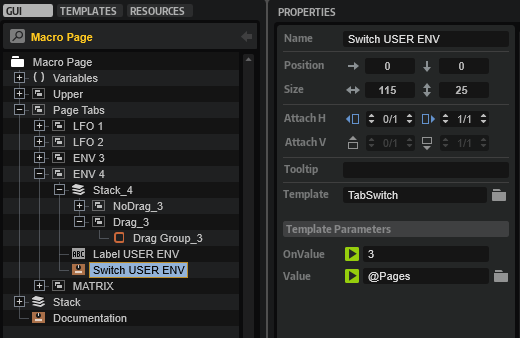
- Select ENV 4 > MATRIX > Switch MATRIX and set the properties as follows:
Properties
| Property | Value |
|---|---|
| OnValue | 4 |
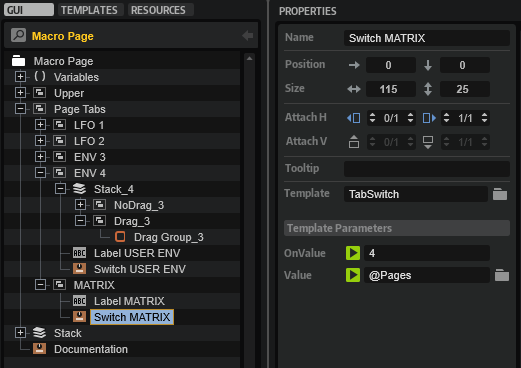
- Select Variables > Pages and set the Maximum to 4.
Properties
| Property | Value |
|---|---|
| Maximum | 4 |
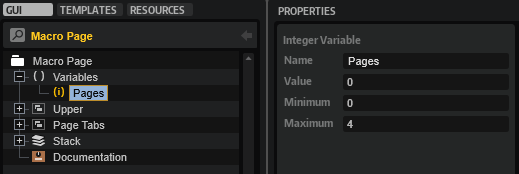
Adding the User Envelope Controls
- Navigate to Stack > Goup PITCH ENV. Duplicate Group PITCH ENV and rename it to "Group USER ENV".
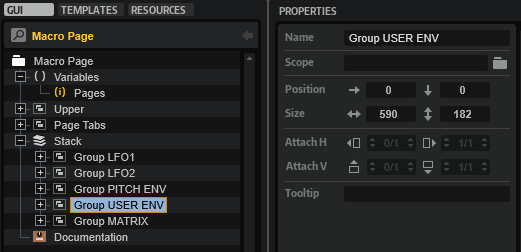
- In the Group USER ENV, connect the Value of each control template to the following zone parameters:
| Template | Value | Zone Parameter |
|---|---|---|
| Init_1 | @0:Layer/@0:Zone/@id:ea | UserL0Offset |
| Attack_1 | @0:Layer/@0:Zone/@id:e6 | UserAttOffset |
| Att Level_1 | @0:Layer/@0:Zone/@id:eb | UserL1Offset |
| Decay_1 | @0:Layer/@0:Zone/@id:e7 | UserDecOffset |
| Sustain_1 | @0:Layer/@0:Zone/@id:e8 | UserSusOffset |
| Release_1 | @0:Layer/@0:Zone/@id:e9 | UserRelOffset |
| Rel Level_1 | @0:Layer/@0:Zone/@id:ec | UserLROffset |
| Velocity_1 | @0:Layer/@0:Zone/@id:8001e | User Env.VelocityToLevel |
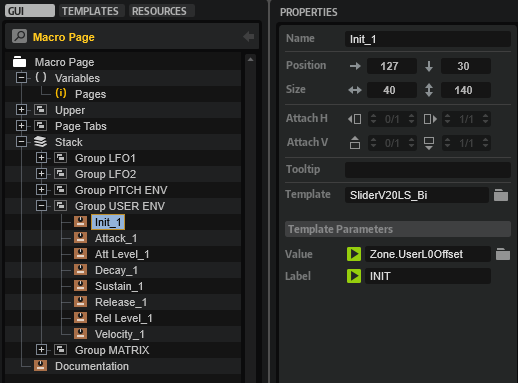
The controls on the USER ENV page are now connected to the user envelope.
❕ In the Example VST Preset, the times and levels of the pitch and user envelopes are already set up to work correctly when using the envelope offset parameters of the zone.
Adding the User Envelope to the UI Script
The translateModSource function in the UI script determines which source is being dropped.
- Open the UI script in the internal script editor and add the condition marked with a comment.
function translateModSource(str)
-- The return values match the modulation sources in the MIDI script.
if str == "LFO1" then return 2 end
if str == "LFO2" then return 3 end
if str == "ENV3" then return 4 end
if str == "ENV4" then return 5 end -- Add this condition.
return 1
end
The string "ENV4" must match the Drag Info of the Drag Group control. See Adding the User Env Page Tab and Drag Group. The return value must match the index of the User Env source in the sources table in the MIDI script. See Adding the User Env to the MIDI Script. The Drag Info and the associated return value define the source that is being dropped and then assigned in the modulation matrix.
Adding the User Envelope to the MIDI Script
You must add the User Env to the sources table in the MIDI script. Otherwise, you will not be able to assign it.
- Go to the Program Tree and select the Mod Matrix MIDI Module.
- Open the MIDI script in the internal script editor and add the line marked with a comment.
sources = {
{ name = "-" , src = ModulationSource.unassigned },
{ name = "LFO 1" , src = ModulationSource.lfo1 },
{ name = "LFO 2" , src = ModulationSource.lfo2 },
{ name = "Pitch Env" , src = ModulationSource.pitchEnv },
{ name = "User Env" , src = ModulationSource.userEnv }, -- Add this line.
{ name = "Key Follow" , src = ModulationSource.keyFollow },
{ name = "Velocity" , src = ModulationSource.noteOnVelocity},
{ name = "Pitch Bend" , src = ModulationSource.pitchBend },
{ name = "Mod Wheel" , src = ModulationSource.modWheel },
{ name = "Aftertouch" , src = ModulationSource.aftertouch },
}
Adding the User Envelope to the Source Menu
To make the User Env selectable in the modulation matrix, you must add it to the MenuSourceRoot template. The MenuSourceRoot template is a Custom Multi Level Menu with a MenuEntry template for each source. The MenuSourceRoot template pops up when you click the SourceMenu template. The SourceMenu template is part of the MatrixRow template which is part of the Template List that creates the rows and controls for the modulation matrix.
A source gets selected through the UI variable @MenuValue. MenuValue is a script parameter defined in the UI script of the MenuSourceRoot template. Basically, MenuValue is a variable for the selected source. It is exported and set by the Source1 or the Source2 template parameter of the Template List that creates the modulation matrix. MenuValue is also connected to the exclusive switch and the Label control within the MenuEntry template. The exclusive switch controls whether an entry is displayed as selected or not, and the Label control displays the name of the selected source.
The OnValue of the MenuEntry template corresponds to the index in the sources table as previously defined in the MIDI script. However, the index of OnValue starts at zero. Therefore, OnValue is always one number below the index of the corresponding source in the sources table.
Together, MenuValue and OnValue control which source is selected and displayed.
Editing the MenuSourceRoot Template
- Go to the Templates Tree, navigate to library > Tutorial Controls > Popup > MenuSourceRoot and edit the template.
- Select the Aftertouch template and set its properties and template parameters as follows:
Properties
| Property | Value |
|---|---|
| Position X | 0 |
| Position Y | 171 |
Template Parameters
| Template Parameter | Value |
|---|---|
| OnValue | 9 |
| Value | @MenuValue |
| Label | Aftertouch |
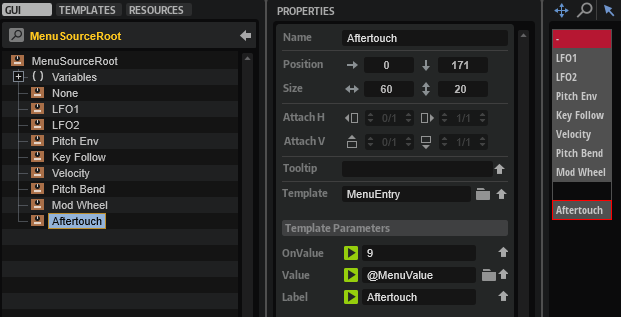
- Select the Mod Wheel template and set its properties and template parameters as follows:
Properties
| Property | Value |
|---|---|
| Position X | 0 |
| Position Y | 152 |
Template Parameters
| Template Parameter | Value |
|---|---|
| OnValue | 8 |
| Value | @MenuValue |
| Label | Mod Wheel |
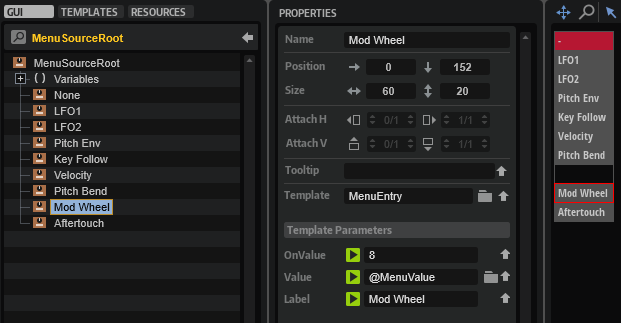
- Select the Pitch Bend template and set its properties and template parameters as follows:
Properties
| Property | Value |
|---|---|
| Position X | 0 |
| Position Y | 133 |
Template Parameters
| Template Parameter | Value |
|---|---|
| OnValue | 7 |
| Value | @MenuValue |
| Label | Pitch Bend |
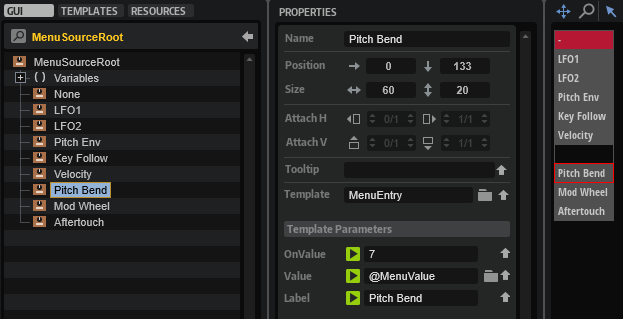
- Select the Velocity template and set its properties and template parameters as follows:
Properties
| Property | Value |
|---|---|
| Position X | 0 |
| Position Y | 114 |
Template Parameters
| Template Parameter | Value |
|---|---|
| OnValue | 6 |
| Value | @MenuValue |
| Label | Velocity |
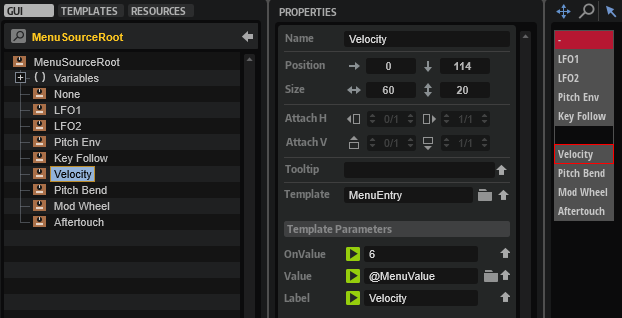
- Select the Key Follow template and set its properties and template parameters as follows:
Properties
| Property | Value |
|---|---|
| Position X | 0 |
| Position Y | 95 |
Template Parameters
| Template Parameter | Value |
|---|---|
| OnValue | 5 |
| Value | @MenuValue |
| Label | Key Follow |
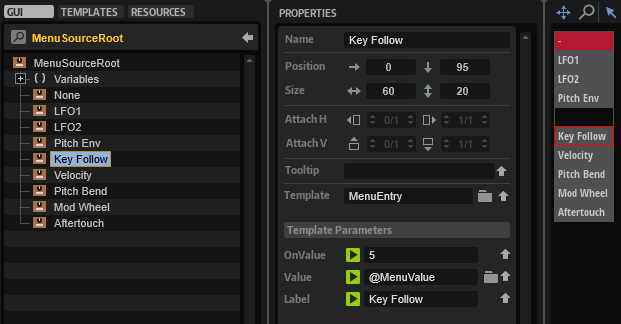
- Duplicate the Pitch Env template, then rename the duplicate to "User Env" and set its properties and template parameters as follows:
Properties
| Property | Value |
|---|---|
| Name | User Env |
| Position X | 0 |
| Position Y | 76 |
Template Parameters
| Template Parameter | Value |
|---|---|
| OnValue | 4 |
| Value | @MenuValue |
| Label | User Env |
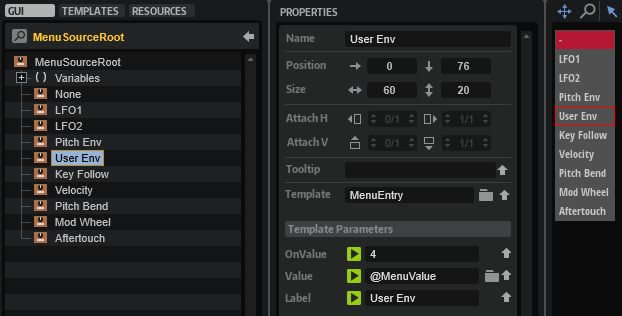
At this point in the tutorial, the new source should work with drag and drop and be selectable from the modulation matrix.
❕ If you want to learn more about multi-level pop-up menus, see Custom Multi Level Menus II.
Increasing the Number of Rows in the Modulation Matrix
Each time you drag a source to a destination, the findEmptyMatrixRow function in the UI script checks if there is an empty row available in the modulation matrix. If there aren't any free rows available, the CanDragMod variable in the UI script will be false and you won't be able to drag and drop sources. You'll see a symbol appear before the sources that lets you know. CanDragMod is connected to the Stack control of each page tab. Depending on CanDragMod the Stack switches between the symbol, dragging is not allowed, and the Drag Group, dragging is allowed. The Stack also changes the tooltips that give instructions.
- Drag and drop at least four sources to make the symbol appear. You won't be able to drag and drop further sources.
The current number of modulation rows is four. To avoid running out of modulation rows too early, let's increase the number of modulation rows to eight.
- Open the UI script in the internal script editor and set the
numRowsvariable to 8.
local numRows = 8
- In the GUI Tree, navigate to Stack > Group MATRIX > Template List. Activate the V-Scroll Style.
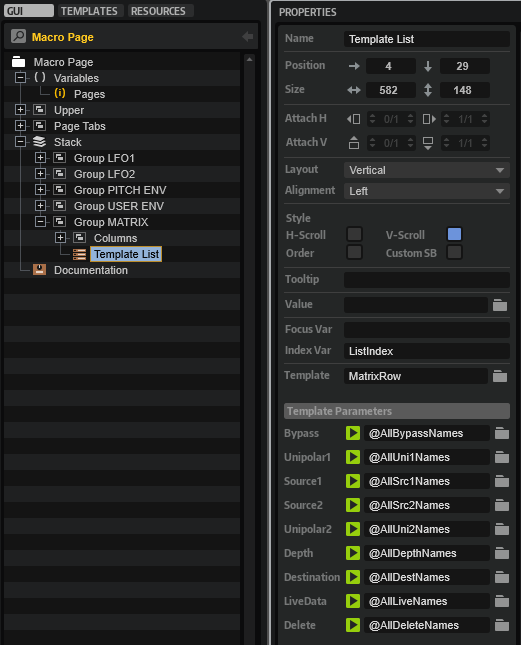
The modulation matrix now has 8 rows, accessible via a vertical scrollbar.
The parameters for the modulation matrix are defined in the UI script by calling the defineAllRowNamesParameter function. The defined parameters are connected to the template parameters of the Template List. The Template List creates the number of rows in the matrix equal to the number of values specified for each parameter.
Display Depth in Semitones or Percent
Depending on whether or not Pitch has been assigned as a destination, the Depth parameter displays values either in semitones or in percent. Which of the two is displayed is controlled by a UI script that is embedded in the DepthSliderHorizontal template. The script defines a DestIndex parameter that is exported as a template parameter and is responsible for deciding whether the values are displayed as semitones or percent, depending on the selected destination. Currently, Pitch is the only destination that needs to display semitones. If there are other destinations that need to display semitones, you will need to add them to the isPitchDest table of the template's UI script. Have a look at the comments in the code below for details.
pitchRange = 60
pitchStretch = 3.1336
-- A table with all destinations that display their depth in semitones.
-- The indices in the isPitchDest table must match the indices of the pitch destinations
-- as previously defined in the destinations table in the MIDI script.
isPitchDest = {
[1] = true, -- Pitch
}
function sinh(x)
return (math.exp(x) - math.exp(-x)) / 2
end
function asinh(x)
return math.log(x + math.sqrt(x * x + 1))
end
function onDepthChanged()
-- Convert from depth to semitones if the destination uses pitch.
if isPitchDest[DestIndex] then
Text = pitchRange * sinh(pitchStretch * 0.01 * Depth) / sinh(pitchStretch)
else
Text = Depth
end
end
function onTextChanged()
-- Convert from semitones to depth if the destination uses pitch.
if isPitchDest[DestIndex] then
Depth = 100 * asinh(Text * sinh(pitchStretch) / pitchRange) / pitchStretch
else
Depth = Text
end
end
defineParameter("Depth", "", 0, -100, 100, 0.1, onDepthChanged)
defineParameter("Text", "", 0, -100, 100, 0.1, onTextChanged)
defineParameter("DestIndex", "", 0, 0, 1000, 1, onDepthChanged)
To edit the UI script of the DepthSliderHorizontal template:
- Go to the Templates Tree, navigate to Tutorial Controls > Matrix > DepthSliderHorizontal and edit the template.
- Click Edit Script to open the internal script editor.
- Add further destinations to the
isPitchDesttable. The indices in theisPitchDesttable must match the indices of the pitch destinations as previously defined in thedestinationstable in the MIDI script.
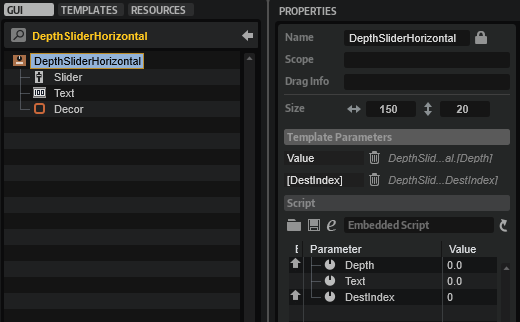
Adding User Envelope Destinations
The parameters of the pitch envelope already exist as modulation destinations. Let's add the parameters of the user envelope as modulation destinations.
Adding the User Envelope to the MIDI Script
You need to add the parameters of the User Envelope to the destinations table in the MIDI script.
- Go to the Program Tree and select the Mod Matrix MIDI Module.
- Open the MIDI script in the internal script editor and append the following lines to the
destinationstable.
{ name = "User Env Init Level" , dest = ModulationDestination.userEnvStartLev },
{ name = "User Env Attack" , dest = ModulationDestination.userEnvAttack },
{ name = "User Env Att Level" , dest = ModulationDestination.userEnvAttLev },
{ name = "User Env Decay" , dest = ModulationDestination.userEnvDecay },
{ name = "User Env Sustain" , dest = ModulationDestination.userEnvSustain },
{ name = "User Env Release" , dest = ModulationDestination.userEnvRelease },
{ name = "User Env Rel Level" , dest = ModulationDestination.userEnvRelLev },
Adding the User Envelope to the Destination Menu
You need to add the User Envelope parameters to the MenuDestRoot template to make them selectable as destinations in the modulation matrix. As with the Pitch Envelope, we want the User Envelope destinations to be in a submenu. The MenuDestRoot template uses the SubMenuEntry template and a Popup List Variable to accomplish this.
- Go to the Templates Tree, navigate to library > Tutorial Controls > Popup > MenuDestRoot and edit the template.
- Select the Pitch Env template and duplicate it, then rename the duplicate to "User Env" and set its properties and template parameters as follows:
Properties
| Property | Value |
|---|---|
| Name | User Env |
| Position X | 60 |
| Position Y | 95 |
Template Parameters
| Template Parameter | Value |
|---|---|
| OnValue | 3 |
| Value | @PopupVar |
| Label | User Env |
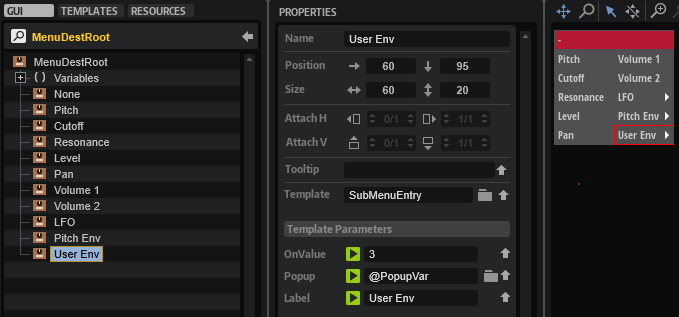
- Navigate to Variables > PopupVar and add "MenuDestUserEnv" to the Popup List Variable.
The entries in the Popup List Variable correspond to the names of the templates to be opened when navigating through the menu.
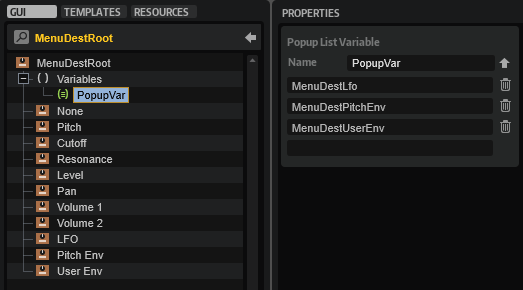
- Go back to the Templates Tree and navigate to library > Tutorial Controls > Popup. Duplicate the MenuDestPitchEnv template and rename the duplicate to "MenuDestUserEnv".
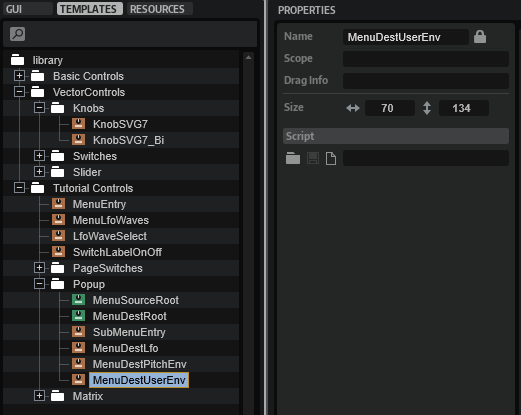
- Edit MenuDestUserEnv and set the OnValue of the contained control templates as follows:
| Template | OnValue |
|---|---|
| Init Level | 19 |
| Attack | 20 |
| Att Level | 21 |
| Decay | 22 |
| Sustain | 23 |
| Release | 24 |
| Release Level | 25 |
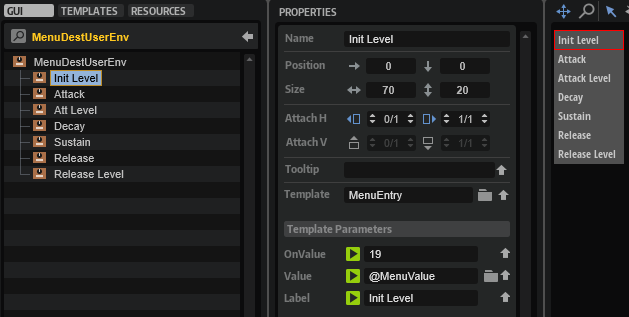
The Value and Label template parameters for each control template are already set correctly.
At this point in the tutorial, the User Envelope destinations should be selectable from the modulation matrix.
❕ If you want to learn more about multi-level pop-up menus, see Custom Multi Level Menus II.
Final Example VST Preset
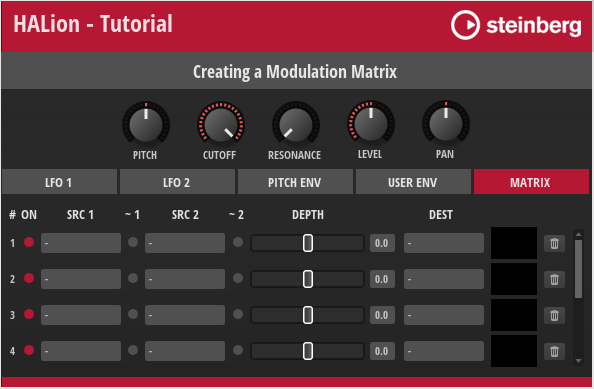
Here, you can find the Example VST Preset with all the editing steps applied.
How the Elements Interact
With the previous tutorial, we wanted to give you an idea of how to customize a modulation matrix to suit your particular instrument. In the following section, you can find a brief description of the connections and the exchange of messages between the various templates and the UI and MIDI scripts.
The UI script plays a central role in the modulation matrix and controls most of the actions. The comments in the UI script explain which UI elements are connected to script parameters and why they are needed. Reading the comments and looking at the associated UI elements will help you to understand how the modulation matrix works. The following screenshot shows the Template List, which creates the rows and controls for the modulation matrix, with its template parameters linked to the parameters of the UI script. These script parameters are defined in the defineAllRowNamesParameter function. They control which zone parameters are connected to the modulation matrix and can be adjusted from there.
Drag and Drop Handling
When dropping a page tab of a source to a destination, the corresponding drop parameter is changed and the change callback calls the addModRow function.
-- The destination index must match the modulation destinations in the MIDI script.
defineParameter("DropPitch", nil, "", function() addModRow(DropPitch, 2) end)
defineParameter("DropCutoff", nil, "", function() addModRow(DropCutoff, 3) end)
defineParameter("DropResonance", nil, "", function() addModRow(DropResonance, 4) end)
defineParameter("DropLevel", nil, "", function() addModRow(DropLevel, 6) end)
defineParameter("DropPan", nil, "", function() addModRow(DropPan, 8) end)
The addModRow function has the Drag Info of the source and the index of the destination as arguments. The two arguments are used to create the assignment in the next available row of the modulation matrix.
function addModRow(srcstr, dest)
local row = findEmptyMatrixRow()
local src = translateModSource(srcstr)
if row then
local rowname = "ModRow"..row
startUndoBlock("Add Modulation Source")
midiModule:setParameter(rowname.."_Src1", src)
midiModule:setParameter(rowname.."_Dest", dest)
endUndoBlock()
end
end
The findEmptyMatrixRow function called in the addModRow function checks if there is an empty row available in the modulation matrix and returns its index. It returns nil if no empty row is available.
function findEmptyMatrixRow()
for r = 1,numRows do
local rname = "ModRow"..r
if midiModule:getParameter(rname .. "_Src1") == 1 and midiModule:getParameter(rname .. "_Src2") == 1 then
return r
end
end
return nil
end
The translateModSource function called in the addModRow function uses the Drag Info to return the index of the modulation source that is being dropped.
function translateModSource(str)
-- The return values must match the index of the modulation sources in the MIDI script.
if str == "LFO1" then return 2 end
if str == "LFO2" then return 3 end
if str == "ENV3" then return 4 end
if str == "ENV4" then return 5 end
return 1
end
The instructions inside the if statement of the addModRow function set the source and destination parameters of the MIDI script, which in turn assigns the modulation.
When assigning sources and destinations using the menus in the modulation matrix or via drag and drop, the MIDI script sets the AnySourceChanged parameter of the UI script, which calls the onAnySourcechanged function, which in turn checks if there are still rows available in the modulation matrix. If no free rows are available, the CanDragMod variable will be false and you will not be able to drag and drop sources.
function onAnySourceChanged()
CanDragMod = findEmptyMatrixRow() ~= nil
end
defineParameter{name = "AnySourceChanged", default=0, min=0, max=100, increment=1, onChanged=onAnySourceChanged}
defineParameter{name = "CanDragMod", default=true}
CanDragMod = findEmptyMatrixRow() ~= nil
❕ Checking for empty modulation rows will only work if the
AnySourceChangedparameters are connected.
Reset Modulation Row
The UI script contains also a function for resetting a modulation row. It is called when the trash bin icon of a row is clicked.
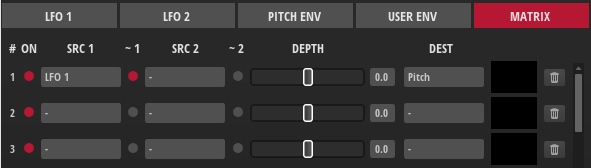
function onDeleteRow(r)
if _G["ModDelete" .. r] == 0 then
return
end
local row = zone:getModulationMatrixRow(r)
if not row then
return
end
startUndoBlock("Delete Modulation Row " .. r)
local rowname = "ModRow"..r
midiModule:setParameter(rowname.."_Src1", 1)
midiModule:setParameter(rowname.."_Src2", 1)
midiModule:setParameter(rowname.."_Dest", 1)
row:setParameter("Destination.Depth", 0)
row:setParameter("Destination.Bypass", false)
endUndoBlock()
end
Defining Modulation Sources and Destinations in the MIDI Script
The modulation sources and destinations that you need for your instrument must be defined in the sources and destinations tables of the MIDI script. The tutorial above described that the settings for the Custom Multi Level Menus must match the definitions of the sources and destinations in the MIDI script.
When loading the MIDI script, the defineAllModParameters function is called.
function defineAllModParameters()
for r = 1,ModRows do
local rname = "ModRow"..r
defineParameter{name=rname.."_Src1", default=1, strings=sourceNames, automatable=false, onChanged=function() sourceChanged(r, 1) end}
defineParameter{name=rname.."_Src2", default=1, strings=sourceNames, automatable=false, onChanged=function() sourceChanged(r, 2) end}
defineParameter{name=rname.."_Dest", default=1, strings=destNames, automatable=false, onChanged=function() destChanged(r) end}
end
end
The function defines the parameters that select the two modulation sources and the destination for each row. The parameters provide the sources and destinations as defined in the associated tables.
When a source is selected, the sourceChanged function is called, which sets either source 1 or source 2 in the specified row. The row and source are specified by the function's arguments.
function sourceChanged(row, unit)
local srcname = "ModRow"..row.."_Src"..unit
local src = _G[srcname]
local mrow = zone:getModulationMatrixRow(row)
if mrow and unit == 1 then
mrow:setSource1(sources[src].src, sources[src].info, sources[src].info2)
mrow:setParameter("Source1.Polarity", def_unipolar[sources[src].src] and 0 or 1)
elseif mrow and unit == 2 then
mrow:setSource2(sources[src].src, sources[src].info, sources[src].info2)
mrow:setParameter("Source2.Polarity", def_unipolar[sources[src].src] and 0 or 1)
end
AnySourceChanged = (AnySourceChanged + 1) % 100
end
Depending on the selected source, the sourceChanged function sets the polarity to either unipolar or bipolar. The def_unipolar table defines the sources that are usually unipolar. All other sources will be set to bipolar when they are selected.
def_unipolar = {
[ModulationSource.unassigned] = true,
[ModulationSource.ampEnv] = true,
[ModulationSource.filterEnv] = true,
[ModulationSource.noteOnVelocity] = true,
[ModulationSource.modWheel] = true,
[ModulationSource.aftertouch] = true,
[ModulationSource.midiControl] = true,
[ModulationSource.noteExpression] = true,
}
Finally, the sourceChanged function increases the AnySourceChanged parameter by one. This parameter must be connected to the identically named parameter of the MIDI script which calls the onAnySourcechanged function, which in turn checks if there are still rows available in the modulation matrix. See Drag and Drop Handling for details.
When a destination is selected, the destChanged function is called, which assigns the destination to the specified row.
function destChanged(row)
local destname = "ModRow"..row.."_Dest"
local mrow = zone:getModulationMatrixRow(row)
if mrow then
mrow:setParameter("Destination.Destination", destinations[_G[destname]].dest)
end
end
Modulation Matrix Examples for Different Zone Types
In the How-tos section, you can find modulation matrix examples for each zone type that you can use as a basis when creating a modulation matrix for an instrument. See Modulation Matrix for FM Zones, Modulation Matrix for Grain Zones, Modulation Matrix for Sample Zones, Modulation Matrix for Spectral Zones, Modulation Matrix for Synth Zones, and Modulation Matrix for Wavetable Zones.
Transferring the Modulation Matrix to Your Instrument
To integrate the moduation matrix into your macro page, you need to do the following:
- Copy all templates. The templates in the Example VST Preset use Resources from the Basic Controls and Vector Controls library. In a later step, you can change these resources to match the look of your instrument.
- Copy the templates from the GUI Tree of the example VST preset to your macro page.
- Copy the code from the UI and MIDI scripts to the respective scripts of your instrument.
- Connect the
AnySourceChangedparameter of the MIDI script with theAnySourceChangedparameter of the UI script.
❕ Checking for empty modulation rows will only work if the
AnySourceChangedparameters are connected.
- Finally, update the UI, for example, by selecting a different program and then selecting your instrument again. This will rebuild the macro page and apply your changes.
Modulation Matrix with Custom Look
You can customize the look and feel of your instrument entirely by using your own Resources. As an example, the modulation matrix of FM Lab is shown in the following screenshot.
/ HALion Developer Resource / HALion Tutorials & Guidelines / Tutorials /
Creating a Template List
On this page:
- Example VST Preset
- Prerequisites
- Overview of Workflows
- Creating a Basic Template List
- Adding Functionality
- Setting the Scope for Controls outside the Template List
- Using UI Script Parameters Instead of UI Variables
Template Lists are versatile and powerful tools for creating controls with repeating elements, such as an effects rack with multiple slots, or a list of articulations that share a set of parameters. The main concept behind Template Lists is based on creating repeating controls from a single template that is referenced and instantiated multiple times. Similar to programming, where for-loops can save many lines of code, Template Lists save you from creating many individual templates. This tutortial describes the creation of a Template List step by step. The example preset already contains the solution. For a better understanding, we recommend that you follow all the steps, as described below.
Example VST Preset
Prerequisites
- Create a program with a synth zone. The simplest way to do this is to open the HALion Home Screen and to select Create>Analog Synth.
- Open the Macro Page Designer and click Create New Macro Page/Library.
Overview of Workflows
- Add a Template List control.
- Create a template for the entries of the list.
- Add controls to the template and export the desired values as template parameters.
- Create variables for the desired entries in the list and connect them to the corresponding template parameters.
Creating a Basic Template List
This first part of the tutorial illustrates the creation of a basic template list without adding further functionality.
- In the Macro Page Designer, go to the GUI Tree and create a Template List. Name it 'BasicList', for example.
- Go to the Templates Tree and create a Template. Name it 'RowEntry'.
- Click Edit Element to open the template.
- Add a Label and a Decor control. The look of an entry is defined by the properties of the controls inside the template. Adjust the size and other properties of the controls as desired.
- Select the Label control and go to the Properties editor. For a better overview, activate Show Properties as Column.
- Next to the Text property, click Export Property
 to export it.
If the Text property is not shown, use the scroll bars to locate the parameter.
The exported Text property becomes a template parameter of the BasicList template list.
- It's helpful to rename the exported Text property. Select RowEntry and go to the Template Parameter section of the Properties editor. Change the name of the exported Text property to 'Name'.
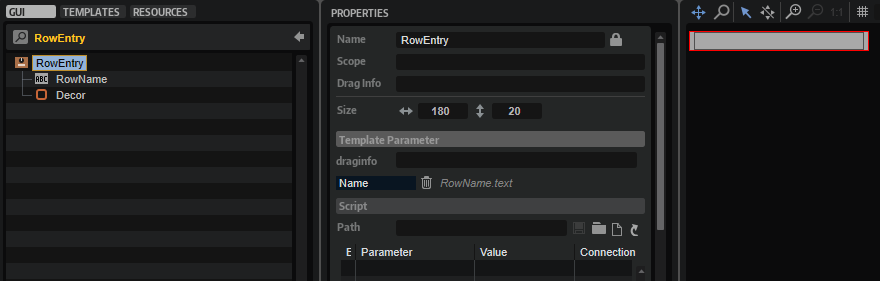
- Close the template and go back to the to the GUI Tree. Select the BasicList item, go to the Properties editor and set Template to 'RowEntry'.
- Create a Variables folder, right-click it and create a String List variable. Name it 'RowNames'.
- Select the String List variable, go to the Properties editor and create entries for each row that you want to display. Name the entries 'Zone 1', 'Zone 2', and 'Zone 3'.
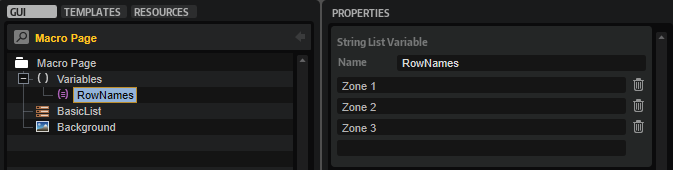
- Select the BasicList item, go to the Properties editor and set the Name template parameter to '@RowNames'. The list entries that you defined in step 9 should now be displayed with the look that you defined in step 4.
- Adjust the position and size of the BasicList template list, if needed.
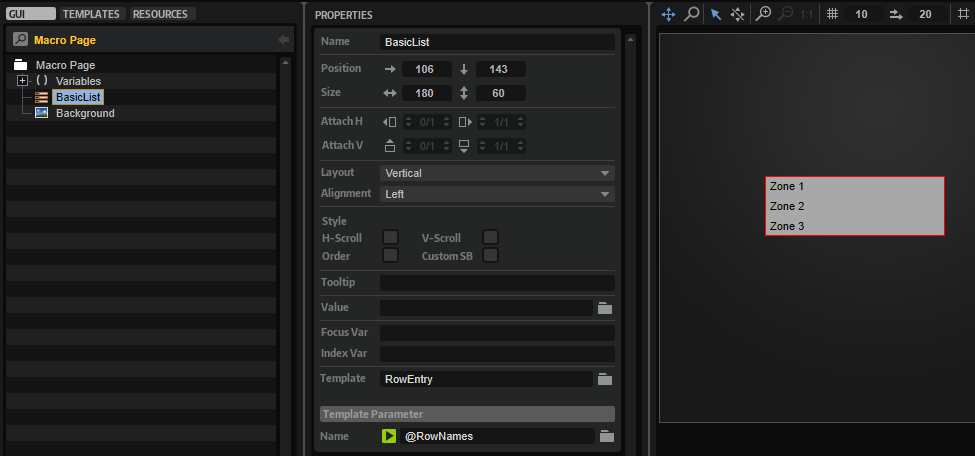
Adding Functionality
In this part of the tutorial, the variables Focus Var and Index Var of the Template List will be used to highlight the selected row and to display the row index. We will also add two more synth zones to the program and further controls to the Template List for adjusting these zones. The synth zones are only used as substitutes for the different articulations of an instrument, which are normally provided by different layers with samples for each articulation.
❕ To follow the subsequent steps, Creating a Basic Template List must be completed first.
- Go to the Program Tree and add two more synth layers.
- Open the Zone Editor and got to the Oscillator section, then switch off all oscillators except oscillator 1. Do this for all three zones. Choose different waveforms for oscillator 1 in each of the three zones.
- Open the Macro Page Designer, select the BasicList template list and go to the Properties editor. Set Focus Var to 'RowFocus' and Index Var to 'RowIndex'. These two variables will be used later inside the RowEntry template to highlight the selected row and to display the row index.
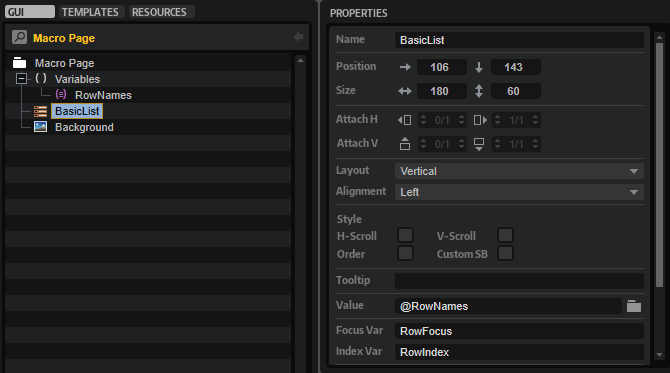
- Select the Variables folder and create a String List variable. Name it 'ZoneMute'. Go to the Properties editor and create the following entries: '@0:Zone 1/@id:66', '@0:Zone 2/@id:66', and '@0:Zone 3/@id:66'. The ZoneMute variable will be used later inside the RowEntry template to control the mute state of the focused zone.
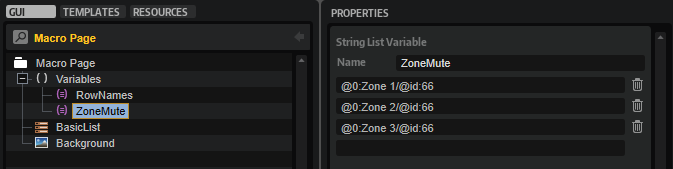
- Create another String List variable and name it 'ZoneCoarse'. Go to the Properties editor and create the following entries: '@0:Zone 1/@id:330002', '@0:Zone 2/@id:330002', and '@0:Zone 3/@id:330002'. The ZoneCoarse variable will be used later inside the RowEntry template to control the Coarse parameter of the oscillator of the focused zone.
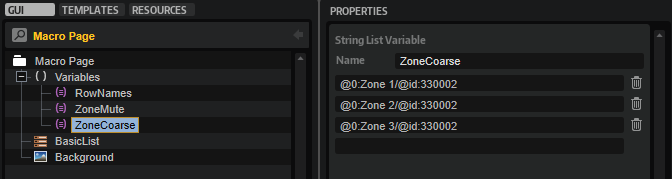
- Create one more String List variable and name it 'ZoneLevel'. Go to the Properties editor and create the following entries: '@0:Zone 1/@id:320001', '@0:Zone 2/@id:320001', and '@0:Zone 3/@id:320001'. The ZoneLevel variable will be used later inside the RowEntry template to control the level of the focused zone.
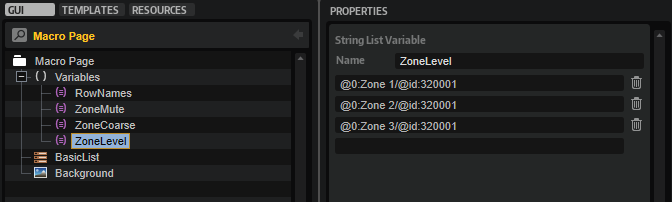
- Go to the Templates Tree, select the RowEntry template and click Edit Element to open it.
- Add a Text control and name it 'RowIndex'. Position it before the Label control that displays the row names. Set the Value to '@RowIndex'. Now, the index number of the row should be shown in the list.
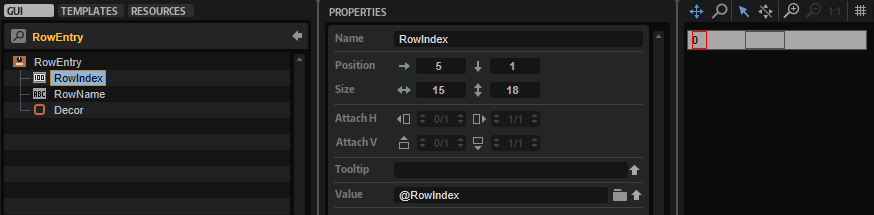
- Create a Stack control and drag the Decor control into it. Rename the decor to 'DecorOff'. Copy the decor and rename it to 'DecorOn'. Go to the Properties editor and change the color of the DecorOn control to fully white. Select the Stack control and set its Value property to '@RowFocus'. Now, a row is highlighted when you click it.
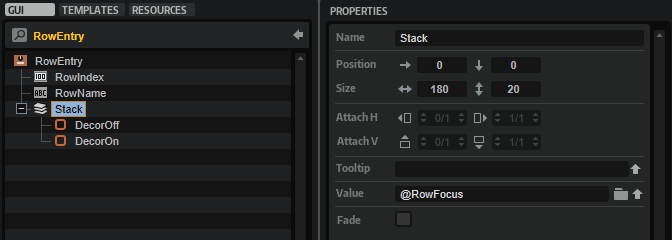
- Add a Switch control and set Mode to 'onoff'. Assign bitmaps for the different states of the switch. Alternatively, you can use a preconfigured switch template from the Basic Controls library. Postition the switch between the RowIndex and the RowName controls. Next to the Value property, click Export Property to export it. Select RowEntry and change the name of the exported Value property to 'Mute'.
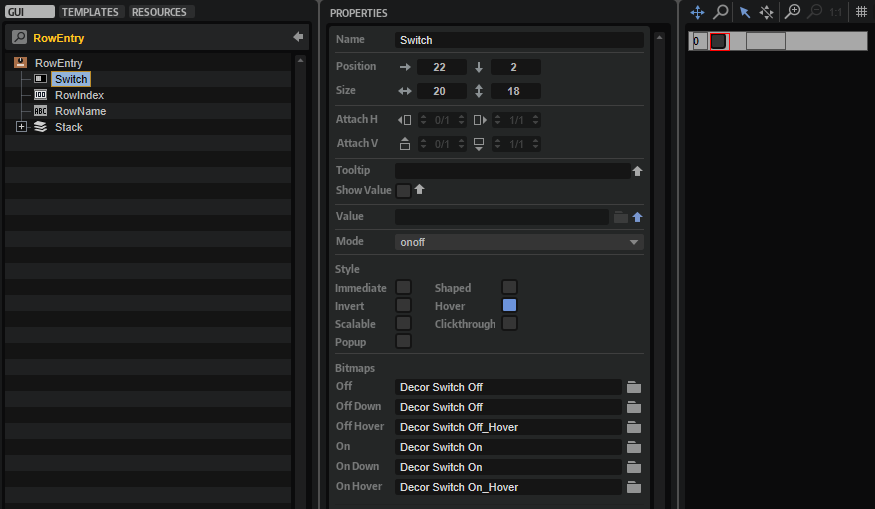
- Add a Text control and name it 'CoarseVal'. Postition the control after the RowName control. Next to the Value property, click Export Property to export it. Select RowEntry and change the name of the exported Value property to 'Coarse'.
- Add another Text control and name it 'LevelVal'. Postition the control after the CoarseVal control. Next to the Value property, click Export Property to export it. Select RowEntry and change the name of the exported Value property to 'Level'.
- Close the RowEntry template and go back to the GUI Tree. Select the BasicList item, go to the Properties editor and set the Template Parameters as follows: Set 'Mute' to '@ZoneMute', 'Coarse' to '@ZoneCoarse', and 'Level' to '@ZoneLevel'. Now, the rows will show the values of the connected parameters of the corresponding zones.
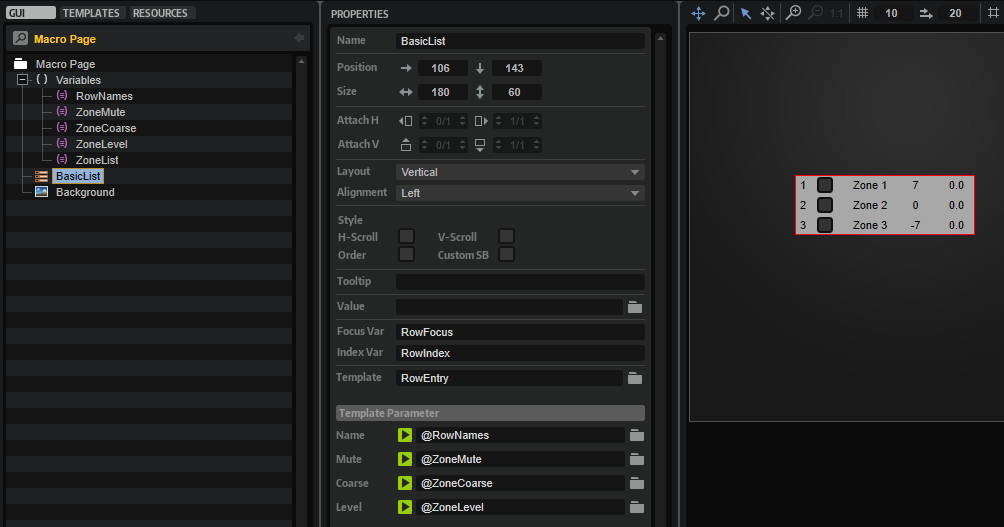
❕ The Stack from step 9 can contain further controls which change the appearance of a row completely, e.g., Label and Text controls with different colors, etc. For them to display the same parameters, their exported Value properties must share the same name.
Setting the Scope for Controls outside the Template List
This last part of the tutorial describes how to use a Template List for managing a common set of controls for different zones, or for the different articulations of an instrument, for example. The common controls exist only once and are not part of the template list. The focus of the template list is used to switch the scope of these controls, which connects them to the corresponding zone, or layer of an articulation.
❕ To follow the subsequent steps, Creating a Basic Template List and Adding Functionality must be completed beforehand.
- Open the Macro Page Designer, select the Variables folder and create a String List variable. Name it 'ZoneList'. Go to the Properties editor and create the following entries: '@0:Zone 1/', '@0:Zone 2/', and '@0:Zone 3/'. The ZoneList variable will be used later to set the focus for a set of common controls.
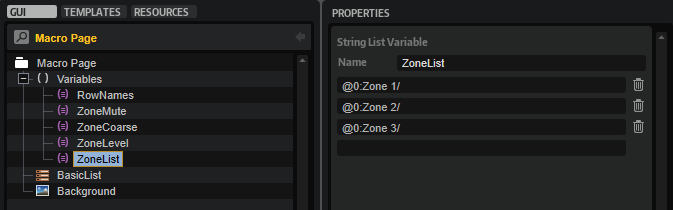
- Create a Group and set the Scope property to '@ZoneList'.
- Add two knobs from the Basic Controls library to the group, one for the Coarse and one for the Level parameter of the zones. Set the Value property of the Coarse knob to '@id:330002' and the Value property of the Level knob to '@id:320001'. Name the labels of the knobs 'Coarse' and 'Level', respectively.
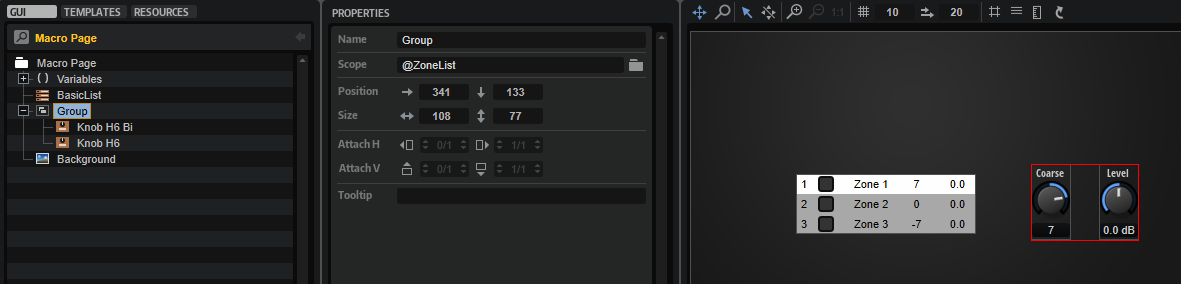
- Select the BasicList template list and set its Value property also to '@ZoneList'. Now, the scope of the knob controls is determined by the focused row in the template list.
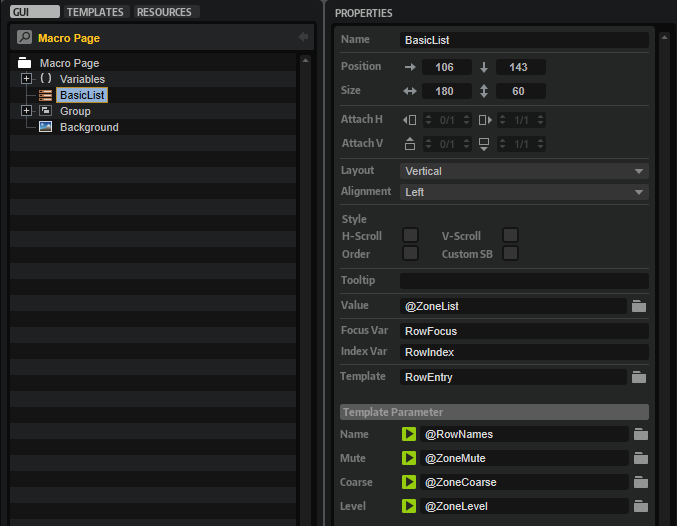
- Finally, create four Label controls, name them 'Mute', 'Name', 'Coarse', and 'Level', and place them above the corresponding columns of the Template List.
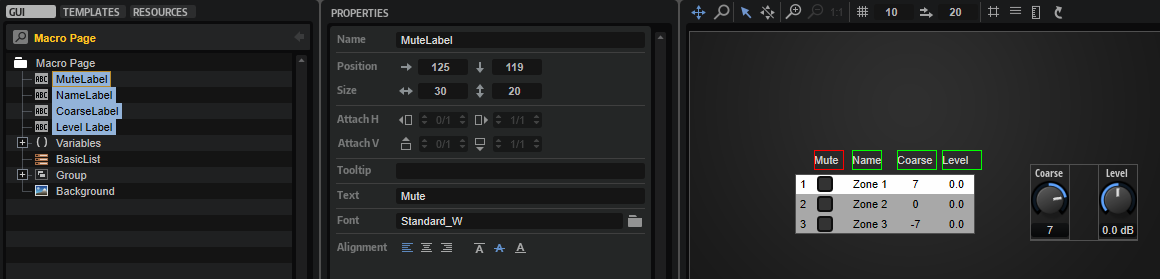
Using UI Script Parameters Instead of UI Variables
Instead of using UI Variables for defining the entries of the Template List, you can use a string list parameter that you have defined in a UI script.
- Create a UI script and define a string list parameter.
- Connect the string list parameter with the corresponding template parameter of the Template List.
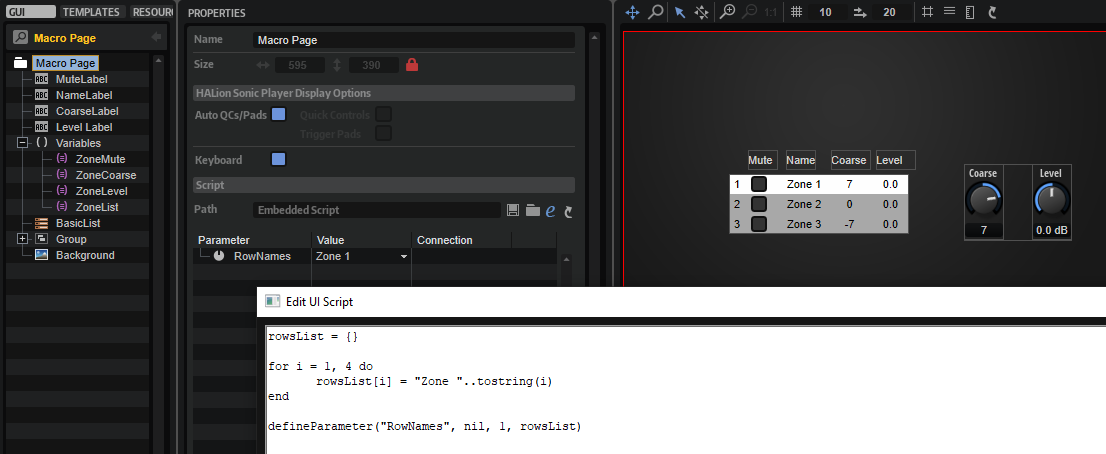
Example
rowsList = {}
for i = 1, 4 do
rowsList[i] = "Zone "..tostring(i)
end
defineParameter("RowNames", nil, 1, rowsList)
/ HALion Developer Resource / HALion Tutorials & Guidelines / Tutorials /
Creating an FX Chain
On this page:
- Example VST Preset
- Prerequisites
- Workflow Overview
- Adjusting the Number of Slots
- Adding Further Effects
- Final Example VST Preset
- How the Elements Interact
- Transferring the FX Chain to Your Instrument
- FX Chain with Custom Look
This tutorial describes how to create an FX Chain using a Template List. The FX Chain provides several slots for loading a predefined set of effects using a Custom Popup Menu. Furthermore, you can rearrange effects using drag and drop.
❕ For an example of a classic FX Rack instead of an FX Chain, see Creating an FX Rack.
Example VST Preset
The FX Chain in this example uses both UI and MIDI script functionality. The corresponding scripts are provided, but not explained in detail line by line. Instead, the connections and interactions between the UI elements and the UI and MIDI scripts are explained so that you can adjust the number of slots and customize the look of the FX Chain without the risk of introducing errors. See How the Elements Interact.
The following section describes how to access Templates and edit UI and MIDI scripts.
To explore the templates in this example:
- Open the Macro Page Designer, go to the Templates Tree and select the template that you want to explore.
- Click Edit Element to examine the template.
To edit the UI script:
- Open the Macro Page Designer and select the topmost element in the GUI Tree.
- Go to the Properties section and click Edit Script to open the internal script editor.
To edit the MIDI script:
- In the Program Tree, select the FX Chain MIDI Module.
- Go to the Sound editor and click Edit Script to open the internal script editor.
The instructions that follow use the internal script editor.
Prerequisites
- You have an instrument with a macro page.
- You have loaded both the preset Creating an FX Chain 01.vstpreset and your instrument into HALion.
Workflow Overview
- Adjust the number of slots in the UI script.
- Add further effects to the UI script and create templates for them.
- Copy the bus and effects from the Example VST Preset to your instrument.
- Copy the templates and resources from the Example VST Preset to your macro page.
- Copy the code of the UI and MIDI scripts from the Example VST Preset into the corresponding scripts of your instrument.
- Change the look of the FX Chain to match the look of your instrument.
Adjusting the Number of Slots
The FX Chain in the Example VST Preset has six slots. You can adjust the number of slots in the FX Chain by setting the numFxSlots variable in the UI script to the desired value.
Let's increase the number of slots from six to seven:
- In the Macro Page Designer, open the UI script in the internal script editor.
- Set the
numFxSlotsvariable to 7.
-- FX Chain handling.
numFxSlots = 7
- In the GUI Tree, select the 'FX Chain' Template List. Set the position and size as follows:
| Property | Value |
|---|---|
| Position X | 21 |
| Position Y | 100 |
| Width | 555 |
| Height | 55 |
- Update the UI, for example, by selecting a different program and then returning to the Example VST Preset. This will rebuild the macro page and apply your changes.
The FX Chain should now have seven slots on the macro page.

Adding Further Effects
To add additional effects, you need to edit the UI script, as well as modify and create the relevant Templates. Let's add "Distortion" to the selection of available effects.
Editing the UI Script
We will use the Clipper effect as a distortion. Therefore, we define fxType = "Clipper" and name = "Distortion". The value of fxType is used for loading the effect upon initialization and the value of name is used for naming the effect in the Program Tree. Functions and templates will also refer to this name.
- In the Macro Page Designer, open the UI script in the internal script editor.
- In the
effectstable, between the entries for"Freq Shifter"and"Studio EQ", insert the following lines:
{ name = "Distortion",
fxType = "Clipper",
settings = {
outputgain = 0.5,
hpcutoff = 0,
hardclip = 0,
Oversample = 1,
lpcutoff = 1,
hardclipoffset = 0,
inputgain = 0.5,
},
},
The code example above lists only the lines of code that need to be added to the effects table. The table lists the available effects and their parameters with names and default settings. The normalized range from 0 to 1 is used for the default settings. The default settings will be used when initializing the effects.
❕ For a code example on how to write effects and their settings to a table, see Snapshot Effects.
Creating a Template for the FX Slot
Each effect has its own template that is displayed in the slot when the effect is selected. Let's create a slot template for the Distortion effect by reusing an existing one.
- In the Templates Tree, navigate to 'library/FX Chain/FX Slots'.
- Copy and paste an existing slot template to the 'FX Slots' folder. You can copy any slot template except the 'FX_Slot' and 'FX_Slot_No_FX' templates.
- Rename the new template to 'FX_Slot_Distortion' and click Edit Element .
- In the GUI Tree, navigate to 'FX_Slot_Distortion/FX Type'. Set the Text property as follows:
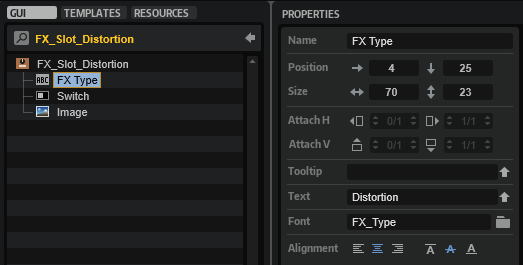
FX Type
| Property | Value |
|---|---|
| Text | Distortion |
Creating a Template for the FX Panel
The Distortion effect needs an FX panel. Let's create one by reusing an existing effect template.
- In the Templates Tree, navigate to 'library/FX Chain/FX Editors'.
- Copy and paste an existing effect template to the 'FX Editors' folder. You can copy any effect template except the 'FX_Editor_No_FX' template.
- Rename the new template to 'FX_Editor_Distortion' and click Edit Element .
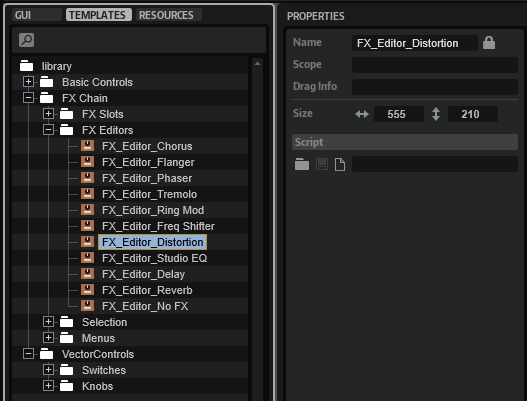
- Adjust the Properties of the controls and templates as described below.
Switch, On and Disable
The Switch, On, and Disable elements must all be connected to the Distortion's Bypass parameter. The easiest way to connect the Bypass parameter is by using drag and drop from the Parameter List. For this, you need to select the Distortion effect in the Program Tree and open the Parameter List.
- In the GUI Tree, select the 'Switch' element and drag the Distortion's Bypass parameter from the Parameter List onto the Value field.
- Select the 'On' element, go to the Template Parameters section and drag the Distortion's Bypass parameter from the Parameter List onto the Value field.
- Select the 'Disable' element and drag the Distortion's Bypass parameter from the Parameter List onto the Value field.
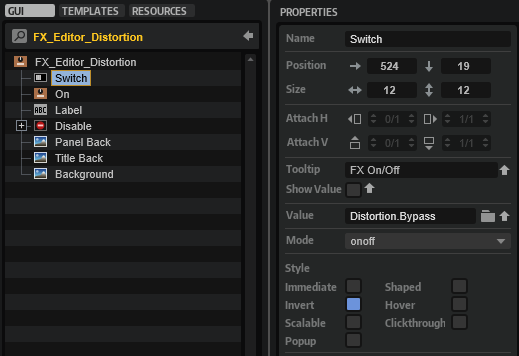
Label
For displaying the correct title:
- Select the 'Label' element and set its Text to "DISTORTION".
| Property | Value |
|---|---|
| Text | DISTORTION |
Knob Templates
Seven knobs are required for the distortion, six knobs for tone control and one knob for the dry/wet mix.
- In the GUI Tree, navigate to 'FX_Editor_Distortion/Disable/Controls'. Set position and size as follows:
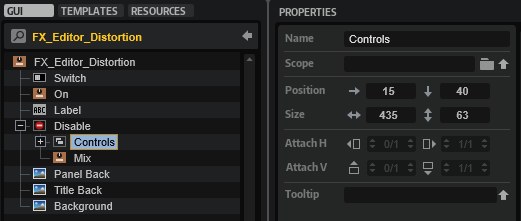
| Property | Value |
|---|---|
| Position X | 15 |
| Position Y | 40 |
| Width | 435 |
| Height | 63 |
- Duplicate the knob templates until you have six of them inside the 'Controls' Group.
- Set the properties of the knob templates as follows:
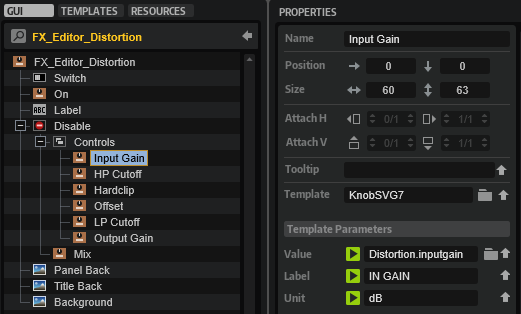
Knob 1
| Property | Value |
|---|---|
| Name | Input Gain |
| Position X | 0 |
| Position Y | 0 |
| Width | 60 |
| Height | 63 |
Knob 2
| Property | Value |
|---|---|
| Name | HP Cutoff |
| Position X | 75 |
| Position Y | 0 |
| Width | 60 |
| Height | 63 |
Knob 3
| Property | Value |
|---|---|
| Name | Hardclip |
| Position X | 150 |
| Position Y | 0 |
| Width | 60 |
| Height | 63 |
Knob 4
| Property | Value |
|---|---|
| Name | Offset |
| Position X | 225 |
| Position Y | 0 |
| Width | 60 |
| Height | 63 |
Knob 5
| Property | Value |
|---|---|
| Name | LP Cutoff |
| Position X | 300 |
| Position Y | 0 |
| Width | 60 |
| Height | 63 |
Knob 6
| Property | Value |
|---|---|
| Name | Output Gain |
| Position X | 375 |
| Position Y | 0 |
| Width | 60 |
| Height | 63 |
Each knob's template parameters must be configured so that they will have the correct display and connection. The easiest way to connect a parameter is by using drag and drop from the Parameter List. To do this, you need to select the Distortion effect in the Program Tree and open the Parameter List.
- For each knob, drag the respective Distortion parameter from the Parameter List onto the Value field of the Template Parameter and set the Label and Unit of the Template Parameters as follows:
Knob Template Input Gain
| Template Parameter | Value |
|---|---|
| Value | Distortion.inputgain |
| Label | IN GAIN |
| Unit | dB |
Knob Template HP Cutoff
| Template Parameter | Value |
|---|---|
| Value | Distortion.hpcutoff |
| Label | HIGHPASS |
| Unit | Hz |
Knob Template Hardclip
| Template Parameter | Value |
|---|---|
| Value | Distortion.hardclip |
| Label | HARDCLIP |
| Unit | % |
Knob Template Offset
| Template Parameter | Value |
|---|---|
| Value | Distortion.hardclipoffset |
| Label | OFFSET |
| Unit | % |
Knob Template LP Cutoff
| Template Parameter | Value |
|---|---|
| Value | Distortion.lpcutoff |
| Label | LOWPASS |
| Unit | Hz |
Knob Template Output Gain
| Template Parameter | Value |
|---|---|
| Value | Distortion.outputgain |
| Label | OUT GAIN |
| Unit | dB |
- The Mix knob template is the seventh and last knob that you have to adjust. Drag the Distortion's Mix parameter from the Parameter List onto the Value field of the Template Parameter and set Label and Unit as follows:
Knob Template Mix
| Template Parameter | Value |
|---|---|
| Value | Distortion.mix |
| Label | MIX |
| Unit | % |
- Finally, update the UI, for example, by selecting a different program and then returning to the Example VST Preset. This will rebuild the macro page and apply your changes.
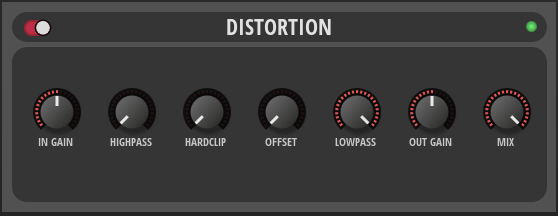
To add more effects, repeat the steps described above, starting with Adding Further Effects, and adjust the values to match the particular effect.
Final Example VST Preset
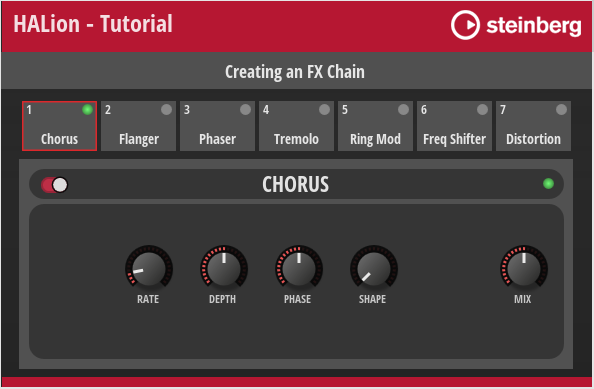
Here, you can find the Example VST Preset with all the editing steps applied.
How the Elements Interact
The UI script plays a central role in the FX Chain and controls most of its actions. The comments in the UI script explain which UI elements are connected to script parameters and why they are needed. Reading the comments and looking at the associated UI elements will help you to understand how the FX Chain works. The following screenshot shows the FX Chain template with its Template Parameters linked to the parameters of the UI script. These script parameters control how the effects chain is displayed on the macro page.
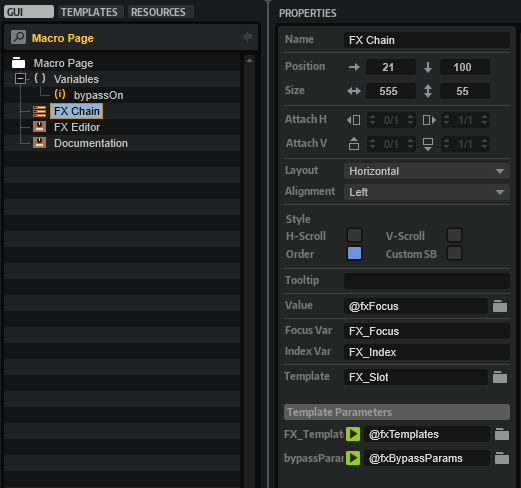
The UI script also contains print functions that are commented out. The print functions can be used to track the function calls.
- Go to the Macro Page Designer.
- Open the UI script in the internal script editor and remove the comments
--before each print function. - To monitor the UI script's output messages, click Show/Hide Script Output Messages
 .
. - Activate Test Macro Page
 .
. - Operate the FX Chain in the Macro Page Designer (not the Macro Page Editor).
❕ You must operate the FX Chain in the Macro Page Designer, otherwise the output messages will not be correct.
Below follows a brief description of the connections and the message exchange within the FX Chain.
FX Handling
- When an effect is loaded into a slot, the
"fxMenuSelectparameter of the UI script is changed and theonFxMenuChangedfunction is called. - The
onFxMenuChangedfunction of the UI script sets theselectFxparameter of the MIDI script, which uses a table to transfer information about which effect to load. TheselectFxparameter calls theonSelectFxfunction in the MIDI script, which loads the effect on the bus. - After the
onSelectFxfunction of the MIDI script has loaded the effect, thesendUpdateBusparameter is set. ThesendUpdateBusparameter of the MIDI script is connected to theupdateBusparameter of the UI script. - When the
updateBusparameter of the UI script is changed, theonBusChangedfunction is called and the associated parameters and templates of the FX Chain are updated by callingdefineFxSwitchesParamanddefineFxMenuParam. - After the
onBusChangedfunction of the UI script has updated the FX Chain templates, theonFxFocusChangedfunction is called. The FX Editor template uses Dynamic Template References, i.e., the template it displays is defined by the@fxEditorUI variable. TheonFxFocusChangedfunction defines the effect panel by setting the@fxEditorUI variable of the FX Editor template to the corresponding effect template.
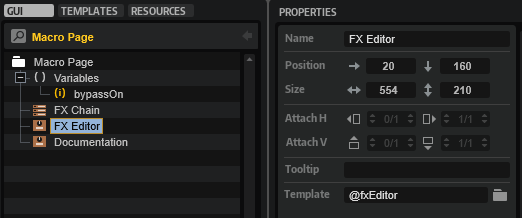
FX Drag and Drop Handling
- When an effect is dragged onto a new position in the FX Chain, the
onTemplateListViewDropfunction of the UI script is called. - The
onTemplateListViewDropfunction of the UI script sets themoveFxparameter of the MIDI script. This calls theonMoveFxfunction of the MIDI script, which repositions the effect on the bus. - After the
onMoveFxfunction has moved the effect, thesendUpdateBusparameter is set. ThesendUpdateBusparameter of the MIDI script is connected to theupdateBusparameter of the UI script.
All other steps are the same as in the FX Handling section, starting with step four.
Transferring the FX Chain to Your Instrument
To integrate the FX Chain into your macro page, you need to do the following:
- Copy the bus and effects from the Program Tree to your instrument. The program structure of your instrument must match the structure of the Example VST Preset and your macro page must be attached to the topmost element in the Program Tree.
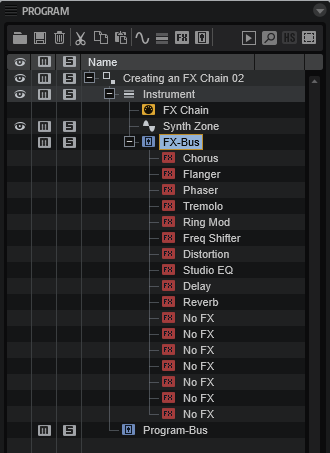
- Copy all the templates from the example VST preset that you edited in the steps above and paste them to the Templates Tree of your macro page. The templates in the example VST preset use Resources from the Basic Controls and Vector Controls libraries. In a later step, you can change these resources to match the look of your instrument.
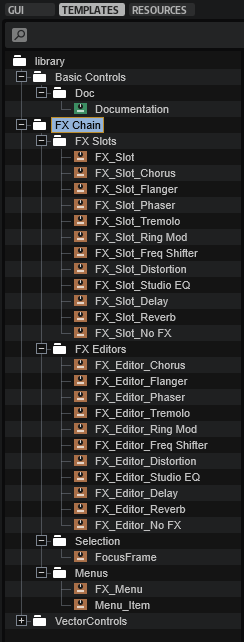
- Copy the Templates and Variables from the GUI Tree of the example VST preset to your macro page.
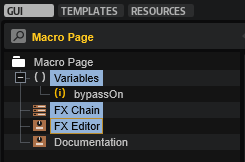
- Copy the code from the UI and MIDI scripts to the respective scripts of your instrument.
- Connect the
sendUpdateBusparameter of the MIDI script with theupdateBusparameter of the UI script.
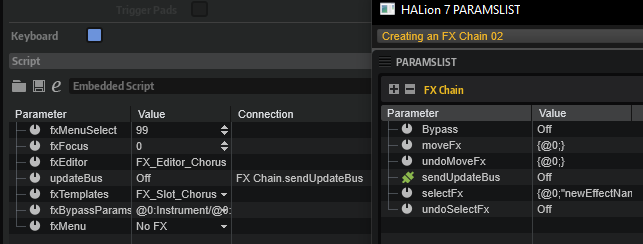
❕ The FX Chain will only work if this connection exists.
- Finally, update the UI, for example, by selecting a different program and then selecting your instrument again. This will rebuild the macro page and apply your changes.
FX Chain with Custom Look
You can customize the look and feel of your instrument entirely by using your own Resources. As an example, the FX chain of Electric Bass is shown in the following screenshot.
/ HALion Developer Resource / HALion Tutorials & Guidelines / Tutorials /
Creating an FX Rack
On this page:
- Example VST Preset
- Prerequisites
- Workflow Overview
- Adjusting the Number of Slots
- Adding Further Effects
- Final Example VST Preset
- How the Elements Interact
- Transferring the FX Rack to Your Instrument
- FX Rack with Custom Look
This tutorial describes how to create an FX Rack using a Template List. The FX Rack provides several slots for loading effects using a Custom Multi Level Menu. Furthermore, you can rearrange effects via drag and drop. Subpresets for each effect are managed using the Preset Browser Custom template.
❕ For an example of an FX Chain instead of an FX Rack, see Creating an FX Chain.
Example VST Preset
The FX Rack in this example uses both UI and MIDI script functionality. The corresponding scripts are provided, but not explained in detail line by line. Instead, the connections and interactions between the UI elements and the UI and MIDI scripts are explained so that you can adjust the number of slots and customize the look of the FX Rack without the risk of introducing errors. See How the Elements Interact.
The following section describes how to access Templates and edit UI and MIDI scripts.
To explore the templates in this example:
- Open the Macro Page Designer, go to the Templates Tree and select the template that you want to explore.
- Click Edit Element to examine the template.
To edit the UI script:
- Open the Macro Page Designer and select the topmost element in the GUI Tree.
- Go to the Properties section and click Edit Script to open the internal script editor.
To edit the MIDI script:
- In the Program Tree, select the FX Rack MIDI Module.
- Go to the Sound editor and click Edit Script to open the internal script editor.
The instructions that follow use the internal script editor.
Prerequisites
- You have an instrument with a macro page.
- You have loaded both the preset Creating an FX Rack 01.vstpreset and your instrument into HALion.
Workflow Overview
- Adjust the number of slots in the UI script.
- Add further effects to the UI and MIDI scripts and create templates for them.
- Copy the bus and effects from the Example VST Preset to your instrument.
- Copy the templates and resources from the Example VST Preset to your macro page.
- Copy the code of the UI and MIDI scripts from the Example VST Preset into the corresponding scripts of your instrument.
- Change the look of the FX Rack to match the look of your instrument.
Adjusting the Number of Slots
The FX Rack in the Example VST Preset has four slots. You can adjust the number of slots in the FX Rack by setting the numFxSlots variable in the UI script to the desired value.
Let's increase the number of slots from four to five:
- In the Macro Page Designer, open the UI script in the internal script editor.
- Set the
numFxSlotsvariable to 5.
-- FX Rack and effects UI
numFxSlots = 5
- Update the UI, for example, by selecting a different program and then returning to the Example VST Preset. This will rebuild the macro page and apply your changes.
The FX Rack should now have five slots on the macro page and in the Program Tree structure.
Adding Further Effects
To add additional effects, you need to edit the UI and MIDI scripts, as well as modify and create the relevant Templates. Let's add "Tremolo" to the selection of available effects.
Editing the UI Script
- In the Macro Page Designer, open the UI script in the internal script editor.
- In the
fxDatatable, between"Phaser"and"Distortion", insert"Tremolo"as Name, and"a"as Bypass ID:
fxData = {
-- Name Bypass ID(hex)
{ "None", "0" },
{ "Chorus", "e" },
{ "Flanger", "e" },
{ "Phaser", "12" },
{ "Tremolo", "a" }, -- Add this line.
{ "Distortion", "14" },
{ "Bit Crusher", "14" },
{ "Delay", "16" },
{ "Reverb", "13" },
}
The ID of the bypass parameter differs depending on the type of effect. You can look up the ID in hex format in the Program List, for example. This information is important when adding other types of effects.
Editing the MIDI Script
- In the Program Tree, select the FX Rack MIDI Module and the internal script editor.
- Add the following information to the
effectDefaultstable.
Tremolo = {
output = 0,
rate = 0.7979797979798,
syncnote = 0,
depth = 0.75,
phase = 1,
temposync = 0,
},
The code example above lists only the lines of code that need to be added to the effectDefaults table. The table lists the available effects and their parameters with names and defaults. The normalized range from 0 to 1 is used for the defaults. The defaults will be used when loading an effect.
❕ For a code example on how to write effects and their settings to a table, see Snapshot Effects.
Modifying the Effect Selector
The Select Effect menu is hierarchical. It has submenus for Modulation, Distortion, and Time. Each submenu has its own Template. First, you need to add the 'Tremolo' menu entry to the Modulation submenu. Then you must increase the OnValues of the subsequent effects in the other submenus by one to match the indices of the arrays and Indexed String Array parameters in the UI script.
- In the Macro Page Designer, go to the Templates Tree and navigate to'library/FX Rack/PopUps/FX Type/M_FX Type Mod'.
- Edit the 'M_FX Type Mod' template.
- In the GUI Tree copy and paste one of the existing Templates, e.g. the 'Phaser' template.
- Set the Properties of the new 'Tremolo' template as follows:
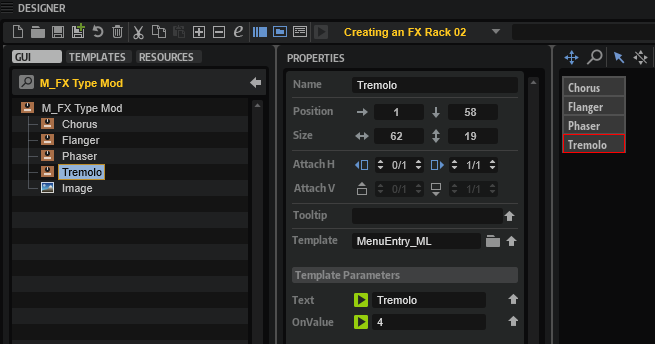
| Property | Value |
|---|---|
| Name | Tremolo |
| Position X | 1 |
| Position Y | 58 |
| Text | Tremolo |
| OnValue | 4 |
- Now, edit the 'M_FX Type Dist' and 'M_FX Type Time' templates.
- Set the OnValue of the the subsequent effects as follows:
| Template | Property | Value |
|---|---|---|
| Distortion | OnValue | 5 |
| Bit Crusher | OnValue | 6 |
| Delay | OnValue | 7 |
| Reverb | OnValue | 8 |
Creating a Template for the FX
The Tremolo effect needs an FX panel. Let's create one by reusing an existing effect template.
- In the Templates Tree, go to 'library/FX Rack/FX/Effects'.
- Copy and paste an existing effect template to the 'Effects' folder. You can copy any effect template except the 'None' template.
- Rename the new template to 'Tremolo' and click Edit Element .
- Adjust the Properties of the controls and templates as described below.
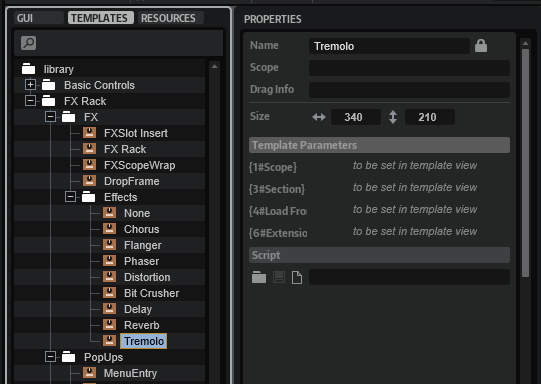
Knob Templates
The knob templates are inside the Disable control. The knobs can be configured with template parameters.
- Set the Template Parameters as follows:
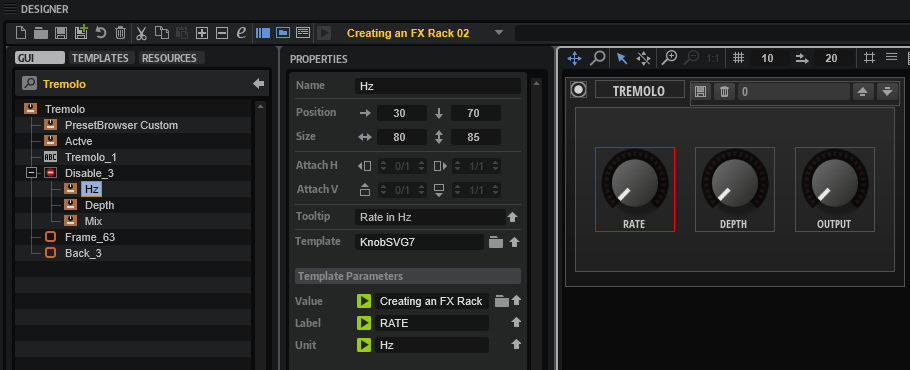
Knob Template HZ
| Template Parameter | Value |
|---|---|
| Value | @id:0 |
| Label | RATE |
| Unit | Hz |
Knob Template Depth
| Template Parameter | Value |
|---|---|
| Value | @id:1 |
| Label | DEPTH |
Knob Template Mix
| Template Parameter | Value |
|---|---|
| Value | @id:2 |
| Label | OUTPUT |
| Unit | dB |
Now, the knobs control the effect parameters and display the corresponding parameter names and units.
Active Template
The ID of the Bypass parameter must be set.
- Set the Template Parameter of the 'Active' template as follows:
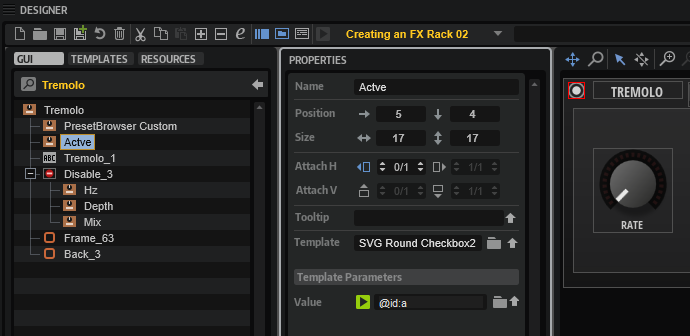
| Template Parameter | Value |
|---|---|
| Value | @id:a |
Disable Group
The value of the Disable group must be set to the same ID as the associated Bypass parameter. The three knobs will be disabled if the effect is bypassed.
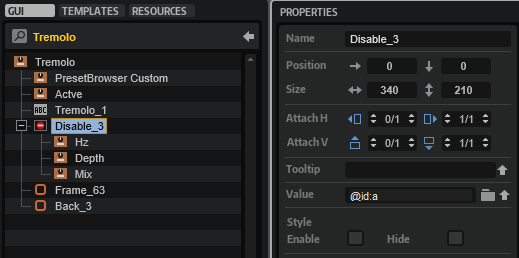
| Property | Value |
|---|---|
| Value | @id:a |
Label Control
The title of the effect must be changed.
- Set the Properties of the Label control as follows:

| Property | Value |
|---|---|
| Name | Tremolo_1 |
| Text | TREMOLO |
Preset Browser Template
The Preset Browser FX Rack template provides the subpreset management for each effect. It can be configured with template parameters.
- Set the Template Parameters as follows:
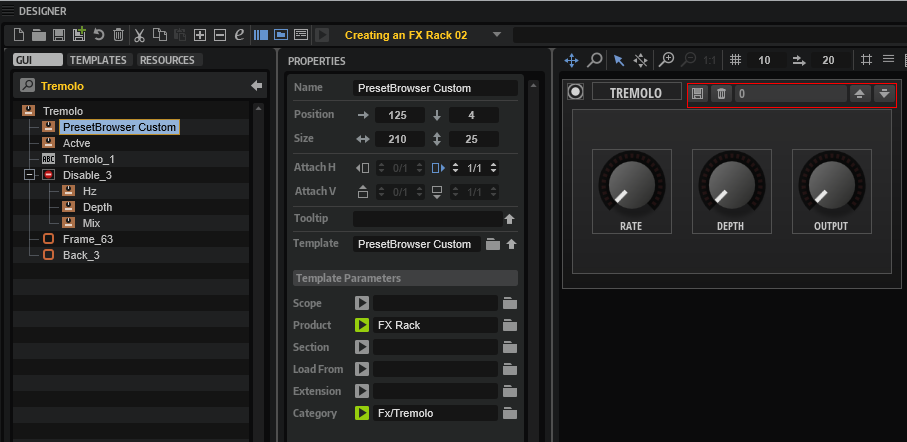
| Template Parameters | Value |
|---|---|
| Product | FX Rack |
| Category | FX/Tremolo |
This way, the Tremolo effect will load and save subpresets from its own location.
❕ The Preset Browser FX Rack template differs from the Preset Browser Custom template. The main difference is that it omits the Mix parameter when loading an FX subpreset. To keep this functionality, you must use the template from this example instead of the Preset Browser Custom template.
- Finally, update the UI by selecting a different program and then selecting the Example VST Preset again. This will rebuild the macro page and apply your changes.
To add more effects, repeat the steps described above, starting with Adding Further Effects, and adjust the values to match the particular effect.
Final Example VST Preset
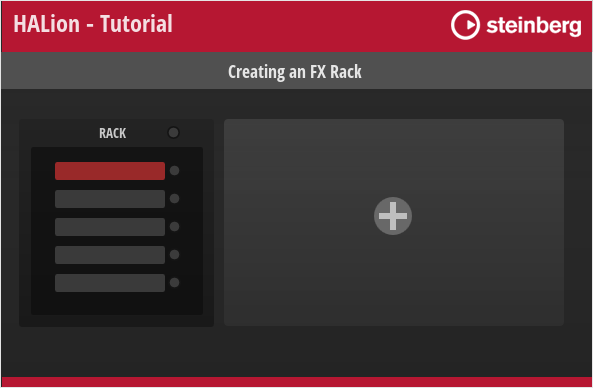
Here, you can find the Example VST Preset with all the editing steps applied.
How the Elements Interact
The UI script plays a central role in the FX Rack and controls most of its actions. The comments in the UI script explain which UI elements are connected to script parameters and why they are needed. Reading the comments and looking at the associated UI elements will help you to understand how the FX Rack works. The following screenshot shows the Insert Rack template with its Template Parameters linked to the parameters of the UI script. These script parameters control how the insert rack is displayed on the macro page.
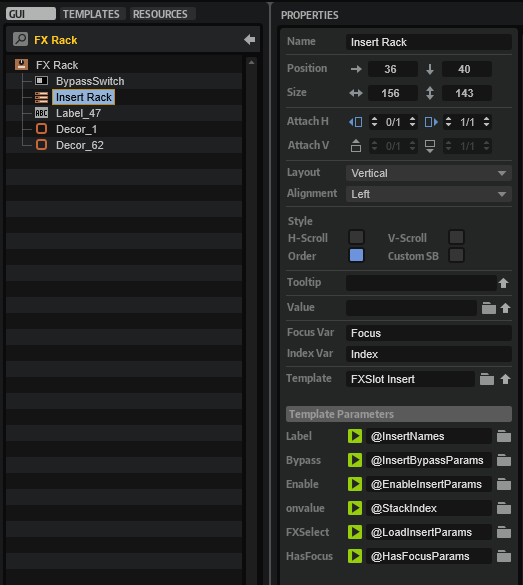
The UI script also contains print functions that are commented out. The print functions can be used to track the function calls.
- Go to the Macro Page Designer.
- Open the UI script in the internal script editor and remove the comments
--before each print function. - To monitor the UI script's output messages, click Show/Hide Script Output Messages .
- Activate Test Macro Page .
- Operate the FX Rack in the Macro Page Designer (not the Macro Page Editor).
❕ You must operate the FX Rack in the Macro Page Designer, otherwise the output messages will not be correct.
Below follows a brief description of the connections and the message exchange within the FX Rack.
FX Handling
- When an effect is loaded into a slot, the UI script's
"LoadInserts"..iparameter is changed and theonSelectFXfunction is called. - The UI script's
onSelectFXfunction sets the MIDI script'sselectFxparameter. This calls theonSelectFxfunction in the MIDI script, which loads the effect on the bus. - After the MIDI script's
onSelectFxfunction has loaded the effect, thesendUpdateBusparameter is set. The MIDI script'ssendUpdateBusparameter is connected to the UI script'supdateBusparameter. - When the UI script's
updateBusparameter is changed, theonBusChangedfunction is called and the associated parameters and templates of the FX Rack are updated. - After the UI script's
onBusChangedfunction has updated the FX Rack, theonShowInsertChangedfunction is called. TheonShowInsertChangedfunction sets the scope and the template for the effect panel.
FX Drag and Drop Handling
- When an effect is dragged and dropped to a new position in the FX Rack, the UI script's
onTemplateListDropfunction is called. - The UI script's
onTemplateListDropfunction sets the MIDI script'smoveFxparameter. This calls the MIDI script'sonMoveFxfunction, which repositions the effect on the bus. - After the
onMoveFxfunction has moved the effect, thesendUpdateBusparameter is set. The MIDI script'ssendUpdateBusparameter is connected to the UI script'supdateBusparameter.
All other steps are the same as in the FX Handling section, starting with step four.
Transferring the FX Rack to Your Instrument
To integrate the FX Rack into your macro page, you need to do the following:
- Copy the bus and effects in the Program Tree. The Program structure of your instrument must match the structure of the Example VST Preset and your macro page must be attached to the topmost element in the Program Tree.
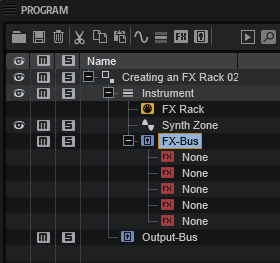
- Copy all Templates. The Templates in the Example VST Preset use Resources from the Basic Controls and Vector Controls library. Later, you can change the Resources to match the look of your instrument.

- Copy the Templates from the GUI Tree to your macro page.
- Copy the code from the UI and MIDI scripts to the respective scripts of your instrument.
- Connect the MIDI script's
sendUpdateBusparameter with the UI script'supdateBusparameter.
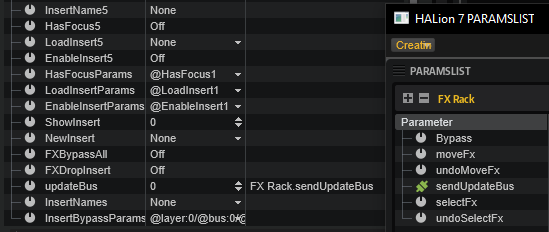
❕ The FX Rack will only work if this connection exists.
- Finally, update the UI, for example, by selecting a different program and then selecting your instrument again. This will rebuild the macro page and apply your changes.
FX Rack with Custom Look
You can customize the look and feel of your instrument entirely by using your own Resources. As an example, the FX rack of FM Lab is shown in the following screenshot.
/ HALion Developer Resource / HALion Tutorials & Guidelines / Tutorials /
Using Attribute Rules
(Since HALion 7.1.0)
On this page:
- MediaBay Attributes
- Attribute Rules
- Attribute Rule
- Prerequisite
- Adding an Attribute Rules Node
- Creating an Attribute Rule
- Setting Attribute Rule Properties
- Investigating Errors
- About the Scope of an Attribute Rule
- Attribute Rules for Other Media Types
- Attribute Rules Presets
- Example
MediaBay Attributes
MediaBay attributes are a quick and easy way to browse and search presets. Attributes are descriptive keywords that you can assign to your presets. Good search results in the MediaBay are highly dependent on correctly set attributes. With a large number of presets, it can be difficult to verify that MediaBay attributes are correct. The Library Creator provides features that allow you to set, delete or check MediaBay attributes during library creation.
Attribute Rules
Attribute Rules is a special node that can be added to a VST Sound in the Structure section. Within the Attribute Rules node, you can create a set of rules and commands for setting, deleting and testing MediaBay attributes.
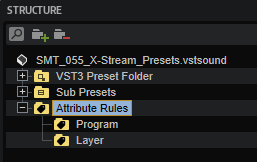
The top node Attribute Rules cannot be renamed. You can create additional Attribute Rules nodes within the top node. These additional nodes define a subset of rules. Additional nodes can be renamed and referenced by that name, for example, to define separate rules for program and layer presets.
Attribute Rule
An Attribute Rule can only be created within an Attribute Rules node. An Attribute Rule defines the rules and actions to be exectued for a certain MediaBay attribute. You must create an Attribute Rule for each desired rule and action.

Prerequisite
For this tutorial, you need a library with a VST Sound that contains program and/or layer presets.
Adding an Attribute Rules Node
- In the VST Sound Container section, select the VST Sound that contains the program presets of your library.
- In the toolbar of the Structure section, click Add.
- Select Attribute Rules > Create Attribute Rules.
An Attribute Rules node is added to the structure of the VST Sound. This node has no function. It serves only as a container for the actual rules and actions.
Creating an Attribute Rule
- In the Structure section, select the Attribute Rules node.
- In the toolbar of the Content section, click Add.
- Select Attribute Rule.
An Attribute Rule is added to the Content section. The Attribute Rule you just created has no function yet. It must be assigned to an attribute and the desired operation must be selected.
Setting Attribute Rule Properties
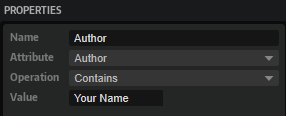
- In the Content section, select the Attribute Rule you want to edit. The current set of rules and actions are displayed in the Properties section to the right.
- Open the Attribute menu and select the desired attribute.
- Open the Operation menu and select the desired action for the selected attribute.
- Enter a Value for the selected operation, if needed.
Attribute Property
The Attribute property defines to which attribute the Attribute Rule applies. To learn more about the different attributes of MediaBay, see the MediaBay Guideline.
Operation Property
The Operation of an Attribute Rule defines the action to be performed on the selected attribute. The Library Creator checks each preset if the rule applies and performs the defined action or reports an error during building the library.
| Operation | Description |
|---|---|
| Require | The attribute must be set. |
| Reject | The attribute must not be set. |
| Contains | The attribute must contain the set value. |
| Set | The attribute is set to the defined value. |
| Clear | The attribute will be deleted. |
Investigating Errors
A red warning sign next to a content file indicates errors before the library is built.
- Click the red warning sign to open a report of the errors and investigate them.
❕ The library is built only if the defined set of rules and actions can be executed without errors.
About the Scope of an Attribute Rule
The scope defines to which presets an Attribute Rule applies. By default, any Attribute Rule that is defined in the top node Attribute Rules applies to all presets within the VST Sound. You can change the scope by creating an additional Attribute Rules node within the top node. This additional node can be used to define a subset of rules. The additional node can be renamed and referenced by that name. The subset of rules and actions apply only to the presets that reference the additional Attribute Rules node.
Creating Additional Attribute Rules
- In the Structure section, create the Attribute Rules node and select it.
- Within the selected node, create another Attribute Rules node.
- Rename the Attribute Rules node you have just created.
- Add an Attibute Rule, see Creating an Attribute Rule.
- Repeat the last step until you have the desired set of rules.
Assigning a Subset of Attribute Rules
- In the Structure section, select the VST3 Preset Folder. The Name and Rules properties are displayed in the Properties section to the right.
- Navigate to the folder that contains the presets to which you want to apply the subset of attribute rules.
- Enter the name of the Attribute Rules node as reference for the Rules property.
You can even assign a subset of attribute rules to single presets.
- Navigate to the desired preset.
- Set the Rules property to the name of the Attribute Rules node you want to reference.
Attribute Rules for Other Media Types
In addition to VST3 presets, you can create attribute rules also for other media types that support MediaBay attributes, for example, audio and MIDI files.
❕ The Private Audio Files folder hides samples from MediaBay. Therefore, attribute rules cannot be applied to samples in the Private Audio Files folder. Only samples in the Public Audio Files folder are visible to MediaBay. For this reason, attribute rules can only be applied to samples in the Public Audio Files folder.
- In the Structure section, select Public Audio Files or MIDI Files, depending on the media type. The Name and Rules properties are displayed in the Properties section to the right.
- Navigate to the folder that contains the content to which you want to apply the subset of attribute rules.
- Enter the name of the Attribute Rules node as reference for the Rules property.
Attribute Rules Presets
You can save and load presets for any Attribute Rules node. The preset saves all the rules for the selected node. Loading a preset restores these rules for the node where you load it.
Saving Attribute Rules
- In the Structure section, select the Attribute Rules node that you want to save.
- In the toolbar of the Content section, click Add.
- Select Save Preset.
- Enter a meaningful name for your attribute rules and click Save.
Loading Attribute Rules
- In the Structure section, select the node for which you want to load the preset. This can be the node of the VST Sound or an Attribute Rules node.
- In the toolbar of the Structure section, click Add.
- Go to Attribute Rules > Load Preset and select the preset that you want to load.
Deleting Attribute Rules
(Since HALion 7.1.10)
- In the toolbar of the Structure section, click Add.
- Go to Attribute Rules > Delete Preset and select the preset that you want to delete.
Example
Using different rules for program presets and the Init layer preset.
- In the Structure section, create the Attribute Rules node and select it.
- Within the selected node, create two more Attribute Rules nodes.
- Rename the Attribute Rules nodes you have just created to "Program Presets" and "Init Layer" respectively.
- Create different rules for your program presets and the Init layer preset.
- Navigate to the VST3 preset folder that contains the program presets.
- In the Properties section to the right, set the Rules property to "Program Presets".

- Navigate to the VST3 preset folder that contains the Init layer preset and select it
- In the Properties section to the right, set the Rules property to "Init Layer".
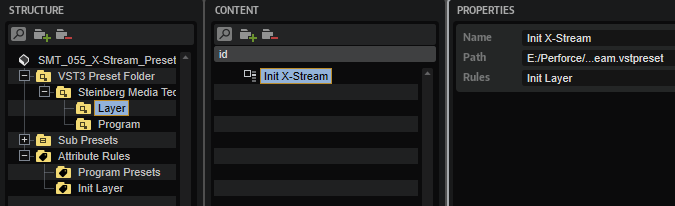
The Library Creator scans each preset to verify whether the referenced rules apply and performs the defined action or reports an error when building the library.
/ HALion Developer Resource / HALion Tutorials & Guidelines / Tutorials /
Using Relative Paths
On this page:
- Abolute Paths vs. Relative Paths
- Creating a Working Directory
- Achieving Relative Paths
- Using Export Program as VST3 Preset with Export Files
- Moving a Library
- Achieving Relative Paths in Scripts
Abolute Paths vs. Relative Paths
Absolute paths use the full file path starting from the root directory of your system. If the source files of your library use absolute paths, you have to relocate them when moving the library to another directory or system. If you work in a team and you need to share your library with your teammates, you must work with relative paths. Relative paths start from a specific working directory, avoiding the need to provide the full file path. If the source files of your library use relative paths, you can move the library to another directory or system without having to relocate the files. Therefore, it is recommended to work with relative paths when creating libraries.
Creating a Working Directory
Libraries and their source files can be moved and shared easily if you keep all files in one place: your working directory. It is recommended that you create one working directory for each library. This directory contains the required subfolders for the different types of source files. Typical subfolders are: VST presets, macropages, samples, scripts, etc. The working directory can be located anywhere on your system.
- To create a working directory and subfolders, use the file browser of your system.
A typical folder structure could look like this:
Achieving Relative Paths
Overview of Workflows
- To export the VST preset to the working directory, you must use Export Program as VST3 Preset...
- Place the source files in the subfolders of the working directory and load them from there.
- Load the source files from any location, then export them into the respective subfolders of the working directory using one of HALion's export functions. There are different functions for exporting samples, macro pages, etc. Then relocate the files with a replace function or load them from their new location.
The different workflows will be explained in detail below.
❕ You cannot create a working directory simply by moving the VST preset and all source files into one directory, because the file paths within the VST preset still point to the locations of the source files that were used when you saved the preset.
Exporting VST Presets to the Working Directory
If you want to save your VST preset for the first time, you might be tempted to use Save Program or Save Program As. However, the save functions only allow you to save programs in the default location for VST presets. The export function allows you to choose the location freely. You must use Export Program as VST3 Preset at least once to export your VST preset to the working directory. After loading the exported VST preset from the working directory, you can save your VST preset using the Save Program command or the export function. Save Program will not ask for a location or file name if the preset was loaded from the working directory.
To achieve relative paths for your VST preset:
- Export the VST preset with Export Program as VST3 Preset to the working directory.
- Load the VST preset from the working directory.
From now on, you can either use Save Program or the export function to save your VST preset.
❕ If you are working on a HALion Sonic library, you usually want to save HALion Sonic layers and not HALion programs. In this case Save Program cannot be used and you must use Export Program as VST3 Preset with the options Export as HALion Sonic Layer and Verify HALion Sonic Layer Structure activated.
Using Source Files from the Working Directory
A practical way to achieve relative paths for your library is to place the source files, e.g., samples, bitmaps, scripts, etc., in the working directory before loading them. This is especially recommended if you already know which files you want to use in your library.
- Place the source files in the subfolders of the working directory and load them from there.
❕ Do not forget to save or export your VST preset after adding new ressources to it.
Using Export Program as VST3 Preset with Export Files
Export Program as VST3 Preset with Export Files activated allows you to create a working directory and export all the required files to it in a single operation.
- In the Program Tree, right-click the program and select Import/Export > Export Program as VST3 Preset
- Activate Export Files.
- If you are working on a HALion Sonic library, activate Export as HALion Sonic Layer and Verify HALion Sonic Layer Structure.
- Choose a location and a file name. The location becomes your working directory. The file name should correspond to the name of your instrument.
- Click OK to start the export.
HALion now creates a VST preset and several subfolders in the working directory. The subfolders store all the ressources that were in use when you exported the program.
Subfolders containing ressources typically look like this:
To activate the relative paths, you must load the exported VST preset:
- Load the exported preset from the working directory. It uses only the exported files in the respective subfolders.
Moving a Library
If you need to move the library to a new location, you must move the whole working directory with its contents. As long as you do not change the folder structure inside the working directory, HALion will be able to load your library, even after moving it.
Achieving Relative Paths in Scripts
Functions like loadPreset require a file path as argument. The function debug.getinfo from the Lua debug library returns the file path of the running script. You can use this information to create a relative file path for your script. The folders in the 'if' branch of the following script example must match the working directory on your hard disk. How to create a working directory is described in Using Relative Paths. The folders in the 'else' branch must match the folders that you specified in the Library Creator. If the folder on the hard disk cannot be found, the file path of the VST sound will be used instead. Note that the VST sound must be mounted for this to work.
Example
-- Load a sub preset from hard disk or VST sound.
-- Find relative path on hard disk.
local info = debug.getinfo(1,'S') -- Function from the Lua debug library.
local source = info.source
local pos = string.find(source, "/library/") -- Assumes the folder "/library/" contains subfolders like "/samples/", "/scripts/", "/VST3 Sub Presets/", etc.
if pos then
contentPath = string.sub(source, 1, pos - 1).."/library/VST3 Sub Presets/" -- The folder on disk with sub presets, for example.
else
-- Extract VST sound GUID, e.g. "vstsound://ABCDEFGHIJKLMNOPQRSTUVWXYZ123456".
-- The GUID of the VST sound can be found in the library creator.
-- "SomeFolderName" is defined in the library creator.
-- The library creator prepends "/.AppData/Steinberg/" when building the library.
-- The content must be in the same VST sound as the script.
contentPath = source:sub(1, 43) .. "/.AppData/Steinberg/SomeFolderName/" -- The location of the sub presets inside the vstsound.
end
-- Load the sub preset from the respective contentPath.
layer = loadPreset(contentPath.."SomePreset.vstpreset")
/ HALion Developer Resource / HALion Tutorials & Guidelines / Tutorials /
Using Velocity Crossfades
On this page:
- Prerequisite
- Activating Velocity Crossfades
- Using the Velocity Options
- Setting the Level Velocity
- Fine-Tuning the Velocity Crossfades
- Example VST Preset
The sampled velocities of an instrument usually have differences in timbre and level. Velocity crossfades allow you to blend between adjacent velocities for smoothing out these differences, which makes the instrument more playable and the sound more realistic.
Prerequisite
To set up velocity crossfades, you need a multi-sample with two or more velocity layers. The following example program has three velocity layers.
Loading the Example VST Preset
- Download Using Velocity Crossfades 01.vstpreset.
- Drag the VST preset to the Slot Rack.
❕ The example VST preset requires the factory content of HALion.
Activating Velocity Crossfades
Overview of Workflows
- Individual Velocity Mode and Velocity Fade must be activated for the layer containing the zones that you want to crossfade.
- Enable Crossfade on Velocity Axis must be activated for all zones that you want to crossfade.
- Adjust the fade handles in the Mapping editor using Crossfade: Symmetric.
Activating the Layer
The options Individual Velocity Mode and Velocity Fade can be found in the Sound editor.
- In the Program Tree, select the layer containing the zones that you want to crossfade.
- Open the Sound editor, go to the Trigger section and activate Individual Velocity Mode and Velocity Fade.
Activating the Zones
The option Enable Crossfade on Velocity Axis can be found in the context menu of the Mapping editor.
- Open the Mapping editor and select all zones.
- Right-click a zone and select Crossfades > Enable Crossfade on Velocity Axis.
❕ The Enable Crossfade on Velocity Axis option is grayed out and cannot be used if Individual Velocity Mode or Velocity Fade are not activated.
Adjusting the Velocity Crossfades
Velocity crossfades are adjusted with the fade handles in the Mapping editor.
❕ The fade handles are only visible if the options for the layer and zones have been activated, as described above. In addition, the zones must be selected and the zoom level must be high enough.
- In the toolbar of the Mapping editor, activate Crossfades: Symmetric
 .
. - Select the zones that you want to crossfade or select all zones.
- Zoom in until you see the fade handles.
- Drag a fade handle to adjust the range of the crossfade.
- Drag one of the fade lines to adjust the curvature of the crossfade.
Using the Velocity Options
Once the velocity crossfades are set up in the Mapping editor, they can be used. You can crossfade the zones using the note-on velocity or by using the value of a MIDI controller, for example. The different usages are configured with the velocity options in the Trigger section of the corresponding layer. Which settings you must use depends on the requirements of your content. The following table lists the different requirements and the settings for the velocity options.
| # | Content Requirements | Velocity Mode | Velocity Fade | Description |
|---|---|---|---|---|
| 1 |
| Note-on | Off |
|
| 2 |
| Note-on | On |
|
| 3 |
| Controller | Off |
|
| 4 |
| Controller | On |
|
| 5 |
| Continuous | Off |
|
| 6 |
| Continuous | On |
|
We will use Velocity Mode Continuous and Velocity Fade On for the example VST preset.
- In the Program Tree, select the layer on which you activated the Individual Velocity Mode and Velocity Fade options.
- Open the Sound editor, go to the Trigger section and set Velocity Mode to "Continuous" and Controller to ""Modulation Wheel"".

- Play a note and use the modulation wheel.
Setting the Level Velocity
The overall dynamic range and response is determined by the Level Velocity settings of the amplitude envelope of the zone.
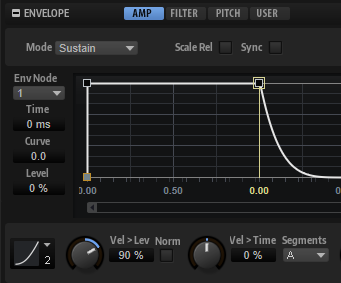
Depending on whether your samples are normalized or not, there are two basic concepts for setting up the level velocity.
If your samples are normalized:
- Choose a Level Velocity Curve. The Squared velocity curve is the most commonly used curve.
- Adjust the dynamic range with the Level Velocity parameter. The higher the value, the greater the dynamic range.
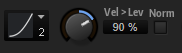
With these settings, the dynamic range and response is mainly determined by the level velocity settings of the zones.
If your samples are not normalized:
- Set the Level Velocity Curve to Linear.
- Activate Use Normalized Velocity.
- Increase the Level Velocity parameter for each velocity layer only as much as necessary until the crossfades sound smooth.
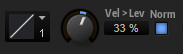
With these settings, the dynamic range and response is determined by the combination of the gains of the samples and the Level Velocity settings of the zones.
Fine-Tuning the Velocity Crossfades
To make the crossfades as seamless as possible, the pitches and the levels of the samples must match as closely as possible. For example, you might hear flanging or breaks in the level during the crossfade if the pitches and the levels of adjacent samples do not match. In the Mapping editor, you can adjust the pitch and the level for each sample individually.
- Go to the Mapping editor and select the sample that you want to adjust.
- Adjust the Tune and Gain parameters until the crossfade of adjacent samples sounds smooth.
Tips for adjusting the Pitches of the Samples
The velocity fades should be activated while adjusting the pitches.
- Play a note with a velocity within the range of a crossfade.
- Adjust the pitches of the adjacent samples until the flanging is minimized or gone.
Tips for adjusting the Gains of the Samples
When using normalized samples, it can be useful to switch off any velocity fades and level velocity settings while adjusting the gains in the Mapping editor.
- In the Program Tree, select the layer on which you activated the Individual Velocity Mode and Velocity Fade options.
- Open the Sound editor, go to the Trigger section and deactivate the Velocity Fade option.
- Open the Zone editor, go to the amplitude envelope and set Level Velocity to 0%.
Now, you hear only the differences in level and timbre between adjacent samples.
- In the Mapping editor, adjust the sample gains until you hear only changes in timbre.
Once you are happy with the gains, activate the Velocity Fade option on the layer and set the Level Velocity of the zones as desired.
Example VST Preset
In the example VST preset, the pitch and gain of each zone were adjusted in the Mapping editor - for smoother crossfades.
- Download Using Velocity Crossfades 02.vstpreset.
- Drag the preset to the Slot Rack.
- Play a note and use the modulation wheel.
/ HALion Developer Resource / HALion Tutorials & Guidelines / Tutorials /
Working with Exported Properties
On this page:
- Prerequisites
- Creating a Simple Template
- Connecting Template Parameters
- Changing the Template While It Is Connected
When creating reusable control templates, it is necessary to export all control properties that need to be accessible on the template level from the controls that are located inside the template.
The properties that can be exported have an Export Property option . The parameter is exported if this option is activated. You can see all exported parameters by selecting the topmost element in the GUI Tree of the template. The following screenshot shows this for the "Knob H6" template from the Basic Controls library.
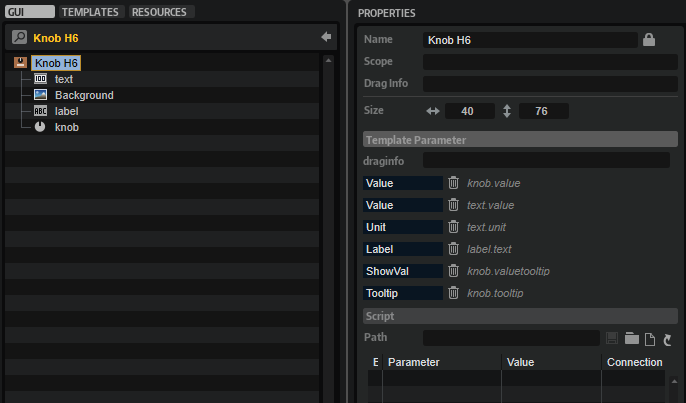
Prerequisites
- A program with a macro page.
Creating a Simple Template
- Go to the Macro Page Designer, create a Knob control on the macro page and assign an animation bitmap.
❕ If you do not have an animation bitmap at hand: You can temporarily add a knob template from the Basic Controls or Additional Controls libraries. This adds the necessary resources and you can assign the respective animation bitmap to your knob.
- Select the Knob control in the GUI Tree, open the context menu and select Create template 'Knob' from 'Knob'.
- In the GUI Tree of the template, change the name of the topmost element to "MyKnob".
- Select the Knob control and export the Value property by clicking Export Property .
- Select "MyKnob" in the GUI Tree and give the Value parameter in the Template Parameter section a meaningful name, e.g., "Value".
- Go back to the GUI Tree of the macro page by clicking Switch back to Macro Page/Parent Template
 .
.
Result: You have created a simple knob template with a Value parameter.
You can add further elements such as labels and text fields to the template and export their relevant parameters, too. Giving exported parameters the same name will combine them on the template level. This way, the template shows a single Value parameter on template level, which could be connected with a knob and a text control inside the template, for example. For more suggestions, try out the knob templates that come with the Basic Controls and Additional Controls libraries.
Connecting Template Parameters
You can connect template parameters like parameters of standard controls. There are multiple ways you can do this:
- Drag and drop an engine or script parameter from the parameter list to the template parameter.
- Open the context menu on a HALion control and select Connect to Macro Page, then do the same for the template and select Connect to Parameter '...' or open the context menu on the Value property and select Connect to Parameter '...'.
- Type in
@exampleto connect the template to a script parameter or a UI variable of that name. - Type in a path to layers, zones, busses, etc., for example,
@type:zone/@id:nn
Changing the Template While It Is Connected
You can exchange the used template at any time, even if it has already been connected. For this, change the template reference in the Template Parameter section in the Properties view.
- If the newly assigned template shares the same parameters, the connections remain intact.
- If the new template does not use the same parameters, a warning message is shown. You can delete the obsolete connections or keep them.
Keeping the connections is useful if you want to switch back to the previous template at a later stage. In this case, all connections are automatically re-established. This is particularly useful if you are working with Dynamic Template References, because in this case, you want to keep exported parameters and their connections even when the template is temporarily not used.
/ HALion Developer Resource / HALion Tutorials & Guidelines /
How-tos
In this section your find short examples focusing on a specific task. The how-tos often feature small code examples you can adapt for your own solutions.
❕ The minimum version for exploring the how-tos is HALion 7.1.
- Animating and Modifying SVGs
- Animating SVGs with Additional Parameters
- Animating Switches Using SVGs
- Custom Multi-Level Menus
- Custom Multi-Level Menus II
- Custom Popup Menus
- Drag-and-Drop Sample Import
- Dynamic Template References
- Key Range Limitation
- Map Samples to Root Key
- MIDI Note Parameters
- Modifying SVGs with Multiple Objects
- Modulation Matrix for FM Zones
- Modulation Matrix for Grain Zones
- Modulation Matrix for Sample Zones
- Modulation Matrix for Spectral Zones
- Modulation Matrix for Synth Zones
- Multi-Level System Menus
- Relative Paths
- Snapshot Effects
- Switching Control Templates
- Using Mouse States in SVGs
- Working with Exported Variables
/ HALion Developer Resource / HALion Tutorials & Guidelines / How-tos /
Animating and Modifying SVGs
(Since HALion 7.0)
On this page:
By harnessing the capabilities of Lua expressions, you can animate controls that incorporate Scalable Vector Graphics (SVGs). Through the manipulation of SVG properties using Lua expressions, you gain control over how the values of these properties are modified within the control itself. This enables you to create dynamic and visually appealing animations that enhance the user experience.
Lua Expressions
An expression begins with $ followed by (). Everything inside the brackets will be evaluated and returns the effective value for the property.
$(expression)
You can use the following variables in Lua expressions:
| Variable | Description |
|---|---|
| N | The normalized value (0 to 1.0) of the control itself. |
| V | The value as sent by the connected engine parameter. |
| S | A string as sent by the connected parameter. |
The string of a S variable is set either by a stringlist variable or by MIDI script or UI script parameters. The ability to use the string output of a parameter allows you to transmit even a full sequence of values, such as the path of an object, for example.
Animating and Modifying SVG Properties
The following examples are intended as an inspiration for you to develop your own solutions and ideas.
Example VST Preset
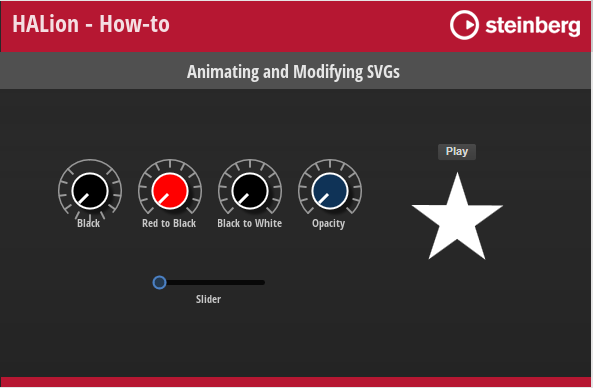
To explore the templates in this example:
- Load Animating and Modifying SVGs.vstpreset.
- Open the Macro Page Designer, go to the GUI Tree and select the template you want to explore.
- Click Edit Element to examine the template.
- Inside the template, select a Knob control, for example. Take a look at which Bitmap resource has been assigned.
- Go to the Resources Tree and select the corresponding SVG resource. Take a look at the IDs, properties, and values as listed below.
Changing the Fill Color of an Object
Knob Black
Resource: Knob11_Scale2_Green.
| ID | Property | Value |
|---|---|---|
| Knob | fill | rgb(0,0,0) |
Description: Static color, in this case black. The original color of the control was green.
Knob Red to Black
Resource: Knob11_Scale2_Red.
| ID | Property | Value |
|---|---|---|
| Knob | fill | rgb($(math.floor((1-N)*255)),0,0) |
Description: The normalized value (0 to 1.0) of the control scales the red channel from 255 to 0. This creates a fade from red to black.
Knob Black to White
Resource: Knob11_Scale2_Blue.
| ID | Property | Value |
|---|---|---|
| Knob | fill | rgb($(math.floor(N*255)),$(math.floor(N*255)),$(math.floor(N*255))) |
Description: The normalized value (0 to 1.0) of the control scales all channels from 0 to 255. This creates a fade from black to white.
❕ rgb values must be integer values, therefore
math.flooris used in the examples above.
Knob Opacity
Resource: Knob11_Scale2_Blue_1.
| ID | Property | Value |
|---|---|---|
| Knob | fill | hsla (220,75%,62%,$(1-N)) |
Description: The normalized value of the control scales the opacity from 1.0 to 0.
Rotating Star
Resource: Rotating Star
| ID | Property | Value |
|---|---|---|
| Stern | fill | $(SColor) |
Description: An animation control changes its color to the value set by the string output of the connected script parameter. $(SColor)is an additional SVG Parameter, see Animating SVGs with Additional Parameters for details. The following script switches between two colors.
function onSwitchChanged()
if Switch then
this:setParameter("FillColor", "rgb(255,0,0)")
else
this:setParameter("FillColor", "rgb(255,255,255)")
end
end
defineParameter("Switch", nil, false, onSwitchChanged)
defineParameter("FillColor", nil, "rgb(255,255,255)")
Changing the Rotation of an Object
Knob Black
Resource: Knob11_Scale2_Green.
| ID | Property | Value |
|---|---|---|
| LineMain | transform | rotate(180,32,32) |
Description: The object is rotated by a fixed amount of 180 degrees around the center at x,y = 32,32 pixels. In this case, the scale is turned up side down.
Knob Black, Knob Red to Black, Knob Black to White, Knob Opacity
Resource: Knob11_Scale2_Green, Knob11_Scale2_Red, Knob11_Scale2_Blue and Knob11_Scale2_Blue_1.
| ID | Property | Value |
|---|---|---|
| KnobLine | transform | rotate($(-135+N*270),32,32) |
Description: A knob control rotates the object by 270 degrees with a start offset of -135 degrees, around the center at x,y = 32,32 pixels. In this case, the indicator of the control is rotated displaying the current value.
Changing the Position of an Object
Slider
Resource: Circle.
| ID | Property | Value |
|---|---|---|
| Circle | transform | translate(-0.5,0.5) |
Description: The upper left corner of the object is moved by a fixed amount, -0.5 pixels down and 0.5 pixels to the right. Here, it places the handle of the slider at the correct position.
Changing the Path of an Object
Slider
Resource: LightStrip H3Uni.
| ID | Property | Value |
|---|---|---|
| Path | d | M 0 9.5 L $(N*100) 9.5 |
Description: Draws a horizontal line using the normalized value of the control.
/ HALion Developer Resource / HALion Tutorials & Guidelines / How-tos /
Animating SVGs with Additional Parameters
(Since HALion 7.0)
On this page:
Animation controls can have more than one animatable SVG property.
Defining Additional SVG Parameters
To define additional parameters, you must use a Lua expression with the V, N, or S variable extended by a name variable. An expression begins with $ followed by (). Everything inside the brackets will be evaluated and returns the effective value for the property.
$(expression)
You can use the following variables in Lua expressions:
| Variable | Description |
|---|---|
| N | The normalized value (0 to 1.0) of the control itself. |
| V | The value as sent by the connected engine parameter. |
| S | A string as sent by the connected parameter. |
| Name | A definable name for the variable. |
The string of a S variable is set either by a stringlist variable or by MIDI script or UI script parameters. The ability to use the string output of a parameter allows you to transmit even a full sequence of values, such as the path of an object, for example.
$(VName) | $(NName) | $(SName)
The additional parameters must be defined in the respective SVG resource like this.
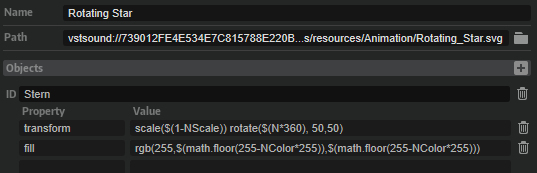
These additional SVG resource attributes are introduced as supplementary values within an Animation control. They can be connected to engine, MIDI script, or UI script parameters, analogous to other control values.

This integration enables the manipulation of SVG elements and their subordinate objects in various ways. Each associated parameter governs a specific facet of the animation. For instance, one parameter might change object rotation, while another parameter concurrently adjusts dimensions, color properties, etc.
❕ To animate SVGs without the utilization of UI scripts, see Animating Switches Using SVGs for details.
Animating Additional SVG Parameters
The following example is intended as an inspiration for you to develop your own solutions and ideas.
Example VST Preset
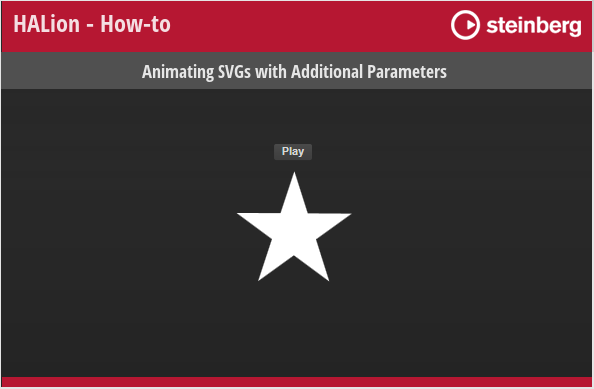
To explore the templates in this example:
- Load Animating SVGs with Additional Parameters.vstpreset.
- Open the Macro Page Designer, go to the GUI Tree and select the Animation Script Example template.
- Click Edit Element to examine the template.
- Inside the template, select the Animation control. Take a look at which Bitmap resource has been assigned.
- Go to the Resources Tree and select the corresponding SVG resource. Take a look at the IDs, properties, and values as listed below.
Changing Multiple SVG Properties
Resource: Rotating Star.
| ID | Property | Value |
|---|---|---|
| Stern | transform | scale($(1-NScale)) |
Description: The star is faded out by scaling it from original to minimum size. The name of the additional parameter is 'Scale'.
| ID | Property | Value |
|---|---|---|
| Stern | transform | rotate($(N*360), 50,50) |
Description: The star is rotated by 360 degrees. It does not need a name variable, because it uses the 'Value' parameter of the Animation control.
| ID | Property | Value |
|---|---|---|
| Stern | transform | rgb(255,$(math.floor(255-NColor*255)),$(math.floor(255-NColor*255))) |
Description: The color fades from white to red. The name of the additional parameter is 'Color'.
The script has three outputs which are connected to the corresponding SVG properties. The speed for each animation is defined inside the script. The script is attached to the Animation Script Example Template.
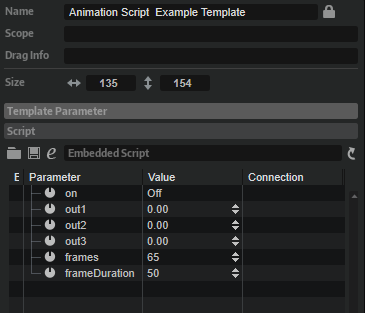
defineParameter{name = "on", default = false, onChanged = function() animate() end}
defineParameter{name = "out1", default = 0, min = 0, max = 1}
defineParameter{name = "out2", default = 0, min = 0, max = 1}
defineParameter{name = "out3", default = 0, min = 0, max = 1}
defineParameter{name = "frames", default = 65, min = 1, max = 1000, type = "integer"}
defineParameter{name = "frameDuration", default = 50, min = 20, max = 10000, type = "integer"}
-- The calcPhasor function returns a closure that maintains the counter value
-- and increments it by the specified increment.
function calcPhasor(increment)
local counter = 0
return function()
counter = (counter + increment) % 1
return counter
end
end
function animate()
-- Create phasors with different speed.
local phasor1 = calcPhasor(1/frames) -- Full speed.
local phasor2 = calcPhasor(1/(frames*2)) -- Half speed.
local phasor3 = calcPhasor(2*1/frames) -- Double speed.
-- Call the phasor functions repeatedly.
while on do
out1 = phasor1()
out2 = phasor2()
out3 = phasor3()
wait(frameDuration)
end
out1, out2, out3 = 0, 0, 0
end
/ HALion Developer Resource / HALion Tutorials & Guidelines / How-tos /
Animating Switches Using SVGs
(Since HALion 7.0)
On this page:
Using SVGs as resources for the different states of a Switch control allows for state-specific animations, to enhance the visibility of each state. The state-specific animations are defined by using Lua expressions in the resource properties of the SVG that is assigned to each state. The SVG resources to be animated require an animation object that defines the duration and number of cycles for the animation. This integration enables the manipulation of SVG objects without the need to use UI scripts.
❕ See Animating SVGs with Additional Parameters for details on using UI scripts for animations.
Adding an Animation Object
Before you can define the animation in the SVG resource properties, you must add an additional animation object to the SVG resource you want to animate.
- Go to the Resource Tree and select the SVG resource you want to animate.
- In the the Objects line, click +.
- Set the ID of the object to
animation. - Add a
durationproperty and set its value to '1'. - Add a
cyclesproperty and set its value to '200'.
In this example, one cycle of the animation takes 1 second and the animation is played for 200 cycles. The settings should be sufficient to keep the animation running, even if you hover the mouse over the switch for a longer time, for example. Depending on the application of your animation, you can increase or decrease these values.
| Property | Description | Type |
|---|---|---|
| duration | This property defines how long it takes to play one cycle of the animation in seconds. | float |
| cycles | This property defines how often the animation is played. The minimum number of cycles must be greater than 0. | integer |
Defining the Animation
The animations are defined in the SVG resource properties by using Lua expressions. An expression begins with $ followed by (). Everything inside the brackets will be evaluated and returns the effective value for the property.
$(expression)
Assuming the presence of an animation object, you can use the following variables in Lua expressions:
| Variable | Description |
|---|---|
| Duration | Corresponds to the value set by the duration property. |
| T | The overal time since the start of the animation in seconds. |
| t | The normalized time (0 to 1.0) within the current cycle. |
| Cycle | The number of completed cycles, starting at 0. The cycles property defines the maximum number of cycles. |
Animating Switches
The following examples are intended as an inspiration for you to develop your own solutions and ideas.
Example VST Preset
To explore the templates in this example:
- Load Animating Switches Using SVGs.vstpreset.
- Open the Macro Page Designer, go to the GUI Tree and select the template you wish to explore.
- Click Edit Element to examine the template.
- Inside the template, select the Switch control. Take a look at which Bitmap resources have been assigned to the different states of the switch.
- Go to the Resources Tree and select the corresponding SVG resource. Take a look at the IDs, properties, and values as listed below.
Animated Dashed Line
Dashes Switch
In this example, the same animation is used for the on and off states of the switch.
Resources: AniRect SW1_Off_Hover, AniRect SW1_On_Hover.
| ID | Property | Value |
|---|---|---|
| Rect | stroke-dashoffset | $(1+t*20) |
Description: A dashed line moves counterclockwise around the switch when you hold the mouse over the switch. By using $(1-t*20) the dashed line moves clockwise around the switch.
Animated Colors
In this example, different animations are used for the on and off states of the switch.
Colors Switch
Resource: AniRect SW2_Off_Hover.
| ID | Property | Value |
|---|---|---|
| Rect | fill | hsla(100,0%,$(100-math.cos(t*6.28)*72)%,1) |
Description: The color periodically fades between grey and white when you hold the mouse over the switch while the switch is in the off state.
Resource: AniRect SW2_On_Hover.
| ID | Property | Value |
|---|---|---|
| Rect | fill | hsla(214, $(100-math.cos(t*6.28)*40)%, $(80-math.cos(t*6.28)*20)%, 1) |
Description: The color periodically fades between white and blue when you hold the mouse over the switch while the switch is in the on state.
Animated Size
In this example, different animations are used for the on and off states of the switch.
Size Switch
Resource: AniRect SW5_Off_Hover.
| ID | Property | Value |
|---|---|---|
| Circle | r | $(7-math.abs(0.5-t)*10) |
| feGaussianBlur1740 | stdDeviation | $(1-math.abs(0.5-t)*2) |
Description: The radius of the circle and the deviation of the blur change periodically when you hold the mouse over the switch while the switch is in the off state. The color is grey and the inner circle is smaller than the blur. The 'r' property describes the radius of the 'Circle' element. A negative value for 'r' must be avoided with math.abs. The 'stdDeviation' attribute defines the standard deviation for the blur.
Resource: AniRect SW5_On_Hover.
| ID | Property | Value |
|---|---|---|
| Circle | r | $(7-math.abs(0.5-t)*6) |
| feGaussianBlur1740 | stdDeviation | $(1-math.abs(0.5-t)*2) |
Description: The radius of the circle and the deviation of the blur change periodically when you hold the mouse over the switch while the switch is in the on state. The color is green and the inner circle is larger than in the off state. The 'r' property describes the radius of the 'Circle' element. A negative value for 'r' must be avoided with math.abs. The 'stdDeviation' attribute defines the standard deviation for the blur.
Animated Brackets
In this example, multiple properties get animated for each state and different animations are used for the on and off states of the switch.
Brackets Switch
Resource: AniRect SW6_Off_Hover.
| ID | Property | Value |
|---|---|---|
| Circle | fill | hsla(100,0%,$(100-math.abs(0.5-t)*144)%,1) |
| Circle | r | $(6-math.abs(0.5-t)*4) |
| ArrowL | transform | translate ($(-10+t*20)) |
| ArrowL | fill | hsla(100,0%,80%,$(1-t*0.9)) |
| ArrowR | transform | translate ($(10-t*20)) |
| ArrowR | fill | hsla(100,0%,80%,$(1-t*0.9)) |
Description: The switch blinks periodically in white and round brackets are moving from the outside to the inside when you hold the mouse over the switch while the switch is in the off state. The 'r' property describes the radius of the 'Circle' element. A negative value for 'r' must be avoided with math.abs.
Resource: AniRect SW6_On_Hover.
| ID | Property | Value |
|---|---|---|
| Circle | fill | hsla(154,40%,$(50-math.abs(0.5-t)*40)%,1) |
| Circle | r | $(6-math.abs(0.5-t)*4) |
| ArrowL | transform | translate ($(-10+t*20)) |
| ArrowL | fill | hsla(154,40%,50%,$(1-t*0.9)) |
| ArrowR | transform | translate ($(12-t*20)) |
| ArrowR | fill | hsla(154,40%,50%,$(1-t*0.9)) |
Description: The switch blinks periodically in green and round brackets are moving from the outside to the inside when you hold the mouse over the switch while the switch is in the on state. The 'r' property describes the radius of the 'Circle' element. A negative value for 'r' must be avoided with math.abs.
/ HALion Developer Resource / HALion Tutorials & Guidelines / How-tos /
Custom Multi-Level Menus
On this page:
The standard menu control can be used to control parameters offering a list of options, for example, the oscillator type of a synth oscillator. Although the menu control is a fast way to implement selection menus, its disadvantage is that it cannot be customized in its appearance and always uses the look of the operating system menus. If you want to implement a menu that follows the look and design language of your instrument, you can create menu templates that can be opened via switches using the popup style.
This custom popup menu can be extended to a custom multi-level menu: The template for the first level of the menu provides exclusive switches that open further popup templates for the next level of the menu. The exclusive switches on the first level must be connected to the same Popup List variable. On the next level, the menu provides exclusive switches that are connected to the desired parameter.
Creating menus with this structure is very flexible and you can configure them freely in every detail. For example, you can reduce the available options by leaving them out. This structure also allows you to create menus that have a completely different look than standard menus. You can create menus with entries that are arranged in a circle or use icons instead of text, for example.
The example below demonstrates how to build a custom multi-level menu for the oscillator type of the synth oscillator. The example is intended as an inspiration for you to develop your own solutions and ideas. You can adapt the look and feel, the number of menu entries, etc. by editing the corresponding templates.
❕ The menu in the example below structures the oscillator types into four subgroups. If you want to show the oscillator types in a single list, please refer to Custom Popup Menus.
❕ HALion 7 introduced another method for creating custom multi-level menus. See Custom Multi-Level Menus II for details.
Example VST Preset
To explore the templates in this example:
- Load Custom Multi-Level Menus.vstpreset.
- Open the Macro Page Designer, go to the Templates Tree and select the template you want to explore.
- Click Edit Element to examine the template.
Prerequisites
- A program with a synth zone and a macro page.
- A group with a Switch, a Text and an Image control.
- A Menu Root template for the first level of the menu.
- A RootMenuEntry template for creating the entries of the first level menu.
- A SubMenu_1, 2, 3, 4 template for each second level menu.
- A MenuEntry template for creating the entries of the second level menu.

How the Elements Interact
Multi-Level Menu Selector
The Multi-Level Menu Selector Group in the GUI Tree contains the elements Menu Switch, Menu Value and Menu Back.
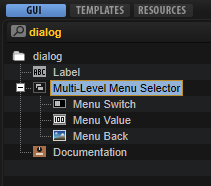
Menu Switch is a Switch control that is configured to open the popup menu. It uses the Popup style with the Menu Root template which contains a Popup List variable and entries for each submenu. The entries for the submenus use the RootMenuEntry template to determine the entries in the root menu. All entries must be connected to the same Popup List variable which selects the SubMenu_1,2,3,or 4 template for the respective entry. The RootMenuEntry template uses the hover exclusive mode to open the respective submenu template when you hover over an entry. The SubMenu_1,2,3,4 and MenuEntry templates determine the entries of the submenus. These templates will be explained in more detail below. Menu Value is a text control for displaying the current value and Menu Back is an image control for the background image.
Menu Switch
This Switch control is used to open the Menu Root template as a pop-up. Since it is combined with a background image and a text, the switch itself does not require any graphics. To open the pop-up menu, the properties of the switch must be set to the following values:
| Property | Values |
|---|---|
| Mode | push |
| Style | Popup |
| Template | Menu Root |
| Close on Click | Outside |
| Placement | Place Left, Place Right, Place Below |
Menu Value
This Text control is connected to the oscillator type parameter and displays the selected type.
Menu Back
This Image control displays a backgroud image, in this case, a black panel.
Menu Root
This template contains four instances of the RootMenuEntry template, one for each oscillator subgroup. The entries are determined by their template parameters: The names of the entries is set with the MenuText parameter (Standard, Sync, Cross, or XOR). All four entries must be connected to the same Popup List variable @submenus and the OnValues must be set accordingly (1-4). When hovering the mouse over a menu entry, it will open the submenu template that refers to the OnValues 1-4.
Variables submenus
The Popup List variable "submenus" selects the SubMenu_1,2,3,4 templates for the respective entry. The order of the list refers to the OnValues 1-4.
RootMenuEntry
This template represents one entry of the root menu. It consists of four elements:
Triangle
This Image control displays a open menu triangle.
Text
This Text control displays the name of the entry. The Style of the control is set to Read-Only so that the text cannot be edited. The Value of the text is exported and the name is set to MenuText on the template level.
Switch
This Switch control uses the hover exclusive mode to open the respective submenu template when you hover over an entry. Since it is combined with a background image and a text, the switch itself does not require any graphics. To open the submenu template, the properties of the switch must be set to the following values:
| Property | Values |
|---|---|
| Value | Exported to the template level. |
| Mode | hover exclusive |
| Style | Popup, Scalable |
| Close on Click | Inside, Outside |
| Placement | Place Right, Place Below |
| Bmp On | MenuHover |
| Onvalue | Exported to the template level. |
Image
This Image control displays a background image for the entry.
SubMenu_1, 2, 3, 4
Each of these templates contains four instances of the MenuEntry template, one for each oscillator type. The entries are determined by their template parameters: The names of the entries is set with the MenuText parameter (e.g., Sine, Triangle, Saw, or Squ PWM). All four entries must be connected to the Type parameter of the desired oscillator and the OnValues must be set accordingly (0-15).
For example:
| Parameter | Value |
|---|---|
| MenuText | Sine |
| OnValue | 0 |
| Value | @0:Zone 1/@id:b0001 |
for the Sine oscillator or
| Parameter | Value |
|---|---|
| MenuText | Sine Sync |
| OnValue | 4 |
| Value | @0:Zone 1/@id:b0001 |
for the Sine Sync oscillator.
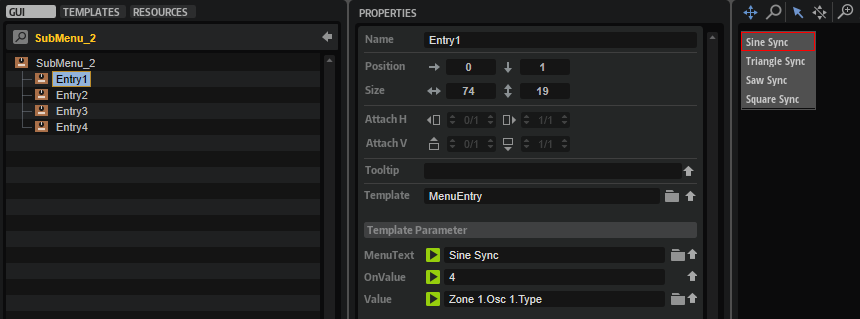
MenuEntry
This template represents one menu entry of the SubMenu_1,2,3,4 templates and must be instantiated for each oscillator type. It consists of three elements:
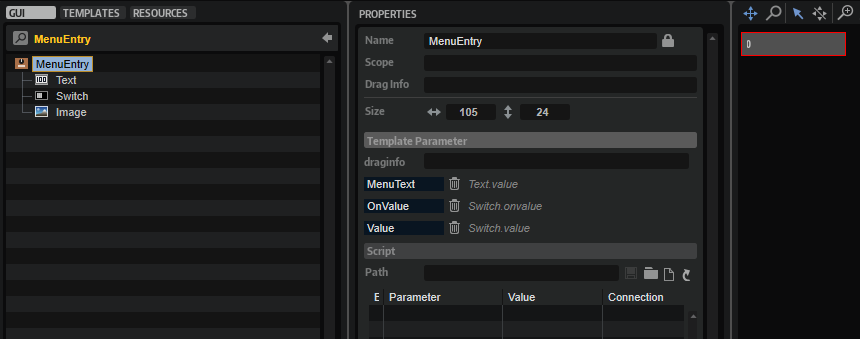
Text
This Text control displays the name of the entry. The Style of the control is set to Read-Only so that the text cannot be edited. The Value of the text is exported and the name is set to MenuText on the template level.
Switch
This Switch control uses the exclusive mode to set the respective oscillator type when you select an entry. Since it is combined with a background image and a text, the switch itself does not require any graphics. The properties of the switch must be set to the following values:
| Property | Values |
|---|---|
| Value | Exported to the template level. |
| Mode | exclusive |
| Style | Hover, Scalable |
| Bmp Hov | MenuHover |
| Onvalue | Exported to the template level. |
Image
This Image control displays a background image for the entry.
❕ Pop-up menus can only be displayed within the dimensions of the macro page. If a pop-up menu is too large, it will be clipped. To prevent this, you can either change the direction in which the pop-up menu opens, e.g., open it to the top instead of to the bottom, or you can change the size of the template, so that it fits, and then activate the scrollbar to be able to scroll to the available entries.
/ HALion Developer Resource / HALion Tutorials & Guidelines / How-tos /
Custom Multi-Level Menus II
(Since HALion 7.0)
On this page:
- Example VST Preset
- Prerequisites
- Overview of Templates
- Importing the Templates
- How the Elements Interact
This how-to describes another way to build custom pop-up menus. The solution shown can be used to build single-level or multi-level pop-up menus. An example of a single-level pop-up menu can be found in Working with Exported Variables.
The example below demonstrates how to build a custom multi-level menu for the oscillator type of the synth oscillator. The example is intended as an inspiration for you to develop your own solutions and ideas. You can adapt the look and feel, the number of menu entries, etc. by editing the corresponding templates.
Example VST Preset
Prerequisites
- Load a program with a synth zone.
- Open the Macro Page Designer and click Create New Macro Page/Library.
Overview of Templates
In this example, you will add the following templates from the Basic Controls library to the Template List:
Importing the Templates
- In the Resource/Library Browser, open the Basic Controls library and navigate to ./Menus/Custom.
- Drag the Selector template to your macro page.
- Set the Template Parameters of the Selector template as follows:
- Set Popup to 'RootMenu'.
- Connect Value to the Osc1 Type parameter, e.g.,
@0:Zone 1/@id:b0001. - Set Label to 'WAVEFORM'.
- Go to the Template List. Drag the following templates from the Resource/Library Browser to the Template List:
- Basic Controls/Menus/Custom/Nested Menu/RootMenu
- Basic Controls/Menus/Custom/Nested Menu/Sub Menus/Menu_Standard
- Basic Controls/Menus/Custom/Nested Menu/Sub Menus/Menu_Sync
- Basic Controls/Menus/Custom/Nested Menu/Sub Menus/Menu_Crossmod
- Basic Controls/Menus/Custom/Nested Menu/Sub Menus/Menu_XOR
The following templates will be added automatically:
- Basic Controls/Menus/Custom/Nested Menu/RootMenuEntry
- Basic Controls/Menus/Custom/Simple Menu/MenuEntry
If you have followed the described steps exactly, the menu should already work.
How the Elements Interact
Selector
The Selector template contains the elements which are required to open the RootMenu template and display the selected value.

UI Variables
| Variable | Description | Type |
|---|---|---|
| sel | This variable is used by all menu entries of the pop-up menu. sel is exported as 'Value' and combined with the Value property of the Text control. As a result, the display string of the connected engine parameter will be displayed instead of the integer value. | Integer |
❕ For further information about exported variables, see Working with Exported Variables.
Controls and Subtemplates
| Element | Description |
|---|---|
| Switch | A Switch control that opens the pop-up menu. Its Popup Template property is exported as 'Popup'. This allows you to select which pop-up menu to open for each instance of the Selector template. |
| Text | A Text control for displaying the display string of the connected engine parameter. This is achieved by exporting the Value property as 'Value'. Since the sel UI variable is also exported as 'Value', both are combined into one template parameter, creating the interface for connecting the engine parameter. |
| Triangle | An Image control to indicate that a pop-up menu can be opened. |
| Decor | A Decor control used as background. |
| Label | A Label control for displaying the name of the connected parameter. Its Text property is exported as 'Label'. This allows you to name the Selector template differently for each instance. |
RootMenu
The RootMenu template is displayed when clicking the selector on the macro page. It defines the menu entries and opens the assigned Submenu templates when navigating through the menu.
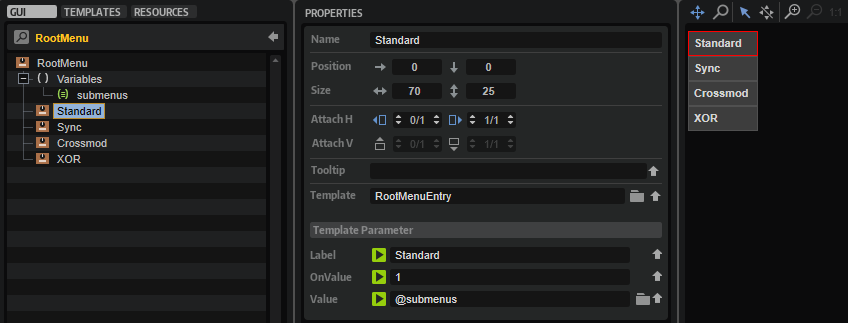
UI Variables
| Variable | Description | Type | Range |
|---|---|---|---|
| submenus | This Popup List variable is required to assign the Submenu templates to the entries of the RootMenu template. The entries in the Popup List correspond to the names of the Submenu templates to be opened when navigating through the menu. The Popup List variable opens the assigned Submenu template when it receives the OnValue of the corresponding RootMenuEntry template. | String | Menu_Standard, Menu_Sync, Menu_Crossmod, Menu_XOR |
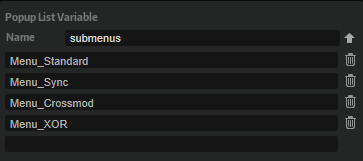
Controls and Subtemplates
| Element | Description |
|---|---|
| Standard, Sync, Crossmod, XOR | These represent the four entries of the menu. They use the RootMenuEntry template which defines the look and functionality of an entry. The Value parameter of all RootMenuEntry templates must be set to @submenus. The OnValue parameters of the specific RootMenuEntry templates must be set to the index of the corresponding entry in the Popup List variable. The OnValue will be sent to the Value parameter which is sent to the submenu Popup List variable which opens the corresponding RootMenuEntry template. The Label parameter defines the name of the entry to be displayed in the menu. |
RootMenuEntry
This template represents one entry in the RootMenu template. It consists of two elements:
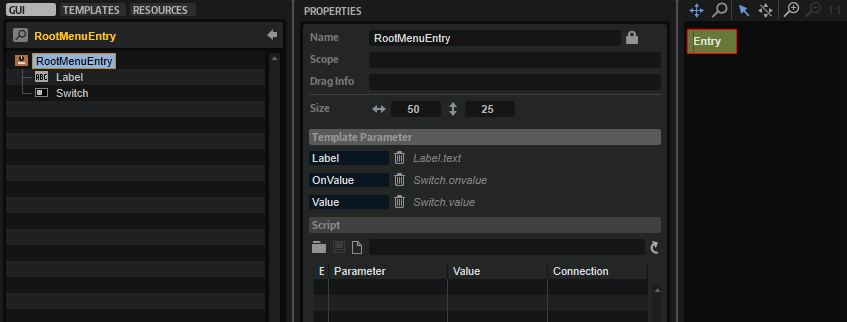
Controls and Subtemplates
| Element | Description |
|---|---|
| Label | A Label control to display the name of the menu entry. Its Text property is exported as 'Label'. This allows you to name the template differently for each instance. |
| Switch | A Switch control with hover exclusive mode which sends its OnValue when the mouse is above the menu entry. The OnValue and Value properties are exported to be set by each instance of the template. See RootMenu for details. |
Submenu
There are four submenu templates in the Template List: Menu_Standard, Menu_Sync, Menu_Crossmod, and Menu_XOR. Each Submenu template contains four MenuEntry templates that define the entries of the submenu.
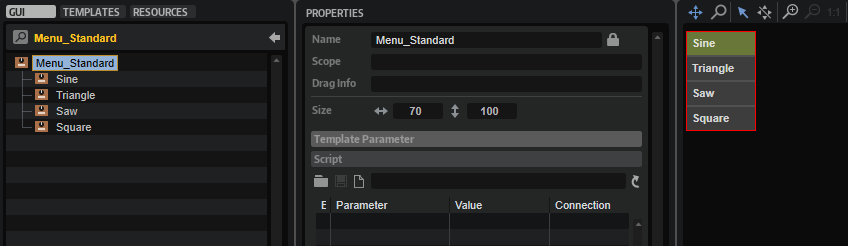
| Element | Description |
|---|---|
| Sine, Triangle, Saw, Square | These represent the four entries of the submenu. They use the MenuEntry template which defines the look and functionality of an entry. The OnValue parameter of each MenuEntry template must be set to the corresponding value of the engine parameter it selects. This value will be sent to the sel variable. See MenuEntry and Selector/UI Variables for details. The Label parameter defines the name of the entry to be displayed in the menu. |
MenuEntry
This template represents one entry in the Submenu template. It consists of two elements:

Controls and Subtemplates
| Element | Description |
|---|---|
| Label | A Label control to display the name of the menu entry. Its Text property is exported as 'Label'. This allows you to name the template differently for each instance. |
| Switch | A Switch control with exclusive mode. The OnValue property is exported to be set by each instance of the template. See Submenu for details. The Value property must be set to @sel, the UI variable of the Selector template. The OnValue will be sent to the Value parameter which is sent to the sel variable. As a result, the currently selected value will be sent to the Selector template which is connected to the engine parameter and the Text control within the Selector template shows the display string of the engine parameter. |
❕ Pop-up menus can only be displayed within the dimensions of the macro page. If a pop-up menu is too large, it will be clipped. To prevent this, you can either change the direction in which the pop-up menu opens, e.g., open it to the top instead of to the bottom, or you can change the size of the template, so that it fits, and then activate the scrollbar to be able to scroll to the available entries.
/ HALion Developer Resource / HALion Tutorials & Guidelines / How-tos /
Custom Popup Menus
On this page:
The standard menu control can be used to set parameters offering a list of options, e.g., the oscillator type of a synth oscillator. Allthough the menu control is a fast way to implement selection menus, its disadvantge is that it always uses the look of the operating system menus. If you want to implement a menu that follows the look and design language of your instrument, you can create menu templates that are openend via a switch using the pop-up style.
This how-to demonstrates how to build a custom pop-up menu for the ocillator type of a synth oscillator. This is how it looks on the macro page if the pop-up menu is opened:
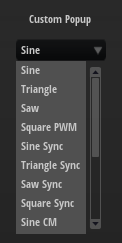
❕ The menu in the example below shows all oscillator types in a long list. If you want to create a menu with mutiple levels, please refer to Custom Multi-Level Menus, Custom Multi-level Menus II or Multi-Level System Menus.
❕ HALion 7 introduced another method for creating custom pop-up menus making use of exported variables. See Working with Exported Variables for details.
Example VST Preset
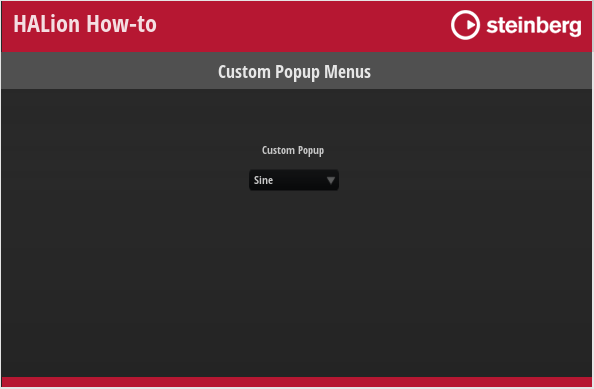
To explore the templates in this example:
- Load Custom Popup Menus.vstpreset.
- Open the Macro Page Designer, go to the Templates Tree and select the template you want to explore.
- Click Edit Element to examine the template.
Prerequisites
- A program with a synth zone and a macro page.
- A Group with a Switch, a Text and an Image control.
- A Simple Menu template for the pop-up menu.
- A SimpleMenuEntry template for creating the entries of the pop-up menu.
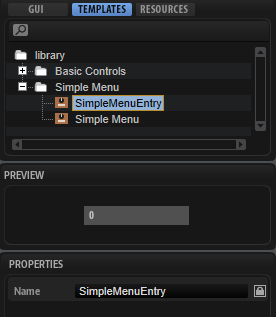
How the Elements Interact
Custom Popup
The Custom Popup Group contains the elements that are needed to open the pop-up menu and to display the selected value.
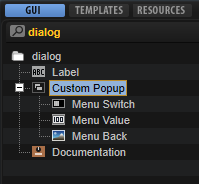
Menu Switch is a Switch control that is configured to open the pop-up menu. It uses the Popup style with the Simple Menu template which contains a Template List that uses the SimpleMenuEntry template for displaying the available options. Menu Value is a Text control for displaying the current value and Menu Back is an Image control for the background image.
Menu Switch
This Switch control is used to open the Simple Menu template as a pop-up. Since it is combined with a background image and a text, the switch itself does not require any graphics. To open the pop-up menu, the properties of the switch must be set to the following values:
| Property | Values |
|---|---|
| Mode | push |
| Style | Popup |
| Template | Simple Menu |
| Close on Click | Inside, Outside |
| Placement | Place Left, Place Right, Place Below |
Menu Value
This Text control is connected to the oscillator type parameter and displays the selected type.
Menu Back
This Image control displays the background image, in this case, a black panel.
Simple Menu
This template contains a template list view that uses the SimpleMenuEntry template to create the entries of the pop-up menu.
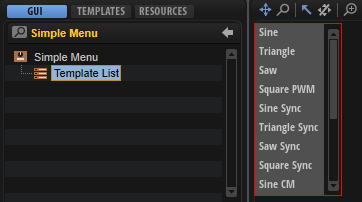
The Value is connected to the oscillator type for switching the types. To create the entries for the available types, the template parameter MenuText must be connected to the oscillator type. The look of the entries is defined in the SimpleMenuEntry template.
SimpleMenuEntry
This template represents one entry in the pop-up menu and is instanciated for each oscillator type.
Text
This Text control displays the name of an entry. The control is set to Read-only so that the text cannot be edited. The Value property is exported and named MenuText on the template level. The entries in the pop-up are created by connecting the exported parameter in the template list view to the oscillator type.
Switch
This Switch control provides the hover image when moving the mouse over an entry.
Image
This Image control displays the gray background for an entry.
❕ Pop-up menus can only be displayed within the dimensions of the macro page. If a pop-up menu is too large, it will be clipped. To prevent this, you can either change the direction in which the pop-up menu opens, e.g., open it to the top instead of to the bottom, or you can change the size of the template, so that it fits, and then activate the scrollbar to be able to scroll to the available entries.
/ HALion Developer Resource / HALion Tutorials & Guidelines / How-tos /
Drag-and-Drop Sample Import
For your macro page to accept sample import by drag and drop, you need a Drop control, the Sample Display template, and a UI script.
Example VST Preset
The following section describes how to access Templates and edit UI scripts.
To explore the templates in this example:
- Open the Macro Page Designer, go to the Templates Tree and select the template that you want to explore.
- Click Edit Element to examine the template.
To edit the UI script:
- Open the Macro Page Designer and select the topmost element in the GUI Tree.
- Go to the Properties section and click Edit Script to open the internal script editor.
Prerequisites
- You have a program that contains a sample zone and a macro page.
How the Elements Interact
Sample Display
The Sample Display template is the same as the one that comes with the Basic Controls library. The Template Parameters of the Sample Display template are fixed, displaying only the waveform, not the FFT. The Scope defines the zone where the sample is loaded, here @0:Sample Zone. See Sample Display > Template Parameters for further details.
You can find more properties inside the Sample Display template. The screenshot shows how they are set up.
In the current example, the original UI script that came with the Sample Display template has been replaced with the UI script on the macro page, primarily to implement the Drag Group Callbacks needed for the drag-and-drop functionality. Drag Group Callbacks are called when you drop something on a Drop control.
SampleDropArea
The Drop control is named 'SampleDropArea' and has the same position and size as the Sample Display template.
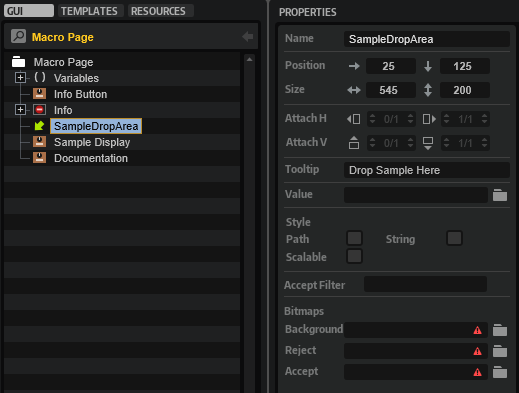
Its name 'SampleDropArea' is used by the Drag Group Callbacks as a condition for calling other functions to import the sample. The sample import as implemented in the UI script supports sample files from the hard disk as well as regions from Cubase. Take a look at the firstRegion function for more details on this.
-- Drag & Drop Sample Import
zone = getElement():getZone()
function firstRegion(data)
if data then
if data.files and data.files[1] then
local af = AudioFile.open(data.files[1])
if af.valid then
return af, 0, af.length
end
end
if data.regions and data.regions[1] then
local af = AudioFile.open(data.regions[1].filename)
if af.valid then
return af, data.regions[1].start, data.regions[1].length
end
end
end
return { valid = false }, 0, -1
end
function onDropFeedback(viewname, draginfo, copy, data)
if viewname == "SampleDropArea" then
local af, start, length = firstRegion(data)
return af.valid
end
end
function onDropGetInfo(viewname, info)
return { info = info, copy = true, move = false }
end
function importSample(sample, start, length)
if sample.valid then
startUndoBlock("Import Sample " .. sample.fileName)
zone:setParameter("SampleOsc.Filename", sample.fileName)
zone:setParameter("SampleOsc.SampleStart", start)
zone:setParameter("SampleOsc.SampleEnd", start + length)
-- check loops
local loop = sample.loops[1]
zone:setParameter("SampleOsc.SustainLoopModeA", 1)
local ls = loop and (loop.loopStart < loop.loopEnd) and math.max(start, math.min(loop.loopStart, start + length)) or start
local le = loop and (loop.loopStart < loop.loopEnd) and math.max(start, math.min(loop.loopEnd, start + length)) or start + length
zone:setParameter("SampleOsc.SustainLoopStartA", ls)
zone:setParameter("SampleOsc.SustainLoopEndA", le)
endUndoBlock()
SampleFileName = sample.fileName
end
end
function onDropInsert(viewname, draginfo, copy, data)
if viewname == "SampleDropArea" then
local sample, start, length = firstRegion(data)
importSample(sample, start, length)
end
end
defineParameter("SampleFileName", nil, "Drag a sample onto the waveform display to import it.")
Info
Hovering over the 'Info' button on the macro page displays the file path of the sample. The 'Info Button' Template and the 'Info' Disable Group are both linked to the @SampleInfo UI variable, which controls whether the 'Info' Disable Group and its contents are displayed. The 'Info' Disable Group contains a Text and a Decor control. The information to be displayed by the Text control is set by the SampleFileName parameter of the UI script.

/ HALion Developer Resource / HALion Tutorials & Guidelines / How-tos /
Dynamic Template References
On this page:
When building macro pages that use multiple, switchable editors, e.g., for different articulations of an instrument, it is advanteageous to use dynamic template references instead of stacked pages. The advantage of using a stack is that you always have access to all subpages from the GUI Tree and that you can establish connections with engine parameters easily. The disadvantage is that the entire macro page with all subpages must be kept in memory, even if only parts of it are displayed. A more economic way to deal with multiple editors is to work with template views and to switch the template reference using a script or a stringlist variable.
This how-to demonstrates how to use a stringlist variable with template references for switching between two templates.
Example VST Preset
To explore the templates in this example:
- Load Dynamic Template References.vstpreset.
- Open the Macro Page Designer, go to the Templates Tree and select the template you want to explore.
- Click Edit Element to examine the template.
Prerequisites
- A macro page with a template view.
- Two templates, One and Two, to be shown alternatively in the template Dynamic Editor.
- A stringlist variable t determining the names of the templates.
- A Menu template to select the template to be displayed.
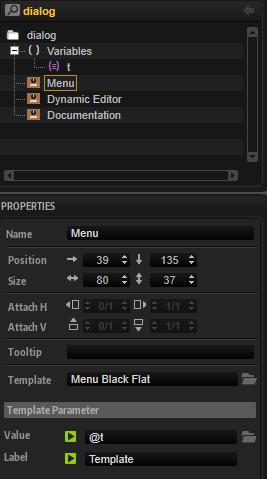
How the Elements Interact
The UI variable defines the names of the templates, One and Two, that are to be switched. The templates One and Two have been set up separately. You find them in the Templates Tree. They are referenced by the template Dynamic Editor, which displays only one of them, depending on which template is selected by the Menu template. This is achieved by setting the Template property of the Dynamic Editor and the Value property of the Menu template both to the UI variable @t.
UI Variables
This variable defines the templates to be switched and it connects the Menu and Dynamic Editor templates.
| Variable | Description | Type | Values |
|---|---|---|---|
| t | Switches between the defined templates. | stringlist | One, Two |
Menu
This Menu template switches between the templates One and Two. Its Value must be set to the UI Variable @t.
Dynamic Editor
This Template control references and displays the templates One or Two, depending on which template is selected by the Menu template. The Template property must be set to the UI variable @t.
More Options
- Instead of using a stringlist variable, you can control the template reference using a UI script parameter.
- When using a UI variable or a UI script parameter, the selected template reference will not be saved with the preset, instead the state will only be saved and restored with projects. If you want to save and restore the state with presets, you must use a Lua Script MIDI module with a corresponding parameter defined.
- Instead of using a Menu control, you can also use exclusive switches to select the template reference.
/ HALion Developer Resource / HALion Tutorials & Guidelines / How-tos /
Key Range Limitation
The key range of a layer is usually C-2 to G8. In the following example, a Range Slider and a UI script are used to limit the key range of a layer to a definable range.
Example VST Preset
The following section describes how to access Templates and edit UI scripts.
To explore the templates in this example:
- Open the Macro Page Designer, go to the Templates Tree and select the template that you want to explore.
- Click Edit Element to examine the template.
To edit the UI script:
- Open the Macro Page Designer and select the topmost element in the GUI Tree.
- Go to the Properties section and click Edit Script to open the internal script editor.
Prerequisites
- You have a program with a layer, a zone, and a macro page.
How the Elements Interact
Key Range
The Key Range template contains the Range Slider and Text controls that are needed to set and display the key range. The Low Value and High Value of the Range Slider and the corresponding values of the Text controls are exported as template parameters with the same names, LowValue for the low key and HighValue for the high key. The template parameters LowValue and HighValue are connected to the LowKeyLimit and HighKeyLimit parameters of the UI script.
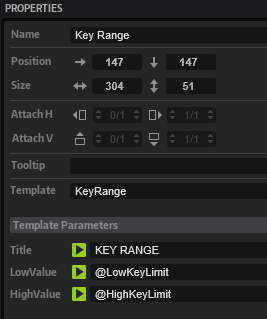
UI Script
The LowKeyValue and HighKeyValue parameters of the UI script are connected to the Low Key and High Key parameters of the layer, respectively, and they define the key range.
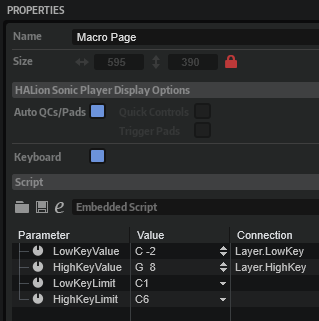
The maximum key range is defined by the lowKey and highKey variables in the UI script.
-- Variables and values to be used for the key range.
function setupKeyRangeParams()
-- Moved into function to keep locals out of global table.
local lowKey = 36
local highKey = 96
local paramDefLow = getElement():getParameterDefinition("LowKey")
local paramDefHigh = getElement():getParameterDefinition("HighKey")
local noteNames = {}
for i = lowKey, highKey do
noteNames[i - lowKey] = paramDefLow:getDisplayString(i):gsub(' ', '')
end
defineParameter("LowKeyValue", nil, paramDefLow, function() LowKeyLimit = LowKeyValue - lowKey end)
defineParameter("HighKeyValue", nil, paramDefHigh, function() HighKeyLimit = HighKeyValue - lowKey end)
function onLowKeyLimit()
if LowKeyLimit > HighKeyLimit then
LowKeyLimit = HighKeyLimit
end
LowKeyValue = LowKeyLimit + lowKey
end
function onHighKeyLimit()
if LowKeyLimit > HighKeyLimit then
HighKeyLimit = LowKeyLimit
end
HighKeyValue = HighKeyLimit + lowKey
end
defineParameter("LowKeyLimit", nil, 0, noteNames, onLowKeyLimit)
defineParameter("HighKeyLimit", nil, highKey - lowKey, noteNames, onHighKeyLimit)
end
setupKeyRangeParams()
/ HALion Developer Resource / HALion Tutorials & Guidelines / How-tos /
Map Samples to Root Key
On this page:
This how-to shows how to map sample zones automatically to the root key that matches the analyzed pitch of the sample. Such helper functions can be useful during the production of large-scale sample libraries.
Example VST Preset
The script parameters Start, Cancel and Channel can be accessed from the macro page of the example VST preset.
❕ The example VST preset requires the factory content of HALion.
Prerequisites
- A program with sample zones.
- The samples have a distinct pitch.
Mapping Samples to the Root Key
The example below assumes that you have a program with sample zones that are not mapped to the root key yet.
- Add a Lua Script module to your program.
- Copy the following code to the Lua Script module.
channelNames = { [0] = "All", "Left", "Right" }
defineParameter( "Channel", nil, 0, channelNames)
defineParameter( "Start", nil, false, function() if Start then onStart() end end)
defineParameter( "Cancel", nil, false)
function onPitchAnalysisFinished(audioFile, channelNum)
print("Progress: 100%")
print(channelNames[channelNum].." channel(s) of "..audioFile.fileName.." analyzed.")
end
function onStart()
zones = this.parent:findZones(true)
for i, zone in ipairs(zones) do
local samplePath = zone:getParameter("SampleOsc.Filename")
print("File: "..samplePath)
local afile = AudioFile.open(samplePath)
afile:analyzePitch(onPitchAnalysisFinished, Channel)
while afile:getPitchAnalysisProgress(Channel) < 1 do
if Cancel then
afile:cancelPitchAnalysis(Channel)
break
end
local progressPercent = 100 * afile:getPitchAnalysisProgress(Channel)
print(string.format("Progress: %2d%%", progressPercent))
wait(2000)
end
if Cancel then
Cancel = false
print("Canceled!")
break
end
local pitch = afile:getPitch(0, -1, Channel)
pitch = math.floor(pitch+0.5)
print("Analyzed Pitch: "..pitch)
zone:setParameter("SampleOsc.Rootkey", pitch)
zone.keyLow = pitch
zone.keyHigh = pitch
end
print("Done!")
Start = false
end
- Go to the Parameter List and activate "Start".
- Open the Mapping editor.
The sample zones will be mapped automatically to the matching root key.
/ HALion Developer Resource / HALion Tutorials & Guidelines / How-tos /
MIDI Note Parameters
On this page:
In HALion, value boxes for MIDI notes display the name of the MIDI note. You can set the value of a MIDI note in one of the following ways:
- Enter the MIDI note number (0 – 127),
- Enter the MIDI note name (C-2 – G8),
- Play the key on your MIDI keyboard.
By using the parameter definition of a MIDI note parameter, you can create a script parameter for this.
Example VST Preset
Prerequisites
- A program with a Lua Script module and a synth zone.
- A macro page with a value box.
Defining a Parameter for MIDI Notes
The following example assumes that you want to split the MIDI keyboard with a split key.
- Copy the following code to the Lua Script module.
-- Get a parameter definition of a MIDI note parameter, e.g., the LowKey parameter of the parent layer.
local paramDef = this.parent:getParameterDefinition("LowKey")
-- Define a SplitKey parameter with this parameter definition.
-- By using the parameter definition of the LowKey parameter, the script parameter will act the same.
defineParameter("SplitKey", "Split Key", paramDef, function() onSplitKeyChanged() end)
function onSplitKeyChanged()
print(SplitKey)
end
- Connect the script parameter to the value box on the macro page.
The SplitKey parameter will act like any MIDI note parameter in HALion: The value box displays the name of the MIDI note and you can enter values as MIDI note number, MIDI note name, or by playing the key on your MIDI keyboard.
/ HALion Developer Resource / HALion Tutorials & Guidelines / How-tos /
Modifying SVGs with Multiple Objects
(Since HALion 7.0)
On this page:
Creating a Checkbox Control
The example below demonstrates how to build a checkbox with two states, the off-state and on-state, from a single SVG file.
Creating an SVG file
Before you can build the checkbox in HALion, you need an SVG file with the representation of a typical checkbox, e.g. two concentric circles.
- Create an SVG file, for example with Inkscape, an open source SVG editor.
- Add two concentric circles and name them 'Back' for the background of the checkbox and 'Check' for the dot that indicates the checked state.
By viewing SVG files in a text editor you gain insight about the available objects and their values. If you open the SVG file in a text editor, it might look like this:

- In HALion, open the Macro Page Designer, add an SVG resource in the Resources Tree and set the Path to the SVG file.
In this example, the added SVG resource is named 'SVG original' and looks the same as in the SVG editor.
Adding Objects
To edit the objects, you must enter the ID of the object, the property you want to change and the corresponding values. If an SVG file contains more than one object, these objects and their properties can be added for further editing like this.
- Go to the Resource Tree and select the SVG resource your want to edit.
- In the Objects line, click +.
- Set the ID of the additional object.
- Set the properties and values of the object.
Creating Multiple Checkbox States
Prerequisites.
- A program with a macro page.
Creating the Checkbox States
- Duplicate the SVG resource 'SVG original' and name it 'SVG Checkbox Off'.
- In the 'SVG Checkbox Off' resource, add the objects 'Back' and 'Check' as described above in Adding Objects.
- Adapt the look to your liking. In this example, 'Back' is set to
fillandorangeand 'Check' is set tofillandrgba (0,0,0,0.4)which is black with an opacity of 40 %.
- Duplicate the SVG resource 'SVG Checkbox Off' and name it 'SVG Checkbox On'.
- In the 'SVG Checkbox On' resource, set the
fillproperty of the 'Check' circle toblack.
- In the GUI Tree, add a Switch control and set its Mode to 'onoff'.
- Assign the 'SVG Checkbox Off' and 'SVG Checkbox On' resources to the Bitmaps Off and On, respectively.
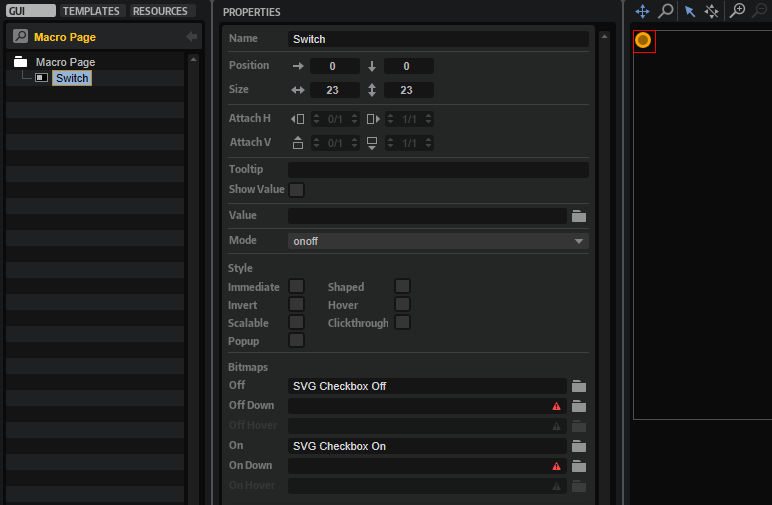
If you want, you can create more variants to implement additional hover-state resources, for example.
/ HALion Developer Resource / HALion Tutorials & Guidelines / How-tos /
Modulation Matrix for FM Zones
This how-to provides a modulation matrix for FM zones that you can use as a basis when creating a modulation matrix for an instrument. There are no modulation source or destination controls on the macro page, only the modulation matrix with its controls, and the UI and MIDI scripts. The main focus is on the selection of modulation destinations, which have been selected with regard to their usability in combination with FM zones.
For a modulation matrix that matches a different zone type, see Modulation Matrix for Grain Zones, Modulation Matrix for Sample Zones, Modulation Matrix for Spectral Zones, Modulation Matrix for Synth Zones, and Modulation Matrix for Wavetable Zones.
Example VST Preset
Modulation Matrix for FM Zones
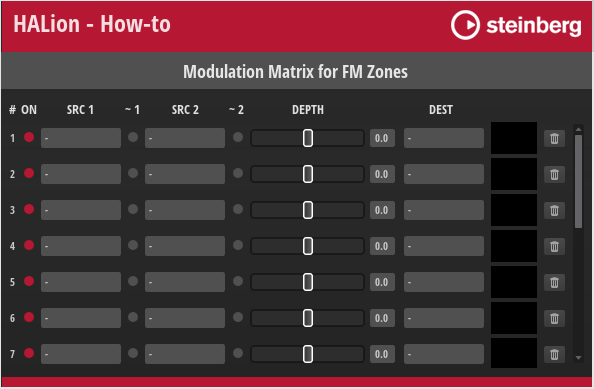
How the Elements Interact
The modulation matrix is provided as-is, without detailed explanations. For information on how this modulation matrix works, see Creating a Modulation Matrix.
/ HALion Developer Resource / HALion Tutorials & Guidelines / How-tos /
Modulation Matrix for Grain Zones
This how-to provides a modulation matrix for Grain zones that you can use as a basis when creating a modulation matrix for an instrument. There are no modulation source or destination controls on the macro page, only the modulation matrix with its controls, and the UI and MIDI scripts. The main focus is on the selection of modulation destinations, which have been selected with regard to their usability in combination with Grain zones.
For a modulation matrix that matches a different zone type, see Modulation Matrix for FM Zones, Modulation Matrix for Sample Zones, Modulation Matrix for Spectral Zones, Modulation Matrix for Synth Zones, and Modulation Matrix for Wavetable Zones.
Example VST Preset
Modulation Matrix for Grain Zones

How the Elements Interact
The modulation matrix is provided as-is, without detailed explanations. For information on how this modulation matrix works, see Creating a Modulation Matrix.
/ HALion Developer Resource / HALion Tutorials & Guidelines / How-tos /
Modulation Matrix for Sample Zones
This how-to provides a modulation matrix for Sample zones that you can use as a basis when creating a modulation matrix for an instrument. There are no modulation source or destination controls on the macro page, only the modulation matrix with its controls, and the UI and MIDI scripts. The main focus is on the selection of modulation destinations, which have been selected with regard to their usability in combination with Sample zones.
For a modulation matrix that matches a different zone type, see Modulation Matrix for FM Zones, Modulation Matrix for Grain Zones, Modulation Matrix for Spectral Zones, Modulation Matrix for Synth Zones, and Modulation Matrix for Wavetable Zones.
Example VST Preset
Modulation Matrix for Sample Zones
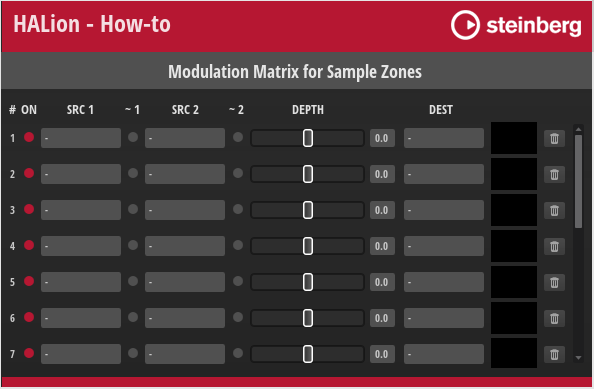
How the Elements Interact
The modulation matrix is provided as-is, without detailed explanations. For information on how this modulation matrix works, see Creating a Modulation Matrix.
/ HALion Developer Resource / HALion Tutorials & Guidelines / How-tos /
Modulation Matrix for Spectral Zones
This how-to provides a modulation matrix for Spectral zones that you can use as a basis when creating a modulation matrix for an instrument. There are no modulation source or destination controls on the macro page, only the modulation matrix with its controls, and the UI and MIDI scripts. The main focus is on the selection of modulation destinations, which have been selected with regard to their usability in combination with Spectral zones.
For a modulation matrix that matches a different zone type, see Modulation Matrix for FM Zones, Modulation Matrix for Grain Zones, Modulation Matrix for Sample Zones, Modulation Matrix for Synth Zones, and Modulation Matrix for Wavetable Zones.
Example VST Preset
Modulation Matrix for Spectral Zones

How the Elements Interact
The modulation matrix is provided as-is, without detailed explanations. For information on how this modulation matrix works, see Creating a Modulation Matrix.
/ HALion Developer Resource / HALion Tutorials & Guidelines / How-tos /
Modulation Matrix for Synth Zones
This how-to provides a modulation matrix for Synth zones that you can use as a basis when creating a modulation matrix for an instrument. There are no modulation source or destination controls on the macro page, only the modulation matrix with its controls, and the UI and MIDI scripts. The main focus is on the selection of modulation destinations, which have been selected with regard to their usability in combination with Synth zones.
For a modulation matrix that matches a different zone type, see Modulation Matrix for FM Zones, Modulation Matrix for Grain Zones, Modulation Matrix for Sample Zones, Modulation Matrix for Spectral Zones, and Modulation Matrix for Wavetable Zones.
Example VST Preset
Modulation Matrix for Synth Zones

How the Elements Interact
The modulation matrix is provided as-is, without detailed explanations. For information on how this modulation matrix works, see Creating a Modulation Matrix.
/ HALion Developer Resource / HALion Tutorials & Guidelines / How-tos /
Modulation Matrix for Wavetable Zones
This how-to provides a modulation matrix for Wavetable zones that you can use as a basis when creating a modulation matrix for an instrument. There are no modulation source or destination controls on the macro page, only the modulation matrix with its controls, and the UI and MIDI scripts. The main focus is on the selection of modulation destinations, which have been selected with regard to their usability in combination with Wavetable zones.
For a modulation matrix that matches a different zone type, see Modulation Matrix for FM Zones, Modulation Matrix for Grain Zones, Modulation Matrix for Sample Zones, Modulation Matrix for Spectral Zones, and Modulation Matrix for Synth Zones.
Example VST Preset
Modulation Matrix for Wavetable Zones

How the Elements Interact
The modulation matrix is provided as-is, without detailed explanations. For information on how this modulation matrix works, see Creating a Modulation Matrix.
/ HALion Developer Resource / HALion Tutorials & Guidelines / How-tos /
Multi-Level System Menus
On this page:
For most applications, standard menus are well suited to select options from a list of strings, e.g., a menu that contains various filter types. However, if the number of entries is too high, for example, a subdivided menu might be preferable. To create a subdivided menu, you must implement the menu entries as a stringlist parameter with strings in the following notation:
/Folder/Subfolder/../Menu Entry
Please see the example below for details.
❕ This how-to demonstrates multi-level menus using the generic look of the operating system. If you want to create menus with a customized look, please refer to Custom Multi-Level Menus, Custom Multi-Level Menus II or Custom Popup Menus.
Example VST Preset
Multi-Level System Menu.vstpreset
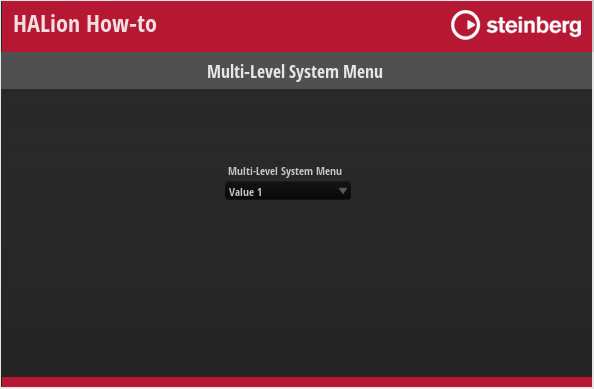
To explore the templates in this example:
- Load Multi-Level System Menu.vstpreset.
- Open the Macro Page Designer, go to the Templates Tree and select the template you want to explore.
- Click Edit Element to examine the template.
Prerequisites
- A macro page with a Menu, a Text, and a Label control, optionally combined as a template.
- A MIDI or UI script that provides parameter definitons and functions
Defining Parameters for the Menu
The following code example shows how to create the menu entries and the resulting display string using a UI script.
Example
-- Create tables for menu entry strings and display output strings
entry_and_output = {
{ "/Folder1/Entry1", "Value 1" },
{ "/Folder1/Entry2", "Value 2" },
{ "/Folder2/Entry1", "Value 3" },
{ "/Folder2/Entry2", "Value 4" },
}
entries = {}
outputs = {}
for i,v in ipairs(entry_and_output) do
entries[i] = v[1]
outputs[i] = v[2]
end
-- Define the parameter "Entry" to be connected to a menu control and the parameter "Output" to display the selected menu entry
defineParameter("Entry", nil, 1, entries, function() Output = Entry end)
defineParameter("Output", nil, 1, outputs)
In the Example VST Preset, the UI script is attached to the macro page.
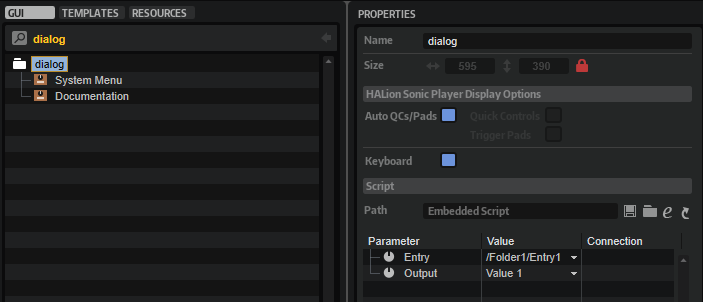
System Menu
The System Menu contains the elements that are needed to display the selected value. The template parameters Text Output and Menu Entries must be connected to the corresponding parameters @Output and @Entry of the UI script.

In this example, the Output parameter is not connected to a physical parameter. To set the value of a parameter, the Output parameter of the UI script must be connected to this parameter in the program.
/ HALion Developer Resource / HALion Tutorials & Guidelines / How-tos /
Relative Paths
On this page:
Functions like loadPreset require a file path as argument. The function debug.getinfo from the Lua debug library returns the file path of the running script. You can use this information to create a relative file path for your script. The folders in the 'if branch' of the following script example must match the working directory on your hard disk. How to create a working directory is described in Using Relative Paths. The folders in the 'else branch' must match the folders that you specified in the Library Creator. If the folder on the hard disk cannot be found, the file path of the VST sound container will be used instead. Note that the VST sound container must be mounted for this to work.
Example
-- Load a sub preset from hard disk or VST sound.
-- Find relative path on hard disk.
local info = debug.getinfo(1,'S') -- Function from the Lua debug library.
local source = info.source
local pos = string.find(source, "/library/") -- Assumes the folder "/library/" contains subfolders like "/samples/", "/scripts/", "/VST3 Sub Presets/", etc.
if pos then
contentPath = string.sub(source, 1, pos - 1).."/library/VST3 Sub Presets/" -- The folder on disk with sub presets, for example.
else
-- Extract VST sound GUID, e.g. "vstsound://ABCDEFGHIJKLMNOPQRSTUVWXYZ123456".
-- The GUID of the VST sound can be found in the library creator.
-- "SomeFolderName" is defined in the library creator.
-- The library creator prepends "/.AppData/Steinberg/" when building the library.
-- The content must be in the same VST sound as the script.
contentPath = source:sub(1, 43) .. "/.AppData/Steinberg/SomeFolderName/" -- The location of the sub presets inside the vstsound.
end
-- Load the sub preset from the respective contentPath.
layer = loadPreset(contentPath.."SomePreset.vstpreset")
/ HALion Developer Resource / HALion Tutorials & Guidelines / How-tos /
Snapshot Effects
On this page:
It can be useful to save the properties and values of the effects that are used on a bus in a table, for example, if you want to manage effects via a script. The following script takes a snapshot of each effect and prints out a properly formatted Lua table containing the effect properties and values.
- Load a Lua Script MIDI module into the branch of the Program Tree which contains the bus and effects that you want to print out as a table.
- Load SnapshotEffects.lua with the Lua Script MIDI module.
- Go to the Parameter List.
- Set the
WithKeysparameter to On if you want to print out a table with the effect name as the key for the table entries. - Set the
WithKeysparameter to Off if you want to print out the table entries as an indexed array.
- Change the Snapshot parameter to print the table to the Output of the Lua Script MIDI module.
- To use the printed table, copy and paste it from the Output into the script that manages the effects.
❕ For an example of using a table like this to manage effects via a script, see Creating an FX Chain or Creating an FX Rack.
Example
effects = {}
-- You can exclude parameters by adding them to this table.
excludedParameters = {"Enable", "Bypass", "Mix", "resetMaxGainRed"}
function excludeParameters(def)
local exclude = false
local name = string.lower(def.name)
for i, parameter in ipairs(excludedParameters) do
local name2 = string.lower(parameter)
if name == name2 then
exclude = true
break
end
end
return exclude
end
function onSnapshot()
local bus = assert(this.parent:getBus(), "No bus found in the layer '"..this.parent.name.."'.")
local foundFx = bus:findEffects()
assert(foundFx[1], "No effects found on the bus '"..bus.name.."'.")
effects = {}
for i, fx in ipairs(foundFx) do
local defs= fx.parameterDefinitions
effects[i] = {}
effects[i].name = fx.name
effects[i].fxType = fx.moduleType
effects[i].settings = {}
for _, def in ipairs(defs) do
local excluded = excludeParameters(def)
if not excluded then
if def.automatable and def.persistent and not def.readOnly then
effects[i].settings[def.name] = fx:getParameterNormalized(def.name)
end
end
end
end
printSnapshot()
Snapshot = false
end
defineParameter("WithKeys", nil, true)
function printSnapshot()
print("effects = {")
for i, effect in ipairs(effects) do
if WithKeys then
-- Use the FX name without spaces as key for the table entries.
local effectKey = string.gsub(effect.name, " ", "")
printRaw(string.format("\t%s = {\n\t name = %q,\n\t fxType = %q,\n\t settings = {", effectKey, effect.name, effect.fxType))
for key, value in pairs(effect.settings) do
key = string.gsub(key, "-", "_")
printRaw(string.format("\n\t %s = %s,", key, value))
end
print("\n\t },\n\t},")
else
-- Print the table as an indexed array.
printRaw(string.format("\t{ name = %q,\n\t fxType = %q,\n\t settings = {\n", effect.name, effect.fxType))
for key, value in pairs(effect.settings) do
key = string.gsub(key, "-", "_")
printRaw(string.format("\t %s = %s,\n", key, value))
end
print("\t },\n\t},")
end
end
print("}")
end
defineParameter("Snapshot", nil, false, function() if Snapshot then onSnapshot() end end)
/ HALion Developer Resource / HALion Tutorials & Guidelines / How-tos /
Switching Control Templates
On this page:
Usually, parameters are connected to specific controls that have a certain look which never changes during the usage of the macro page. However, in some cases it might be useful to be able to change the look, either to allow the user to choose between different styles, or because one editor template is used to edit different parameters with different scopes which should be indicated by different controls. A simple example would be a template that provides several knobs to control oscillators 1, 2, and 3 of a synth zone, where each set of knobs has a different color to better distinguish between them.
This example demonstrates how to use a Lua Script MIDI module with a KnobType parameter to switch between two different knob templates. The parameter is defined in a MIDI module, which saves and restores the state with the preset.
❕ If you do not want to save and restore the KnobType with the preset, but only with a project, you can implement this parameter in a UI script.
Example VST Preset
Switching Control Templates.vstpreset
Prerequisites
- A macro page with a Switchable Knob template.
- A MIDI module script with a KnobType parameter.
- Two knob templates: KnobLC1 and Knob BB.
- A Menu template to select the knob template that should be displayed.
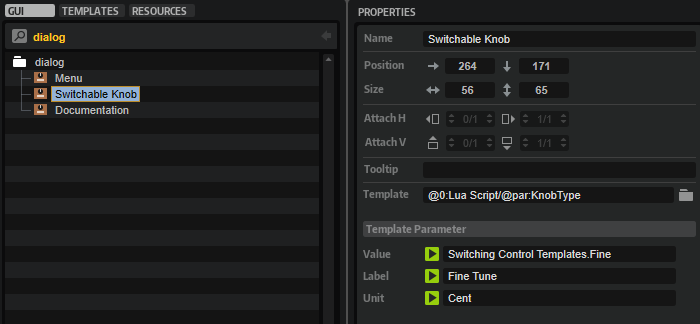
Connecting the Controls
- Add a Lua Script MIDI module to the program and define the parameter KnobType.
defineParameter{
name = "KnobType",
default = 1,
strings = { "Knob BB", "Knob LC1" },
}
- Edit the knob templates and export the parameters that you want to use on the template level, e.g., Value, Label, Text.
- Connect the Switchable Knob template with the script parameter by setting its Template property to
@0:Lua Script/@par:KnobType. - Connect the Menu template with the script parameter by setting its Value property to
@0:Lua Script/@par:KnobType. - Connect the Value of the Switchable Knob template to an engine parameter.
Result: You can use the menu to switch the template reference between Knob LC1 and Knob BB. If you save the program, the knob type is saved and restored with the preset.
/ HALion Developer Resource / HALion Tutorials & Guidelines / How-tos /
Using Mouse States in SVGs
(Since HALion 7.0)
On this page:
You can use variables related to mouse actions to modify a SVG resource that is assigned to a Switch control. The advantage is that you don't have to assign separate resources to the different states of a Switch control to indicate its current state. The indication of a particular state is defined within the SVG resource itself using Lua expressions. Please note that this cannot be used in combination with animations, as these are only executed when switching between the different states of a switch and the assigned resources.
❕ See Animating Switches Using SVGs for details on using animations with Switch controls.
Defining Mouse States
The mouse states are defined in the SVG resource properties by using Lua expressions. An expression begins with $ followed by (). Everything inside the brackets will be evaluated and returns the effective value for the property.
$(expression)
You can use the following variables in Lua expressions:
| Variable | Description |
|---|---|
| On | The on-state of the switch. |
| Down | The down-state of the switch. |
| Hover | The hover-state of the switch. |
Using Mouse States
The following example is intended as an inspiration for you to develop your own solutions and ideas.
Example VST Preset
To explore the template in this example:
- Load Using Mouse States in SVGs.vstpreset.
- Open the Macro Page Designer, go to the GUI Tree and select the 'SVG Mod Switch' template.
- Click Edit Element to examine the template.
- Inside the template, select the Switch control. Take a look at which Bitmap resource has been assigned to the off-state of the switch.
- Go to the Resources Tree and select the corresponding SVG resource. Take a look at the IDs, properties and values as listed below.
Indicating Mouse States
Mouse States
Resources: SVGMod_Rect SW.
| ID | Property | Value |
|---|---|---|
| Rect | fill | hsla(154,$(0+On*40)%,$(30+Hover*20+On*20)%,1) |
Description: Each state of the switch shows a different color, including the hover-states for the on- and off-states.
/ HALion Developer Resource / HALion Tutorials & Guidelines / How-tos /
Working with Exported Variables
(Since HALion 7.0)
On this page:
UI variables can be defined within any template. The UI variables inside a template can be used to connect multiple controls, for example. By exporting the value of a property and the UI variable itself to the same template parameter, you create an interface for connecting engine parameters outside of the template to the property and UI variable within the template. The following example illustrates this using a single-level pop-up menu. An example of a multi-level pop-up menu using an exported variable can be found in Custom Multi-Level Menu II.
Single-Level Pop-up Menu
The single-level pop-up menu is implemented through a combination of a Selector, a Menu and a MenuEntry template. The Selector template opens the Menu template for selecting the values and contains the controls for displaying the display string of the connected engine parameter. The Menu template contains four MenuEntry templates which represent the selectable values.
Example VST Preset

To explore the templates in this example:
- Load Working with Exported Variables.vstpreset.
- Open the Macro Page Designer, go to the Templates Tree and select the template you want to explore.
- Click Edit Element to examine the template.
Overview
In this example, there is one exported UI variable. Look for the the sel UI variable inside the Selector template.
Within the Selector template, the sel UI variable and the Value property of the Text control are both exported as 'Value'. This creates the interface for connecting the engine parameter, in this case, the oscillator type of Zone 1.
The Popup parameter of the Selector template is defined to open the Menu template. The Menu template contains four MenuEntry templates which represent the values that you can select.
The Value property of the MenuEntry template has the sel UI variable assigned. As a result, the currently selected value will be sent to the Selector template that is connected to the engine parameter and the Text control within the Selector template shows the display string of the engine parameter.
How the Elements Interact
Selector
The Selector template contains the elements that are required to open the Menu template and display the selected value.
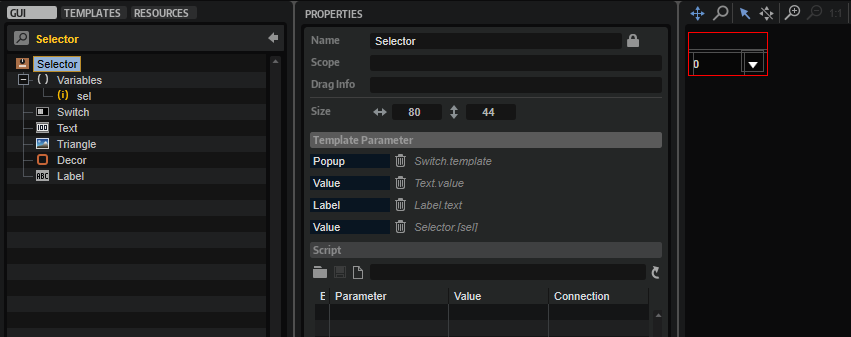
UI Variables
| Variable | Description | Type |
|---|---|---|
| sel | This variable is used by all menu entries of the pop-up menu. sel is exported as 'Value' and combined with the Value property of the Text control. As a result, the display string of the connected engine parameter will be displayed instead of the integer value. | Integer |
Controls and Subtemplates
| Element | Description |
|---|---|
| Switch | A Switch control that opens the popup menu. Its Popup Template property is exported as 'Popup'. This allows you to select which pop-up menu to open for each instance of the Selector template. |
| Text | A Text control for displaying the display string of the connected engine parameter. This is achieved by exporting the Value property as 'Value'. Since the sel UI variable is also exported as 'Value', both are combined into one template parameter, creating the interface for connecting the engine parameter. |
| Triangle | An Image control to indicate that a pop-up menu can be opened. |
| Decor | A Decor control used as background. |
| Label | A Label control for displaying the name of the connected parameter. Its Text property is exported as 'Label'. This allows you to name the Selector template differently for each instance. |
Menu
The Menu template contains four MenuEntry templates that define the entries of the menu.
| Element | Description |
|---|---|
| Sine, Triangle, Saw, Square | These represent the four entries of the submenu. They use the MenuEntry template which defines the look and functionality of an entry. The OnValue parameter of each MenuEntry template must be set to the corresponding value of the engine parameter it selects. This value will be sent to the sel variable. See MenuEntry and Selector/UI Variables for details. The Label parameter defines the name of the entry to be displayed in the menu. |
MenuEntry
This template represents one entry in the Menu template. It consists of two elements:
Controls and Subtemplates
| Element | Description |
|---|---|
| Label | A Label control to display the name of the menu entry. Its Text property is exported as 'Label'. This allows you to name the template differently for each instance. |
| Switch | A Switch control with exclusive mode. The OnValue property is exported to be set by each instance of the template. See Menu for details. The Value property must be set to @sel, the UI variable of the Selector template. The OnValue will be sent to the Value parameter which is sent to the sel variable. As a result, the currently selected value will be sent to the Selector template which is connected to the engine parameter and the Text control within the Selector template shows the display string of the engine parameter. |
❕ Pop-up menus can only be displayed within the dimensions of the macro page. If a pop-up menu is too large, it will be clipped. To prevent this, you can either change the direction in which the pop-up menu opens, e.g., open it to the top instead of to the bottom, or you can change the size of the template, so that it fits, and then activate the scrollbar to be able to scroll to the available entries.
/ HALion Developer Resource / HALion Tutorials & Guidelines /
Guidelines
In this section you find Steinberg's guidelines for creating libraries and many details on how to build your own instruments that work in HALion Sonic. Following these guidelines ensures an equal quality of the libraries and, therefore, improves the user experience and the success of your library.
/ HALion Developer Resource / HALion Tutorials & Guidelines / Guidelines /
HS Preset Guideline
On this page:
When you create the final HALion Sonic Program presets, you should follow the guideline below. For example, if the library manufacturers adjust preset levels using different standards, the user might have to adjust the mixer level with every preset to compensate for this. Following the guideline below ensures an equal quality of the libraries and, therefore, improves the user experience and the success of your library.
Sound Design Conventions
Modulation Wheel, MIDI CCs and Quick Controls
- The modulation wheel should always be assigned. You can assign the modulation wheel as MIDI CC in the modulation matrix or as a quick control.
- Do not assign any MIDI CCs to controls on the interface. They are not saved with VST3 presets.
- For details how to assign the quick controls, see the Quick Controls Guideline.
Trigger Pads
- Please assign the Trigger Pads where you think it is useful. For example, to trigger different chords or phrases.
- If you assign the Trigger Pads, please always start with the top row and assign the pads from left to right. If you assign a mix of variations and chords, please use the top row for the variations and the bottom row for the chords.
- If you assign chords to the Trigger Pads, please use the chord as pad name, e.g., Cm, C, CMaj7, C7, etc. If you assign variations to the Trigger Pads, please use Vari 1, Vari 2, Vari 3, etc., as pad name. Arp 1, Arp 2, Arp 3, etc., can also be used.
Level Settings
- If you use the plug-in in a sequencer: Start a default project. The slot level of the program in HALion Sonic should be set to the default setting. The master fader and any other levels in the project should be set to the default settings as well. To check the level, open the mixer in the sequencer and check the peak level of the master channel. The clipping LED should not light up.
- If you use the standalone version of the plug-in: Start the plug-in with the factory default settings. The Master Volume of the plug-in and and the slot level should be set to the default values. The clipping LED of the slot should not light up.
- Bass and lead sounds should be between -1 dB and 0 dB if you play a single note at full velocity.
- Polyphonic sounds, e.g., pads, should be at -6 dB if you play a single note at full velocity.
Transpose Settings
- Sounds like leads, pads, and comps should not be transposed. A3 (69) should play 440 Hz.
- (Synth) Bass sounds can be transposed -2 octaves below the normal sounds. This allows for playing bass sounds without transposing, e.g., on small two-octave MIDI controller keyboards.
Effect Settings
- You can assign insert effects to the layers and the program on the Inserts tab in HALion Sonic. Please do not use any AUX effects, because they are not saved with program presets.
- If you use REVerence for your presets, remember that it can be quite heavy on the CPU. Consider using the algorithmic reverb instead.
- Remove any effects that you do not use.
- Avoid empty slots in the Insert rack.
In the example above, the second insert effect is deactivated and the third insert slot is empty. This should be avoided.
Tempo Sync
- Sounds that typically play in sync with the song tempo, e.g., dance and sequencer sounds, should make use of the sync settings for the LFOs and effects. Use 120 BPM as your base song tempo.
Orphaned Settings
- Oscillators and other settings that are not in use should be switched off. However, if a setting is switched off and the user activates this setting, the sound should still be OK.
- If you copy and modify a preset, any orphaned settings might not sound OK. Please set these to useful default values.
Preset Naming Conventions
- Use only English names.
- Avoid names of companies, artists, or song names.
- Decades in preset names should always be named like this: 70s, 80s, 90s, etc. Not 70ies or 80's, etc.
- Presets should not start with numbers. Otherwise, they will be listed at the beginning of the results list. Instead of "80s Glamor", you should use "Glamorous 80s ", for example.
- Avoid childish or offensive puns in your preset names.
- Avoid generic names, e.g., Digi Bass, Ana Lead, Smooth Pad, etc. It is likely that such names are already used.
- Do not use the instrument category in the name. For example, bass, lead, pad, synth brass, etc. are already covered by the MediaBay’s category and subcategory. Therefore, these words should not be used in the preset name. It would be redundant information.
/ HALion Developer Resource / HALion Tutorials & Guidelines / Guidelines /
Quick Controls Guideline
On this page:
In previous releases of HALion Sonic (< 3.0.10), parameters of layers could only be assigned to layer quick controls and direct assignments to program quick controls were not possible. This restraint was removed for more flexibility and to simplify the sound design process.
Show Layer QC
On HALion Sonic's Options page, there is a new option in the Global section: Show Layer QC.
If Show Layer QC is switched off:
- The quick control section shows only the program quick controls.
- New quick control assignments can only be made for the program.
If Show layer QC is switched on:
- The quick control section of HALion Sonic shows program or layer quick controls. You can switch between those quick controls using the buttons on the left.
- New quick control assignments can be made for the program or for layers 1-4.
By default, Show Layer QC is switched off.
Quick Controls Conventions
- If possible, all quick controls of the program should be assigned. They can be used to control the most important parameters of the insert effects, for example.
- Please also assign the sphere control of the program. Try to keep the sphere always centered. This way, the user can default the sphere, if needed. This is not possible if the sphere has an offset from its center position.
- The quick controls and spheres of the layers do not have to be assigned. They can be left empty.
- Quick controls should be assigned from left to right with no empty quick controls in between.
- Sound parameters should be assigned to the first quick controls (QC 1 to QC 4) and effect parameters should be assigned to the last quick controls (QC 5 to QC 8).
- Keep the layout of the quick control assignments consistent. For example, if you assign Filter Cutoff and Fitler Resonance for all your presets, always assign them to the same quick controls.
- Assign effect parameters in groups with the Mix parameter as last quick control assignment. For example, like this:
| [...] | QC5 | QC6 | QC7 | QC8 |
|---|---|---|---|---|
| [...] | Delay Time | Delay Mix | Reverb Time | Reverb Mix |
/ HALion Developer Resource / HALion Tutorials & Guidelines / Guidelines /
MediaBay Guideline
On this page:
With the help of MediaBay attributes, you can quickly and easily browse and search presets. Attributes are descriptive keywords that you can assign to your presets. Good search results in the MediaBay highly depend on accurately set attributes. When you specify attributes for your final HALion Sonic program presets, you should follow the guideline below. This ensures an equal quality of the attributes and, therefore, improves browsing and searching in the MediaBay.
❕ Please use the MediaBay of HALion Sonic to specify attributes for your presets. Do not use the MediaBay of Cubase, because it contains attributes that are not supported by HAlion Sonic presets.
Library Creator Properties
The following attributes are assigned automatically to all your presets when you build your libraries using the Library Creator:
| Library Creator Property | MediaBay Attribute | Description |
|---|---|---|
| Long Name | Library Name | If the Long Name is too long, the Name property is used instead. |
| Manufacturer | Library Manufacturer | Your name or company name. |
| Family | PlugIn Name | The target plug-in that the library was designed for. |
Any other attributes must be set manually.
Which Media Files Must Get Attributes?
- The MediaBay scans only those VST3 presets that are located in the VST3 Presets folder of your library. This means that you must specify attributes for all VST3 presets that are located in this folder. Otherwise, the users cannot find the presets. In the Library Creator, a warning message is displayed if attributes were not set.
- The subpresets in the VST3 Sub Presets folder are not scanned by the MediaBay and do not need attributes. These subpresets are loaded via a script and not with the MediaBay.
- All samples of your library are located in a Private Audio folder. Private means that the MediaBay does not scan these samples and you do not need to add attributes to them. The samples are loaded together with the VST3 preset or via a script.
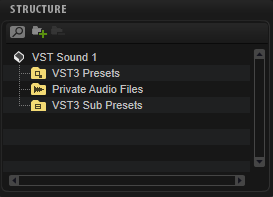
VST3 Preset Attribute Conventions
The different preset categories require different sets of attributes. This guideline gives you advice on how to add the correct attributes.
- For regular instrument presets, the common attributes should be set.
- For categories like Drum&Perc > Beats, for example, you should add additional attributes.
Common Attributes
The following MediaBay attributes must be set for each preset manually:
| MediaBay Attribute | Description |
|---|---|
| Author | The name of the company or of the sound designer. |
| Category/Sub Category | Use this attribute to classify the sound. If you set the Sub Category first, the Category is set automatically. |
| Properties | See Properties, Moods and Articulations. |
| Moods | See Properties, Moods and Articulations. |
| Articulations | See Properties, Moods and Articulations. |
| Rating | A rating of three stars is recommended as starting point for presets. The users can then lower or raise the rating. |
| Name | This attribute is defined with the preset file name when the preset is saved. |
The following MediaBay attributes are set automatically by the Library Creator. You must set the corresponding properties in the Library Creator before you build the library.
| MediaBay Attribute | Description |
|---|---|
| Library Manufacturer | This attribute is defined with the Manufacturer property in the Library Creator. |
| Library Name | This attribute is defined with the Long Name property in the Library Creator. |
| PlugIn Name | This attribute is defined with the Family property in the Library Creator. |
Properties, Moods and Articulations
Properties, Moods and Articulations describe the character of a sound with labels. As soon as you type, you get a suggestion of labels. You can select a suggested label to autocomplete it. This also helps to avoid spelling mistakes. You should at least set some Properties that describe the sound as you hear it. Moods and Articulations are optional. The difference between Properties and Moods is that the Properties describe a sound acoustically without rating it. The Moods describe a sound emotionally and therefore interpret and rate it. Articulations describe the way the sound or instrument is played, as a composer would describe it.
The libraries of FM Lab and Tales both use Properties. FM Lab even uses Articulations on some presets. You can use these two libraries as examples for your own productions.
- Set the Properties, Moods and Articulations so that they describe the preset as precisely as possible.
- Labels that do not match what you hear should be avoided.
- Fewer labels that perfectly match are much better than too many labels that only partially match.
- Use the autocomplete feature to avoid spelling mistakes.
❕ Presets that use an arpeggiator should not get the Category Synth Lead > Arpeggio by default. You should use this Category only for classic arpeggio sounds. If you have a synth bass with a step sequencer or arpeggio, you should set the Category Bass > Synth Bass. To indicate that the preset contains an arpeggio or a sequence, set Arpeggio or Sequenced as label for the Properties, instead.
Additional Attributes
These attributes can be set in addition, e.g., for VST3 presets with the Category Drum&Perc > Beats.
| MediaBay Attribute | Description |
|---|---|
| Signature | The time signature as numerator and denominator. |
| Style | Use this attribute to classify the musical style. If you set the Sub Style first, the Style is set automatically. |
| Sub Style | Use this attribute to classify the musical style. If you set the Sub Style before the Style, the Style is set automatically. |
| Tempo | The tempo in beats per minute (bpm). |
Special Attributes
These attributes are mainly needed to display information in HALion's Browser.
| MediaBay Attribute | Description |
|---|---|
| Bars & Beats | The number of bars and beats in a loop, for example. This attribute is set for samples, not for presets. |
| Comment | Use this attribute to add a comment to each preset. |
| Family Name | This attribute is used for sample sets. Samples with the same Family Name belong to the same sample set. |
| Follow Tempo | This attribute defines whether a loop uses AudioWarp to follow the host tempo. |
| GM Sound | This attribute defines the program number of a GM Sound. |
| Key | The key in which a loop was written, for example, a loop with chords or a loop with a melody. |
| Keywords | This attribute is set by HALion when you import third-party sampler programs. |